Author: Austin Weaver

  • Bay Area Piano Lessons: 7 Honest Ways to Choose Your Format

    Bay Area Piano Lessons: 7 Honest Ways to Choose Your Format

    If you’re looking for bay area piano lessons, you’re facing a question that would have seemed impossible just a few years ago: should you learn in person or online? Both formats have real advantages, and both have tradeoffs that matter differently depending on your schedule, location, and learning style.

    I’ve taught piano in the Bay Area for over a decade, and I’ve watched this choice evolve from a pandemic workaround into a permanent part of how people learn music. The truth is, there’s no universally right answer—but there is a right answer for you. If you’d like to experience both teaching styles firsthand, I offer a free 30-minute trial lesson where we can figure out what fits your goals best.

    Let’s walk through the real factors that should guide your decision.

    The Short Answer

    Choose in-person bay area piano lessons if you’re a complete beginner who needs close guidance on hand position and posture, if you’re a young child learning focus and discipline, or if you value the ritual of going somewhere to learn. Choose online bay area piano lessons if you have a reliable schedule conflict with in-person times, if you live far from qualified teachers, if you already have decent technique, or if you learn best in your own familiar space.

    Most importantly, the quality of the teacher matters far more than the format. A great teacher will make either setting work beautifully.

    Why This Choice Matters Now

    Before 2020, piano lessons were almost universally in-person. Teachers occasionally offered Skype makeup lessons, but that was the exception. Then the world changed, and suddenly everyone was teaching on Zoom.

    What surprised most of us in the music education world was how well it worked. Not perfectly—there are real limitations—but far better than we expected. Students made genuine progress. Beginners learned proper technique. Advanced students prepared for college auditions.

    Now that both options are stable and widely available, choosing between them is less about what’s possible and more about what’s optimal for your specific situation. That’s actually harder, because it requires you to be honest about your priorities and constraints.

    The Bay Area adds another layer to this decision. Traffic, commute times, parking, and the sheer geographic spread of the region make logistics matter more here than in many other places. A teacher fifteen miles away might be forty-five minutes in traffic, which changes the calculus considerably.
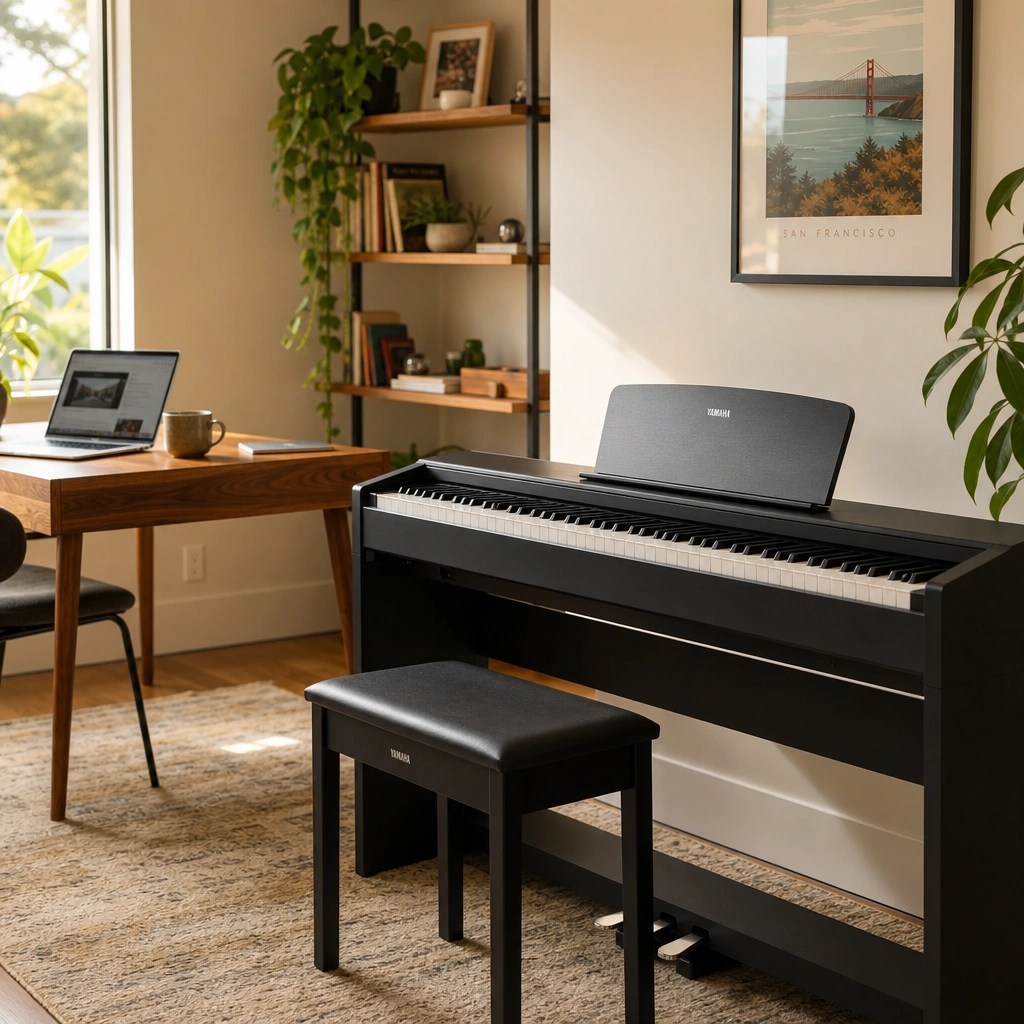
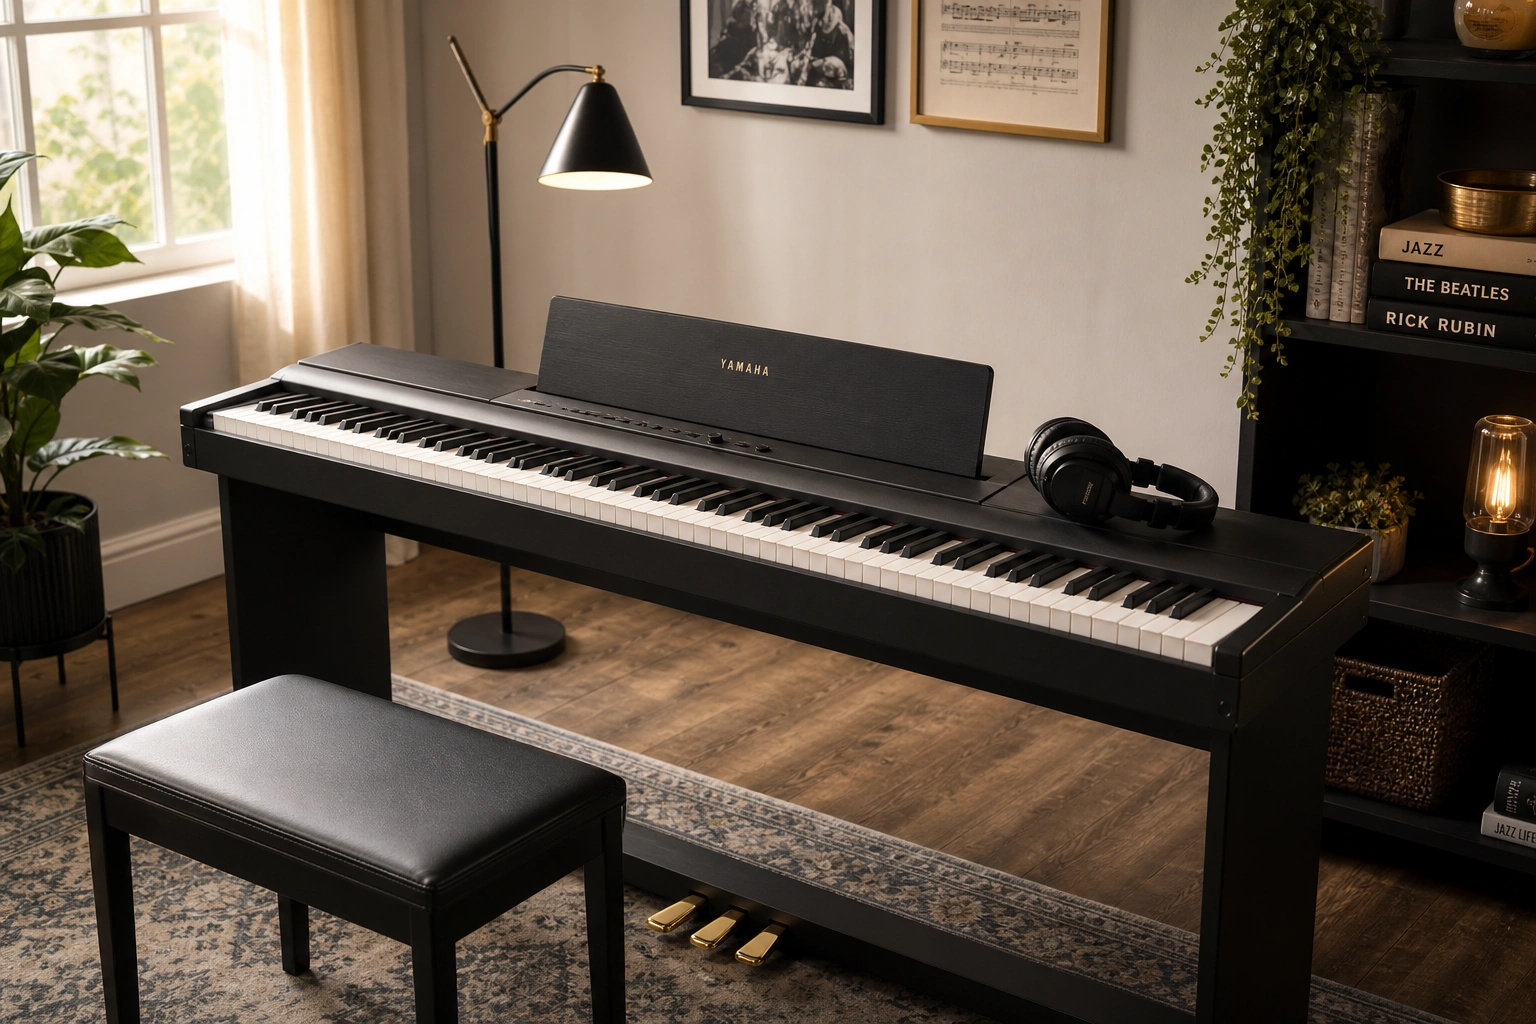
    Home setup for online bay area piano lessons with digital piano and laptop

    Seven Factors to Weigh

    Here are the variables that actually matter when choosing between online and in-person bay area piano lessons. I’ve seen each of these tip the decision for different students.

    1. Your Current Skill Level

    Complete beginners benefit more from in-person instruction, especially in the first few months. Why? Because learning proper hand shape, wrist position, and posture is much easier when a teacher can gently adjust your hand or demonstrate the angle of your wrist from multiple perspectives.

    That said, I’ve successfully taught total beginners online by using multiple camera angles, verbal cues, and careful observation. It works, but it requires more intention from both student and teacher.

    If you already play at an intermediate level or higher, the format matters much less. You likely already have solid technique, and what you need most is repertoire guidance, interpretation feedback, and musical insight—all of which translate beautifully through a screen.

    2. Your Age and Attention Style

    Young children (roughly ages 5-9) often do better with in-person bay area piano lessons. The physical presence of a teacher helps them stay focused, and the ritual of going to a lesson creates a boundary that reinforces focus. At home, surrounded by toys and familiar distractions, staying engaged for thirty minutes can be genuinely harder.

    There are exceptions—some kids are more comfortable at home, and some teachers are brilliant at engaging young students through a screen. But as a general pattern, in-person tends to work better for the elementary school crowd.

    Teenagers and adults usually adapt to online lessons more easily. They have the self-regulation to stay focused, and many actually prefer the convenience and comfort of learning from home.

    3. Your Schedule and Commute Reality

    Be ruthlessly honest here. If you live in San Jose and work in San Francisco, and the only teacher you love is in Oakland, are you actually going to make that drive every week?

    Bay Area traffic is not theoretical. It’s the difference between a commitment you keep and one that slowly falls apart over six months. I’ve seen students choose a slightly less ideal teacher nearby over a perfect-fit teacher across the bay, and they were right to do so—consistency beats perfection.

    Online bay area piano lessons eliminate this variable entirely. Your lesson starts when you sit down at your piano, no buffer time required. For busy professionals, parents juggling multiple kids’ schedules, or anyone with unpredictable work hours, this is transformative.

    4. Your Learning Environment at Home

    Do you have a quiet, dedicated space where you can take a lesson without interruption? Is your piano or keyboard in good condition, well-lit, and positioned so a camera can capture both your hands and your posture?

    If yes, online lessons become much more viable. If your piano is in a high-traffic living room where family members wander through, or if your lighting is poor, or if your internet connection drops frequently, in-person starts to look more appealing.

    Technical requirements for online lessons are not demanding, but they are real. You need decent internet, a device with a camera, and a way to position that camera so your teacher can see your hands and upper body. Most people can solve this with a laptop or tablet and a simple stand, but it’s worth thinking through before you commit.

    5. Your Instrument Quality

    This matters more for online lessons. In person, a teacher can hear and feel the nuances of your instrument. Online, audio quality is compressed, and subtle dynamics get lost.

    If you have a real acoustic piano in decent condition, this isn’t an issue. If you’re working with a digital piano, you’ll want at least a mid-range model with weighted keys and decent speakers or headphones. If you’re unsure what you need, this guide on what size keyboard for piano lessons covers the basics.

    For in-person bay area piano lessons, many teachers have a high-quality instrument in their studio, which can actually be an advantage if your home piano isn’t great. You get to practice on a better instrument once a week, which helps you develop your ear.

    6. What You’re Working Toward

    If you’re preparing for a formal piano exam, a conservatory audition, or a high-stakes performance, in-person lessons offer an edge. Your teacher can help you refine stage presence, manage performance anxiety in real time, and give you the experience of playing for someone in the room—something that still feels different from playing for a camera.

    If you’re learning for personal enrichment, working through a bucket list of pieces you’ve always wanted to play, or building a skill for songwriting or composition, online lessons work just as well. The goals are more flexible, and the convenience of online often means you’re more consistent, which matters more than the minor advantages of being in the same room.

    7. Your Personality and Comfort

    Some people simply learn better in person. They feed off the energy of shared physical space, they like the formality and focus that comes with going somewhere, and they find it easier to be vulnerable and make mistakes when they’re not staring at their own face on a screen.

    Others are the opposite. They’re more relaxed at home, less self-conscious, and they appreciate the slight distance that a screen provides when they’re working through something difficult. Neither is better—it’s just temperament.

    “Austin explains everything clearly and makes online piano lessons easy to follow.” – Emily Carter

    Seeing how each format actually feels is the fastest way to know which works for you. Your first 30-minute lesson with Austin is free – no card, no pressure.
    Book your free trial →

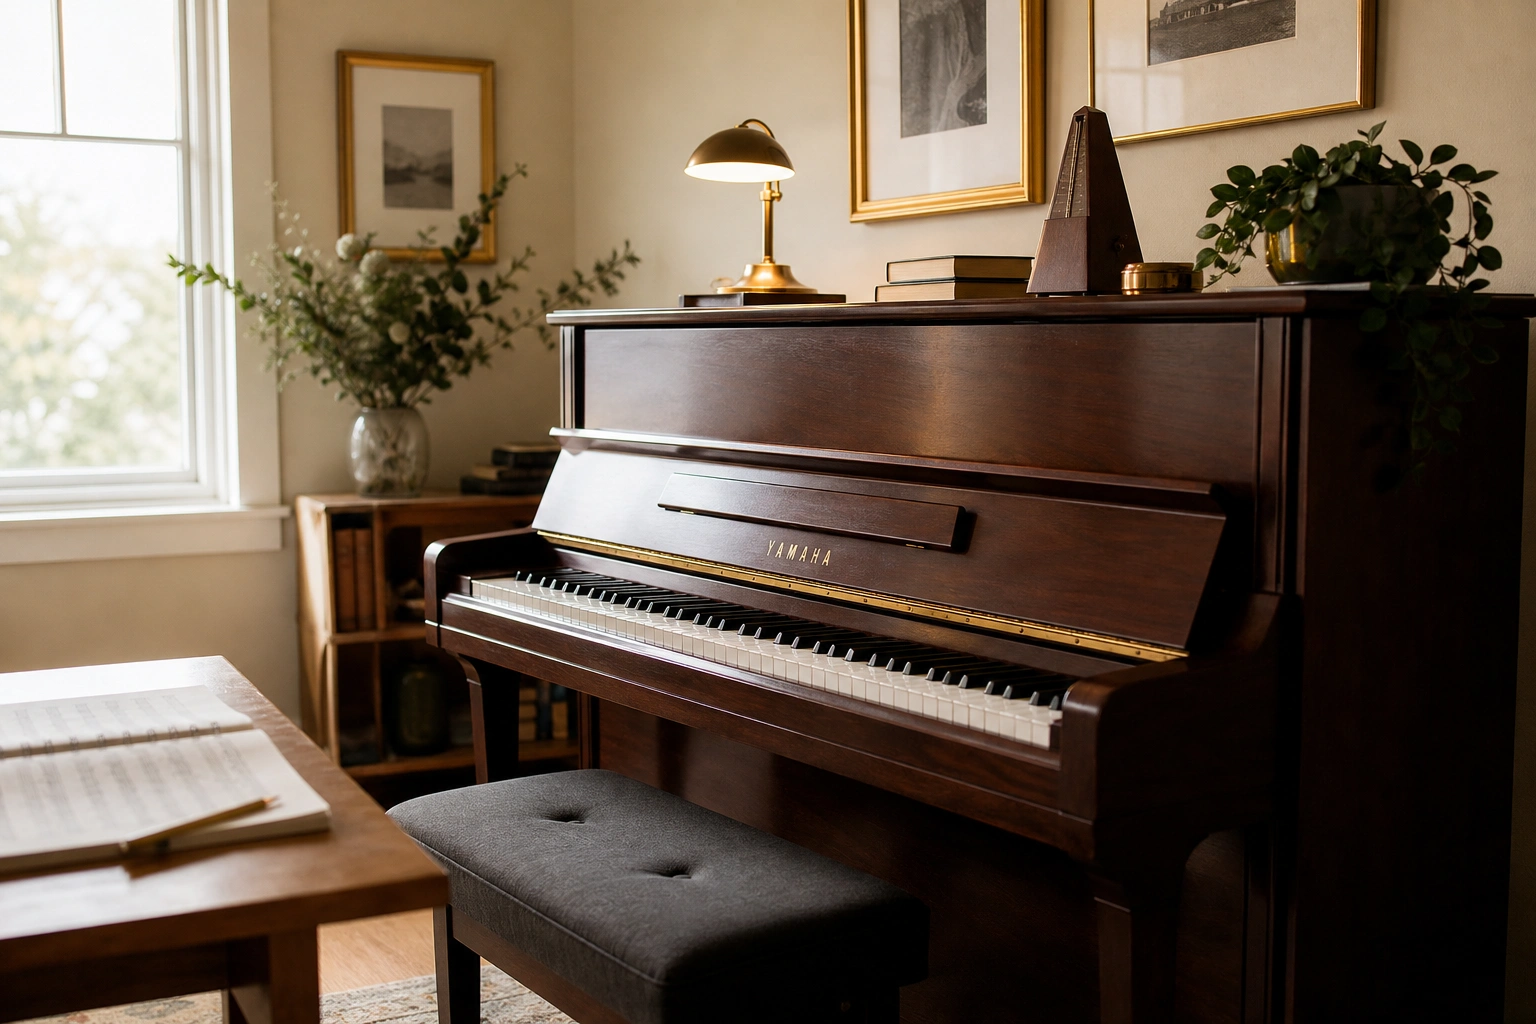
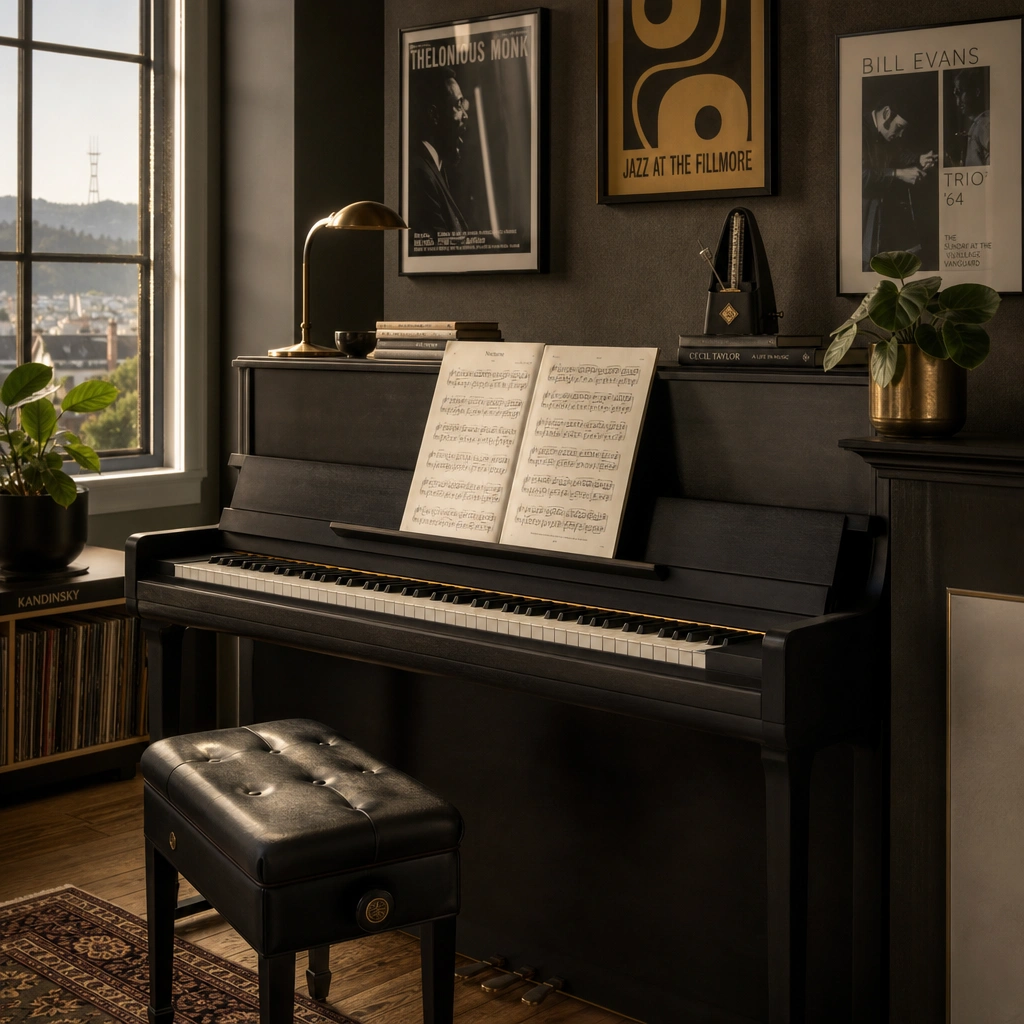
    Acoustic piano in professional studio for in-person piano lessons in the Bay Area

    When In-Person Bay Area Piano Lessons Make the Most Sense

    There are situations where in-person is clearly the better choice, and it’s worth naming them explicitly.

    You’re a true beginner with no musical background. The first few months of piano involve building physical habits that will stay with you for years. A teacher who can gently reposition your hand, check your wrist angle from the side, and make sure you’re sitting at the right height has a real advantage. It’s not impossible to learn this online, but it’s harder.

    You’re a young child (ages 5-8). The structure and focus that come with going to a teacher’s studio help many young students stay engaged. At home, even with a parent present, the pull of familiar distractions can be strong.

    You’re preparing for performance or auditions. Playing for someone in the room is still qualitatively different from playing for a camera. If your goal involves performing in front of people, you’ll want regular practice doing exactly that. For more on this, see this guide to piano recital preparation.

    You have a great teacher nearby. If you’ve found someone whose teaching style clicks with you, and they’re a reasonable drive away, the convenience trade-off is often worth it. Teacher quality trumps format almost every time.

    You don’t have a good practice environment at home. If your piano is in a chaotic shared space, or if your home internet is unreliable, in-person eliminates those variables.

    When Online Lessons Are the Better Fit

    Online bay area piano lessons aren’t a compromise—they’re often the optimal choice, depending on your situation.

    You have significant commute constraints. If getting to a teacher’s studio takes more than twenty minutes each way, you’re adding nearly an hour to every lesson. Over the course of a year, that’s enormous. Online lessons start on time, every time, with no traffic.

    You’re an intermediate or advanced player. Once you have solid technique, most of what you need from a teacher is musical: phrasing, interpretation, repertoire selection, and feedback on your sound. All of this works beautifully online. Some of my most advanced students prefer online lessons because they can record the session and review specific advice later.

    You have an unpredictable schedule. Online lessons are easier to reschedule, and some teachers offer more flexible timing for online students because there’s no studio transition time between lessons. If you travel frequently for work or have caregiving responsibilities that make leaving the house complicated, online is often more sustainable.

    You’re an adult learner. Many adults feel more comfortable learning at home. There’s less performance pressure, and you can immediately practice what you’ve just learned without having to drive home and try to remember everything. The comfort of your own space can actually accelerate learning.

    You want access to a specific teacher. One of the best things about online lessons is that geography stops mattering. If there’s a teacher whose style you love, but they’re two hours away, online makes that possible. I teach students across the Bay Area and beyond, and location is no longer a limiting factor.

    Online lessons also pair beautifully with structured supplemental resources. At Weaver Music, students get access to a four-level lesson path that reinforces concepts between lessons, which makes the online format even more effective.
    Student learning piano at home in comfortable Bay Area environment

    What About Hybrid Options

    Some teachers, including me, offer a hybrid approach: mostly online with occasional in-person sessions when it makes sense. This can be the best of both worlds.

    You get the convenience and consistency of online lessons, but you also get periodic in-person check-ins to address technique, try a different instrument, or prepare for a performance. This works especially well for intermediate students who have solid fundamentals but benefit from occasional hands-on adjustments.

    Hybrid formats are more common now than they were a few years ago, and they’re worth asking about if you’re torn between the two. Not every teacher offers this, but it’s becoming more standard in bay area piano lessons as both teachers and students recognize the value of flexibility.

    The Bay Area Logistics Reality Check

    Let’s talk specifically about what it means to take in-person bay area piano lessons in this region. If you live in a dense neighborhood in San Francisco or Berkeley, getting to a nearby teacher might be a ten-minute walk. That’s easy.

    But if you live in Fremont and work in Palo Alto, and the teacher you want is in Oakland, you’re looking at a serious weekly commute. Even fifteen miles can mean forty-five minutes in traffic during peak hours. Over a year, that’s not trivial—it’s dozens of hours and significant stress.

    Parking is another factor. Some teachers have dedicated parking; others are in neighborhoods where street parking is competitive. If you’re rushing from work to make a 6 PM lesson and spend fifteen minutes circling for parking, that affects your state of mind when you sit down to play.

    I’m not saying these obstacles are insurmountable, but they’re worth being realistic about. I’ve seen students start with enthusiasm, then quietly stop scheduling lessons six months later because the logistics wore them down. If you choose in-person, make sure the location is truly sustainable, not just theoretically possible.

    Online bay area piano lessons strip all of this away. Your commute is from your couch to your piano. Your lesson starts on time because there’s no travel buffer. This isn’t a small thing—it’s often the difference between a habit that sticks and one that fades.

    According to research on music education retention published by the National Association for Music Education, logistical barriers are one of the top reasons students discontinue lessons, even when they’re still motivated to learn. Removing friction matters.

    Making Your Decision

    Here’s how I’d suggest thinking through this choice for bay area piano lessons.

    First, write down your non-negotiables. What absolutely has to be true for this to work? Maybe it’s “I can’t drive more than twenty minutes each way.” Maybe it’s “I need to practice on my own piano because I can’t afford to buy one yet.” Maybe it’s “I need to be able to reschedule with less than 24 hours’ notice because my work is unpredictable.”

    Second, be honest about your learning style. Do you focus better in a formal setting, or do you relax more at home? Do you need physical demonstration to learn movement, or do you pick things up well from verbal instruction and visual example?

    Third, consider the practical details. What does your schedule actually look like? Where do you live and work? What’s your commute tolerance? What’s your home environment like?

    Fourth, think about cost and value. In-person lessons sometimes cost slightly more because of studio overhead, but not always. At Weaver Music, lessons are $99 per 60-minute session regardless of format. What you’re really trading is time and convenience against certain instructional nuances.

    If you’re still unsure, the best move is to try both. Take a few lessons online with one teacher and a few in-person with another (or the same teacher, if they offer both). You’ll know within a month which format feels right. There’s no substitute for direct experience.

    Also consider what resources you’ll have access to beyond the lesson itself. Do you learn well from supplemental videos? Do you benefit from written practice guides? Some teaching approaches, like the one I use at Weaver Music, include access to a structured video library that reinforces what we cover in lessons, which makes both online and in-person formats more effective.

    You can also explore whether apps and self-guided tools fit into your plan by reading about whether piano learning apps work, though most students find that apps are best used alongside—not instead of—regular lessons.

    Finally, don’t overthink it. This isn’t a permanent, life-altering choice. You can start with online bay area piano lessons and switch to in-person later, or vice versa. You can try hybrid. The important thing is to start, stay consistent, and adjust as you learn what works for you.

    “I started as a complete beginner, and Austin made the learning process feel comfortable.” – Noah Peterson

    You’ll learn more about your preferences in four weeks of actual lessons than in four hours of research. Trust that you’ll figure it out as you go.

    You can read through a dozen articles comparing online and in-person piano lessons, weigh every variable, and map out the perfect decision tree—and all of that has value. But there’s one thing that cuts through all the research faster and more clearly: sitting down with a good teacher and experiencing what a lesson actually feels like.

    One thirty-minute session will tell you whether you’re comfortable on camera, whether your home setup works, whether the teacher’s communication style clicks with you, and whether the format feels sustainable. You’ll know in your gut whether this is something you’ll actually do every week, or whether it’s going to quietly fall off your calendar after a month.

    That’s exactly why I offer a free trial lesson—no credit card, no obligation, just a real lesson where we figure out where you are and where you want to go. If online feels right, we’ll keep going. If you’d rather meet in person, we’ll make that work. And if the timing isn’t right or we’re not a good fit, that’s fine too.

    The format you choose matters less than finding a teacher you trust and a routine you’ll stick with. Everything else is details.

    Ready to find out for yourself?

    Your first 30-minute lesson with me is completely free – we will evaluate where you are, talk through your goals, and map out your path.
    Book Your Free Trial Lesson

  • Online Piano Lessons vs In Person: 7 Honest Differences

    Online Piano Lessons vs In Person: 7 Honest Differences

    The debate around online piano lessons vs in person has intensified over the past few years, and for good reason. Both formats can produce excellent results, but they work differently, suit different learners, and come with distinct trade-offs. I’ve taught piano both ways for over a decade, and I’ve seen students flourish in each setting.

    The question isn’t really which format is objectively better—it’s which one matches your circumstances, learning style, and goals. If you’re curious about trying lessons before committing, you can book a free 30-minute trial lesson to experience how online or in-person instruction feels in practice.

    The short answer

    Online piano lessons vs in person each have unique strengths. Online lessons offer unmatched flexibility, lower cost, and access to teachers anywhere in the world. In-person lessons provide immediate physical corrections, stronger personal connection, and no technology barriers. Neither format is universally superior—the right choice depends on your schedule, location, learning preferences, and budget.

    For many students, online piano lessons vs in person becomes less about which is “better” and more about which constraints matter most. A parent juggling three kids’ schedules may prioritize flexibility. An adult beginner struggling with hand position may value in-person feedback. Both can lead to real progress with the right teacher.

    How online piano lessons vs in person differ

    The core teaching principles remain identical whether you’re across a piano bench or across a screen. Music theory, technique, repertoire, sight-reading—all of these get taught effectively in both environments. What changes is the delivery mechanism and the ancillary experience.

    Online piano lessons vs in person differ most noticeably in these areas:

    • How feedback is communicated and demonstrated
    • The time and cost investment required
    • The ease of fitting lessons into a busy week
    • The type of social interaction that happens
    • The technical setup and potential for disruptions

    Understanding these differences helps you make a choice that aligns with your real-world situation. Let’s break down each area in detail.

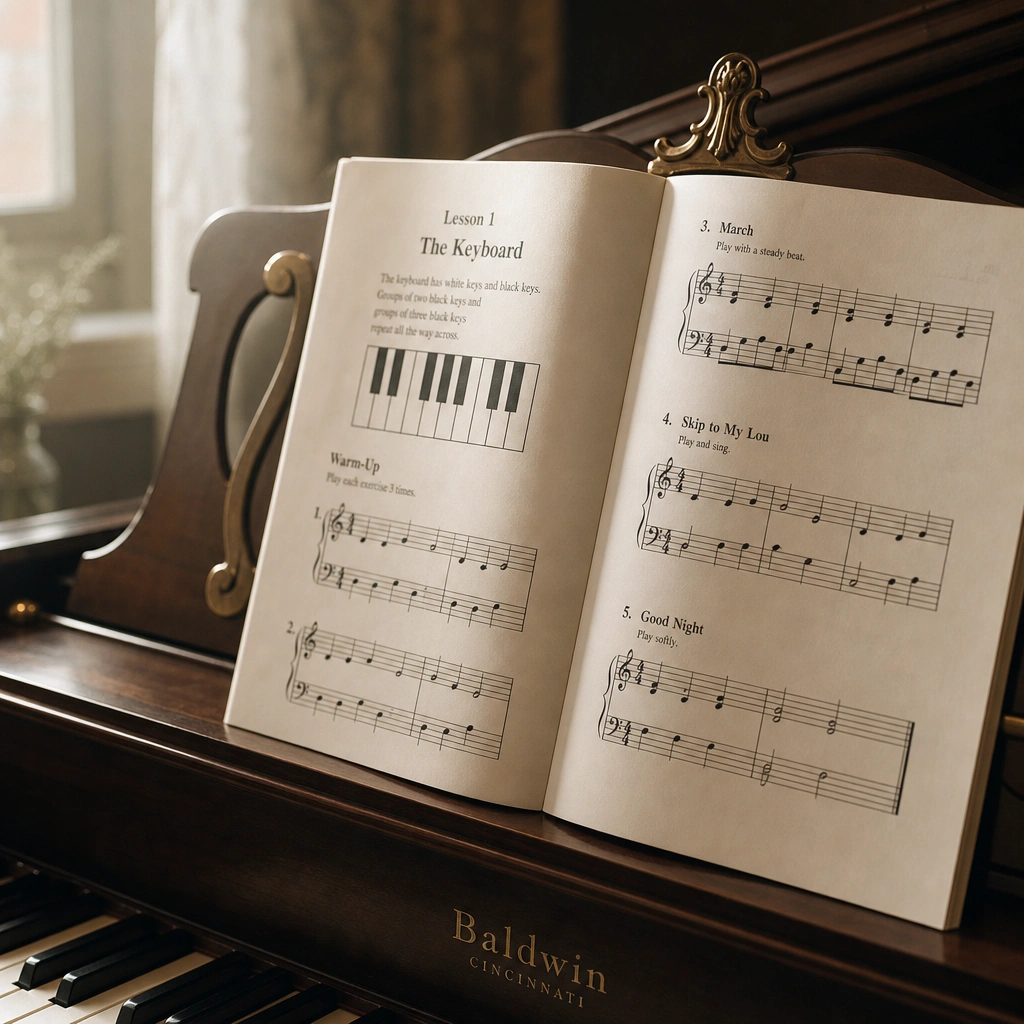
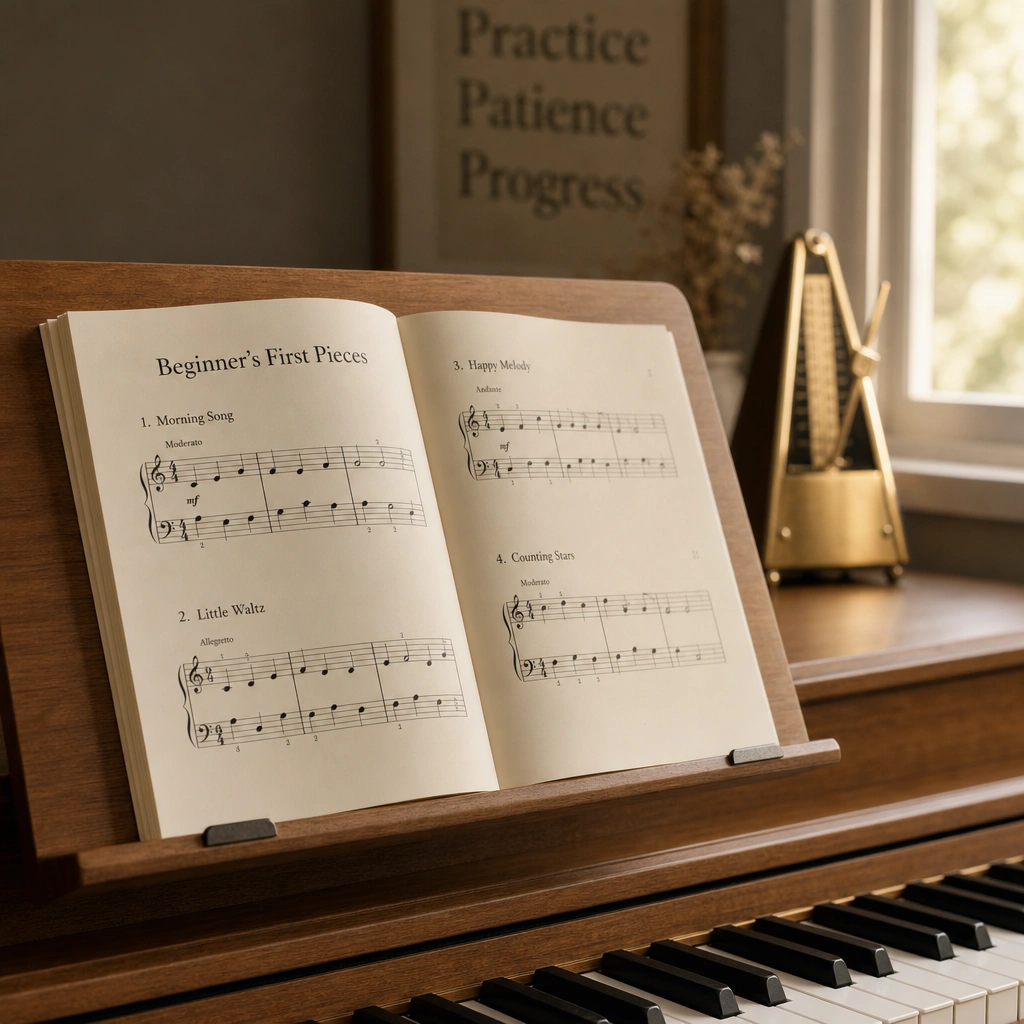
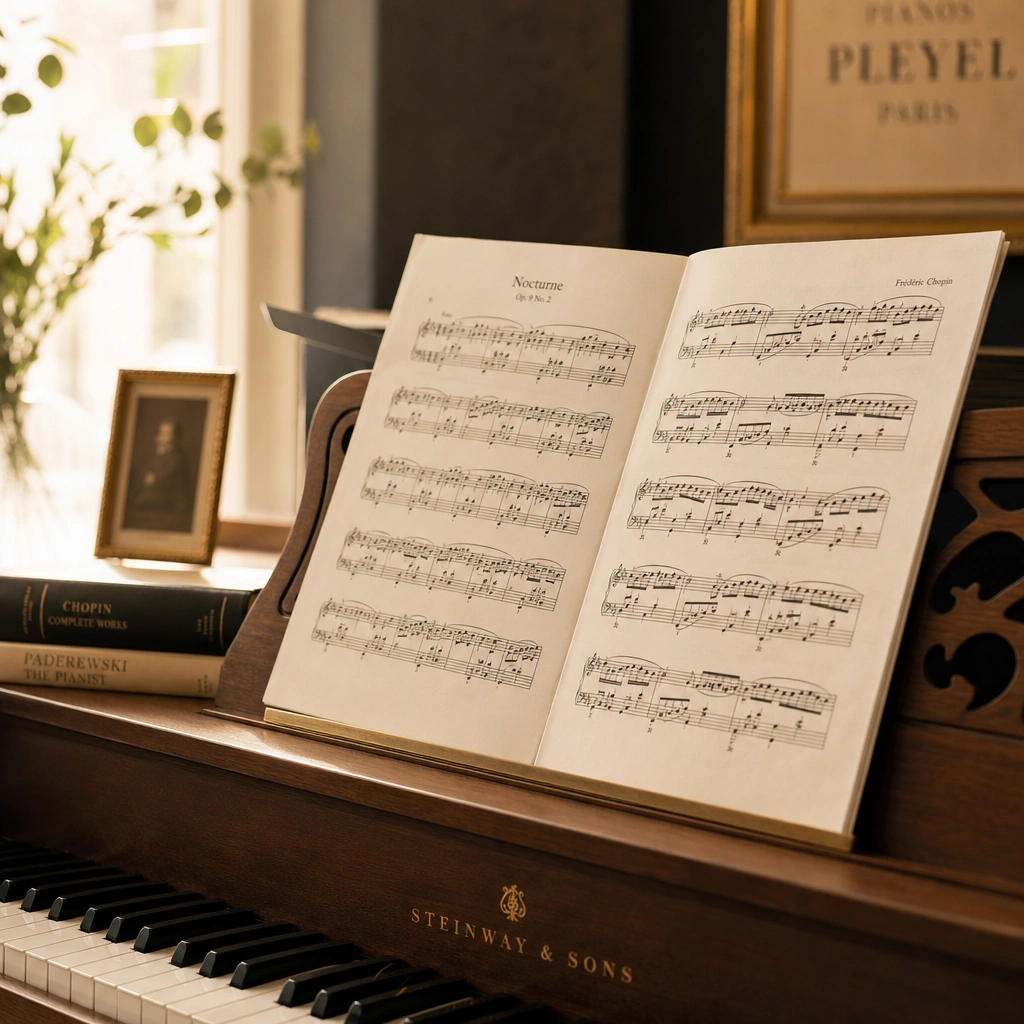
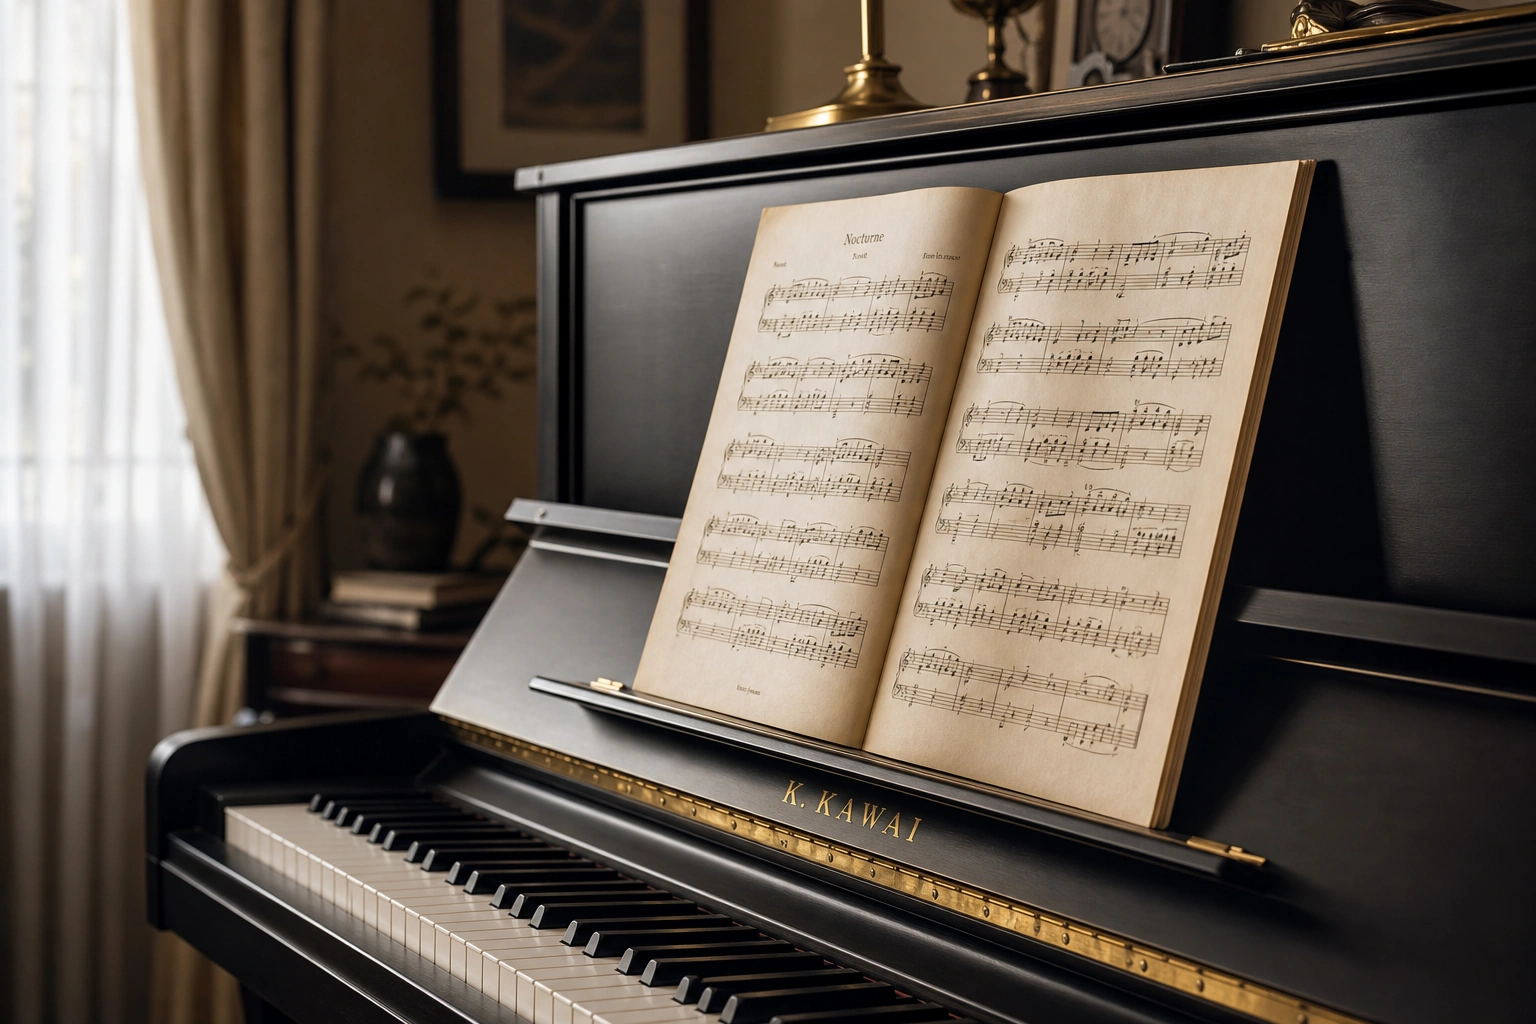
    Sheet music on stand illustrating online piano lessons vs in person teaching materials

    Feedback quality and hands-on correction

    In-person lessons allow me to gently reposition a wrist, tap a rhythm on a student’s shoulder, or physically demonstrate weight transfer from one finger to another. These tactile cues can accelerate understanding, especially for younger kids or total beginners who are still building body awareness at the keyboard.

    That said, online piano lessons vs in person have narrowed the feedback gap considerably. A good camera angle lets me see finger position, posture, and hand shape in real time. I can demonstrate on my own piano, ask the student to mirror me, and provide verbal corrections that are often just as effective as physical ones.

    “Austin explains everything clearly and makes online piano lessons easy to follow.” – Emily Carter

    Where in-person still has an edge is in catching micro-movements—slight thumb collapses, wrist tension, or unconscious tilting. On video, these can be harder to spot depending on lighting and camera quality. But for the vast majority of students, well-delivered verbal and visual feedback online gets the job done.

    Some aspects actually work better online. Screen sharing lets me annotate sheet music in real time, highlight theory concepts on a virtual whiteboard, or walk through basic music theory for piano with shared visuals that would require a physical handout in person.

    Cost comparison

    This is where online piano lessons vs in person diverge significantly. In-person instruction typically costs more, not because the teaching is better, but because of the overhead involved—studio rent, utilities, commute time for the teacher, and geographic market rates.

    At Weaver Music, lessons are $99 per 60-minute session whether online or in-person in the Bay Area. But many teachers charge a premium for in-person slots due to limited availability and higher costs. Online lessons also eliminate your own commute expenses—gas, parking, or public transit fees add up over weeks and months.

    If cost is a primary consideration, online piano lessons vs in person will almost always favor the online route. You’re paying for teaching expertise, not real estate, and you get the same curriculum either way. For families weighing how much piano lessons cost, the online option often makes high-quality instruction accessible when in-person rates would stretch the budget too far.

    There’s also the hidden cost of time. A 30-minute in-person lesson might require an hour of total time when you factor in driving. That same lesson online takes exactly 30 minutes, letting you reclaim that time for practice, homework, or rest.

    Trying both formats for yourself makes the choice much clearer. Your first 30-minute lesson with Austin is free – no card, no pressure.

    Book your free trial →

    Flexibility and scheduling

    Online piano lessons vs in person offer vastly different levels of scheduling freedom. When lessons happen over Zoom, you’re not locked into teachers within a 20-mile radius. You can work with someone three time zones away, access evening or early-morning slots that local studios don’t offer, and reschedule more easily when life gets chaotic.

    For students with unpredictable schedules—shift workers, parents of young kids, college students, frequent travelers—the flexibility of online lessons can be the difference between consistent progress and giving up entirely. I’ve taught students who logged in from hotel rooms, relatives’ houses, and temporary living situations without missing a beat.

    In-person lessons require both you and the teacher to be in the same physical space at the same time. If you’re sick, stuck in traffic, or dealing with a last-minute conflict, that lesson is often lost. Online piano lessons vs in person reduce friction and make it easier to maintain momentum, which is crucial for building skills over months and years.

    That said, some students thrive on the structure of leaving home and going somewhere for a lesson. The physical routine creates a mental boundary that says “this is piano time,” which can be harder to establish when your lesson happens in your living room.

    Laptop setup for online piano lessons in warm home studio environment

    Technology requirements

    In-person lessons require basically nothing beyond your instrument and yourself. Online piano lessons vs in person introduce a layer of technology that can be either seamless or frustrating, depending on your setup and comfort level.

    At minimum, you need a device with a camera and microphone, a stable internet connection, and a way to position the camera so the teacher can see your hands and posture. Most laptops, tablets, or phones work fine. Audio quality matters more than you’d think—cheap built-in mics can distort piano sound, making it harder for the teacher to assess tone and dynamics.

    I’ve worked with students who set up an iPad on a music stand, a laptop on a stack of books, or a phone propped against a lamp. It doesn’t have to be fancy, but it does have to be functional. If you’re not tech-savvy or don’t have reliable internet, online piano lessons vs in person may add stress rather than convenience.

    On the flip side, once your setup is dialed in, it’s effortless. No packing bags, no commute, no waiting room. You sit down, click a link, and you’re in your lesson. For students who already spend time on video calls for work or school, the barrier to entry is minimal.

    Weaver Music lessons happen over Zoom, which is user-friendly and widely supported. I also provide access to a four-level lesson path, so students can review material between lessons regardless of format.

    Social connection and motivation

    One underrated aspect of the online piano lessons vs in person question is the human element. In-person lessons create a distinct type of presence—you’re sharing physical space, breathing the same air, and picking up on body language and micro-expressions that video can’t fully capture.

    For younger students especially, that in-the-room connection can boost engagement and accountability. Kids are less likely to zone out when the teacher is right there. The ritual of going to a lesson, seeing the same studio, and interacting face-to-face can reinforce the seriousness and importance of practice.

    But online piano lessons vs in person doesn’t mean online is impersonal. I’ve built deep, lasting relationships with students I’ve never met in person. We laugh, troubleshoot, celebrate breakthroughs, and work through frustrations just as meaningfully as we would in a studio. Video is intimate in its own way—I see students in their home environment, meet their pets, and get a window into their daily lives.

    “I started as a complete beginner, and Austin made the learning process feel comfortable.” – Noah Peterson

    Some introverted students actually prefer online lessons. The screen provides a subtle buffer that reduces performance anxiety and makes it easier to ask questions. For adults especially, the comfort of learning in private space—without the self-consciousness of playing in front of someone in the room—can be liberating.

    The social connection also extends to recitals and community. In-person studios often host group events and performances more easily, though online platforms are catching up with virtual recitals and shared practice groups. If you value the community aspect, ask prospective teachers how they facilitate it in their format.

    Which students thrive in each format

    After years of teaching both ways, I’ve noticed patterns in who gravitates toward online piano lessons vs in person. These aren’t hard rules—plenty of students succeed in either setting—but they’re useful starting points.

    Students who often do well with online lessons:

    • Self-directed learners who practice consistently without external pressure
    • Adults with busy or irregular schedules
    • People in rural areas or places with few local teachers
    • Students who are comfortable with technology
    • Learners who prefer privacy and lower social pressure
    • Anyone looking to access a specific teacher regardless of location

    Students who often benefit more from in-person lessons:

    • Young children (roughly under age 8) who need more hands-on guidance
    • Complete beginners struggling with hand position and posture
    • Students with unreliable internet or limited tech access
    • Learners who thrive on routine and physical separation between home and “lesson space”
    • People who value strong in-person social connection
    • Anyone preparing for live performances who benefits from in-studio practice

    That said, I’ve taught seven-year-olds online who did beautifully and working professionals in-person who needed that clear boundary. The format matters less than the quality of teaching and the student’s commitment to practice. If you’re curious which might suit you, the free trial piano lesson lets you test the waters with zero commitment.

    For parents weighing the benefits of piano lessons for kids, both formats deliver the cognitive, emotional, and creative advantages—the delivery method is secondary to consistent, quality instruction.

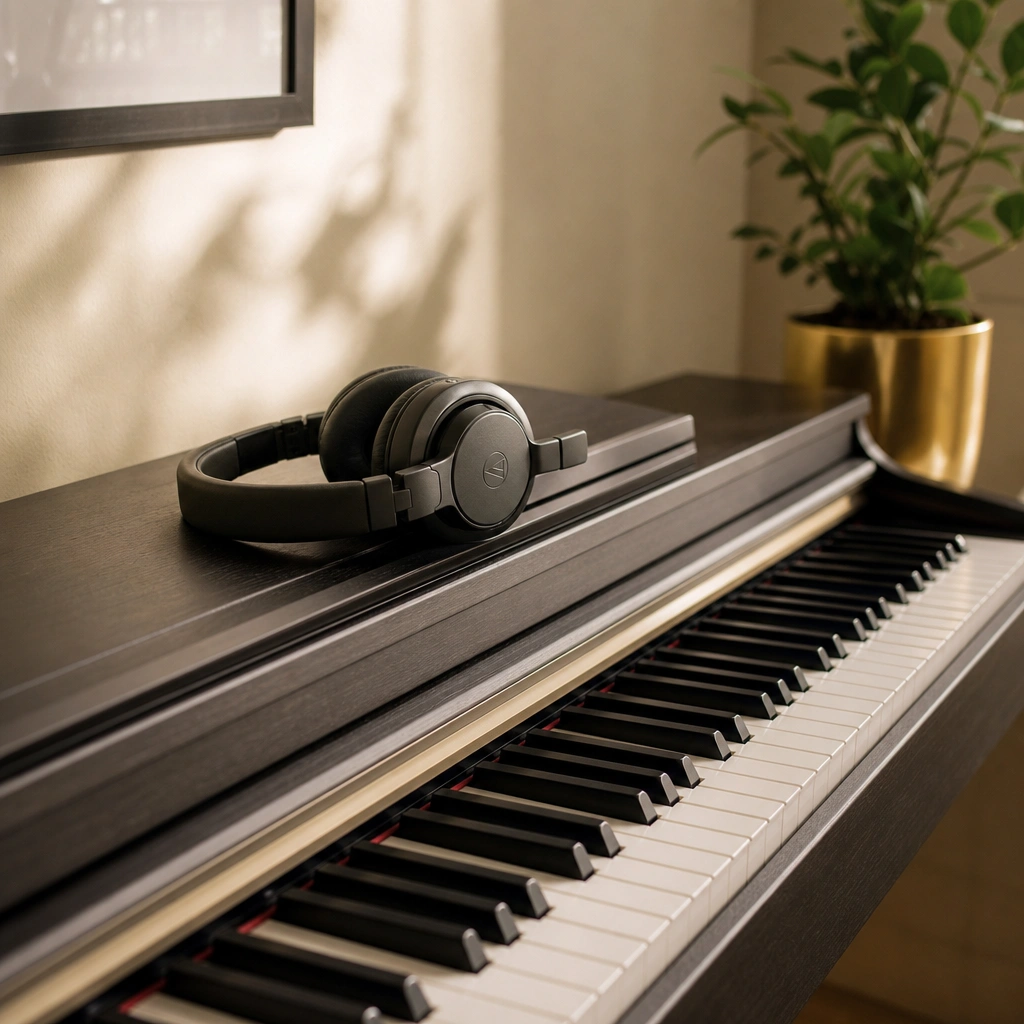
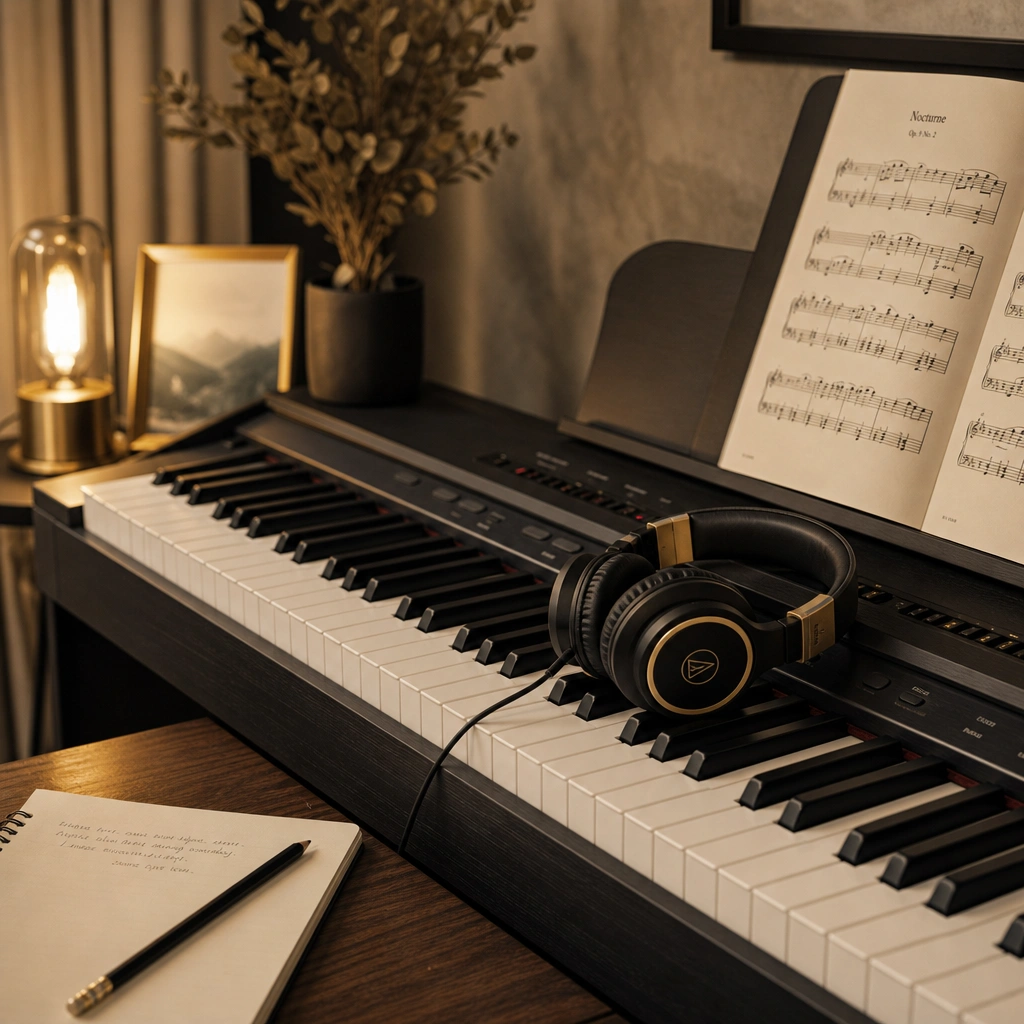
    Headphones on digital piano showing flexible online and in-person lesson options

    How to decide what works for you

    The online piano lessons vs in person choice ultimately comes down to a handful of practical questions. Here’s a framework I share with prospective students:

    Ask yourself:

    • Do I have a reliable internet connection and a device with a camera?
    • Is my schedule predictable, or do I need maximum flexibility?
    • Am I comfortable learning via video, or do I need physical presence?
    • Is there a teacher nearby whose teaching style and expertise match my goals?
    • What’s my budget, and does it include commute time and costs?
    • Am I a complete beginner who might benefit from hands-on posture correction?
    • Do I have a good practice instrument at home that the teacher can see clearly on camera?

    If you answered yes to reliable tech, flexible scheduling needs, and comfort with video, online piano lessons vs in person will likely tilt toward online. If you’re a brand-new player unsure about hand position, or if you value in-person ritual and community, in-person may serve you better.

    But here’s the secret: you don’t have to choose forever. Many students start one way and switch later as circumstances or preferences change. I’ve had students begin online, move to in-person when they relocated to the Bay Area, then switch back to online when they traveled for work. The teaching adapts.

    One overlooked factor is the quality of your home instrument. If you’re not sure what size keyboard for piano lessons you need, that’s worth sorting out before committing to either format. A 61-key keyboard with unweighted keys will limit your progress whether your teacher is on Zoom or in the room.

    You can also read about whether piano learning apps work if you’re considering supplementing lessons with self-guided tools. Apps can be helpful practice aids, but they don’t replace the personalized feedback and accountability a teacher provides—online or in person.

    The debate around online piano lessons vs in person often assumes one is inherently better, but that’s a false premise. What matters is finding a teacher who understands your goals, communicates clearly, and meets you where you are—whether that’s in a studio or on a screen.

    Research supports the effectiveness of online music instruction when delivered thoughtfully. A study on distance education found that remote learning can be as effective as in-person instruction when the right pedagogical strategies are used. The format is just a vehicle; the teaching quality is what drives results.

    If you’re still on the fence about online piano lessons vs in person, the best move is to try both if possible. Many teachers offer a trial lesson in each format, letting you compare the experience firsthand. At Weaver Music, the first 30-minute lesson is free whether you choose online via Zoom or in-person in the Bay Area, so you can make an informed decision without financial risk.

    Another consideration is what happens beyond the lesson itself. Both formats require consistent home practice. Whether you’re learning easy piano songs for beginners or working on advanced repertoire, progress happens between lessons. The format of the lesson is less important than how well the teacher equips you to practice effectively on your own.

    For students preparing for performances, piano recital preparation works slightly differently in each format. In-person lessons can include mock recitals in the studio, while online lessons might use recorded practice performances reviewed during the session. Both approaches build confidence and stage readiness.

    The online piano lessons vs in person discussion also touches on learning pace. Some students worry that online lessons will slow their progress. In my experience, the pace is determined by practice time and focus, not lesson format. A student who practices diligently will advance quickly whether they see me on a screen or across the piano bench.

    One final point: online piano lessons vs in person isn’t just about logistics—it’s about finding a learning environment where you feel comfortable, supported, and motivated. If video calls make you self-conscious, in-person may feel safer. If driving across town stresses you out, online removes that friction. Your emotional comfort matters as much as the technical trade-offs.

    At the end of the day, the online piano lessons vs in person question is deeply personal. There’s no universal right answer, only the answer that fits your life, your learning style, and your goals. The good news is that both paths can lead to real, lasting progress—and the choice is yours.

    How to decide what works for you

    You can learn a lot by reading comparisons of online piano lessons vs in person, watching YouTube demos, and asking friends about their experiences. But at some point, the best way forward is to experience a real lesson and see how it feels.

    If you’re motivated and have a basic sense of what you want to work on, you can make progress on your own using books, apps, and free resources. But here’s what I’ve seen after teaching hundreds of students: one session with a teacher who watches your hands, listens to your playing, and gives you personalized feedback accelerates your progress by weeks or even months.

    A single lesson clarifies what you’re doing well, what needs adjustment, and what to focus on in your practice. It turns vague frustration into actionable steps. Whether that lesson happens online or in person, the clarity and direction it provides are the same.

    If you’re ready to move past the research phase and experience what online piano lessons vs in person actually feels like with a real teacher, I’d love to work with you. Your first 30-minute lesson is completely free—no credit card, no obligation, no pressure. We’ll assess where you are, talk through your goals, and map out a path that makes sense for your schedule and learning style.

    Ready to find out for yourself?

    Your first 30-minute lesson with me is completely free – we will evaluate where you are, talk through your goals, and map out your path.
    Book Your Free Trial Lesson

  • Do Piano Learning Apps Work? 7 Honest Truths Every Beginner Should Know

    Do Piano Learning Apps Work? 7 Honest Truths Every Beginner Should Know

    As a piano teacher with over a decade of experience, I get asked constantly whether do piano learning apps work. Parents wonder if they should skip traditional lessons. Adults hope an app might be the low-pressure solution they’ve been looking for.

    The question comes up in nearly every free trial lesson I teach. Here’s my honest answer: do piano learning apps work? Yes, they can work, but not in the way most people hope.

    They’re useful tools for specific situations, but they have serious limitations that developers don’t advertise. In this article, I’ll walk you through exactly what these apps do well, where they fail, and who actually benefits from using them.

    The short answer

    Do piano learning apps work? Yes, but only for motivation, basic familiarity, and supplemental practice.

    They excel at getting complete beginners to touch the keys and learn a few simple songs. They fail at teaching proper technique, musicality, sight-reading, and anything beyond beginner repertoire.

    Most students plateau quickly without real feedback. Apps can’t see your posture, catch tension in your wrists, or explain why your rhythm feels off.

    For those things, you need human eyes and ears. The reality is that apps provide a starting point, not a complete learning path.

    They’re best understood as motivation tools rather than comprehensive instructors. When asking do piano learning apps work as a replacement for lessons, the answer becomes much more complicated.

    Sheet music and smartphone on piano bench illustrating do piano learning apps work comparison

    What piano apps actually do well

    Let me start with what piano apps genuinely offer. I’ve watched students use them, tested several myself, and I can confirm they have real strengths in specific areas.

    Lowering the barrier to entry

    Apps make starting feel effortless. There’s no scheduling, no commute, no performance anxiety.

    You download the app, plug in a keyboard, and you’re playing notes within minutes. For someone intimidated by traditional lessons, that ease matters.

    The psychological barrier to starting piano is real. Apps dissolve that fear and get people actually sitting at the keyboard, which is half the battle.

    This accessibility has introduced countless people to piano who might never have taken that first step otherwise. That’s genuinely valuable, even if it’s just the beginning of a longer journey.

    Instant gratification and gamification

    Piano apps reward you immediately. You earn points, unlock levels, see your streak counter climb.

    For beginners who need encouragement, this feedback loop keeps them coming back. Traditional piano practice can feel slow.

    Apps make progress visible in a way that sheet music doesn’t, especially in the first few weeks. The dopamine hit from completing a level or maintaining a streak can be powerful motivation for establishing a daily practice habit.

    That consistency matters, even if the practice itself is limited. Many students tell me the app got them to practice daily for the first time in their lives.

    Flexible scheduling

    You can practice at midnight or during lunch. There’s no coordinating calendars or waiting for your lesson day.

    For busy adults or parents juggling schedules, this flexibility is appealing. Apps are always available, removing one common excuse for not practicing.

    When you have fifteen minutes between meetings or after the kids go to bed, you can squeeze in a session. This on-demand access fits modern lifestyles in a way that weekly scheduled lessons sometimes struggle to match.

    Song-based learning that feels fun

    Most piano apps teach through popular songs rather than exercises. You’re playing a tune you recognize, not drilling scales.

    That makes the first sessions enjoyable. Many of my students discovered they liked piano through an app first, then came to me when they wanted to go deeper.

    That pathway is valid. Learning songs you actually want to play creates emotional investment in the process.

    Apps capitalize on this by offering recognizable melodies from the start. The instant reward of playing something familiar keeps motivation high in those critical first weeks.

    Low financial risk for exploration

    At $10-$30 per month, apps represent a minimal financial commitment compared to traditional lessons. If you’re unsure whether piano is for you, this low barrier makes experimentation easier.

    You can test the waters without making a significant investment. For many people, this feels like a safer first step than committing to a series of lessons.

    The low cost removes financial anxiety from the exploration phase, which can be valuable for people on tight budgets or those who simply want to try before investing more seriously.

    “I started as a complete beginner, and Austin made the learning process feel comfortable.” – Noah Peterson

    Where do piano learning apps work best?

    So when do piano learning apps work in practice? Based on what I’ve seen, they’re most effective in these specific scenarios.

    Absolute beginners exploring interest

    If you’ve never touched a piano and want to see whether you enjoy it, an app is a reasonable starting point.

    You’ll learn where middle C is, how to press keys in sequence, and whether the instrument appeals to you. This is essentially a trial phase.

    Apps work well for the first few weeks of curiosity. They answer the basic question: “Do I actually like sitting at a piano and making music?”

    That’s valuable information before you invest in lessons or equipment. The app becomes a low-stakes exploration tool that helps you make an informed decision about next steps.

    Supplemental ear training and rhythm games

    Some apps include rhythm exercises, interval recognition, and call-and-response drills. These can complement real lessons.

    I occasionally recommend specific apps to students as homework tools. Used alongside a teacher, certain app features add value.

    Just don’t rely on them as your primary instructor. They work best as focused practice tools for specific skills.

    The gamified format actually serves these repetitive drills well, making what could be tedious practice more engaging. When someone asks do piano learning apps work for ear training specifically, I can say yes—with caveats.

    Casual players with no performance goals

    If your only goal is to play a handful of simple songs for personal enjoyment and you’re not concerned with technique or advancing, apps can meet that need.

    You’ll learn basic melodies and have fun. This is a small audience, but it exists.

    For those people, do piano learning apps work? Sure, within that limited scope. If you’re content playing simplified versions of popular songs in your living room and have no ambitions beyond that, apps can deliver exactly what you’re looking for.

    Daily practice motivation between lessons

    Students who take weekly lessons sometimes use apps to maintain momentum on non-lesson days. The app provides structure and accountability for daily practice sessions.

    This hybrid approach leverages the app’s strengths (consistency, accessibility, motivation) while relying on the teacher for everything else. It’s one of the smartest ways to use app-based tools.

    The combination addresses the question of whether do piano learning apps work as supplements rather than replacements—and the answer is a definitive yes.

    Empty piano in sunlit room representing traditional piano learning environment

    The serious limitations nobody talks about

    Now let’s talk about where piano apps fall short. These aren’t minor issues—they’re fundamental problems that prevent most students from progressing beyond a basic level.

    No feedback on technique

    Apps can’t see your hand position, wrist angle, or finger curvature. They can’t tell if you’re building tension, collapsing your knuckles, or using awkward fingerings.

    Over time, bad habits solidify and become painful to unlearn. I’ve worked with dozens of students who started with apps and developed issues I had to spend months correcting.

    Tension, incorrect thumb positioning, and weak fourth fingers are the most common problems I see. These issues don’t just slow progress—they can lead to pain and even injury if left unchecked.

    Proper technique isn’t just about playing correctly. It’s about playing sustainably, protecting your body, and building a foundation for advanced repertoire.

    Apps completely ignore this dimension. They measure note accuracy but miss everything about how you’re producing those notes, which matters enormously for long-term development.

    They don’t teach sight-reading

    Most apps use falling note animations or color-coded keys, not traditional sheet music. You’re following visual cues on a screen, not reading notation.

    This might feel easier, but it keeps you dependent on the app forever. Real musical independence requires the ability to read sheet music.

    Apps actively prevent that skill from developing. You’re memorizing patterns and reacting to visual prompts, which uses completely different cognitive pathways than reading staff notation.

    Without sight-reading skills, you can never sit down at a piano with a piece of sheet music and play something new. You’re permanently limited to whatever content the app provides.

    This is one of the biggest reasons why do piano learning apps work only to a point—they create dependency rather than independence.

    Limited repertoire depth

    Apps typically offer beginner-level pop songs and simplified classics. Once you exhaust that library, there’s nowhere to go.

    You can’t learn an actual Chopin nocturne or work through a Beethoven sonata using an app. The ceiling is low.

    Students hit it within months and then plateau. Real piano literature spans centuries and includes works of staggering complexity and beauty.

    Apps give you access to maybe one percent of that repertoire, and even then in simplified versions. This limitation becomes frustrating quickly for anyone who develops genuine interest in the instrument.

    No musical interpretation or expression

    Apps measure whether you hit the right note at the right time. They don’t teach dynamics, phrasing, rubato, or emotional expression.

    Playing piano becomes a mechanical game of accuracy, not an artistic practice. Music without interpretation is just noise.

    Apps don’t address this at all. The difference between playing notes and making music is everything.

    Apps train you for the former while ignoring the latter completely. You never learn how to shape a phrase, when to pull back the tempo for emotional effect, or how to balance melody against accompaniment.

    These are the skills that make piano playing genuinely rewarding. Without them, the instrument becomes a button-pushing exercise rather than an expressive art form.

    Algorithm-based progression that ignores individual needs

    Apps follow pre-programmed learning paths. They can’t adjust based on your specific struggles, learning style, or goals.

    Everyone gets the same sequence regardless of their background or needs. A human teacher adapts constantly, spending extra time on concepts that challenge you and moving quickly through material you grasp easily.

    Apps can’t do this. This one-size-fits-all approach works for some students and frustrates others, but it never optimizes learning the way personalized instruction can.

    Understanding what’s missing in app-based learning is much clearer when a teacher explains it in real time. Your first 30-minute lesson with Austin is free – no card, no pressure.

    Book your free trial →

    Do piano learning apps work for reading music?

    This deserves its own section because it’s one of the most common misconceptions. Many people assume that using a piano app will teach them to read music.

    It won’t. Apps that use scrolling notes, light-up keys, or tablet overlays actively train you to rely on visual shortcuts instead of traditional notation.

    You’re learning patterns and memorizing sequences, not decoding staff notation in real time. Some apps claim to teach reading, but their approach is usually superficial.

    They might label notes occasionally or quiz you on flashcards, but that’s not the same as reading fluently while playing. If literacy is your goal, do piano learning apps work for that purpose?

    No. You need structured sight-reading practice with actual sheet music, ideally guided by someone who can explain rhythm, intervals, and how to practice reading efficiently.

    For a foundational approach to this skill, understanding basic music theory makes a meaningful difference. Musical literacy is the difference between being able to play only what someone else has programmed for you and being able to pick up any piece of sheet music and learn it independently.

    That freedom is what most serious students ultimately want. Apps trade that long-term independence for short-term ease.

    It’s a bad bargain if your goal is genuine musical development. Real reading skills require understanding notation, rhythm values, key signatures, and the ability to translate symbols into sound in real time.

    Apps bypass this entire cognitive process by giving you color cues and falling notes. It feels easier initially, but it prevents you from developing the skill that unlocks the full world of piano music.

    The gamification question

    Let’s address the gamification feature that apps lean on heavily. Points, streaks, and achievements can motivate beginners, but they also create problems that aren’t immediately obvious.

    Extrinsic vs intrinsic motivation

    Apps train you to play for rewards—unlocking levels, maintaining streaks, earning badges. This is extrinsic motivation.

    It works short-term, but it doesn’t build the intrinsic love of music that sustains long-term practice. According to research on motivation and learning, extrinsic rewards can actually undermine deeper engagement once the novelty fades.

    Students stop asking “do I love this music?” and start asking “did I get my points?” That shift changes your relationship with the instrument in subtle but important ways.

    Long-term piano students practice because they love the sound they create, the challenge of mastering difficult passages, or the emotional release music provides. Apps never cultivate these deeper motivations.

    Shallow engagement

    Gamification encourages speed and completion. You rush through a song to hit 100% accuracy and move on.

    There’s no incentive to replay a piece slowly, focus on tone, or explore emotional nuance. Piano mastery requires deep, patient engagement with material.

    Apps are designed for the opposite: quick wins and constant novelty. The best practice happens when you spend thirty minutes on eight measures, refining every detail until it sounds exactly right.

    Apps punish this approach by making it boring and unrewarded. The metrics they track—songs completed, accuracy percentage, streak days—all encourage surface-level engagement rather than deep learning.

    The streak anxiety problem

    Many students report feeling anxious about breaking their streak, even when they’re sick, traveling, or genuinely need a break.

    The app’s motivational tool becomes a source of stress. This external pressure can turn practice from a joy into an obligation.

    That’s the opposite of what we want in music education. When the fear of losing a streak becomes the primary driver, you’ve lost the intrinsic connection to music itself.

    Headphones on digital piano keyboard for practice and app-based learning

    Apps vs teachers: the real comparison

    People often position apps and teachers as competitors. The truth is, they’re fundamentally different tools that serve different purposes.

    Let’s break down what each actually provides. Understanding this distinction helps answer the core question of whether do piano learning apps work as standalone solutions.

    What a teacher offers that apps don’t

    A teacher watches your hands, corrects your posture, explains why something sounds wrong, customizes your curriculum, answers questions, and adapts to your learning style.

    We catch problems before they become habits. We also teach musicality—how to shape a phrase, when to linger on a note, how to balance hands, how to build toward a climax.

    Apps have no framework for this. At Weaver Music, every lesson is personalized.

    Whether you’re learning remotely via Zoom or in person here in the Bay Area, I’m watching, listening, and giving you real-time feedback that no algorithm can replicate.

    A teacher also provides accountability, encouragement during frustrating plateaus, and the expertise to diagnose exactly why a passage isn’t working. These human elements are irreplaceable.

    What apps offer that lessons don’t

    Apps are available anytime, cost less upfront, and feel less intimidating for anxious beginners. They’re convenient and commitment-free.

    For someone testing the waters or looking for casual entertainment, those benefits matter. But if your goal is genuine skill development, the convenience comes at a steep cost.

    Apps also offer instant practice opportunities without needing to schedule anything. That spontaneity appeals to people with unpredictable schedules.

    The trade-off is that you sacrifice quality for convenience. Apps give you access, but not expertise.

    Cost comparison over time

    Apps typically charge $10-$30 per month. Lessons cost more—at Weaver Music, 60-minute lessons are $99, and your first 30-minute trial is completely free.

    Over a year, apps seem cheaper. But consider what you’re paying for.

    With a teacher, you make measurable progress. With an app, most users stall within weeks and quit within months.

    The cost-per-outcome ratio actually favors lessons if you’re serious about learning. If you spend a year with an app and plateau at a beginner level, you’ve wasted that time and money.

    If you spend a year with a teacher and can now play intermediate repertoire with proper technique and musicality, that’s an investment that pays dividends for life.

    For a fuller breakdown of lesson pricing, you can review how much piano lessons cost and what that investment includes.

    The accountability factor

    Having a scheduled lesson with a real person creates accountability that apps can’t match. You practice because you don’t want to show up unprepared.

    That external structure helps many students stay consistent. Apps try to replicate this with streaks and reminders, but it’s not the same as knowing a human is expecting to hear your progress next Tuesday.

    The social contract of teacher-student relationships drives practice in ways that gamification simply cannot replicate. Human accountability runs deeper than digital badges.

    Who should actually use piano apps

    So do piano learning apps work for anyone? Yes. Here are the specific profiles where apps make sense and can deliver real value.

    Curious beginners testing interest

    If you’re not sure you want to commit to lessons but you’re piano-curious, try an app for a month.

    See if you enjoy sitting at the keys. If you do, transition to real instruction.

    This exploratory phase is legitimate. Not everyone knows whether they’ll connect with piano, and apps provide a low-risk way to find out.

    Kids who need a fun introduction

    Young children sometimes respond well to the game-like interface. Apps can spark initial interest before formal lessons begin.

    Just don’t let them replace lessons long-term. For parents considering options, understanding the benefits of piano lessons for kids helps clarify why live instruction matters.

    Apps can be a gateway, getting kids excited about piano so they’re receptive when real lessons begin. That’s a valuable role.

    Adults returning to piano casually

    If you played as a child and want to noodle around for fun without serious goals, apps provide easy access to simple songs.

    This is recreational, not developmental. For those looking to truly rebuild skills, getting back into piano as an adult is more effective with guidance.

    But if your only goal is casual enjoyment and you’re content with limited repertoire, apps can serve that purpose without frustration.

    Supplement to weekly lessons

    Some students use apps for rhythm games, ear training drills, or quick daily motivation between lessons. This works if the app complements rather than replaces real instruction.

    I sometimes assign app-based ear training as homework. Used this way, apps add value without the limitations becoming problematic.

    Travelers who want to maintain basic skills

    If you’re traveling for work or vacation and won’t have access to a piano or lessons for several weeks, an app on a portable keyboard can help you maintain basic finger dexterity and rhythm.

    This is maintenance mode, not learning, but it serves a purpose for students who want to avoid losing ground during travel.

    Can you combine apps with lessons?

    Absolutely. In fact, this is the smartest approach for certain students.

    Apps can handle repetitive drills and maintain daily engagement, while lessons provide the technique, musicality, and personalized feedback that apps can’t offer.

    For example, you might use an app for five minutes of interval recognition each day, then bring questions and repertoire to your weekly lesson. The app keeps you engaged between sessions without trying to replace the teacher.

    At Weaver Music, students have access to a four-level lesson path covering technique, theory, and repertoire. This structured content works alongside live lessons to reinforce concepts.

    That combination—guided instruction plus on-demand resources—gives you the best of both worlds. Think of apps as practice tools, not teachers.

    Used correctly, they’re helpful. Used as substitutes, they fail. The key is understanding what each tool is good for and using it accordingly.

    Apps for daily motivation and specific skill drills. Lessons for everything that requires human judgment, feedback, and expertise.

    This hybrid model acknowledges that do piano learning apps work best when integrated into a broader learning strategy rather than serving as the sole instructional method.

    The smarter path forward

    If you’ve been wondering whether do piano learning apps work well enough to skip lessons, here’s what I’d recommend instead.

    Try an app if you want, but set a deadline. Give yourself two to four weeks.

    If you’re still interested and want to improve beyond basic songs, book a real lesson. You’ll progress faster, avoid building bad habits, and actually develop the skills that make piano rewarding long-term.

    Apps can introduce you to the instrument, but they can’t teach you to play it with confidence, fluency, or musicality. At Weaver Music, we teach students of all ages and levels, from total beginners to advanced players.

    Lessons are available worldwide via Zoom or in person here in the Bay Area. Every student starts with a free 30-minute trial where we assess your current level, talk through your goals, and map out a personalized plan.

    You can explore the keyboard on your own and pick up a few patterns. But one guided lesson will show you what you’re missing—and get you to your goals infinitely faster.

    No app can replace the moment when a teacher watches you play, identifies exactly what’s holding you back, and shows you the fix in real time. That clarity is what moves people forward.

    Apps keep you busy. Teachers help you improve. If your goal is actual skill development rather than casual entertainment, invest in instruction that can actually deliver results.

    The students who make the most progress are those who combine structured lessons with disciplined daily practice. Apps can support that practice, but they can’t replace the structure and feedback that lessons provide.

    What to look for in your first lesson

    When you book a trial lesson, pay attention to whether the teacher assesses your technique, asks about your goals, and explains their teaching philosophy.

    These are signs of someone who personalizes instruction rather than following a rigid curriculum. At Weaver Music, the trial lesson is designed to give you clarity.

    We identify what you already know, where you want to go, and exactly what needs to happen to bridge that gap. That roadmap is something no app can provide because it requires understanding you as an individual learner with unique strengths, challenges, and aspirations.

    Setting realistic expectations

    Whether you use apps or lessons, understand that piano mastery takes years of consistent practice. Apps promise fast results, but meaningful progress is gradual.

    A good teacher sets realistic timelines and celebrates incremental improvement. That honest approach builds sustainable motivation rather than the boom-and-bust cycle that apps often create.

    Understanding what’s achievable in weeks, months, and years helps you stay motivated through the inevitable plateaus. Apps rarely communicate these timelines honestly, which leads to disappointment when progress slows.

    Making the transition from app to lessons

    If you’ve been using an app and realize you want more, don’t worry about “starting over.” A good teacher will assess what you’ve learned, identify gaps, and build from there.

    Many of my students began with apps. We work together to preserve the positive habits they developed while addressing the technical issues that need correction.

    The transition is smoother than most people expect, and the acceleration in progress once you have personalized feedback is dramatic. Within a few weeks, most students realize how much they were missing.

    Ready to find out for yourself?

    Your first 30-minute lesson with me is completely free – we will evaluate where you are, talk through your goals, and map out your path.
    Book Your Free Trial Lesson

  • Free Trial Piano Lesson: 7 Essential Tips to Prepare and Succeed

    Free Trial Piano Lesson: 7 Essential Tips to Prepare and Succeed

    If you’re thinking about starting piano lessons, most teachers offer a free trial piano lesson to help you decide if it’s the right fit. I’ve taught hundreds of these first sessions over the past decade, and I can tell you the students who get the most from them arrive knowing what to expect and what questions to ask.

    A free trial piano lesson is your chance to experience what working together actually feels like, get honest feedback on where you are, and map out a realistic path forward. At Weaver Music, we offer a free 30-minute trial lesson with no credit card required and no pressure to continue—just a real conversation about your goals and a taste of how we teach.

    Whether you’re a complete beginner, returning after years away, or looking for lessons for your child, this guide will show you exactly how to prepare and what to look for.

    The short answer

    A free trial piano lesson is a short introductory session—usually 30 minutes—where you meet the teacher, discuss your goals, assess your current level, and try some actual playing. The teacher explains their teaching approach and answers your questions.

    You’ll leave with a clear sense of whether the teaching style, personality, and logistics work for you. Most trials include a brief assessment if you have prior experience, or a first taste of hand position and simple notes if you’re brand new.

    There’s no commitment, and the best teachers never pressure you to sign up on the spot. Think of it as a genuine opportunity to see whether this teacher and approach align with how you learn best.

    What actually happens in a free trial piano lesson

    Let me walk you through what typically happens in those first thirty minutes, because knowing the structure helps you relax and participate fully.

    The first five minutes: introductions and goals

    We start by talking. I ask what brought you to piano, what you hope to play someday, and whether you’ve had any prior experience. If it’s for your child, I ask them directly what songs they like and what sounds fun to them.

    This isn’t small talk. Your answer tells me how to structure everything that follows. Someone who wants to play Chopin needs a different path than someone who wants to play church hymns or write their own songs.

    I also want to understand your timeline and availability. Are you looking for weekly lessons long-term, or do you have a specific event you’re working toward? These practical details shape my recommendations.

    The middle twenty minutes: assessment and teaching

    If you’re a complete beginner, I’ll show you proper hand position, introduce you to a few keys, and often get you playing a simple melody or pattern in the first ten minutes. It’s not about mastery; it’s about experiencing what learning feels like with me.

    If you have experience, I might ask you to play something you already know, or I’ll guide you through a short exercise to see how you read, how your technique looks, and where we might focus first. I’m listening for strengths to build on and gaps to address.

    Either way, this is real teaching. You’ll leave having learned something concrete, not just talked about learning. I might introduce you to basic music theory concepts, demonstrate proper posture and hand positioning, or help you play through a simple piece that matches your current level.

    For students with some background, I also assess reading ability and familiarity with rhythm notation. This helps me gauge which method books or materials would serve you best going forward.

    The last five minutes: questions and next steps

    I explain how lessons work: format, scheduling, cost, practice expectations. I answer any questions you have. Then I offer a completely honest take on whether I think we’re a good fit and what I’d recommend as a next step.

    At Weaver Music, lessons are $99 per 60-minute session, available via Zoom worldwide or in-person in the Bay Area. Students also get access to a four-level lesson path for reference between lessons.

    There’s never pressure to decide immediately. A good free trial piano lesson gives you the information you need to make the right call for yourself.

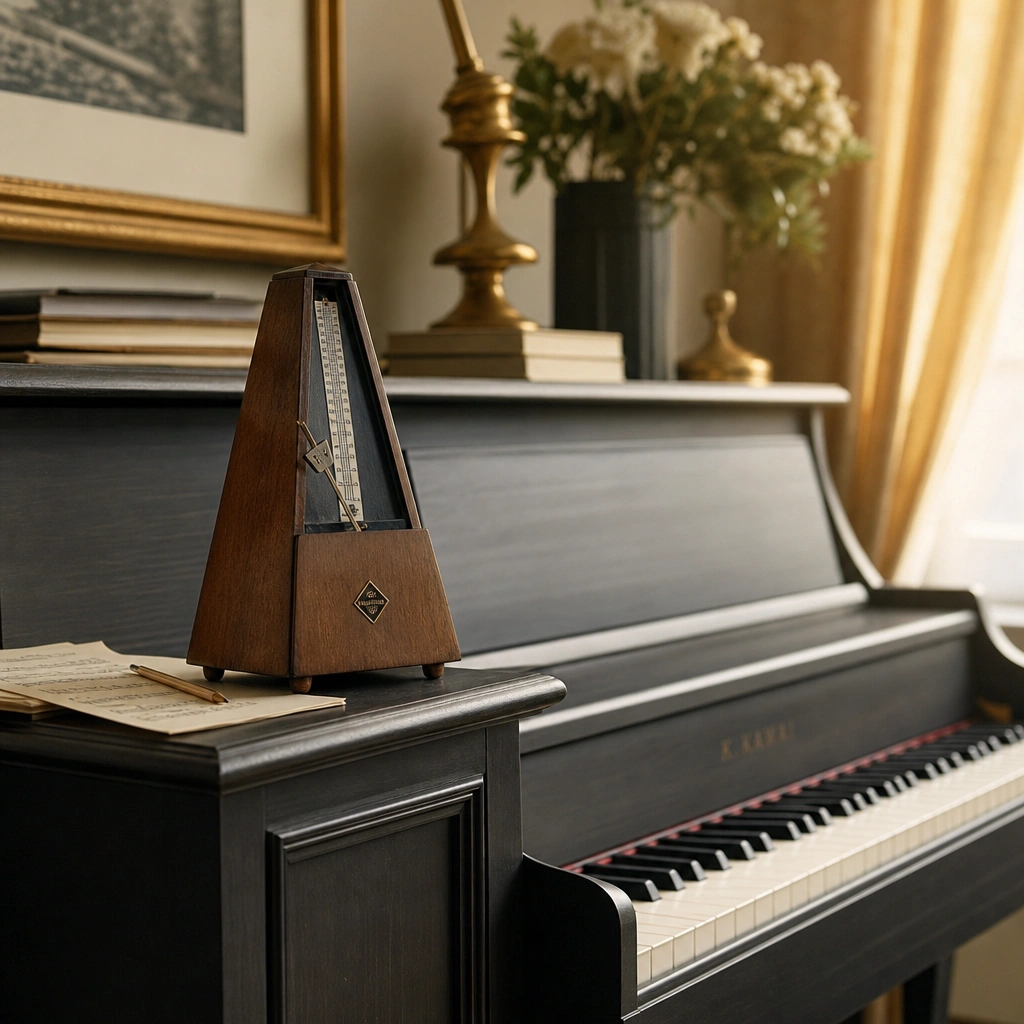
    Sheet music and metronome prepared for a free trial piano lesson

    Before your free trial piano lesson: practical prep

    You don’t need to practice or study anything before your first trial, but a little logistical prep makes the session smoother and more valuable.

    If you don’t have a piano or keyboard yet

    That’s completely normal. Many people book a free trial piano lesson before they’ve purchased an instrument—they want to make sure they’ll actually stick with it first.

    Let the teacher know in advance. We can still cover goals, explain technique using diagrams or video, and discuss what instrument to get. If you’re close to purchasing, ask during the trial.

    I often recommend starting with a 61-key or 88-key digital keyboard with weighted keys, depending on your budget and goals. The weighted keys help you develop proper finger strength and technique from the beginning, which matters more than most beginners realize.

    If you want more detail on sizing, I wrote a full guide on what size keyboard you need for piano lessons.

    If it’s an online lesson

    Most trial lessons happen over Zoom now. Test your camera angle before the session—I need to see your hands and the keys clearly. A side angle works best, not straight-on from behind you.

    Check your audio. Piano sound can be tricky over video, but as long as I can hear the notes clearly enough to tell what you’re playing, we’re fine. If you have a digital keyboard, plugging headphones into it won’t help me hear you; I need to hear the sound through your device’s microphone or speakers.

    Good lighting also makes a difference. I need to see your hand position and finger placement clearly to give you accurate technical feedback. Natural light or a desk lamp positioned to illuminate the keys works well.

    Mindset matters more than preparation

    The best thing you can bring to a free trial piano lesson is honesty about your goals and an openness to feedback. I’m not judging your current level; I’m assessing how I can help you improve from wherever you are.

    Some students worry they need to impress the teacher during the trial. That’s backwards. The trial exists so I can meet you where you are and create a realistic plan. Pretending you know more than you do, or downplaying your experience, just makes it harder for me to help you effectively.

    “I started as a complete beginner, and Austin made the learning process feel comfortable.” – Noah Peterson

    What to have ready

    Here’s a short checklist of things that make your free trial piano lesson more productive:

    • Your instrument set up and ready (if you have one)
    • A notebook or device to jot down any recommendations
    • A list of songs or styles you’d eventually like to play
    • Any prior sheet music or method books you’ve used, if applicable
    • Questions about scheduling, cost, or teaching approach

    If you’ve played before and stopped, think about why you quit and what would need to be different this time. That’s valuable information for both of us. Maybe your previous teacher focused too much on classical repertoire when you wanted to learn jazz, or perhaps the practice expectations felt overwhelming given your schedule.

    Understanding what didn’t work before helps me design an approach that will. I’ve had many students return to piano after a decade or more away, and the ones who reflect on their previous experience tend to build more sustainable practice habits the second time around.

    Questions to ask during your free trial piano lesson

    A free trial piano lesson is a two-way evaluation. You’re interviewing the teacher as much as they’re assessing you. Here are the questions I think matter most:

    About teaching approach

    • Do you teach from a specific method book, or customize the curriculum?
    • How do you balance technique, theory, and repertoire?
    • How much say do students have in what they learn?
    • What does a typical lesson look like after the first few months?

    About practice and progress

    • How much practice do you expect between lessons?
    • How do you help students stay motivated when progress slows?
    • What does realistic progress look like in the first three to six months?
    • Do you assign specific practice tasks, or is it more general?

    About logistics

    • How do you handle scheduling and rescheduling?
    • What happens if I need to miss a lesson?
    • Do you offer any resources between lessons (videos, written guides, recordings)?
    • Is there a minimum commitment, or can I pause if needed?

    At Weaver Music, students get access to a library of video lessons organized by level, so you can review concepts or explore topics between our live sessions. Scheduling is flexible, and lessons are available for all ages and skill levels.

    Don’t be shy about asking about cost, either. If a teacher is vague or evasive about pricing during the trial, that’s a yellow flag. Transparency matters. You should know exactly what you’re committing to financially before you book your first paid lesson.

    If you want to understand the broader pricing landscape, I wrote a detailed breakdown in my article on how much piano lessons cost.

    Beginner method book and notebook ready for piano lesson preparation

    What teachers are evaluating (and why that’s helpful)

    During your free trial piano lesson, I’m paying attention to several things, and none of them are about judging you. I’m gathering information so I can teach you better.

    Your current technical foundation

    If you’ve played before, I’m looking at hand position, posture, how you approach the keys, and whether you’ve developed any tension habits. These aren’t criticisms; they’re clues about what we’ll work on first.

    If you’re brand new, I’m watching how quickly you absorb new physical concepts. Some people are very kinesthetic and pick up hand shape instantly; others need more verbal explanation and time.

    Tension is one of the most common issues I see in returning students. You might have learned to play with raised shoulders, locked wrists, or fingers that collapse at the joints. These habits limit your progress and can cause discomfort during longer practice sessions. The good news is they’re completely fixable with awareness and consistent attention.

    How you learn best

    Do you learn faster by watching and imitating, or by understanding the underlying theory first? Do you ask a lot of questions, or prefer to try things and self-correct? Are you comfortable with mistakes, or do they frustrate you?

    All of this tells me how to structure future lessons and what kind of practice assignments will work for you. There’s no wrong learning style, but teaching is much more effective when I adapt to yours.

    Some students thrive with detailed explanations of why something works before they try it. Others want to jump in, experiment, and ask questions only when they hit a roadblock. Both approaches are valid, and I adjust my teaching accordingly.

    Your goals and motivation

    The student who wants to play one specific song for a wedding has different needs than the student who wants a lifelong musical hobby. Neither goal is better, but the path differs.

    I also listen for how intrinsic your motivation is. Are you here because you’ve always wanted to play, or because someone told you it would be good for you? Both are valid, but they require different kinds of support.

    For students with short-term goals, I might focus more heavily on the specific piece you need to learn, teaching just enough technique and theory to support that immediate aim. For students building a long-term practice, I take a broader approach, building a foundation that will serve you for years.

    Compatibility

    Honestly, I’m also assessing whether we’ll work well together. Teaching is a relationship. If your learning style and my teaching style don’t align, or if our personalities clash, you’ll make faster progress with someone else.

    A good free trial piano lesson surfaces that early, before anyone wastes time or money. I want you to find the right teacher, even if that teacher isn’t me. The fit matters more than credentials or experience level.

    Experiencing this evaluation firsthand is the fastest way to know if we’re a good match. Your first 30-minute lesson with Austin is free – no card, no pressure.

    Book your free trial →

    Red flags and green flags in a free trial piano lesson

    Not all piano teachers are created equal, and a free trial piano lesson is your chance to spot the difference. Here’s what to watch for.

    Green flags (good signs)

    • The teacher asks about your goals and listens carefully to your answers
    • They explain concepts clearly and check whether you understand
    • They give you specific, actionable feedback, not vague praise
    • They’re honest about timelines and what’s realistic
    • They make you feel comfortable making mistakes
    • You leave with at least one concrete thing you learned or understood better
    • They explain their teaching philosophy and why they teach the way they do
    • The trial felt like real teaching, not a sales pitch

    One of the best indicators is whether the teacher gives you something specific to work on if you decide to continue. Good teachers are already thinking about your next steps, not just trying to close the sale.

    Red flags (warning signs)

    • The teacher talks more than they listen
    • They pressure you to commit before the trial is even over
    • They make grand promises about how quickly you’ll progress
    • They don’t ask about your goals or seem disinterested in your answers
    • They criticize prior teachers or methods harshly (instead of just explaining their own approach)
    • They seem frustrated or impatient when you don’t understand something immediately
    • Pricing or scheduling policies are unclear or keep changing

    Trust your gut. If something feels off during the free trial piano lesson, it probably won’t improve over time. The right teacher makes you feel capable and motivated, not anxious or inadequate.

    Another subtle red flag is a teacher who dismisses your musical preferences. If you want to learn pop songs but the teacher insists classical training is the only valid path, you’ll likely end up frustrated. The best teachers meet you where your interests lie.

    After the trial: making your decision

    You just finished your free trial piano lesson. Now what?

    Give yourself time to reflect

    Don’t feel like you need to decide on the spot. A good teacher won’t pressure you. Sleep on it. Think about whether the teaching style felt right, whether you’d look forward to weekly lessons with this person, and whether the logistics actually fit your life.

    It’s also completely fine to try trial lessons with two or three teachers before committing. Teaching personalities vary widely, and the best teacher for someone else might not be the best teacher for you.

    I encourage students to trust their instincts here. You’ll know within a day or two whether the trial sparked genuine excitement about learning, or whether it felt like an obligation. Both responses are valuable data points.

    What if you’re still unsure?

    If you liked the teacher but aren’t sure about committing to regular lessons, ask about doing a few sessions on a trial basis. Many teachers, including me, are open to a “let’s try four lessons and see how it goes” arrangement.

    If you’re unsure whether you’ll stick with piano at all, that’s normal. Most beginners feel that way. The only way to find out is to start. A free trial piano lesson is designed to lower that barrier as much as possible.

    Some hesitation is natural, especially if you’ve tried learning an instrument before and quit. But hesitation based on logistics—like unclear scheduling or vague pricing—is a different matter. Those concerns should be resolved during the trial itself.

    What if the trial didn’t go well?

    If the trial didn’t click, that’s valuable information, not a failure. Maybe the teaching style wasn’t a fit, or maybe you realized piano isn’t what you thought it would be. Either way, you learned something important without any financial risk.

    If you’re still interested in piano but the teacher wasn’t right, keep looking. The difference between a good match and a poor match is enormous. I’ve had students come to me after frustrating experiences elsewhere, and they’re often surprised at how much more enjoyable learning becomes with the right fit.

    Don’t let one disappointing trial sour you on lessons entirely. Teaching approaches vary dramatically, and finding the right match is worth the effort.

    Student seated at piano in peaceful studio environment

    Getting started right makes all the difference

    You can absolutely teach yourself piano using YouTube videos, apps, and free online resources. Thousands of people do. You’ll learn some songs, develop some facility at the keyboard, and have fun exploring on your own timeline.

    But if you’ve read this far, you probably already sense that a free trial piano lesson offers something different: personalized feedback, a clear path tailored to your goals, and someone who spots the small technical issues before they become ingrained habits.

    I’ve worked with hundreds of students over the past decade—total beginners, adults returning after years away, kids just starting out, and advanced players refining their skills. The ones who progress fastest and stay motivated longest are the ones who start with good guidance from the beginning.

    Self-teaching works for some people, particularly those with prior musical training or exceptional self-discipline. But most students benefit enormously from having an experienced teacher identify inefficiencies in their technique early on. Fixing a tension habit after six months of self-taught practice takes far longer than learning the correct approach from day one.

    A single trial lesson won’t make you a pianist, but it will show you what’s possible and give you a clear map forward. If you’re curious about what you could actually achieve at the piano, if you want honest feedback on where to start, or if you’re tired of guessing whether you’re practicing the right things, that’s exactly what the trial is for.

    For parents wondering whether lessons are worth it for your child, I wrote a full article on the benefits of piano lessons for kids that might help you decide. The research on cognitive development, discipline, and creative expression is compelling, but the trial lesson will show you whether your specific child enjoys the learning process.

    At Weaver Music, the free trial piano lesson is genuinely free—no credit card, no strings, no pressure. We’ll talk through your goals, assess where you are, and I’ll teach you something concrete in that first thirty minutes. Then you decide whether it’s right for you.

    Whether you book with me or someone else, I hope this guide helps you get the most from your free trial piano lesson. Showing up prepared, asking good questions, and knowing what to look for makes all the difference. The trial is your opportunity to gather the information you need to make a confident decision about your musical journey.

    Many students tell me they wish they’d taken a free trial piano lesson years earlier instead of putting it off. The time is going to pass either way. Starting now means you’ll be months ahead of where you’d be if you wait. For more context on what makes piano instruction valuable, the Music Teachers National Association offers helpful resources on finding qualified instructors and understanding different teaching methodologies.

    Ready to find out for yourself?

    Your first 30-minute lesson with me is completely free – we will evaluate where you are, talk through your goals, and map out your path.
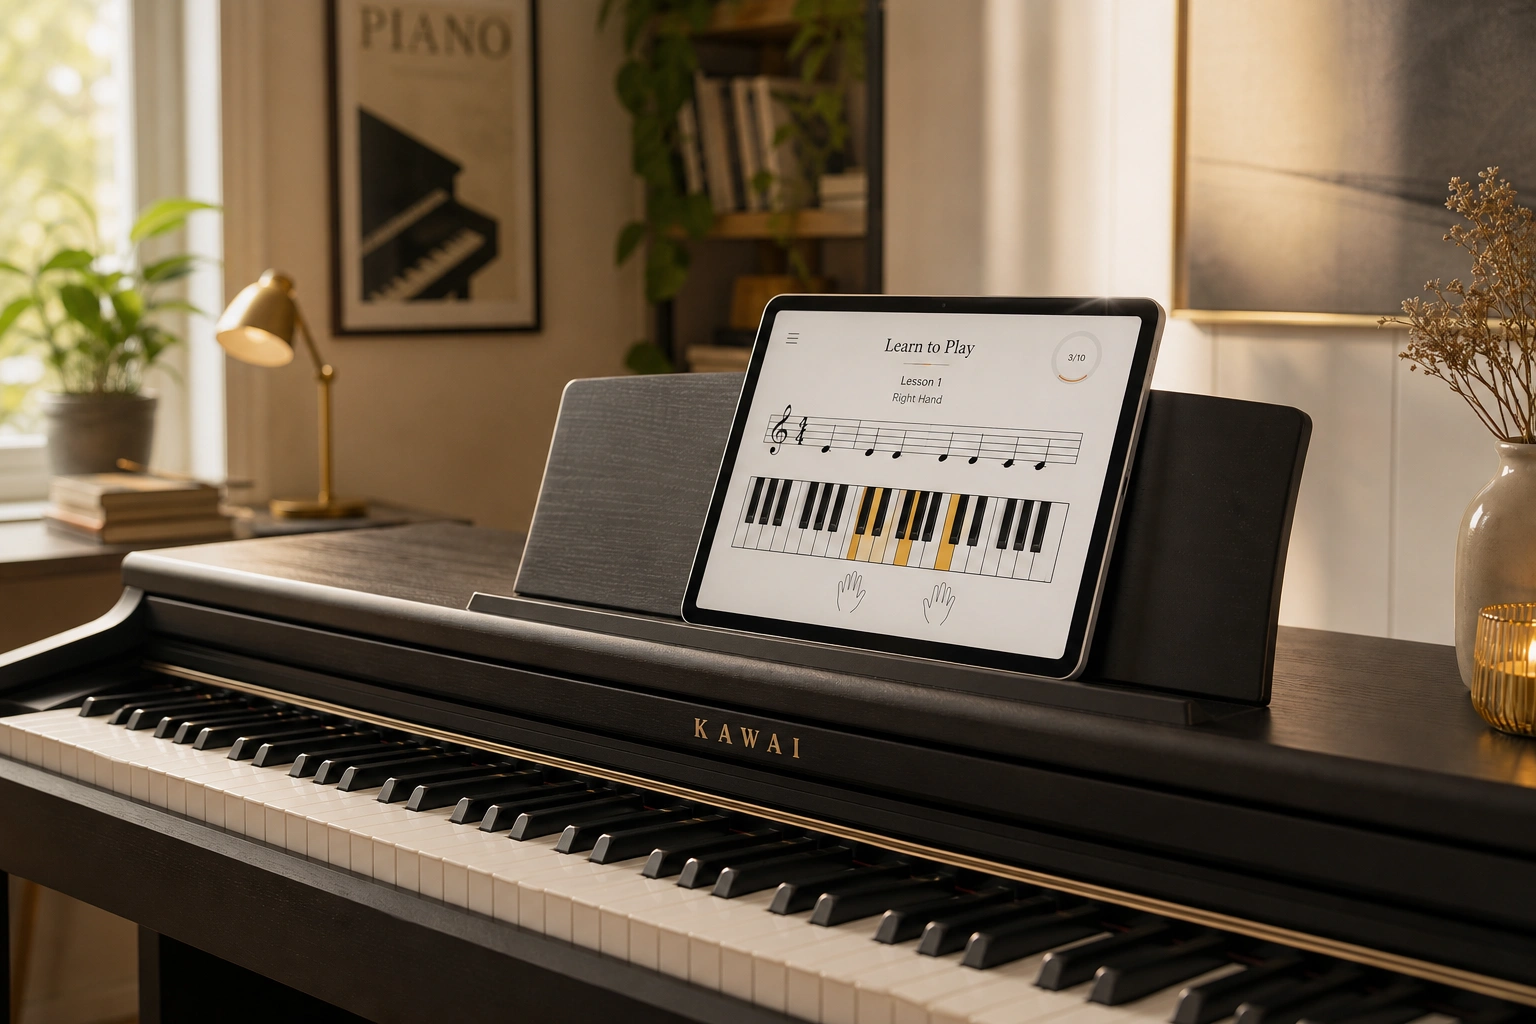
    Book Your Free Trial Lesson

  • What Size Keyboard for Piano Lessons? 3 Easy Answers

    What Size Keyboard for Piano Lessons? 3 Easy Answers

    When you’re starting piano lessons or helping your child begin, one of the first questions you’ll face is this: what size keyboard for piano lessons should you actually get? The options—61, 76, or 88 keys—all look similar in photos, but the differences matter more than you might think.

    I’ve taught hundreds of students over the past decade, and I’ve seen how the right keyboard size helps students progress smoothly, while the wrong choice can create frustration down the road. The good news is that choosing what size keyboard for piano lessons doesn’t have to be complicated once you understand what each option offers.

    If you’re just starting out and want personalized guidance on equipment and technique, we offer a free 30-minute trial lesson where we can discuss your specific situation and goals.

    The short answer

    For most piano students taking real lessons, an 88-key keyboard is the best choice. It’s the same size as an acoustic piano, which means you’ll never run out of keys as you learn more advanced pieces.

    If you’re learning classical music, preparing for exams, or planning to play intermediate and advanced repertoire, 88 keys is essential. That said, younger children (roughly ages 3-6) can start on a 61-key keyboard if budget or space is tight, as long as you plan to upgrade within a year or two.

    A 76-key keyboard splits the difference but often costs nearly as much as 88 keys, making it less practical for most students. The question of what size keyboard for piano lessons really comes down to how serious you are and how long you plan to keep the instrument.

    Let’s break down each option so you can make the right choice for your situation.

    Why keyboard size matters for piano lessons

    Piano music is written for 88 keys. That’s been the standard since the late 1800s, and nearly all published sheet music assumes you have access to the full range.

    When you’re playing beginner pieces, you might only use 20 or 30 keys, which is why smaller keyboards can feel fine at first. But as you progress, even intermediate pieces start using more of the keyboard.

    A simple song like “Für Elise” uses keys outside the range of a 61-key keyboard. If you’re working through method books like Faber or Alfred, you’ll hit limitations within the first year or two on a smaller instrument.

    Beyond the practical range, there’s also muscle memory and spatial awareness. When you practice on an 88-key keyboard, you develop a sense of where you are on the instrument—how far left is low, how far right is high.

    On a smaller keyboard, that sense gets compressed, and students sometimes struggle when they transition to a full-sized piano later.

    Another factor is resale value and longevity. An 88-key digital piano holds its value better and will serve you for many years. A 61-key keyboard often ends up replaced within a year or two, which means you’re buying twice.

    Understanding what size keyboard for piano lessons you need also affects how your teacher can work with you. When I teach, I design lesson plans around standard repertoire that assumes full keyboard access.

    Students with smaller keyboards sometimes have to skip pieces or transpose them, which interrupts the natural learning progression.

    The physical relationship between your body and the keyboard matters too. Proper posture, arm position, and hand placement are all calibrated to a full-sized instrument.

    When students practice on significantly smaller keyboards, they can develop habits that don’t translate well when they eventually move to a standard piano.

    Sheet music on a stand illustrating what size keyboard for piano lessons students need to play standard repertoire

    61-key keyboards: when they work and when they don’t

    A 61-key keyboard covers five octaves, which is enough for very simple songs and the earliest stages of learning. These keyboards are inexpensive, portable, and take up minimal space.

    For a young child just testing the waters, or for someone who wants to learn a few chords and simple melodies without serious commitment, a 61-key model can get you started.

    I’ve had students begin on 61-key keyboards, especially young kids whose parents weren’t sure if piano would stick. In those cases, the smaller keyboard served its purpose for six months to a year.

    But here’s what happens next: the student progresses, the music gets more interesting, and suddenly they’re running out of keys. We have to skip pieces or transpose them awkwardly, which interrupts the learning flow.

    Another issue with 61-key keyboards is that many don’t have weighted keys or touch sensitivity. Without those features, students don’t develop proper finger strength or dynamics.

    If you’re serious about what size keyboard for piano lessons will support real progress, a 61-key model should be a temporary solution at best.

    The limitation becomes especially apparent when students want to play popular pieces they hear on the radio or see performed online. Most contemporary arrangements, even simplified versions, assume you have more than five octaves available.

    This can be discouraging for motivated students who feel held back by their instrument.

    When a 61-key keyboard makes sense:

    • Your child is under age 6 and you’re testing interest before investing more
    • You have severe space or budget constraints and plan to upgrade soon
    • You only want to learn simple pop songs or basic chords, not classical or advanced pieces
    • You’re using it as a portable practice instrument while traveling, with a full keyboard at home

    When to skip 61 keys:

    • You’re a teen or adult beginner planning to take lessons seriously
    • You want to play classical music or work through standard method books
    • You can afford the jump to 88 keys (often only $100-200 more for an entry-level model)
    • You’re planning to continue lessons for more than a year

    76-key keyboards: the middle ground

    A 76-key keyboard gives you a bit more range—about six octaves—and can handle a wider variety of beginner and early-intermediate music. In theory, it’s a compromise between portability and functionality. In practice, I rarely recommend them.

    The problem with 76 keys is that they cost almost as much as entry-level 88-key digital pianos, but you still face limitations as you advance. You’ll run into pieces that need those extra low or high notes, and you’ll still need to upgrade eventually.

    It’s the worst of both worlds: not cheap enough to be a temporary starter, and not complete enough to last long-term. There are niche cases where 76 keys make sense—gigging musicians who need portability and play mostly contemporary music, or producers who use a keyboard as a MIDI controller.

    But for piano lessons, especially for students working through a curriculum, I’ve seen very few situations where 76 keys is the right answer to what size keyboard for piano lessons you need.

    If you’re choosing between 76 and 88 keys and the price difference is small, go with 88 every time. If budget is the issue, a used 88-key digital piano will serve you far better than a new 76-key model.

    The used market for digital pianos is robust, and you can often find excellent instruments from students who upgraded or stopped playing.

    Empty piano bench and keyboard in a practice space for piano lessons

    88-key keyboards: the full piano experience

    An 88-key digital piano or keyboard is the gold standard for piano lessons. It matches the range of an acoustic piano, which means every piece of music ever written for piano is accessible to you.

    You won’t outgrow it, you won’t need to skip songs, and you’ll build the spatial awareness and technique that transfers directly to any piano you sit down at. When I teach, I assume my students have access to 88 keys.

    That allows me to assign pieces from the standard repertoire, work through method books without modification, and help students develop the full range of skills they need.

    When a student shows up with a smaller keyboard, we make it work, but it’s always a compromise.

    Modern 88-key digital pianos have come down significantly in price. You can find solid beginner models with weighted keys and good sound for around $400-600 new, and even less used.

    Yes, it’s more than a 61-key keyboard, but when you consider that it’s a one-time purchase that will last for years, the value is clear.

    For serious students wondering what size keyboard for piano lessons will support long-term growth, the answer is unequivocally 88 keys.

    The psychological benefit of having a “real” piano cannot be overstated—students practice more consistently and take their playing more seriously when they feel equipped like a real pianist.

    What to look for in an 88-key digital piano:

    • Weighted or hammer-action keys that simulate acoustic piano touch
    • Touch sensitivity so softer and harder playing produces different volumes
    • Sustain pedal input (often sold separately but essential)
    • Headphone jack for quiet practice
    • A stable stand and bench at the right height
    • At least 64-note polyphony, preferably 128 or higher

    If you want more guidance on the technical side of keyboard features, I’ve written about weighted keys vs unweighted, which goes into more depth on why key action matters so much for developing proper technique.

    An 88-key instrument isn’t just about having enough notes. It’s about creating an environment where you can learn without artificial limits, where your progress is shaped by your effort and curiosity, not by the equipment you happen to own.

    According to Piano TV’s comprehensive guide on piano keys, the standardization of 88 keys has remained constant because it perfectly encompasses the range of human hearing in musical contexts.

    Choosing the right keyboard is easier when you can ask questions and get personalized advice. Your first 30-minute lesson with Austin is free – no card, no pressure.

    Book your free trial →

    What size keyboard for piano lessons by age and level

    The right answer to what size keyboard for piano lessons often depends on the student’s age, goals, and level of commitment. Here’s how I typically advise families and adult students based on those factors.

    Young children (ages 3-6)

    Very young beginners have small hands and short attention spans. A 61-key keyboard can work for the first six months to a year, especially if you’re not sure whether piano will stick.

    Look for a model with at least touch-sensitive keys if possible, even if they’re not fully weighted.

    That said, if your child is showing genuine interest and you’re planning to continue lessons, I’d encourage you to start with 88 keys from the beginning. Kids adapt quickly, and having the full keyboard means they won’t hit a ceiling as they grow.

    Many families find that investing in a quality 88-key digital piano from the start saves money and hassle in the long run.

    For more perspective on starting young students, you might find this article on the benefits of piano lessons for kids helpful in understanding what to expect as your child progresses.

    Older children and teens (ages 7+)

    By age seven or so, students have the hand size and focus to work with a full keyboard, and their musical ambitions are growing. At this stage, what size keyboard for piano lessons should you choose? Definitely 88 keys.

    Teens especially will progress quickly if they’re motivated, and a smaller keyboard will become limiting within months.

    Older students are also more likely to compare themselves to recordings and performances they see online, most of which are on full-sized pianos. Having an 88-key instrument helps them feel like they’re learning the “real” thing, which can be a meaningful psychological boost.

    Teen students often want to learn current pop songs, film scores, and video game music—all of which typically require the full range of the keyboard.

    Adult beginners

    If you’re an adult starting piano for the first time or coming back after years away, get 88 keys. You deserve the full experience, and you’ll progress faster when you’re not fighting against equipment limitations.

    Adult students often have specific pieces they dream of playing, and those pieces almost always require the full keyboard.

    I work with many adult students, both locally in the Bay Area and online via Zoom, and the ones who start with quality 88-key instruments simply have fewer obstacles in their path.

    If you’re curious about what the journey looks like, I’ve written about getting back into piano as an adult, which covers common challenges and how to overcome them.

    Advanced or returning students

    If you’ve played before or you’re planning to work on intermediate or advanced repertoire, this isn’t even a question. You need 88 keys, ideally with high-quality weighted action that closely mimics an acoustic piano. Anything less will hold you back and feel frustrating.

    Advanced students benefit from instruments with graded hammer action, where the lower keys feel slightly heavier than the higher ones, just like on an acoustic grand piano.

    This level of realism becomes increasingly important as you tackle more complex repertoire with demanding technical passages.

    Sustain pedal and digital piano setup for learning piano

    Other features that matter beyond key count

    While figuring out what size keyboard for piano lessons is important, key count is only one piece of the puzzle. Here are other features that matter just as much for a good learning experience.

    Weighted vs. unweighted keys

    Weighted keys simulate the hammer action of an acoustic piano. When you press a key, there’s resistance, and you have to use proper finger strength and technique to play.

    Unweighted keys feel like pushing buttons—there’s no feedback, no dynamics, and no development of real piano touch.

    For lessons, weighted keys are non-negotiable if you want to build proper technique. Even a budget 88-key digital piano with graded hammer action will serve you far better than a fancy 61-key synth with unweighted keys.

    The muscle memory you develop on weighted keys transfers directly to acoustic pianos. Students who learn on unweighted keyboards often struggle when they sit down at a real piano because their fingers haven’t developed the necessary strength and control.

    Touch sensitivity

    Touch sensitivity means the keyboard responds to how hard or soft you press the keys. Play gently, and the sound is quiet. Play with force, and it’s loud.

    This is fundamental to expressive playing and is essential for any student working on real music. Most modern digital pianos have this feature, but some very cheap keyboards do not. Always check before you buy.

    Touch sensitivity is what allows you to create musical phrasing, dynamics, and emotion in your playing—without it, everything sounds robotic and flat.

    Pedal input

    The sustain pedal is a core part of piano playing. You’ll need it within the first few months of lessons, especially if you’re learning anything beyond the absolute basics.

    Make sure your keyboard has a pedal input jack, and budget for a sustain pedal if one doesn’t come included.

    Some keyboards come with simple on/off pedals, but it’s worth investing in a pedal that supports half-pedaling for more advanced technique later.

    Sound quality and polyphony

    Polyphony refers to how many notes the keyboard can play at once. For piano lessons, you want at least 64-note polyphony, though 128 or higher is better.

    Lower polyphony means notes can cut off unexpectedly when you use the pedal or play complex chords, which is distracting and limits your musical expression.

    Sound quality matters too. You don’t need a concert grand sound, but the piano voice should be pleasant and inspiring to listen to. You’ll be spending hours with this instrument—make sure it sounds good to your ears.

    Many digital pianos now include multiple piano voices sampled from famous concert grands, giving you options to find a sound that motivates you to practice.

    Build quality and stand

    A wobbly keyboard on a flimsy stand is frustrating to play. If possible, invest in a sturdy furniture-style stand or a heavy-duty X-stand, and pair it with a proper bench at the right height.

    Good posture and a stable setup make practice more enjoyable and reduce the risk of tension or injury.

    According to research on ergonomics and piano playing, proper setup significantly impacts both comfort and technique development.

    “Austin explains everything clearly and makes online piano lessons easy to follow.” – Emily Carter

    Making the choice that fits your situation

    So what size keyboard for piano lessons is right for you? Let me bring it all together with some practical scenarios.

    If you’re on a tight budget: Look for a used 88-key digital piano. Brands like Yamaha, Casio, Korg, and Roland make durable models that hold up well over time.

    You can often find a used P-45, CDP-130, or similar model for $200-400, which is a much better investment than a new 61-key keyboard.

    Check local classifieds, Facebook Marketplace, and music store bulletin boards for deals.

    If space is an issue: Remember that an 88-key digital piano is only about 52 inches wide—roughly the width of a couch. It’s not as huge as you might think, and many models are designed to fit in small apartments.

    If you truly can’t make 88 keys work, start with 61 and plan your upgrade path from day one. Some slim-profile 88-key models are designed specifically for tight spaces and can even be stored vertically when not in use.

    If your child is very young and you’re unsure about commitment: A 61-key keyboard with touch-sensitive keys can work as a trial instrument for six months to a year.

    But if lessons are going well and your child is engaged, upgrade to 88 keys before they hit the limitations. Don’t wait until frustration sets in.

    Watch for signs like your child asking to play songs that don’t fit on the keyboard, or your teacher suggesting pieces that require more range.

    If you’re serious about learning: Just get 88 keys. You’ll thank yourself a year from now when you’re playing pieces you love and not wrestling with a keyboard that can’t keep up with your progress.

    The difference in cost is smaller than you think, and the difference in experience is enormous.

    One often-overlooked factor is the learning environment you’re creating. Piano practice is much more enjoyable on an instrument that feels right, sounds good, and doesn’t impose artificial limits.

    When students feel like they’re playing a “real” piano, they’re more motivated to practice, more proud of their progress, and more likely to stick with it long-term.

    At Weaver Music, lessons are $99 per 60-minute session, and all students get access to our four-level lesson path to support practice between lessons.

    Whether you’re learning online via Zoom or in person here in the Bay Area, having the right equipment at home makes every lesson more productive. The instrument you practice on every day matters more than almost any other factor in your progress.

    If you’re working on building your skills and want to explore foundational concepts, the article on basic music theory for piano is a great resource to pair with your lessons, regardless of what size keyboard for piano lessons you ultimately choose.

    You can absolutely learn valuable skills on your own—there are countless free resources, video tutorials, and method books available. Many students make real progress through self-study, especially if they’re disciplined and curious.

    But here’s what I’ve seen over and over again in ten years of teaching: the students who get personalized feedback early on progress faster, build better habits, and avoid the frustrating plateaus that come from small technique issues that go unnoticed.

    When you’re choosing what size keyboard for piano lessons and setting up your practice space, a single conversation with an experienced teacher can save you months of confusion.

    We can talk through your specific situation—your budget, your space, your goals—and make sure you’re set up for success from day one.

    That’s exactly what the free 30-minute trial lesson is for: no sales pitch, just honest guidance tailored to where you are and where you want to go.

    Having taught students at every level, from complete beginners to advanced players returning after a break, I’ve seen how the right equipment choice early on sets the stage for years of enjoyable progress.

    Ready to find out for yourself?

    Your first 30-minute lesson with me is completely free – we will evaluate where you are, talk through your goals, and map out your path.
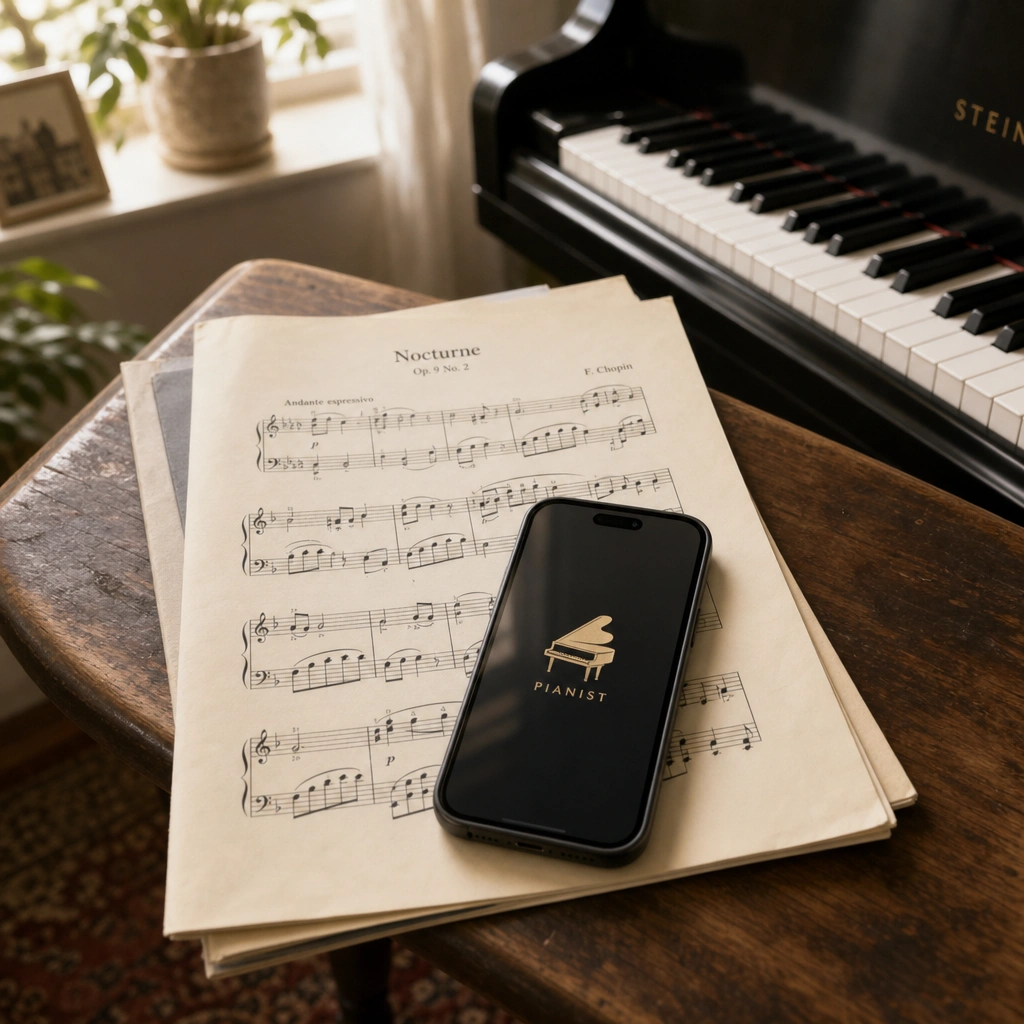
    Book Your Free Trial Lesson

  • 7 Essential Basic Music Theory for Piano Concepts

    7 Essential Basic Music Theory for Piano Concepts

    When I started teaching piano over a decade ago, I noticed something interesting. The students who understood basic music theory for piano didn’t just play their pieces better—they learned faster, remembered longer, and actually enjoyed practicing more. Music theory isn’t some abstract academic exercise. It’s the toolkit that helps you understand what your hands are doing and why music sounds the way it does.

    In this guide, I’m breaking down the seven essential concepts of basic music theory for piano that every beginner should know. These aren’t obscure rules from dusty textbooks. They’re the practical building blocks I teach in every single first lesson, whether I’m working with a six-year-old or a sixty-year-old.

    The short answer

    Basic music theory for piano includes seven essential concepts: understanding the staff and clefs, learning note names on the keyboard, reading rhythm and time signatures, recognizing scales and keys, identifying intervals and chords, interpreting dynamics and expression marks, and knowing how these elements work together to create music.

    Each concept builds on the others, and you don’t need to master everything at once. Even a basic grasp of these fundamentals will dramatically improve your ability to read sheet music, learn new pieces, and understand what makes music work.

    Why basic music theory for piano actually matters

    I get it. You want to play piano, not study theory. But here’s what I’ve seen happen hundreds of times: students who skip basic music theory for piano end up hitting a wall about six months in. They can parrot back pieces they’ve memorized, but they can’t figure out new music on their own.

    Understanding theory gives you independence. When you know why certain notes sound good together, you can figure out songs faster. When you understand rhythm patterns, you don’t have to count out every single measure from scratch.

    Theory also makes practice more efficient. Instead of mindlessly repeating passages, you start recognizing patterns. That complicated-looking section? It’s just a C major scale. Those confusing chords? They’re built on a simple pattern you already know.

    At Weaver Music, I incorporate theory naturally into every lesson. It’s not a separate boring subject—it’s woven into the music you’re already learning. And it starts making sense much faster than you’d think.

    Empty piano in sunlit studio for learning basic music theory for piano

    The staff and clefs: your musical roadmap

    The musical staff is your roadmap for where to place your fingers. It consists of five lines and four spaces, and each line and space represents a different note. Think of it like a graph where higher positions mean higher pitches.

    Piano music uses two clefs: treble (the fancy swirl) and bass (the backwards C with dots). Generally, your right hand plays notes written in treble clef, and your left hand plays bass clef notes. Together, these two staves connected by a brace create the grand staff.

    Reading the treble clef

    The treble clef circles around the second line from the bottom, which is the note G. That’s why it’s also called the G clef. From bottom to top, the lines spell out E-G-B-D-F (Every Good Boy Does Fine, or whatever mnemonic works for you). The spaces spell F-A-C-E, which is easier to remember.

    These notes correspond to the middle-to-upper range of the piano keyboard, typically what your right hand plays when you’re just starting out.

    Reading the bass clef

    The bass clef (or F clef) has two dots that surround the second line from the top—that’s F. The lines from bottom to top are G-B-D-F-A (Good Boys Do Fine Always), and the spaces are A-C-E-G (All Cows Eat Grass).

    Bass clef covers the lower range of the piano. Once you understand how these two clefs work together, you can read any piano music written in standard notation. This knowledge directly connects to reading sheet music faster.

    Notes on the keyboard: the pattern that repeats

    Here’s something that makes basic music theory for piano easier than you might think: the piano keyboard is just the same pattern repeated over and over. Once you know one octave, you know them all.

    The white keys are named A through G, then the pattern repeats. The black keys are named in relation to the white keys—they’re either sharps (a half step higher) or flats (a half step lower). For example, the black key between C and D can be called either C# (C-sharp) or Db (D-flat).

    The C major pattern

    Start by finding C on your keyboard. It’s the white key immediately to the left of the group of two black keys. From any C, play all the white keys up to the next C—that’s a C major scale, and it’s the foundation of basic music theory for piano.

    This pattern—whole step, whole step, half step, whole step, whole step, whole step, half step—creates the major scale sound. You don’t need to memorize that right away, but understanding that scales follow patterns (not random notes) is huge.

    Finding middle C

    Middle C sits right in the middle of your keyboard, usually near the brand name on most pianos. It’s the landmark note that connects treble and bass clefs. On the grand staff, middle C sits on a small line (called a ledger line) between the two staves.

    Once you can reliably find middle C, navigating the rest of the keyboard becomes much easier. This is one of the first things I teach in the free 30-minute trial lesson at Weaver Music.

    Piano keyboard with sheet music showing musical notes and theory concepts

    Rhythm and time signatures: when to play

    Understanding basic music theory for piano means knowing not just which notes to play, but when and for how long. That’s where rhythm and time signatures come in.

    The time signature appears at the beginning of a piece as two stacked numbers. The top number tells you how many beats are in each measure (the section between two vertical bar lines). The bottom number tells you what type of note gets one beat.

    Common time signatures

    The most common time signature is 4/4 (often shown as a C for “common time”). This means four beats per measure, and a quarter note gets one beat. When you tap your foot to most pop songs, you’re feeling 4/4 time.

    Other common signatures include 3/4 (waltz time—think “one-two-three, one-two-three”) and 6/8 (which has a lilting, compound feel). You don’t need to master every time signature immediately, but recognizing the pattern helps you count correctly.

    Note values and rhythm

    Different note shapes tell you how long to hold each note:

    • Whole notes: four beats (in 4/4 time)
    • Half notes: two beats
    • Quarter notes: one beat
    • Eighth notes: half a beat
    • Sixteenth notes: quarter of a beat

    Each note also has a corresponding rest (a symbol for silence) with the same duration. Understanding these relationships is fundamental to basic music theory for piano, and it’s something we practice consistently in our lesson plan.

    Scales and keys: the foundation of melody

    Scales are organized sequences of notes, and they’re the backbone of basic music theory for piano. Every piece of music is built around a scale, which determines its key and overall sound.

    We already touched on the C major scale (all white keys from C to C). But there are twelve major scales total, one starting on each of the twelve notes (seven white keys plus five black keys). Each scale follows the same pattern of whole and half steps.

    Major vs. minor scales

    Major scales sound bright and happy. Minor scales, with their slightly different pattern, sound sadder or more dramatic. A minor is the relative minor of C major—it uses the same notes but starts on A instead of C, which completely changes the feel.

    You don’t need to learn all twelve major and twelve minor scales your first week. But understanding that different keys create different moods helps you interpret music more expressively.

    Key signatures

    Instead of writing a sharp or flat symbol every time that note appears, composers use key signatures. These are the sharps or flats written right after the clef at the beginning of each line. They tell you which notes to automatically play sharp or flat throughout the piece.

    For example, if you see one sharp on the F line in the treble clef, you’re in G major, and you play F# every time unless told otherwise. Learning to quickly identify key signatures is an important part of basic music theory for piano.

    Intervals and chords: notes working together

    An interval is the distance between two notes. A chord is three or more notes played together. These concepts are central to basic music theory for piano because most piano music involves playing multiple notes simultaneously.

    Understanding intervals

    Intervals are numbered based on how many letter names they span. From C to E is a third (C-D-E is three letters). From C to G is a fifth (C-D-E-F-G is five letters). Some intervals sound consonant and stable, while others create tension that wants to resolve.

    When you start recognizing intervals by sight and sound, you’ll learn new pieces dramatically faster. That melody that looked complicated? It’s just a series of thirds moving up the scale.

    Basic chord types

    Chords are built by stacking intervals, usually thirds. A major chord combines a root note, a major third above it, and a perfect fifth above the root. C-E-G creates a C major chord.

    Minor chords lower the middle note by a half step. C-Eb-G is C minor—same root and fifth, but that flatted third gives it a darker sound. Learning basic chord shapes helps with both reading music and playing by ear, which I cover more in this guide to playing by ear.

    Chord progressions

    Songs aren’t random collections of chords. They follow patterns called progressions. In C major, the I-IV-V progression (C major, F major, G major) forms the backbone of countless songs across every genre.

    Understanding basic music theory for piano means recognizing these patterns. Once you do, you’ll see them everywhere, making it easier to learn songs from beginner-friendly pieces to more complex compositions.

    Metronome and sheet music on piano for practicing rhythm and music theory

    Dynamics and expression marks: bringing music to life

    Basic music theory for piano isn’t just about the notes themselves—it’s also about how you play them. Dynamics and expression marks tell you about volume, speed, and mood.

    Dynamic markings

    These Italian terms and symbols tell you how loud or soft to play:

    • pp (pianissimo): very soft
    • p (piano): soft
    • mp (mezzo-piano): moderately soft
    • mf (mezzo-forte): moderately loud
    • f (forte): loud
    • ff (fortissimo): very loud

    You’ll also see crescendo (gradually get louder, shown as a widening wedge) and diminuendo or decrescendo (gradually get softer, shown as a narrowing wedge). These markings transform notes on a page into actual music with emotional depth.

    Tempo and expression marks

    Tempo markings tell you how fast to play. Allegro means fast and lively. Andante means walking pace. Adagio means slow and stately. These words give you the general feel, though modern sheet music often includes metronome markings for precision.

    Expression marks like legato (smooth and connected), staccato (short and detached), and fermata (hold longer than written) add character to your playing. They’re the difference between a mechanical rendition and an actual musical performance.

    Articulation in context

    When you combine all these elements—the right notes at the right time, with appropriate dynamics and expression—basic music theory for piano becomes the language of musical communication. It’s not about following rules for the sake of rules. It’s about understanding what the composer intended and bringing that to life.

    This is something we work on extensively in lessons, whether you’re taking lessons via Zoom from anywhere in the world or in-person here in the Bay Area. At $99 per 60-minute lesson, you get focused attention on not just playing notes correctly, but playing them musically.

    How to practice basic music theory for piano

    Knowing theory is one thing. Actually internalizing it so it becomes second nature is another. Here’s how I recommend practicing basic music theory for piano concepts so they stick.

    Integrate theory with pieces you’re learning

    Don’t study theory in isolation. When you’re learning a new piece, take two minutes to analyze it first. What key is it in? What’s the time signature? Can you spot any patterns—repeating rhythms, scales, or chord progressions?

    This analytical practice makes the theory relevant and memorable. It also makes learning the piece faster because you’re recognizing patterns instead of memorizing individual notes.

    Use flashcards and apps

    Old-school flashcards work great for note reading and interval recognition. There are also excellent apps that gamify basic music theory for piano. Five minutes a day of consistent practice adds up quickly.

    The key is consistency over intensity. Fifteen minutes three times a week beats a three-hour cram session once a month. Your brain needs regular exposure to build those neural pathways.

    Play scales and chords

    Don’t just read about scales—play them. Start with C major, hands separately. Once that’s comfortable, try other major scales. Feel how the patterns are the same, just starting on different notes.

    Same with chords. Build major and minor chords on different roots. Listen to how they sound. Play progressions. This kinesthetic learning cements basic music theory for piano in your muscle memory and your ears, not just your brain.

    Sing and listen

    Theory becomes much more meaningful when you can hear it. Sing the notes you’re reading. Listen to intervals and try to identify them by ear. Play different chord progressions and notice how they make you feel.

    According to research from the broader field of music theory, students who engage multiple senses—visual (reading), kinesthetic (playing), and aural (listening)—retain concepts much better than those who only read about them.

    Ask questions and work with a teacher

    Basic music theory for piano can seem overwhelming when you’re teaching yourself from books or videos. A good teacher can clarify confusing concepts, answer your specific questions, and give you exercises targeted to exactly what you need to work on.

    That’s one reason I always start new students with a free 30-minute trial lesson. It lets me assess where you are with both playing and theory, and we can map out a path that makes sense for your goals and learning style. Theory doesn’t have to be dry or confusing when it’s taught well.

    Review regularly

    Even after you understand a concept, come back to it. Review key signatures every few weeks. Quiz yourself on note names. Play through scales you learned months ago. This spaced repetition keeps basic music theory for piano fresh in your mind.

    Students who review consistently don’t just remember theory—they actually use it while they play, which is the whole point. It becomes part of how they think about music, not just facts they memorized for a quiz.

    Connect theory to real music

    Every time you listen to a song you love, try to identify elements you’ve learned. Can you hear when the chords change? Can you tell if it’s in a major or minor key? Can you feel the time signature?

    This practice makes basic music theory for piano feel relevant to actual music, not just exercises. It shows you that the theory you’re learning describes the music you hear every day, from classical to pop to jazz.

    Be patient with yourself

    Nobody absorbs all of basic music theory for piano overnight. I’ve been teaching for over a decade, and I’m still learning new things about how theory concepts connect. Give yourself permission to learn gradually.

    Start with the fundamentals—staff reading, basic note names, simple rhythms. Build from there. Each concept you understand makes the next one easier. And remember, the goal isn’t to become a music theorist. It’s to become a better, more independent pianist who enjoys playing more.

    Whether you’re six or sixty, brand new to piano or returning after years away, basic music theory for piano gives you tools to understand and enjoy music more deeply. It’s worth the investment of time and attention.

    Ready to find out for yourself?

    Your first 30-minute lesson with me is completely free – we will evaluate where you are, talk through your goals, and map out your path.
    Book Your Free Trial Lesson

  • 5 Easiest Piano Songs for Beginners: Proven Choices

    5 Easiest Piano Songs for Beginners: Proven Choices

    When you’re just starting your piano journey, one of the most exciting moments is learning your first recognizable song. You want something that sounds like real music, not just scales and exercises, but you also need pieces that won’t leave you frustrated and stuck. That’s exactly where the easiest piano songs for beginners come in—they’re the perfect bridge between technique and musicality.

    After teaching piano for more than a decade, I’ve watched hundreds of students work through their first songs. I’ve seen which pieces build confidence and which ones accidentally discourage new players. The easiest piano songs for beginners share specific qualities that make them accessible while still feeling rewarding to play.

    In this guide, I’ll walk you through my top picks for the easiest piano songs for beginners, explain what makes them work so well, and give you practical tips for learning them effectively. Whether you’re teaching yourself or working with an instructor, these songs will give you a strong foundation.

    The short answer

    The easiest piano songs for beginners are short, familiar melodies with simple rhythms, limited hand position changes, and minimal or no left-hand accompaniment. Songs like “Ode to Joy,” “Mary Had a Little Lamb,” and “Happy Birthday” fit perfectly because they use just a few notes, stay in one hand position, and let you focus on reading notes and building coordination without overwhelming complexity.

    These songs typically stay within a five-finger position and use mostly quarter notes and half notes, making them ideal first pieces.

    What makes a piano song easy for beginners?

    Not all simple-sounding songs are actually easy to play. Before we dive into specific pieces, it helps to understand what makes certain songs genuinely accessible for beginners versus others that just sound simple.

    The easiest piano songs for beginners usually have these characteristics:

    • Limited range: The melody stays within a five-finger position, meaning you don’t need to move your hand up and down the keyboard constantly
    • Simple rhythms: Mostly quarter notes, half notes, and whole notes—no complex dotted rhythms or sixteenth notes
    • Familiarity: Songs you already know by ear make learning much faster because you can hear when you’ve played a wrong note
    • Right hand only or simple left hand: Many true beginner pieces focus on the melody in the right hand with either no left hand or very basic whole note accompaniment
    • Repetition: Patterns that repeat give you more practice with the same notes and help with memorization

    When I work with new students at Weaver Music, I always start by asking what songs they’d love to play someday. Then we find beginner-friendly versions or stepping-stone pieces that build toward those goals. Understanding what makes a song accessible helps you choose practice material wisely.

    One crucial element is hand position. If a song requires constant shifting, it becomes exponentially harder for someone still building basic finger independence and note-reading skills. That’s why I always recommend starting with the easiest piano songs for beginners that keep your hands in a stable position.

    Another factor many beginners overlook is tempo flexibility. The easiest piano songs for beginners sound good at any speed, which means you can practice them slowly without losing the musical character. This gives you permission to work at your own pace without feeling like you’re compromising the music.

    According to research published in the Journal of Research in Music Education, students who begin with appropriately-leveled repertoire show significantly higher retention rates and greater long-term enjoyment of music study compared to those who attempt pieces beyond their skill level too early.

    Sheet music for the easiest piano songs for beginners on a wooden music stand

    5 easiest piano songs for beginners

    Here are my top five picks for absolute beginners. I’ve taught every one of these songs dozens of times, and I’ve seen firsthand how quickly students can learn them and how much confidence they build in the process. These are the easiest piano songs for beginners that deliver real musical satisfaction.

    Each of these pieces can typically be learned in one to three weeks with consistent practice, depending on how much time you put in daily. What makes these particular songs stand out is that they’re not just technically simple—they’re musically rewarding and instantly recognizable, which keeps motivation high throughout the learning process.

    1. Ode to Joy (Beethoven)

    “Ode to Joy” is probably the most famous melody on this list, and it’s surprisingly perfect for beginners. The entire melody can be played in one five-finger position in the right hand, and the rhythm is almost entirely quarter notes.

    What I love about this piece is that it sounds impressive. Your friends and family will recognize it immediately, which gives you a huge motivation boost. The melody sits comfortably in the middle of the keyboard, usually starting on E or C depending on the arrangement.

    Most beginner arrangements keep the left hand very simple—either single whole notes or half notes that move in a predictable pattern. Some versions are even right-hand-only, which is perfect if you’re still working on hand independence.

    The melody has a clear structure with repeating sections, so once you learn the first phrase, you’re already halfway there. This repetition is exactly what makes these some of the easiest piano songs for beginners.

    Tips for learning Ode to Joy

    • Start with just the right hand and get it solid before adding the left
    • Practice hands separately until each hand feels comfortable on its own
    • The melody moves mostly by step (neighboring notes), so finger numbers follow logically
    • Pay attention to the phrasing—where the musical sentences begin and end
    • Count out loud initially to ensure you’re holding half notes for the full two beats

    2. Mary Had a Little Lamb

    “Mary Had a Little Lamb” is often the very first song piano students learn, and for good reason. It uses only four notes (E-D-C-D in the most common version) and has a rhythm simple enough that most people can play it by ear on their first try.

    This song is particularly useful because it teaches you to navigate between three adjacent fingers without moving your hand position. The pattern is repetitive and predictable, which builds muscle memory quickly.

    Because the melody is so familiar, you’ll know immediately if you’ve hit a wrong note. This instant feedback is invaluable when you’re still learning to read music and connect what you see on the page to what you hear.

    Many method books include this as one of the earliest songs, often with just the right hand at first. Once you’re comfortable, you can add simple left-hand notes on the downbeats. The fact that this appears in so many curricula is no accident—it’s genuinely one of the easiest piano songs for beginners.

    Why this song works

    • Only four notes total in the simplest version
    • Highly repetitive melodic pattern
    • Everyone knows how it should sound
    • Natural stepping stone to slightly more complex pieces
    • Can be played entirely with fingers 2, 3, and 4 of the right hand

    If you’re exploring structured learning paths, you’ll likely encounter this song in the very first lessons of any beginner curriculum.

    Piano keyboard with headphones in a welcoming practice space for beginner pianists

    3. Happy Birthday

    “Happy Birthday” is one of the most practical songs you can learn. You’ll actually use it in real life, whether at family gatherings or celebrations with friends. That practical application gives you built-in motivation to master it.

    The melody fits comfortably in a five-finger position with just one small jump in the middle of the phrase. The rhythm includes a dotted note (on “birth-day to”), which gives you your first taste of slightly more complex rhythms without being overwhelming.

    This song is slightly more challenging than “Mary Had a Little Lamb” but still firmly in beginner territory. The small jump I mentioned is usually from G up to C, which helps you start thinking about moving beyond strict five-finger positions.

    Most beginner arrangements use whole notes in the left hand on the root note of each chord, making the accompaniment straightforward and predictable. As you advance, you can add fuller chord voicings. The universal familiarity of this melody makes it one of the easiest piano songs for beginners to learn by ear and then match to sheet music.

    Learning Happy Birthday

    • Master the dotted rhythm on “happy birth-day to” before working on speed
    • The melody has two identical phrases and one that’s slightly different—learn the pattern
    • Practice the octave jump slowly at first
    • This is a great song to memorize since you’ll play it so often
    • Try transposing it to different keys once you’re comfortable—great ear training

    4. Chopsticks

    “Chopsticks” has a special place in piano culture. It’s often the first duet people learn, and it’s incredibly fun to play with a friend or teacher. The main melody uses a distinctive repeated-note pattern that’s instantly recognizable.

    What makes “Chopsticks” one of the easiest piano songs for beginners is its unique approach. You can actually play the melody using just your index fingers on each hand, which is where it gets its name. This makes it accessible even before you’ve developed much finger independence.

    The left-hand part is equally simple—just two notes alternating back and forth. When played as a duet, one person plays the simple melody while another adds a more elaborate accompaniment, making it sound fuller than it actually is to play.

    The rhythm is straightforward, and the entire piece is based on repetition and variation. Once you get the basic pattern, you’ve essentially learned the whole song. The social aspect of playing “Chopsticks” as a duet also makes practice more enjoyable and builds your ability to stay in time with another musician.

    Why Chopsticks is perfect for beginners

    • Can be played with just index fingers initially
    • Great introduction to playing with both hands together
    • Fun to play as a duet, which builds ensemble skills
    • Simple alternating pattern in the left hand
    • Teaches the concept of ostinato (a repeating pattern)

    5. Twinkle Twinkle Little Star

    “Twinkle Twinkle Little Star” is a classic beginner piece that appears in virtually every piano method book. It’s slightly more complex than “Mary Had a Little Lamb” but still very accessible, making it one of the easiest piano songs for beginners.

    The melody uses a five-finger position and includes some skips (intervals larger than a step), which helps you start developing spatial awareness on the keyboard. The opening notes jump up a fifth from C to G, teaching you to navigate beyond adjacent keys.

    The rhythm is entirely quarter notes and half notes, keeping things simple. The melody has a clear ABA structure—the beginning and end are the same, with a slightly different middle section. This structure helps with memorization and gives you an early introduction to musical form.

    What’s particularly useful about this song is that it exists in countless arrangements. You can start with the absolute simplest version and gradually work up to arrangements with more elaborate left-hand patterns as your skills develop. This scalability makes it perfect for long-term skill building.

    Progression with Twinkle Twinkle

    • Start with right hand only until it’s comfortable
    • Add simple whole notes in the left hand (C and G typically)
    • Graduate to broken chords or alberti bass patterns as you advance
    • The melody teaches you to skip notes, not just play adjacent keys
    • Try the famous Suzuki variations once you master the basic melody

    Many students I work with through Weaver Music lessons are surprised at how many variations exist of this simple tune. It’s a song that can grow with you throughout your entire piano journey.

    Empty piano bench in sunlit room ready for practice session with beginner songs

    How to approach learning these songs

    Knowing which songs to learn is only half the battle. How you practice them makes all the difference in how quickly you progress and how much you actually enjoy the process. Here’s my tested approach for working through the easiest piano songs for beginners.

    Start by listening to the piece several times before you even touch the piano. If possible, watch a video of someone playing it. This gives your brain a model to work toward and makes the learning process much more intuitive. You can find excellent performances of all these songs on YouTube, where professional pianists and teachers have recorded clear demonstrations.

    When you sit down to practice, always work on one hand at a time first. I cannot stress this enough—trying to put hands together before each hand is comfortable independently will slow you down and create frustration. Get the right hand solid, then the left hand solid, then carefully combine them.

    Break the song into small sections. Don’t try to learn an entire piece in one sitting. Work on just the first phrase or even the first few measures until they’re comfortable. Mastery comes from building small successes into larger ones.

    Practice strategies that work

    • Practice slowly at first—speed comes naturally with familiarity
    • Use a consistent fingering from the very beginning (don’t change which fingers play which notes)
    • Practice the tricky spots more than the easy parts
    • Record yourself occasionally to hear what needs improvement
    • Practice without looking at your hands to build muscle memory and keyboard geography
    • Use a metronome to develop steady timing, even on these simple pieces
    • Set small daily goals rather than trying to learn everything at once

    If you’re looking for more guidance on effective practice routines, you might find learning to read sheet music faster helpful as you work through these pieces.

    Consistent short practice sessions beat occasional long ones. Twenty minutes daily will get you much further than two hours on Sunday. The easiest piano songs for beginners can typically be learned in just a few weeks with this kind of consistent approach.

    One technique I teach all my beginners is mental practice. Between piano sessions, visualize yourself playing the piece. Think through the finger numbers, the key names, and how the melody sounds. This mental rehearsal strengthens neural pathways and accelerates learning without requiring you to be at the piano.

    Common mistakes beginners make

    Even with the easiest piano songs for beginners, there are some common pitfalls I see students fall into. Being aware of these helps you avoid them and progress more smoothly.

    The biggest mistake is trying to play too fast too soon. I get it—you want to play at performance tempo and sound like the recording. But playing fast before you’re ready just reinforces mistakes and creates tension in your hands and arms.

    Another common issue is inconsistent fingering. If you use different fingers each time you play a passage, you’re essentially learning it from scratch every time. Decide on a fingering that works (or follow what’s written in your music) and stick with it every single repetition.

    Many beginners also neglect the left hand. Because the melody is usually in the right hand, it’s tempting to just add a minimal left hand and call it done. But developing both hands equally from the start will serve you tremendously as you advance.

    Other mistakes to watch for

    • Looking at the hands instead of the music—this slows down sight-reading development
    • Ignoring rhythm—counting matters even in simple songs
    • Playing through mistakes instead of stopping and fixing them
    • Not using the proper finger curve and hand position
    • Practicing only when you feel inspired instead of building a routine
    • Tensing up shoulders and arms instead of staying relaxed
    • Skipping the fundamentals to jump to “cooler” songs too quickly

    Working with a teacher helps catch these issues early. At Weaver Music, we offer lessons at $99 per 60-minute session, with your first 30-minute trial completely free, so you can get feedback on your technique from the very beginning.

    According to research from the National Association for Music Education, students who receive regular feedback and guidance are significantly more likely to continue playing long-term compared to those who teach themselves without any structured input.

    Building from easy songs to harder repertoire

    Once you’ve mastered these easiest piano songs for beginners, you might wonder what comes next. The good news is that these simple pieces build foundational skills that transfer directly to more advanced music.

    The hand positions you learn, the finger independence you develop, and the note-reading skills you build all stack together. Each new piece should stretch you just slightly beyond your current comfort zone—not so much that it’s overwhelming, but enough that you’re learning something new.

    After these five songs, good next steps might include slightly longer folk songs, simple classical pieces like minuets by Bach, or beginner arrangements of popular songs you love. The key is maintaining that sweet spot where the music is challenging but achievable.

    Many students move on to pieces like “Für Elise” (just the famous opening section), “Canon in D,” or simplified versions of movie themes. These require more notes, more hand position changes, and more complex rhythms, but they build naturally on the skills you’ve developed with the easiest piano songs for beginners.

    Skills you’re building

    • Note recognition speed
    • Finger independence and control
    • Hand coordination and independence
    • Rhythm reading and counting
    • Musical expression and phrasing
    • Practice discipline and routine-building
    • Confidence in performing for others
    • Understanding of musical form and structure

    At Weaver Music, we have a four-level lesson path that takes students from absolute beginner through intermediate repertoire. Whether you’re learning with a teacher, taking one-on-one lessons via Zoom or in-person in the Bay Area, or teaching yourself with online resources, having a clear progression path keeps motivation high.

    Don’t rush to leave these beginner pieces behind too quickly. There’s value in thoroughly mastering simple music before moving on. A piece isn’t truly learned until you can play it comfortably, musically, and from memory.

    The easiest piano songs for beginners aren’t just stepping stones to better music—they are real music that deserves to be played beautifully. The interpretation and expression you bring to “Twinkle Twinkle” matters just as much as what you’ll eventually bring to Chopin.

    If you’re an adult returning to piano after years away, these songs make excellent review material before tackling more advanced pieces. Check out our guide on getting back into piano as an adult for more specific advice on returning players.

    Remember that everyone progresses at their own pace. Some students move through these easiest piano songs for beginners in a month; others take three months. Both timelines are perfectly fine. What matters is that you’re enjoying the process and building solid fundamentals that will support your playing for years to come.

    The path from “Mary Had a Little Lamb” to Beethoven sonatas is long, but every great pianist started exactly where you are now—with simple melodies and basic techniques. The difference between those who eventually play advanced repertoire and those who quit isn’t talent; it’s patience, consistent practice, and choosing appropriate music for each stage of development.

    These five songs—”Ode to Joy,” “Mary Had a Little Lamb,” “Happy Birthday,” “Chopsticks,” and “Twinkle Twinkle Little Star”—are your foundation. Master them, enjoy them, and use them as springboards to whatever musical goals you’re pursuing. They’re the easiest piano songs for beginners for a reason: they work.

    As you continue your journey beyond these initial pieces, you’ll discover that the skills you’ve built become the foundation for everything else. The finger patterns you learned in “Mary Had a Little Lamb” appear in Mozart. The interval skips from “Twinkle Twinkle” show up in Beethoven. The hand coordination from “Chopsticks” prepares you for complex polyphonic music.

    I’ve seen countless students transform from hesitant beginners struggling with these easiest piano songs for beginners into confident pianists tackling repertoire they once thought impossible. The journey always starts here, with simple melodies and patient practice.

    Ready to find out for yourself?

    Your first 30-minute lesson with me is completely free – we will evaluate where you are, talk through your goals, and map out your path.
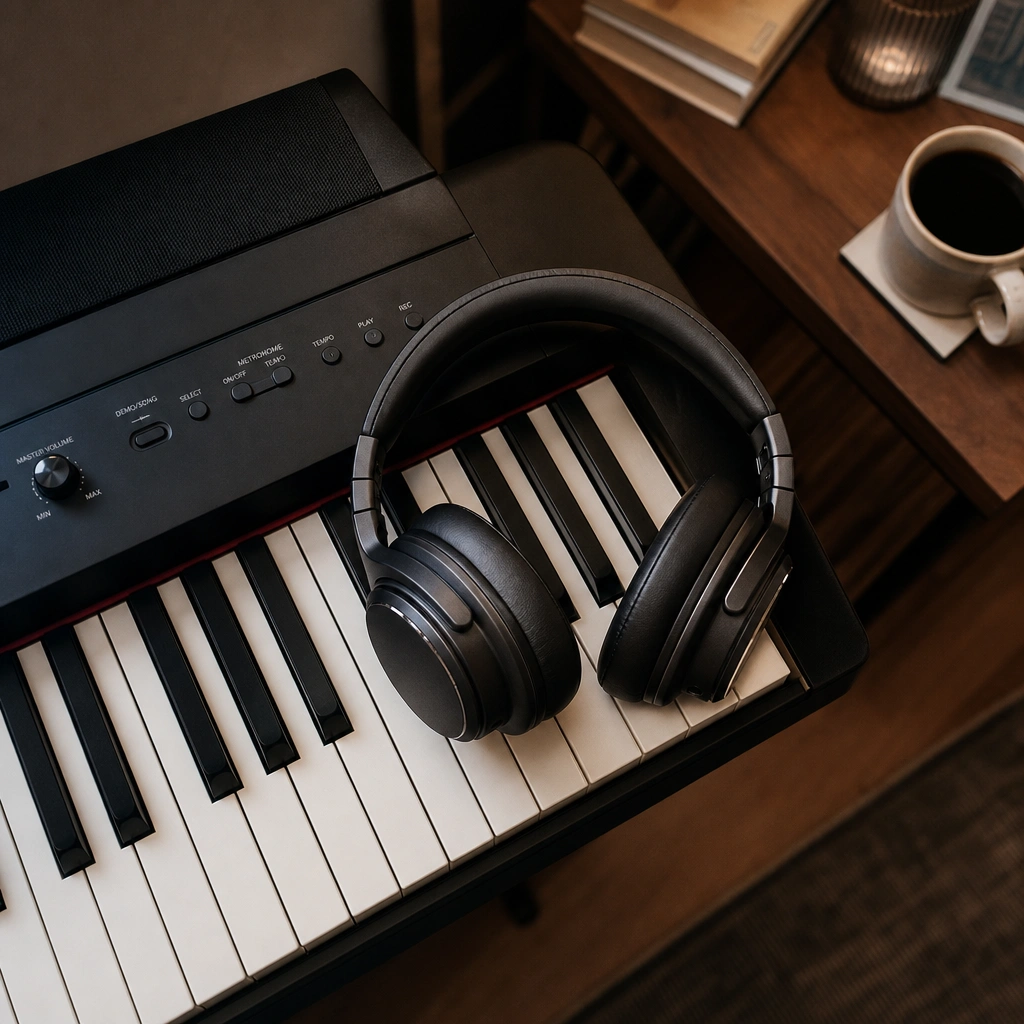
    Book Your Free Trial Lesson

  • How to Memorize Piano Pieces: 7 Proven Techniques That Work

    How to Memorize Piano Pieces: 7 Proven Techniques That Work

    If you’ve ever sat down to play a piece from memory only to have your mind go completely blank halfway through, you’re not alone. Learning how to memorize piano pieces is one of the most common challenges my students face, whether they’re preparing for a recital or simply want the freedom to play without the sheet music in front of them. The good news? Memorization isn’t about having a photographic memory or special talent—it’s a skill you can develop with the right techniques.

    Over my years of teaching hundreds of students, I’ve tested every memorization method out there. Some work brilliantly, others waste time. In this guide, I’m sharing the seven techniques that consistently help my students understand how to memorize piano pieces faster and more securely, so you can walk into any performance with confidence.

    The short answer

    To memorize piano pieces effectively, use multiple memory pathways: learn hands separately first, break the piece into small phrases, understand the harmonic structure, engage visual memory by picturing the keys, build kinesthetic memory through repetition, develop aural memory by singing along, and practice strategically with targeted repetition of trouble spots. Combining these approaches creates redundant memory pathways that stick.

    The key insight about how to memorize piano pieces is that relying on just one type of memory is risky. When you engage visual, kinesthetic, analytical, and aural memory together, you build a safety net. If one pathway fails during performance, the others catch you.

    Why memorization matters (and when it doesn’t)

    Let me be honest: not every piece needs to be memorized. If you’re playing for your own enjoyment at home, there’s zero shame in keeping the music in front of you. Some of the world’s finest accompanists perform with sheet music their entire careers.

    But memorization offers real benefits. First, it frees you to focus entirely on musical expression rather than reading. Your eyes aren’t glued to the page, so you can watch your hands, connect with an audience, or simply close your eyes and feel the music.

    Second, the process of memorizing forces you to understand a piece deeply. You can’t memorize what you don’t truly know. This deeper understanding makes you a better musician overall.

    Third, for performances and recitals, memorization is often expected. More importantly, it eliminates the anxiety of page turns and the possibility of losing your place on the page. When you know how to memorize piano pieces securely, you’re prepared for anything.

    That said, I never force beginners to memorize. For students just learning how to read sheet music, keeping their eyes on the page reinforces reading skills. Timing matters.

    Sheet music and metronome demonstrating how to memorize piano pieces with structured practice

    Technique #1: Hands separate, always

    This is where memorization truly begins. Before you even think about putting hands together from memory, each hand needs to be rock-solid on its own. I’ve seen countless students skip this step because it feels tedious, and they always regret it later.

    When you learn how to memorize piano pieces hands separately, you’re isolating each melodic line and giving your brain a manageable task. Your right hand often carries the melody, which might seem easier to remember, but your left hand deserves equal attention. Many memory slips happen in the left hand because students under-practice it.

    Here’s my process:

    • Practice the right hand alone until you can play it perfectly from memory three times in a row
    • Do the same with the left hand—no shortcuts here
    • Only then begin combining hands, section by section
    • Regularly return to hands-separate practice even after the piece feels secure

    Some students resist this because it feels like extra work. But trust me: this is the fastest path. Working on left hand exercises separately builds both technical skill and memory security that will serve every piece you learn.

    According to research published in the journal Frontiers in Psychology, practicing hands separately activates different neural pathways and strengthens motor learning more effectively than hands-together practice alone. This scientific backing confirms what I’ve observed in my studio for years.

    Technique #2: Chunking – memorize in musical phrases

    Your brain doesn’t memorize a piece as one long stream of notes. It groups information into meaningful chunks. Understanding how to memorize piano pieces through chunking means working with your brain’s natural wiring instead of against it.

    Think of it like memorizing a phone number. You don’t remember ten individual digits; you remember them in groups: (415) 555-1234. Music works the same way.

    I teach students to identify natural musical phrases—usually 2 to 4 measures—and treat each as a single unit. These phrases typically correspond to melodic or harmonic ideas that have a beginning, middle, and end.

    Here’s the chunking process:

    • Identify where phrases begin and end (often at breathing points in the melody)
    • Memorize one phrase completely, hands separate, then together
    • Practice starting from different phrases, not always from the beginning
    • Link phrases together gradually: first phrase + second phrase, then second + third, etc.

    The ability to start from any phrase is crucial. If you always practice from the beginning, that’s the only place you’ll be confident starting. During performance, if you stumble, you need anchor points throughout the piece.

    Chunking also helps you identify patterns. Many pieces repeat the same melodic or harmonic idea in different sections. Once you recognize these repetitions, you’re not memorizing new material—you’re recognizing familiar patterns in new contexts. This dramatically reduces the actual amount of unique material you need to commit to memory.

    Empty grand piano in a peaceful studio setting perfect for memorization practice

    Technique #3: Visual memory – what it looks like

    Visual memory means picturing the keyboard geography and the physical patterns your hands make. When I close my eyes and think of a piece I know well, I can see my hands moving across the keys—even though I’m not touching a piano.

    This is different from reading the sheet music visually (though that helps too). I’m talking about spatial memory: knowing that your hand jumps up to the black keys in this section, that you’re playing in the middle of the keyboard here, or that your thumb lands on middle C at this moment.

    To develop visual memory while learning how to memorize piano pieces:

    • Pay attention to the physical shapes and patterns on the keyboard
    • Notice landmarks: “This phrase starts on F,” “This chord has three black keys”
    • Visualize the patterns away from the piano—in bed before sleep, or during a walk
    • Practice the piece in your mind, watching your imaginary hands play

    Mental practice strengthens memory without physical fatigue. Athletes use this technique constantly, and it works brilliantly for musicians too. Studies show that mental rehearsal activates many of the same neural pathways as physical practice.

    I encourage students to visualize not just the notes, but the full context: what does the keyboard look like from your seated position? Where do your hands move in relation to each other? These spatial relationships become powerful memory anchors.

    Technique #4: Kinesthetic memory – muscle patterns

    Kinesthetic memory—sometimes called muscle memory—is what happens when your fingers seem to know where to go without conscious thought. This is powerful, but also risky if it’s your only memorization strategy.

    I’ve had students who could play a piece perfectly from muscle memory, but the moment they thought about what they were doing, or someone asked them to start from the middle, they fell apart completely. That’s kinesthetic memory working in isolation.

    Used correctly, though, it’s an essential component of how to memorize piano pieces. Your fingers develop motor patterns through repetition. These patterns are efficient and reliable, especially for fast passages where you don’t have time to think about every note.

    To build healthy kinesthetic memory:

    • Practice slowly and correctly—repetitions matter, so make them accurate
    • Focus on the physical sensation of movements: what does this chord feel like? How does your hand move to the next position?
    • Practice in different tempos to avoid becoming tempo-dependent
    • Combine with other memory types—never rely on muscle memory alone

    The danger with kinesthetic memory is that it’s fragile when disrupted. In performance situations where nerves strike or you make a mistake, muscle memory can abandon you. That’s why layering memory types matters so much.

    I also recommend practicing with different touch and dynamics occasionally. If you always practice a passage the same way, your muscle memory becomes tied to that specific execution. Varying your approach builds more flexible, resilient motor patterns.

    Technique #5: Analytical memory – understand the structure

    This is the most underused technique among amateur pianists, yet it’s the one professional musicians rely on most. Analytical memory means understanding the music theory behind what you’re playing: the chords, the key changes, the harmonic progressions, the form.

    When you know how to memorize piano pieces analytically, you’re not just memorizing notes—you’re memorizing musical logic. You understand why a certain note comes next, not just that it does.

    Here’s what I look for with students:

    • Identify the key and any modulations
    • Analyze the chord progressions (even if it’s just I-IV-V-I)
    • Recognize patterns and sequences that repeat
    • Understand the formal structure (verse-chorus, ABA, sonata form, etc.)
    • Notice where the music does something unexpected

    This approach works especially well for adult learners who enjoy understanding the “why” behind the music. Even basic theory knowledge helps. If you recognize that a passage is just a I-V-vi-IV progression in C major, you’re not memorizing 16 individual notes—you’re memorizing one harmonic concept.

    Don’t worry if theory isn’t your strength yet. My lesson plan includes theory fundamentals that make analytical memorization accessible even for beginners.

    Analytical understanding also helps you reconstruct passages if memory fails. If you know the harmonic progression and general melodic shape, you can often figure out what comes next even if you temporarily forget the exact notes. This safety net has saved countless performances.

    Technique #6: Aural memory – sing and hear it

    Can you hear the piece in your head when you’re away from the piano? If you can, you have strong aural memory. If you can’t, it’s time to develop it, because this is one of the most reliable memory pathways.

    Aural memory means knowing how the music sounds—not just the melody, but the harmony, the bass line, the inner voices, everything. When you truly know how to memorize piano pieces aurally, you can sing or hum any part of the piece.

    Here’s how to build aural memory:

    • Sing the melody while you practice (even if you don’t consider yourself a singer)
    • Hum or sing the bass line separately
    • Listen to recordings of the piece, but also listen to your own playing
    • Try to hear the piece in your mind before you play it
    • Practice away from the piano: can you “play” the piece in your head?

    Aural memory connects beautifully with playing by ear. Students who develop their ear tend to memorize faster and more securely. They also recover from mistakes more gracefully, because they can hear where the music needs to go next.

    If you work with a teacher during lessons, ask them to help you develop this skill. At Weaver Music, I incorporate ear training into lessons at every level because it transforms how students relate to music.

    One effective exercise: try playing through a memorized piece in your mind while away from the piano, hearing every note. When you get stuck, make a note of that spot and give it extra attention during your next practice session. This mental practice reveals weak spots in your memory before they become performance problems.

    Digital piano with headphones and practice notebook for focused memorization work

    Technique #7: Strategic practice and repetition

    Not all repetitions are created equal. Mindlessly playing through a piece ten times won’t help you understand how to memorize piano pieces effectively. Strategic practice targets your weak spots and builds memory systematically.

    Here’s my strategic approach:

    • Identify trouble spots—usually transitions between sections or technically demanding passages
    • Practice these spots more than the easy sections (3:1 ratio at minimum)
    • Use the “random start” method: practice starting from different points in the piece
    • Practice backwards: start with the last phrase, then add the second-to-last, and so on
    • Use distributed practice: shorter sessions over more days beat marathon cramming

    Research on memory consolidation shows that sleep plays a crucial role. When you practice a section today and then sleep on it, your brain consolidates that memory overnight. This is why cramming the day before a performance doesn’t work—there’s no time for consolidation.

    I recommend practicing a piece you’re memorizing at least five days a week, even if some sessions are brief. Twenty minutes of focused practice beats two hours of distracted playing. Quality matters more than quantity.

    Also, test your memory regularly by playing without the music. Don’t wait until you “feel ready.” Testing is part of learning. You’ll discover weak spots early when there’s still time to fix them.

    The backward practice method deserves special mention. By starting with the ending and working backward, you ensure that the end of your piece is just as secure as the beginning. This also means that as you practice, you’re always moving toward familiar territory rather than into the unknown, which builds confidence.

    Common mistakes that sabotage memorization

    I’ve seen certain memorization mistakes repeatedly over the years. Avoiding these will save you enormous frustration when you’re figuring out how to memorize piano pieces:

    Mistake #1: Starting memorization too late. Don’t wait until a piece is “performance ready” to start memorizing. Begin the memorization process from day one. As you learn each phrase, learn it from memory.

    Mistake #2: Always practicing from the beginning. If you only practice starting from the top, the opening will be rock-solid but the middle and end will be shaky. Vary your starting points constantly.

    Mistake #3: Never practicing without the music. Some students use the sheet music as a security blanket even when they technically know the notes. Force yourself to practice without it.

    Mistake #4: Relying on one memory type. If muscle memory is your only tool, you’re in trouble. Layer multiple memory pathways for security.

    Mistake #5: Skipping the slow practice. Fast, sloppy repetitions don’t build reliable memory. Slow, accurate practice does. You can gradually increase tempo after the memory is secure.

    Mistake #6: Not reviewing old material. Memory fades without maintenance. Even after a piece is memorized, review it weekly or it will deteriorate.

    Mistake #7: Practicing only when fresh. Occasionally practice when you’re tired or distracted. Performance conditions aren’t always ideal, and your memory needs to be robust enough to handle less-than-perfect mental states.

    What to do when memory slips during performance

    Even with perfect preparation, memory slips happen. Understanding how to memorize piano pieces includes knowing how to recover gracefully when things go wrong. This skill matters just as much as the memorization itself.

    If you experience a memory slip during performance:

    • Keep the rhythm going—play something, even if it’s just a simplified version
    • Don’t stop and announce the mistake; most audiences won’t notice if you keep moving
    • Jump to the next section you remember clearly rather than trying to reconstruct exactly where you were
    • Use your aural memory: what should happen next harmonically?
    • Breathe and stay calm; panic makes memory worse

    This is where having multiple memory pathways proves its worth. If your muscle memory fails, your analytical understanding of the chord progression might save you. If visual memory abandons you, your ear might guide you home.

    I always tell students that how you recover from a mistake matters more than whether you make one. Professionals make mistakes too—they just recover so smoothly you don’t notice. Managing performance anxiety and building recovery skills go hand in hand with memorization.

    Practice recovery strategies during your preparation. Deliberately introduce disruptions: have someone call out a random measure number and start from there, or intentionally play a wrong note and practice continuing smoothly. These drills build recovery skills that serve you when unexpected problems arise.

    Building long-term retention

    Learning how to memorize piano pieces for a performance next month is one thing. Keeping pieces in your permanent repertoire is another. If you want music to stay with you for years, you need a maintenance strategy.

    Here’s what works for long-term retention:

    • Review memorized pieces at least once a month, even after the performance is over
    • Keep a “repertoire rotation” where you cycle through old pieces regularly
    • Record yourself playing from memory periodically to identify weak spots
    • Perform pieces multiple times in different contexts (informal gatherings, recordings, etc.)
    • Accept that some forgetting is normal and re-memorizing is faster the second time

    I maintain a personal repertoire of about 30 pieces that I can perform at any time. But this requires ongoing work. I cycle through them systematically, spending 10-15 minutes a week on each. This maintenance practice is much easier than learning from scratch, but it’s not optional.

    For students working on building repertoire, I incorporate review into our lesson structure. During your weekly lessons—whether that’s in-person here in the Bay Area or via Zoom anywhere in the world—we make time for both new learning and repertoire maintenance. This balanced approach, part of the teaching philosophy at Weaver Music, ensures your hard work doesn’t evaporate.

    The truth is, memorization is a skill that improves with practice. Your tenth memorized piece will come easier than your first. Your brain actually gets better at the process, building more efficient pathways. This is one reason why starting piano at any age works—the brain remains capable of this kind of learning throughout life.

    Creating a repertoire journal can help with long-term retention. Note when you first memorized each piece, common trouble spots, and the specific techniques that worked best for that particular piece. This record becomes invaluable when you need to refresh a piece months or years later.

    How to memorize piano pieces at different skill levels

    The techniques for how to memorize piano pieces remain consistent across skill levels, but the application differs. Let me share how memorization approaches adapt as you progress.

    For beginners: Start with very short pieces or even individual sections. A beginner might spend several weeks memorizing a 16-measure piece, and that’s perfectly appropriate. Focus heavily on hands-separate practice and chunking. At this stage, kinesthetic and visual memory will likely dominate, with analytical memory developing as theory knowledge grows.

    Simple folk songs, easy classical pieces, and method book repertoire provide ideal memorization practice for beginners. The limited technical demands let you focus on the memorization process itself.

    For intermediate players: You’re ready to memorize longer, more complex pieces with multiple sections. This is when analytical memory becomes increasingly important. Understanding form (ABA, rondo, theme and variations) helps you organize larger structures mentally.

    Intermediate students should begin building a performing repertoire of 5-10 memorized pieces that they maintain over time. This stage is also when you can start using more sophisticated practice techniques like backward practice and random starting points throughout entire pieces, not just small sections.

    For advanced players: Memorization becomes more efficient as pattern recognition improves. You’ve internalized so many musical structures that new pieces often contain familiar elements. Advanced players can often memorize significant portions of a piece while learning it initially, rather than memorizing as a separate step.

    At this level, analytical memory typically leads the process, with other memory types reinforcing it. Advanced students should maintain a substantial repertoire of 15-30 pieces and develop the ability to memorize complete movements or multi-movement works.

    Regardless of level, the fundamental principle remains: layer multiple memory types for security. A beginner using three memory pathways for a simple piece has more reliable memorization than an advanced player using only muscle memory for a complex work.

    Whether you’re a returning adult who is getting back into piano or a young student preparing for your first recital, these seven techniques for how to memorize piano pieces will serve you for every piece you learn. The key is patience with the process and trust that layered memory pathways will hold when you need them most.

    At Weaver Music, whether students join me for in-person lessons in the Bay Area or connect via Zoom from anywhere in the world, I guide them through these memorization techniques tailored to their learning style and goals. The first 30-minute trial lesson is free, giving us time to assess where you are and create a personalized plan. Regular lessons are $99 for 60 minutes, and students of all ages and levels—from complete beginners to advanced players—benefit from patient, supportive instruction that builds both technical skill and musical confidence.

    Memorization transforms your relationship with a piece of music. What starts as dots on a page becomes something that lives inside you, something you can share without barriers. That transformation is worth the effort. With these seven proven techniques for how to memorize piano pieces, you have everything you need to build a secure, lasting memory of the music you love.

    Ready to find out for yourself?

    Your first 30-minute lesson with me is completely free – we will evaluate where you are, talk through your goals, and map out your path.
    Book Your Free Trial Lesson

  • Piano Recital Preparation: 7 Proven Steps for Easy Success

    Piano Recital Preparation: 7 Proven Steps for Easy Success

    If you’re reading this, you or your child probably has a piano recital coming up. Whether it’s your first time performing or your tenth, effective piano recital preparation makes all the difference between a stressful experience and a confident, enjoyable performance. I’ve coached hundreds of students through their recitals over the past decade, and I’ve learned that preparation goes far beyond just practicing your piece.

    Piano recital preparation involves mental readiness, logistical planning, and strategic practice techniques that build genuine confidence. In this guide, I’ll walk you through everything you need to know, from the moment you choose your piece to the bow you take after your final note.

    The short answer

    Successful piano recital preparation requires starting at least 6-8 weeks before the performance date. Focus on solid practice habits, perform your piece multiple times for family and friends, address performance anxiety early, and prepare all logistics (what to wear, what to bring, arrival time) at least one week in advance. The key is building muscle memory and confidence through repeated performance simulation.

    Why piano recital preparation matters

    Let me be honest with you: I’ve seen incredibly talented students stumble through recitals because they didn’t prepare properly, and I’ve seen beginners shine because they followed a structured preparation plan. The difference is rarely about talent.

    Recitals teach skills that extend far beyond the piano. They build resilience, time management, and the ability to perform under pressure. These are life skills that serve students in school presentations, job interviews, and countless other situations.

    Proper piano recital preparation also protects the joy of music-making. When students feel unprepared, they associate performing with stress and anxiety. But when they’re genuinely ready, recitals become celebrations of their hard work and growth.

    At Weaver Music, our students participate in recitals as part of their development journey. We’ve found that students who follow a structured piano recital preparation process not only perform better but also enjoy the experience more and are excited to perform again.

    Sheet music on stand as part of piano recital preparation checklist

    The complete piano recital preparation timeline

    Let’s break down piano recital preparation into a realistic timeline. This assumes you have about 8 weeks to prepare, which is ideal for most students.

    Weeks 8-6: Selection and initial learning

    Choose a piece that’s slightly easier than what you’re currently working on in lessons. This is crucial. You want to perform something you can play confidently, not something that pushes your technical limits. A piece at 80-90% of your current ability level is perfect.

    During these first weeks, focus on:

    • Learning the notes accurately with correct fingering
    • Understanding the structure of the piece
    • Marking dynamics and expression from the start
    • Playing slowly with a metronome to build accuracy

    If you’re still struggling to read the music fluently, check out this guide on how to read sheet music faster to accelerate your progress.

    Weeks 5-4: Building fluency and expression

    Now your piano recital preparation shifts toward making the piece musical and automatic. You should be able to play through the entire piece without stopping, even if it’s slower than performance tempo.

    Key activities during this phase:

    • Gradually increase tempo using a metronome
    • Record yourself and listen critically
    • Work on problem sections in isolation
    • Add expression, phrasing, and personal interpretation
    • Practice performing the piece from start to finish without stopping

    Understanding how to use a metronome properly during this phase will help you build steady, reliable tempo control.

    Weeks 3-2: Performance simulation

    This is where piano recital preparation becomes real. Start performing your piece for others at least 3-5 times before the actual recital. This is not optional—it’s essential.

    Perform for:

    • Family members in your living room
    • A few friends via video call
    • Your practice group or other students
    • Anyone willing to listen

    Each performance teaches you something about managing nerves and recovering from mistakes. You’ll discover which sections need more work and where your memory might slip under pressure.

    Week 1: Final polish and logistics

    The final week of piano recital preparation focuses on consistency and logistics. Your piece should be secure by now. Don’t make major changes or suddenly practice for hours—this often backfires.

    Instead:

    • Play through your piece once or twice daily at performance tempo
    • Visualize the performance going well
    • Confirm recital details (time, location, dress code)
    • Prepare everything you’ll need to bring
    • Get adequate sleep and avoid cramming
    Empty piano bench in home studio during practice session

    Mastering your piece: the practice strategy

    The way you practice during piano recital preparation is just as important as how much you practice. Quality beats quantity every time.

    The 5-times-perfect rule

    I teach my students this rule: you haven’t truly learned a section until you can play it correctly five times in a row. Not five times total—five consecutive times without mistakes.

    This builds the kind of reliability you need for performance. One successful attempt might be luck. Five in a row is genuine mastery.

    Practice performing, not just playing

    There’s a difference between running through your piece during practice and actually performing it. During piano recital preparation, dedicate some practice sessions to pure performance simulation.

    Here’s how:

    • Decide you’re going to perform the piece completely, start to finish
    • Stand up, walk away from the piano, then return and sit down
    • Take a breath, exactly as you will at the recital
    • Play through without stopping, no matter what happens
    • If you make a mistake, keep going—practice recovery

    This teaches you to continue despite errors, which is essential for recital success.

    Target the trouble spots

    Every piece has sections that are trickier than others. During piano recital preparation, identify your top three challenging spots and give them focused attention.

    Use targeted exercises to address specific challenges. For instance, if your left hand struggles in certain passages, dedicated left hand piano exercises can build the strength and independence you need.

    Practice these sections:

    • Hands separately first, then together
    • At half tempo, then gradually faster
    • With different rhythmic patterns to build security
    • Starting from different points (not always from the beginning)

    Memory strategies

    Whether you’re performing from memory or using the score, understanding your piece deeply is crucial for piano recital preparation. I recommend memorizing through multiple pathways:

    • Visual memory: Picture the sheet music in your mind
    • Kinesthetic memory: Feel the physical patterns in your hands
    • Analytical memory: Understand the harmonic and structural logic
    • Aural memory: Hear the piece in your mind

    When you know a piece through all four pathways, memory slips are far less likely.

    Mental preparation for piano recital success

    Physical practice is only half of piano recital preparation. The mental game is equally important, and it’s where many students struggle most.

    Performance anxiety is completely normal—I’ve written extensively about piano performance anxiety and strategies to manage it. The key is acknowledging nervousness while not letting it control you.

    Visualization techniques

    Mental rehearsal is a powerful tool for piano recital preparation. Research shows that visualizing a successful performance activates similar neural pathways as actual practice.

    Try this daily in the week before your recital:

    • Sit quietly and close your eyes
    • Imagine walking onto the stage or to the piano
    • Feel yourself sitting down and adjusting the bench
    • Picture playing through your piece successfully
    • Imagine the feeling of satisfaction when you finish
    • Visualize people applauding and you taking a bow

    Make it as vivid and detailed as possible. This builds confidence and familiarity with the performance experience.

    Reframing nervousness

    Here’s something I tell every student during piano recital preparation: nervousness and excitement create identical physical sensations. Your racing heart and heightened alertness aren’t your enemy—they’re your body preparing to perform at its best.

    Instead of thinking “I’m so nervous,” try reframing it as “I’m excited and energized.” This simple mental shift can transform your performance experience.

    Developing a pre-performance routine

    Athletes have pre-game rituals, and pianists benefit from them too. As part of your piano recital preparation, develop a consistent routine for the moments before you perform.

    Your routine might include:

    • Three slow, deep breaths
    • Silently humming the opening phrase
    • Rolling your shoulders to release tension
    • A specific positive phrase you repeat to yourself
    • Flexing and releasing your hands

    Practice this routine before every simulation performance so it becomes automatic and calming.

    Building confidence through small wins

    Confidence doesn’t appear magically on recital day. It accumulates through consistent small successes during your piano recital preparation journey. Each time you successfully play through a difficult passage, each mini-performance for family, each moment you push past discomfort—these all deposit confidence into your mental bank account.

    Keep a practice journal where you note daily achievements, no matter how small. “Played measures 16-24 perfectly three times” or “Performed for Mom without stopping” are victories worth recording. When recital day nerves strike, reviewing these wins reminds you of everything you’ve already accomplished.

    Piano with metronome and music materials ready for practice

    What to bring: the recital day checklist

    Practical piano recital preparation includes making sure you have everything you need on performance day. Create this checklist at least one week before and gather items the night before.

    Essential items

    • Sheet music: Even if performing from memory, bring your music as backup
    • Pencil: For any last-minute markings
    • Water bottle: Stay hydrated, but sip carefully to avoid needing the bathroom mid-recital
    • Tissues or handkerchief: For nervous sweaty hands
    • Small towel: To quickly dry hands if needed
    • Any mobility aids or cushions: If you need a footstool or bench cushion, bring it

    Optional but helpful

    • A small snack for sustained energy
    • Hand cream (apply well before performing, not right before)
    • A book or quiet activity for waiting time
    • Headphones to listen to calming music beforehand
    • A change of clothes if there’s a long gap before the recital

    What to wear

    Choosing recital attire is part of piano recital preparation that students often overlook. Your outfit should be comfortable, allow free movement, and help you feel confident.

    Guidelines for recital clothing:

    • Choose something you’ve worn before—recital day isn’t the time for breaking in new shoes
    • Ensure sleeves don’t restrict arm movement or catch on the keys
    • Avoid noisy jewelry that might clink against the piano
    • Pick shoes you can comfortably use the pedals in
    • Dress slightly more formally than everyday wear, but stay comfortable

    For younger students especially, practice playing in your recital outfit at least once during piano recital preparation to ensure it doesn’t create unexpected challenges.

    Dress rehearsal and final preparations

    If possible, the best piano recital preparation includes practicing at the actual recital venue or on a similar piano. Many teachers organize dress rehearsals for this reason.

    Benefits of venue familiarization

    Performing in the actual space removes unknowns. You’ll experience the acoustics, the feel of that particular piano, the sight lines, and the distance from the audience.

    If you have access to the venue beforehand:

    • Practice your entrance and exit
    • Adjust the bench to your preferred height
    • Test the pedals and key responsiveness
    • Notice any quirks of that particular instrument
    • Get comfortable with the room’s acoustics

    If you can’t access the venue, try to practice on different pianos during your piano recital preparation. This builds adaptability.

    The week before: maintaining perspective

    In the final days of piano recital preparation, I’ve seen students practice obsessively or hardly at all. Neither extreme is helpful.

    Aim for moderate, consistent practice:

    • Play through your piece 1-2 times daily
    • Don’t suddenly increase practice time
    • Avoid making changes to fingerings or interpretation
    • Trust the work you’ve already done
    • Focus on rest and mental preparation

    Remember why you’re doing this. Recitals aren’t about perfection—they’re about sharing music and celebrating progress. I remind my students at Weaver Music that every recital, regardless of how it goes, teaches valuable lessons and builds resilience.

    Understanding different piano types

    Part of effective piano recital preparation involves understanding the instrument you’ll perform on. If you’ve been practicing on an upright piano at home but the recital features a grand piano, the touch and response will feel different.

    Grand pianos typically have more responsive action, richer tone, and better sustain. The pedals may feel different, and the overall sound projection is stronger. If you practice primarily on a digital piano, acoustic pianos will have more dynamic range and require different touch sensitivity.

    According to research from the National Association for Music Education, students who experience various piano types during their training develop better adaptability and stronger technical control. This is why practicing on the recital venue piano—or at least a similar instrument—is so valuable.

    Recital day: your step-by-step guide

    The day has arrived. Your piano recital preparation has led to this moment. Here’s how to navigate recital day with confidence.

    Morning and afternoon

    Start your day calmly. Avoid dramatic changes to your routine, and definitely don’t skip meals due to nerves.

    • Eat a balanced breakfast and lunch
    • Play through your piece once or twice, but don’t over-practice
    • Do something relaxing and unrelated to piano
    • Arrive at the venue 20-30 minutes early
    • Use the bathroom before the recital starts

    Waiting for your turn

    Watching other performers can be inspiring or nerve-wracking. Focus on supportive listening rather than comparison.

    While waiting:

    • Listen to others with appreciation, not judgment
    • Use your pre-performance routine to stay centered
    • Silently review your piece, hearing it in your mind
    • Gently stretch your hands and wrists
    • Breathe deeply and regularly

    Your moment on stage

    When it’s your turn, all that piano recital preparation comes together. Walk confidently to the piano, take your time adjusting the bench, and breathe.

    Remember:

    • Pause before beginning—don’t rush
    • If you make a mistake, keep going without reaction
    • Focus on the music, not the audience
    • If you have a memory slip, jump to a section you know well
    • Finish strong, even if things didn’t go perfectly

    After your last note, pause briefly, then stand and bow. Accept the applause graciously—you’ve earned it.

    For parents: supporting your child

    Parents play a crucial role in piano recital preparation and on recital day itself. Your energy and attitude significantly influence your child’s experience.

    Helpful parent strategies:

    • Stay calm and positive, even if you’re nervous for them
    • Avoid last-minute criticism or “helpful” suggestions
    • Remind them that you’re proud regardless of how it goes
    • Don’t obsess over mistakes afterward—celebrate the courage it took to perform
    • Make recital day feel special and celebratory

    The broader benefits of piano lessons for children extend far beyond musical skills. If you’re curious about the developmental advantages, explore the benefits of piano lessons for kids.

    Managing unexpected challenges

    Even with thorough piano recital preparation, unexpected situations can arise. The piano bench might be at the wrong height, the acoustics might sound different than you expected, or the piano action might feel unusual.

    When the unexpected happens, take a moment to adjust. It’s perfectly acceptable to stand up and readjust the bench height, take an extra breath, or briefly test the pedals before beginning. The audience understands that performers need to be comfortable, and taking these few seconds shows professionalism rather than hesitation.

    After the recital: reflection and growth

    Piano recital preparation doesn’t end when the performance does. The reflection phase is where deep learning happens.

    Immediate post-recital

    Right after performing, emotions run high. Give yourself or your child space to decompress. Celebrate the accomplishment of performing, regardless of how perfectly it went.

    Do something enjoyable afterward—go for ice cream, watch a movie, or just relax. Performing takes courage and energy, and that deserves recognition.

    Reflection within a few days

    Once emotions settle, reflect constructively on your piano recital preparation and performance. This is best done with your teacher.

    Helpful reflection questions:

    • What went well? What are you proud of?
    • What aspects of preparation served you best?
    • What would you do differently next time?
    • How did you handle nervousness?
    • What did you learn about yourself as a performer?

    Focus on specific, actionable insights rather than vague self-criticism. “I need to start memorizing earlier” is helpful. “I’m terrible at performing” is not.

    Setting goals for next time

    Use this recital experience to inform your approach to piano recital preparation next time. Maybe you’ll start earlier, practice more performance simulations, or work on a different aspect of managing nerves.

    Each recital builds on the last. Students who perform regularly become increasingly comfortable with the process. At Weaver Music, we’ve watched nervous beginners transform into confident performers over the course of a few recitals.

    Recording and reviewing your performance

    If your recital was recorded (video or audio), reviewing it can be incredibly valuable for your piano recital preparation journey, though wait a few days before watching. Initial emotions can make it hard to view objectively.

    When you do watch or listen:

    • Note what you did well—often we’re better than we felt in the moment
    • Identify specific technical areas to address in future practice
    • Observe your stage presence and body language
    • Notice how the audience might not have perceived mistakes you thought were obvious
    • Use insights to refine your approach for the next performance

    Recordings also serve as wonderful milestones. Years later, you’ll appreciate seeing your progress and remembering the courage it took to perform.

    Continuing your musical journey

    Recitals are milestones, not destinations. They mark progress along your musical journey and give you goals to work toward.

    Whether you’re just starting out or continuing to develop your skills, structured guidance makes all the difference. Our four-level lesson path provides comprehensive instruction for students at every stage, and our personalized lessons offer the individualized feedback that accelerates growth.

    We work with students of all ages and levels, from young beginners to adults returning to piano. Every student gets a free 30-minute trial lesson where we assess your current abilities and map out a personalized plan. Our lessons are available both in-person in the Bay Area and via Zoom for students worldwide, at $99 per 60-minute session.

    If you’re looking for patient, supportive teaching that prepares you not just to play but to perform with confidence, book your free trial lesson and experience the Weaver Music difference.

    The long-term benefits of performance experience

    Piano recital preparation is a learnable skill. With the right approach, support, and practice, you can walk onto that stage feeling genuinely ready. The butterflies might still be there—that’s normal and even helpful. But underneath them, you’ll have the solid foundation of thorough preparation and the confidence that comes with it.

    Every student I’ve taught has taught me something about resilience, courage, and the power of music to help us grow. Your recital will be its own unique experience, and regardless of how every note turns out, the act of preparing and performing will make you a stronger, more capable musician.

    According to research from the National Association for Music Education, students who participate in music performances demonstrate improved self-confidence, discipline, and ability to handle pressure in other areas of life. Piano recital preparation truly is preparation for life.

    The skills you develop through this process—planning ahead, breaking large tasks into manageable steps, managing anxiety, performing under pressure, and bouncing back from setbacks—translate directly to academic presentations, job interviews, athletic competitions, and countless life situations where you need to show up and perform your best.

    Building a performance portfolio

    As you continue your piano journey and participate in multiple recitals, you’re building a performance portfolio that demonstrates growth over time. Each recital adds to your experience base, making subsequent performances progressively easier.

    Consider keeping a performance journal where you document:

    • Pieces you’ve performed and when
    • What worked well in your piano recital preparation
    • Challenges you overcame
    • Feedback from teachers and audience members
    • Personal reflections on your growth as a performer

    This journal becomes a powerful record of your musical journey and a source of encouragement during challenging preparation periods.

    I hope this guide gives you the roadmap you need for successful piano recital preparation. Remember: you’ve got this. Take it one step at a time, trust your preparation, and enjoy sharing your music with others. The stage is waiting, and with these proven strategies, you’ll walk on ready to succeed.

    Ready to find out for yourself?

    Your first 30-minute lesson with me is completely free – we will evaluate where you are, talk through your goals, and map out your path.
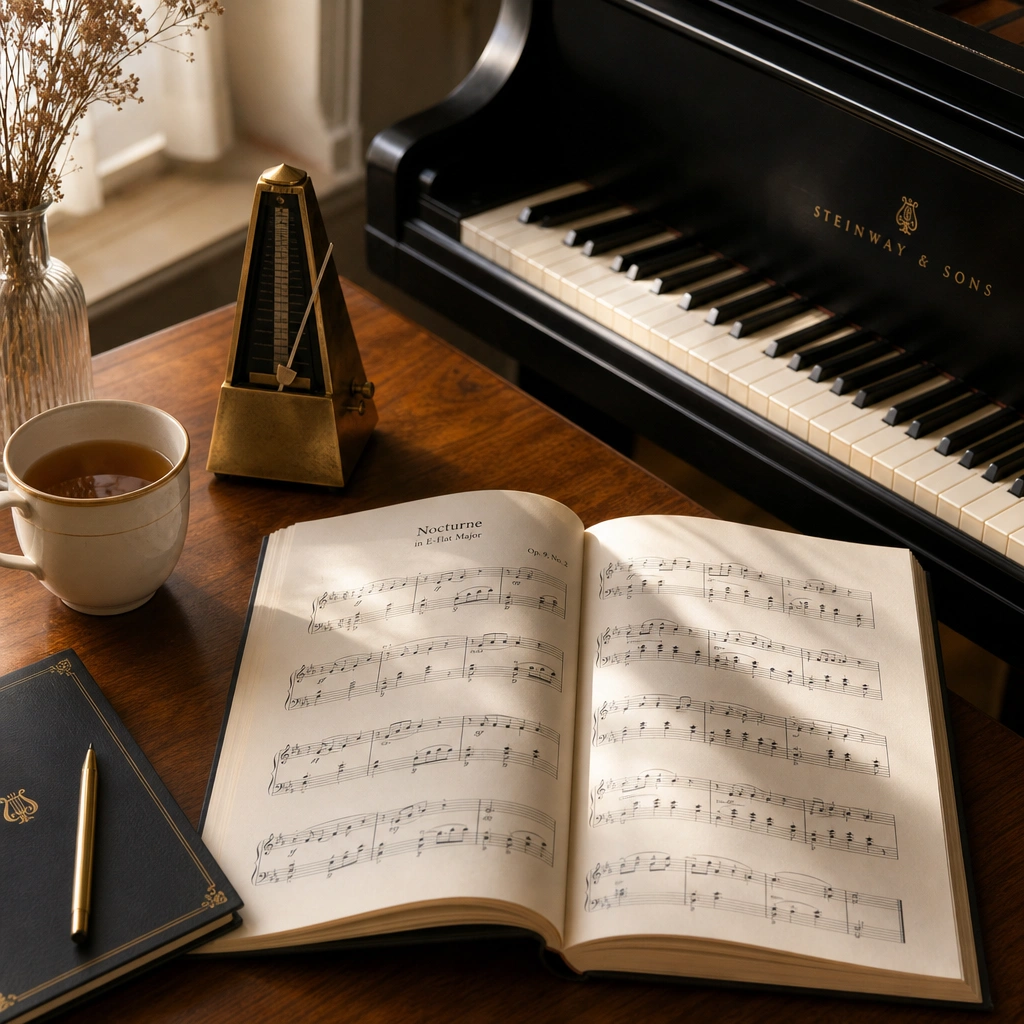
    Book Your Free Trial Lesson

  • How to Read Sheet Music Faster: 7 Proven Sight Reading Tips

    How to Read Sheet Music Faster: 7 Proven Sight Reading Tips

    If you’ve ever felt frustrated watching your eyes crawl slowly across the page while your brain struggles to translate those dots into music, you’re not alone. Learning how to read sheet music faster is one of the most common challenges I hear from students at every level. The good news? Sight reading speed isn’t a talent you’re born with—it’s a skill you can systematically improve with the right approach.

    Over my years teaching piano in the Bay Area and on Zoom, I’ve helped hundreds of students transform from hesitant note-by-note readers into confident sight readers. The strategies I’m sharing today aren’t theory—they’re the same practical techniques I use in my studio every week, and they work whether you’re a complete beginner or returning to piano after years away.

    The short answer

    To learn how to read sheet music faster, you need to shift from reading individual notes to recognizing patterns and intervals. Practice sight reading material that’s slightly easier than your current level for 5-10 minutes daily, train your eyes to read ahead of where you’re playing, and focus on maintaining forward momentum rather than perfection.

    Speed comes from pattern recognition, not faster note identification. The real breakthrough happens when you stop treating every note as a separate puzzle to solve and start seeing music the way fluent readers see words—in chunks, shapes, and familiar patterns.

    Why sight reading speed matters

    Before we dive into the how, let’s talk about why improving your sight reading speed is worth the effort. When you can read sheet music faster, you unlock a completely different relationship with the piano.

    First, it dramatically expands your repertoire. Instead of spending weeks laboriously learning a single piece, you can explore dozens of compositions. You can sight read through new music to decide what you actually want to learn deeply.

    Second, faster reading means more musical playing. When your brain isn’t consumed with “what note is this,” you have mental bandwidth for dynamics, phrasing, and expression—the things that actually make music beautiful.

    Third, it makes playing more enjoyable. Let’s be honest: the stop-and-start, hunt-and-peck approach to reading music is frustrating. When you can read fluently enough to maintain the flow of a piece, practice becomes genuinely fun.

    I see this transformation constantly in my students. The moment someone breaks through to faster reading, their whole attitude toward practice changes. They start choosing more adventurous pieces and actually enjoying their time at the keyboard.

    Beginner sheet music for learning how to read sheet music faster through consistent practice

    Understand what you’re actually reading

    One of the biggest obstacles to learning how to read sheet music faster is treating notation like a foreign alphabet. Many students spend years at the piano still thinking “that note on the line is E” every single time they see it.

    But music notation isn’t really an alphabet—it’s a visual map of pitch and time. The faster you can internalize this spatial relationship, the faster you’ll read.

    The geography of the staff

    Think of the grand staff as a landscape. Middle C sits right in the middle, and everything extends up and down from there. Notes on lines versus spaces, the distance between notes, the shape of a chord—these are all visual information your brain can process much faster than verbal labels.

    I encourage students to practice seeing intervals visually. A third has one note in between. A fifth spans five letter names. Instead of naming each note in a C major chord (C-E-G), see it as a stack of thirds with a specific visual shape.

    Key signatures as context, not obstacles

    Many pianists waste enormous mental energy double-checking key signatures for every note. Instead, internalize the key signature as the “home base” for the piece. If you’re in D major, your default assumption is F# and C# unless you see a natural sign.

    This shift—from constantly checking to having the key signature as background context—is a game-changer for reading speed. Your brain stops interrupting the flow to verify and starts trusting the framework.

    Understanding music theory fundamentals doesn’t just help you play better—it directly accelerates how to read sheet music faster by giving you context for what you’re seeing. When you understand the underlying harmonic structure, your eyes can predict what’s coming next on the page.

    Train your eyes to read ahead: How to read sheet music faster

    Here’s something most students don’t realize: when you read text, your eyes are always several words ahead of what your mouth is saying. Fluent music reading works exactly the same way.

    The technical term is “eye-hand span,” and it’s the secret weapon of strong sight readers. Your eyes should be reading the next measure while your hands are playing the current one.

    The look-ahead exercise

    Here’s a practical drill I use with students who want to learn how to read sheet music faster. Choose a very simple piece—something well below your level. Play it while consciously forcing your eyes to stay one or two beats ahead of your hands.

    At first this feels impossibly awkward. Your eyes want to follow your hands. But stick with it. Start with just one beat ahead, then gradually increase the distance.

    Try this variation: place a blank card or piece of paper to cover the notes you’re currently playing, so you literally cannot look at them. You must rely on what you’ve already read and what’s coming next.

    Trust your peripheral vision

    You don’t need to stare directly at every note to read it. Your peripheral vision can catch an enormous amount of information—the general contour of a melody, whether it’s moving up or down, the rhythm pattern.

    Strong sight readers use their central vision for reading ahead and their peripheral vision to confirm what their hands are currently doing. This takes practice, but it’s trainable. The key is resisting the urge to look down at your hands or back at notes you’ve already played.

    Metronome on piano for developing rhythm skills and sight reading speed

    Recognize patterns, not individual notes

    This is perhaps the single most important concept for how to read sheet music faster: you must shift from note-by-note reading to pattern recognition.

    Think about how you read this sentence. You didn’t decode it letter by letter—you recognized whole words, maybe even whole phrases, in a single glance. Music reading works the same way.

    Common patterns to internalize

    Start by learning to instantly recognize these musical “words”:

    • Scales and scale fragments – ascending or descending runs
    • Arpeggios – broken chords in various patterns
    • Triads – three-note chords in root position and inversions
    • Repeated notes – same pitch multiple times
    • Stepwise motion – melodies moving by adjacent notes
    • Octave doublings – the same note in both hands
    • Common chord progressions – I-IV-V-I and similar patterns

    When you see a measure filled with sixteenth notes that outline a C major arpeggio, you don’t need to read each note individually. Your brain should register “C arpeggio, ascending” and your hands already know what to do.

    Interval reading versus note naming

    Here’s a technique that dramatically improved my own sight reading: stop naming notes and start reading intervals.

    Instead of “that’s G, then B, then D,” think “starting note, up a third, up a third.” Your fingers can execute “up a third” much faster than they can translate “G to B” into a physical motion. This is especially powerful for how to read sheet music faster in unfamiliar keys.

    This connects beautifully with ear training. If you’re developing skills in how to play piano by ear, you’re already training your brain to hear and execute intervals—sight reading just adds the visual component.

    Practice with easier material

    Here’s a mistake I see constantly: students try to improve their sight reading by struggling through music at or above their current level. This actually slows down your progress.

    To genuinely learn how to read sheet music faster, you need to practice sight reading with material that’s significantly easier than what you can already play. I’m talking two or three levels below your current repertoire.

    Why easier material works

    When the technical demands are low, your brain can focus entirely on the reading process. You’re training your eyes and your pattern recognition, not wrestling with difficult fingerings or stretches.

    Think of it like learning to speed-read text. You don’t practice with dense academic papers—you practice with simple, clear writing so you can focus on the mechanics of reading faster.

    I recommend keeping a stack of easy method books around for this exact purpose. Adult beginners returning to piano often have old lesson books from childhood that work perfectly. The goal is to sight read through one or two pages daily of material you can almost play at tempo on the first read.

    The fresh music rule

    True sight reading means reading something you’ve never seen before. Once you’ve played through a piece even once, it’s no longer pure sight reading—your brain has started to memorize it.

    This means you need a constant supply of fresh material. Libraries are fantastic for this. Borrow a book, sight read through it over a week, return it, get another. You’re not trying to perfect these pieces—you’re using them as reading practice.

    For students working on consistent practice habits, I often recommend incorporating sight reading into your routine. If you’re wondering how often should a beginner practice piano, daily sessions with even 5-10 minutes of sight reading practice will yield remarkable results over time.

    Use rhythm first, then add pitches

    Many students trying to figure out how to read sheet music faster are actually struggling with two separate skills at once: reading rhythm and reading pitch. When you’re overwhelmed, separate them.

    The rhythm-only approach

    Before you play a new piece, try this: tap or clap the rhythm while counting out loud, ignoring the pitches entirely. This lets you absorb the rhythmic structure without the cognitive load of finding notes.

    Once the rhythm feels comfortable, add the pitches. You’ll be amazed how much easier it is when you’re not simultaneously decoding both elements.

    I use this constantly with students learning pieces with complex rhythms—syncopation, dotted rhythms, triplets. Get the rhythm in your body first, then add the notes. It’s not slower overall; it’s actually much faster than trying to do everything at once and making mistakes.

    Subdivision and counting

    A metronome isn’t just for keeping tempo—it’s a reading tool. When you practice sight reading with a metronome, you’re training your eyes to move in consistent time units.

    If you haven’t explored this yet, I have detailed guidance on how to use a metronome piano practice effectively. For sight reading specifically, set it slower than you think you need. The goal is steady, continuous reading, not speed.

    Count subdivisions out loud while you play: “one-and-two-and” for eighth notes, “one-ee-and-ah” for sixteenths. This keeps your brain locked into the rhythmic grid and prevents the drifting tempo that plagues many sight readers.

    Empty piano bench in welcoming studio space for dedicated sight reading practice sessions

    Build a consistent sight reading routine

    Knowing the techniques for how to read sheet music faster is one thing. Actually improving requires consistent, deliberate practice. Here’s the routine I recommend to students, and it takes just 10 minutes a day.

    The daily sight reading practice plan: How to read sheet music faster with focused sessions

    Minutes 1-2: Warm-up scan. Before you play anything, scan through the piece. Look at the key signature, time signature, tempo marking. Notice any repeated sections, patterns, or tricky spots. This preview primes your brain.

    Minutes 3-8: First read-through. Play the piece at a slow, steady tempo. Do not stop for mistakes. Do not go back. If you fumble a note, keep going. The cardinal rule of sight reading practice is forward momentum.

    Minutes 9-10: Reflection. What patterns did you recognize? Where did you get tripped up? Was it rhythm, pitch, or hand position? This reflection is where the learning solidifies.

    Then tomorrow, use completely different music. Remember: sight reading practice requires fresh material every time.

    Track your progress

    Keep a simple log. Note the date, the piece, and your subjective difficulty rating (easy/medium/hard). Over weeks and months, you’ll notice that pieces you rated “hard” are now “medium,” or you’re successfully sight reading more complex material.

    This visible progress is incredibly motivating. Sight reading improvement can feel invisible day-to-day, but over time the gains are substantial.

    If you’re working with a teacher—whether through our free trial lesson or regular lessons—bring your sight reading log. We can identify patterns in your challenges and tailor exercises to address them.

    Develop strong hand position awareness

    Here’s something that dramatically affects how to read sheet music faster: the less you look at your hands, the more you can focus on the page.

    Strong sight readers develop what I call “keyboard geography”—a physical sense of where notes are without visual confirmation. Your hands know where to go because they’ve internalized the spatial relationships.

    Practice without looking

    Spend part of your regular practice time playing familiar pieces, scales, or exercises without looking at your hands at all. Keep your eyes on the music or even close them entirely.

    At first, you’ll make mistakes. That’s fine. You’re training your proprioception—your body’s sense of where it is in space. Over time, your hands develop reliable muscle memory for intervals, hand shapes, and positions.

    This is especially important for pieces with hand position changes. Strong sight readers see a position shift coming in the music, execute it without looking down, and keep their eyes moving forward on the page.

    Five-finger positions and beyond

    Beginners often learn in five-finger positions—each finger assigned to one note. While this is limiting long-term, it’s actually a useful concept for developing hand position awareness.

    Even in advanced playing, you’re often in some kind of hand position or shape. Maybe it’s an octave span, maybe it’s a particular chord voicing. The faster you can recognize “this passage is in C position” or “this is D major arpeggio shape,” the less you need to verify individual notes.

    Technique exercises aren’t separate from sight reading—they’re foundational to it. When your hands are comfortable with common patterns, your eyes can race ahead. For students working on technical development, I often recommend focused work on left hand piano exercises since the left hand is often weaker at pattern recognition.

    Managing the mental game

    Finally, let’s address something that doesn’t get talked about enough: the psychological component of learning how to read sheet music faster.

    Many students experience genuine anxiety around sight reading. They feel exposed, embarrassed by mistakes, pressured to perform. This anxiety actively interferes with the reading process—stress narrows your focus and disrupts the pattern recognition we’ve been discussing.

    If you experience performance anxiety more broadly, you might find useful strategies in my article on piano performance anxiety. Many of the same principles apply to sight reading pressure.

    Permission to make mistakes is essential. In my studio, I tell students that sight reading practice is the one time mistakes don’t just not matter—they’re actually expected and useful. Every stumble tells you something about what patterns you need to work on.

    The compound effect of small improvements

    Here’s what keeps me passionate about teaching this skill: small improvements in sight reading have outsized effects on your overall musicianship.

    When you can read faster, you learn pieces faster. When you learn pieces faster, you play more repertoire. When you play more repertoire, you encounter more patterns. When you know more patterns, you read even faster. It’s a beautiful upward spiral.

    I’ve watched adult students who were convinced they’d never be “natural” sight readers transform into confident readers within six months of consistent practice. I’ve seen kids who struggled with note reading suddenly take off once these concepts clicked.

    The difference isn’t talent. It’s approach. It’s understanding what sight reading actually is—pattern recognition, eye-hand span, rhythmic structure—and practicing those specific skills deliberately.

    Resources and continued learning

    While this article covers the core strategies for how to read sheet music faster, there’s always more to explore. If you’re working on your own, consider supplementing with music theory study to deepen your pattern recognition.

    The Wikipedia article on sight-reading offers interesting historical and theoretical context if you want to dive deeper into how this skill develops across different instruments and musical traditions.

    For those interested in structured learning, our four-level lesson path includes dedicated sight reading exercises integrated with technique and repertoire development. Each level builds the specific skills we’ve discussed here in a systematic progression.

    Of course, working with a teacher provides personalized feedback that’s invaluable for sight reading development. In lessons—whether you’re joining us for our $99 60-minute sessions on Zoom or in person here in the Bay Area—I can watch exactly where your eyes go, identify the specific patterns you’re missing, and assign targeted exercises.

    Your next steps

    If you’re ready to seriously improve how to read sheet music faster, here’s what I recommend you do this week:

    • Acquire a stack of easy sight reading material—two or three levels below your current playing ability
    • Schedule 10 minutes of sight reading into your daily practice, ideally at the beginning when your mind is fresh
    • Focus on one technique at a time: this week, maybe it’s reading ahead; next week, recognizing intervals instead of naming notes
    • Keep a simple practice log to track your progress and challenges
    • Be patient and kind with yourself—this is a skill that develops over months, not days

    Remember, every expert sight reader you’ve ever admired started exactly where you are now. They just practiced the right things consistently. You can absolutely do the same.

    Whether you’re a parent researching benefits of piano lessons for kids and want your child to develop strong reading skills from the start, an adult getting back into piano as an adult and rediscovering this skill, or an active student looking to break through a plateau—these strategies work.

    The journey to fluent sight reading is one of the most rewarding aspects of piano study. There’s something almost magical about that moment when the dots on the page flow directly into music under your hands, when you stop translating and start simply playing. That’s what we’re working toward, and it’s absolutely within your reach.

    Ready to find out for yourself?

    Your first 30-minute lesson with me is completely free – we will evaluate where you are, talk through your goals, and map out your path.
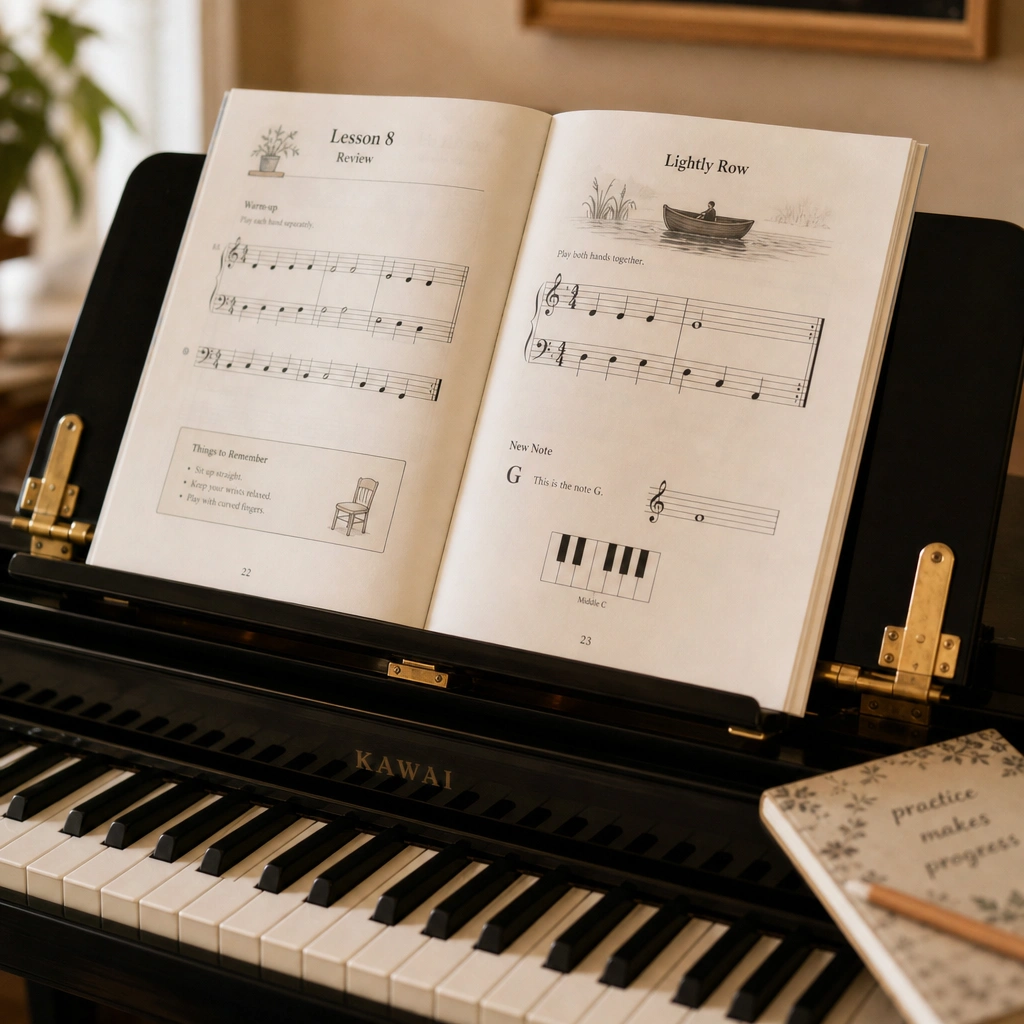
    Book Your Free Trial Lesson