Blog

  • How to Read Chord Symbols on Piano from a Lead Sheet

    How to Read Chord Symbols on Piano from a Lead Sheet

    The short answer

    Learning how to read chord symbols piano players see on a lead sheet means decoding a short label like “Am7” or “G/B” into the notes you play with your left hand (or both hands) under a melody. The letter names the root, extra letters and numbers name the chord quality, and a slash tells you which note goes in the bass. Once you know the handful of patterns, it reads almost like words.

    I’ve taught this to students ranging from eight-year-olds learning their first pop song to retirees picking piano back up after forty years, and the lightbulb moment is always the same: chord symbols aren’t a secret code, they’re shorthand. If you’d like a teacher to walk through your own lead sheets with you, Austin offers a free 30-minute trial lesson where this is often the very first thing we tackle.

    What is a lead sheet, and how is it different from sheet music?

    A lead sheet shows the melody line written in standard notation plus chord symbols written above the staff, leaving the exact accompaniment up to the player. Traditional sheet music, by contrast, writes out both hands note-for-note. Lead sheets are the norm for jazz standards, church music, and most pop fake books.

    The appeal of a lead sheet is flexibility. Two pianists can play the same lead sheet for “Fly Me to the Moon” and come up with completely different arrangements, because the chord symbols only tell you the harmony, not the voicing, rhythm, or register. That freedom is exactly why beginners sometimes find lead sheets harder at first than fully notated music.

    • Full sheet music: every note for both hands written out
    • Lead sheet: melody notated, harmony given as chord symbols
    • Fake book: a collection of lead sheets, usually one page per song

    If you’re deciding whether to learn chords or notes first as a beginner, lead sheet reading usually comes after you’re comfortable finding notes on the staff, not before.

    What do the letters and symbols in a chord name actually mean?

    A basic chord symbol is a letter (the root note) plus an optional suffix describing the chord’s quality. “C” alone means a C major triad: C, E, G. “Cm” or “Cmin” means C minor: C, Eb, G. The letter always tells you where to start; the suffix tells you how to stack the other two notes.

    Here’s how the most common triad symbols break down in practice:

    • C = C major (C, E, G) – no suffix means major
    • Cm or Cmin = C minor (C, Eb, G)
    • Cdim or C° = C diminished (C, Eb, Gb)
    • Caug or C+ = C augmented (C, E, G#)
    • Csus4 = C with the 3rd replaced by the 4th (C, F, G)
    • Csus2 = C with the 3rd replaced by the 2nd (C, D, G)

    I tell students to memorize one rule first: no letters after the root means major, every time, in every key. Once that’s automatic, the minor, diminished, and augmented symbols stop feeling random and start feeling like small, predictable edits to a major triad. If you want a deeper reference on how these qualities are built, musictheory.net’s lesson on triads is a solid, free companion to what we cover here.
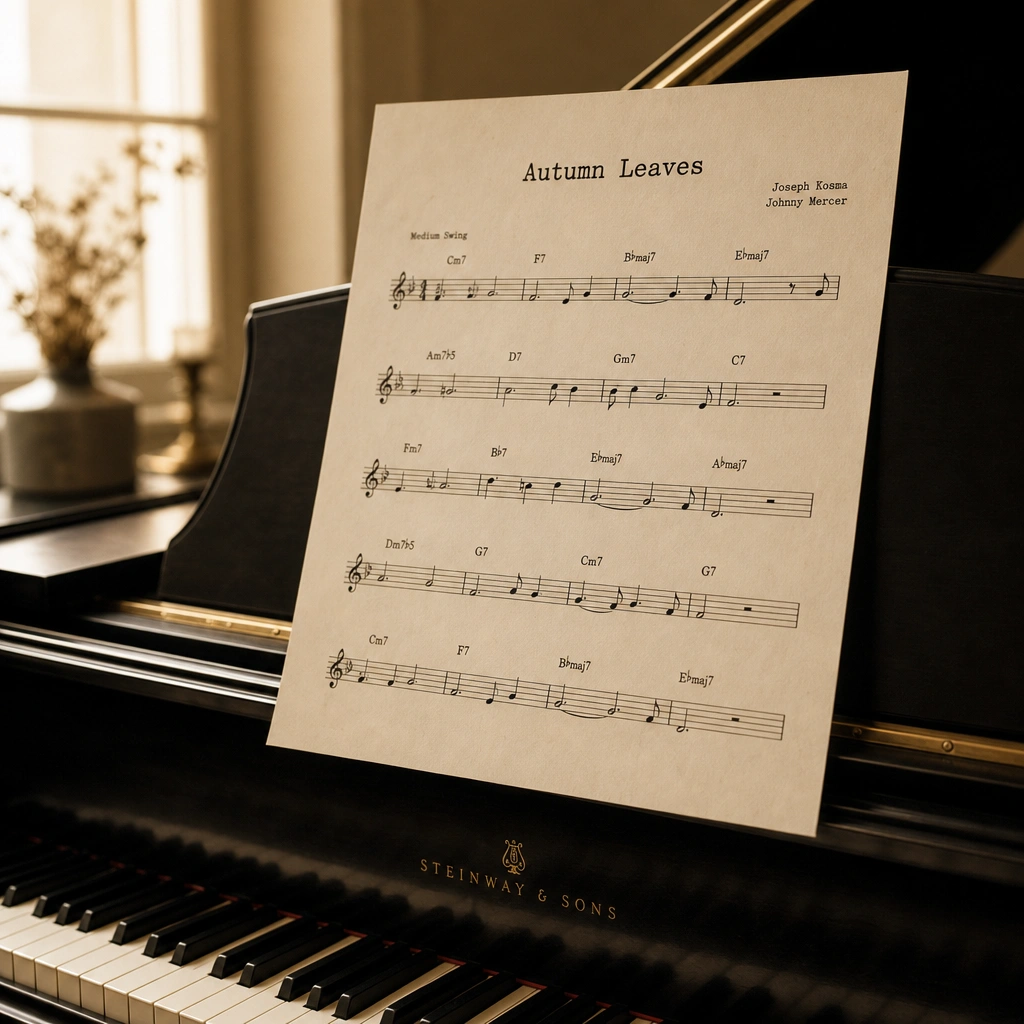
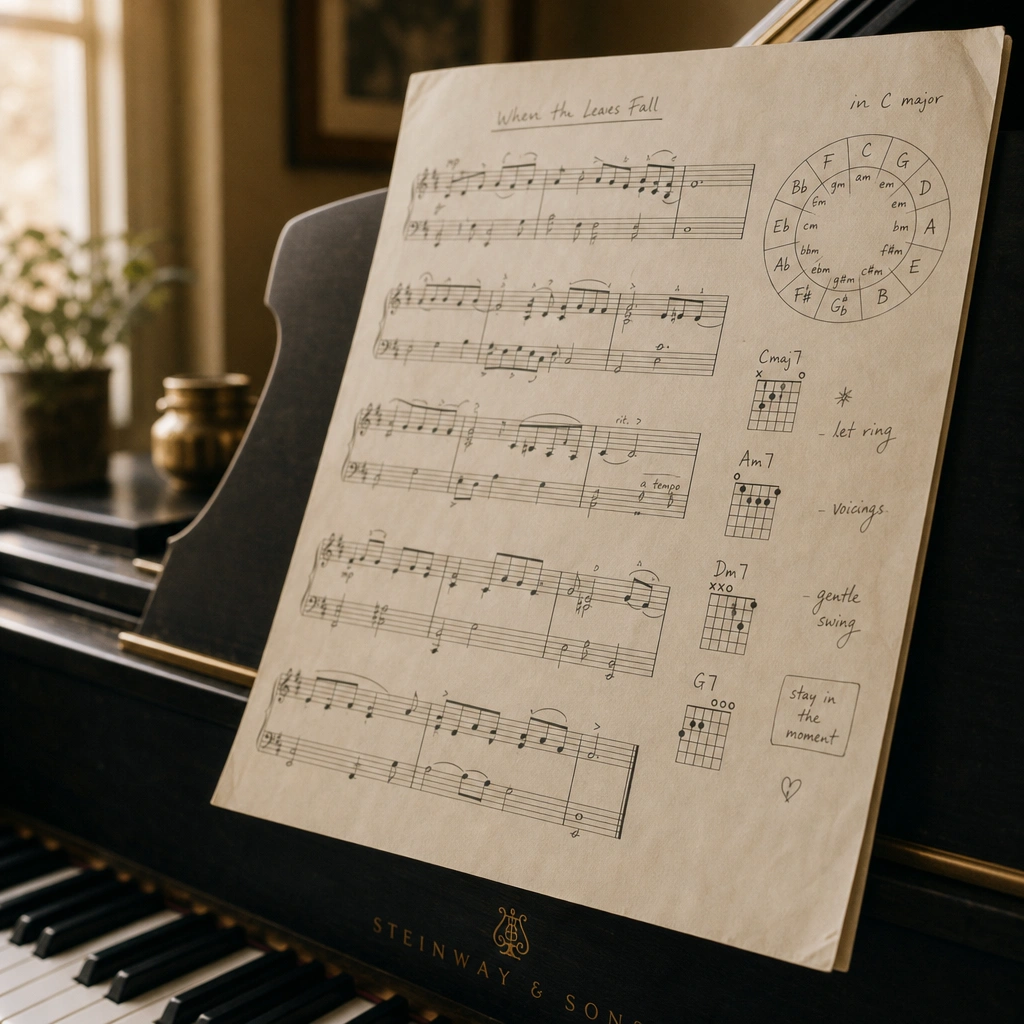
    Close-up of chord symbols written above a melody line, showing how to read chord symbols piano students use on a lead sheet

    How do you read seventh chords like Cmaj7 or G7?

    A seventh chord symbol adds one more note stacked a third above the triad, and the exact label tells you whether that note is major or minor relative to the root. “G7” means a dominant seventh (G, B, D, F). “Cmaj7” means a major seventh (C, E, G, B). “Am7” means a minor seventh (A, C, E, G).

    This is the spot where I see students stall the most, because “7” alone and “maj7” look similar but produce different chords. Here’s the breakdown I give in lessons:

    1. G7 (dominant 7th): major triad plus a minor 7th above the root
    2. Cmaj7 or CM7: major triad plus a major 7th above the root
    3. Am7: minor triad plus a minor 7th above the root
    4. Bm7b5 or Bø: diminished triad plus a minor 7th (common in minor key ii chords)
    5. Cdim7: fully diminished triad plus a diminished 7th

    A student of mine, a 34-year-old software engineer working through a jazz fake book, kept playing “maj7” chords as plain dominant 7ths for weeks because the labels looked interchangeable at a glance. The fix was simple: I had him circle every “maj” in a song before playing a single note. Once the visual habit stuck, the mix-up disappeared within two sessions.

    If chord symbols on your favorite songbook still feel like a foreign language, a short lesson can make them click fast. Your first 30-minute lesson with Austin is free – no card, no pressure.

    Book your free trial →

    What does a chord symbol with a slash mean, like C/E?

    A slash chord tells you to play a specific note in the bass that isn’t the root of the chord. “C/E” means play a C major chord with E in the bass instead of C. The letter before the slash is still the chord; the letter after the slash is just which note sits lowest.

    Slash chords show up constantly in pop and worship music to create smoother bass lines. A progression like C, G/B, Am, F lets the bass walk down step by step (C to B to A to F) instead of jumping around. Composers also use slash chords to notate chords over a pedal tone, where the bass note stays fixed while the chords above it change.

    • G/B: G major chord, B in the bass
    • D/F#: D major chord, F# in the bass
    • C/G: C major chord, G in the bass (a very common “inverted” sound)

    The quickest way to internalize this is to play the bass note alone with your left hand first, then add the chord with your right, so your ear hears the two layers separately before you combine them.
    Notebook and pencil resting on a closed piano, suggesting quiet study of chord symbols and music theory

    How do you actually play a chord once you’ve read the symbol?

    Playing from a chord symbol means choosing a voicing: deciding which octave, which inversion, and which hand plays what. A beginner typically plays root-position triads with the left hand while the right hand plays the written melody. More advanced players spread the notes out, add octaves, or use both hands for fuller harmony.

    There’s no single “correct” way to voice “Fmaj7” – that’s the whole point of a lead sheet. I usually start new students with three steps in order:

    1. Find the root and play it alone in the left hand on beat one
    2. Build the full chord in root position so your ear knows its basic shape
    3. Experiment with inversions so the chord sits closer to the previous one, reducing hand jumps

    This connects directly to scale and key fluency – if you already know your way around the circle of fifths, you’ll recognize chord patterns faster because related chords tend to cluster together by key. Students who’ve also worked on scales tend to find chord shapes under their fingers more naturally, since the notes overlap constantly.

    “Austin explains everything clearly and makes online piano lessons easy to follow.” – Emily Carter

    That kind of plain, step-by-step explanation is exactly how I approach chord symbols with every new student, whether we’re working over Zoom or in person for Bay Area students.

    What mistakes do beginners make when reading chord symbols?

    The most common mistake beginners make is ignoring suffixes and treating every chord symbol as if it were a plain major triad. The second most common is rushing past slash chords and playing the chord’s own root in the bass instead of the specified bass note, which quietly breaks the intended sound of the progression.

    • Skipping the suffix: playing “Dm” as “D” because the letter looks the same at a glance
    • Confusing “7” with “maj7”: covered above, but worth repeating because it’s so frequent
    • Ignoring slash chords: playing the root in the bass instead of the note after the slash
    • Memorizing shapes without naming notes: this works until a song changes key and the shape no longer applies

    I had a 10-year-old student who memorized “C, F, G” shapes perfectly for months, but froze the moment a song introduced “G7.” She wasn’t bad at piano – she’d just never been shown that the “7” meant “add one more note.” Five minutes of explanation and she was back on track permanently. This is also a great area to connect with basic improvising, since knowing chord tones is the backbone of learning to improvise on piano. For a broader overview of how chord notation evolved, the Berklee-affiliated Berklee resources on jazz harmony are worth a look if you want to go deeper.
    Person seated at a piano from behind in a sunlit studio, representing quiet practice of reading chord symbols

    Common questions

    Do I need to read sheet music to read chord symbols?

    Reading chord symbols doesn’t require fluent sheet music reading, but you do need to recognize note names on the staff for the melody line. Many students learn chord symbols and basic melody reading side by side, since lead sheets combine both skills on a single page.

    Are chord symbols the same in every genre of music?

    Chord symbol notation is largely standardized across pop, jazz, and worship music, though jazz fake books tend to use more extended chords like 9ths, 11ths, and 13ths. Classical sheet music rarely uses chord symbols at all, since it’s fully notated for both hands instead.

    What’s the difference between a chord symbol and guitar tablature?

    A chord symbol names the harmony abstractly, leaving voicing up to the player, while guitar tablature shows exact finger placement on specific strings and frets. Pianists read the chord symbol and choose their own voicing; guitarists following tab play a fixed, predetermined shape.

    Can young kids learn to read chord symbols?

    Children as young as seven or eight can learn basic major and minor chord symbols once they’re comfortable finding notes on the keyboard. I usually introduce chord symbols after a student has a solid grip on note names and simple five-finger positions, often within the first year of lessons.

    How long does it take to get comfortable reading chord symbols?

    Most students who practice chord reading for 15-20 minutes a few times a week get comfortable with basic major, minor, and seventh chord symbols within 4-6 weeks. Slash chords and extended jazz chords typically take a few additional months of regular exposure to feel automatic.

    Do I need a real piano to practice this, or will a keyboard work?

    A full-size, touch-responsive keyboard works fine for learning chord symbols, since the skill is about note recognition and hand shapes rather than touch sensitivity. What matters more is having at least 61 keys so you have room to move chords up and down without running out of keys.

    Reading chord symbols is one of those skills that feels overwhelming for about two weeks and then suddenly becomes second nature – I’ve watched it happen with students of every age, from kids to adults getting back into piano after years away. If you want a clear, personalized plan for working through this with real songs you actually want to play, Weaver Music lessons run $60 for 30 minutes, $80 for 45 minutes, or $99 for a full hour, with a free 30-minute trial lesson to start – no card required.

    Ready to find out for yourself?

    Your first 30-minute lesson with me is completely free – we will evaluate where you are, talk through your goals, and map out your path.
    Book Your Free Trial Lesson

  • Are Online Piano Lessons Good for Kids by Age?

    Are Online Piano Lessons Good for Kids by Age?

    The short answer

    Online piano lessons for kids work well starting around age 6 or 7, when a child can sit, focus, and follow verbal instruction for 20-30 minutes. For younger children, in-person lessons or a parent-assisted online setup usually go smoother. I’ve taught both formats, and the deciding factor is rarely the child’s age alone – it’s attention span and whether an adult is nearby to help in the first few months. You can see what that looks like in a free 30-minute trial lesson before committing to anything.

    I get this question from Bay Area parents constantly, usually right after a friend mentions switching to Zoom lessons or a school schedule stops leaving room for driving across town. The honest answer is: it depends less on the technology and more on the kid. Some 6-year-olds thrive online. Some 10-year-olds need a teacher in the room for the first semester. Let’s go through it by age.

    What age is right for online piano lessons?

    Most children are ready for online piano lessons by age 6 or 7, once they can follow spoken instructions without constant redirection and sit through a 20-30 minute session. Kids younger than that – roughly ages 4 to 5 – typically do better with an in-person teacher who can physically guide hand position and keep them engaged face to face.

    Here’s the breakdown I actually use when a parent asks me where to start:

    • Ages 4-5: In-person is usually easier. Their attention is short, and a screen adds a layer of distance that makes it harder to correct a slouched wrist or a curled thumb in real time.
    • Ages 6-8: Online works for most kids, especially with a parent sitting nearby for the first month or two.
    • Ages 9-12: Online works well independently. Kids this age can usually manage the screen, the keyboard, and the instructions on their own.
    • Teens: Online is often their preferred format – no driving, easy to fit around homework and sports.

    I’ll say this plainly: this is based on what I’ve observed teaching hundreds of students, not a hard scientific rule. Every kid is different, and I’ve had 5-year-olds who did beautifully on Zoom because they were used to video calls with grandparents. The guide above is a starting point, not a verdict.

    How do online lessons work for young kids?

    Online piano lessons for young kids, ages 6 to 8, work best when a parent sits within earshot for the first several sessions and the keyboard is positioned so the teacher can see the student’s hands clearly on camera. The teacher talks the child through posture, finger numbers, and note names the same way they would in person, just through a screen.

    A few things that make a real difference at this age:

    • Position the camera to show the full keyboard and the student’s hands, not just their face.
    • Keep the first few lessons short on talk and long on doing – young kids lose focus fast during explanations.
    • Have the parent nearby, not necessarily watching, just available if the child freezes up or the connection drops.

    I had a 7-year-old student, Lily, whose mom sat quietly in the next room for the first six weeks. By week seven, Lily was setting up the keyboard and logging into Zoom herself. That’s typical – the parent’s job shrinks fast once the routine sticks. If your child is younger and still finding focus, our piece on motivating kids to practice has routines that pair well with online lessons.

    Online piano lessons for kids setup with keyboard and tablet for video calls

    What do online piano lessons look like for tweens?

    Online piano lessons for tweens, roughly ages 9 to 12, typically run 30 to 45 minutes and require little to no parent involvement once the first month is over. Kids this age can manage their own camera angle, follow a lesson plan, and take notes on what to practice before the next session.

    This is actually my favorite age range to teach online. Tweens are old enough to self-direct but still eager to please, which means they tend to practice what you ask. A common mistake I see at this stage: parents assume independence means the child needs less structure. It’s the opposite – a clear, written practice plan matters more once a parent stops sitting in on every lesson.

    At Weaver Music, every lesson follows a consistent curriculum covering technique, reading, theory, and repertoire, built around music the student actually wants to play. That structure matters even more online, because there’s no in-person routine (walking into a studio, sitting on a specific bench) to anchor the habit. The lesson plan has to do that work instead.

    Curious whether online lessons would click for your child? Your first 30-minute lesson with Austin is free – no card, no pressure.

    Book your free trial →

    Can teenagers succeed with online piano lessons?

    Teenagers often succeed better with online piano lessons than younger kids do, because they can manage their own schedule, troubleshoot basic tech issues, and prefer the flexibility of not driving to a studio after a full day of school. Online lessons also let a serious teen keep working with the same teacher through a move or a busy sports season.

    Teens tend to want one of two things: a song they’re genuinely excited about, or exam/audition prep for school music programs. Online lessons handle both fine. One of my teenage students, Daniel, kept his weekly Zoom lesson through two cross-country moves in one year – something that simply wouldn’t have worked with an in-person-only setup.

    “I have improved more with Weavers Music than I expected. Austin is patient and encouraging.” – Daniel Brooks

    If a teen is deciding between learning songs they love versus a more traditional path, our guide on classical or pop piano first is a good next read.

    What equipment does my child need?

    A child taking online piano lessons needs a keyboard with at least 61 full-sized keys, a stable internet connection, a device that can run Zoom, and a way to position the camera so the teacher can see both the keys and the student’s hands. A piano is ideal but not required to start.

    Equipment basics by priority:

    1. Keys: 61 keys minimum; 88 full-size keys is better long-term if the budget allows.
    2. Camera position: A laptop propped up or a phone on a small tripod, angled to show the keyboard and hands.
    3. Audio: Built-in laptop speakers are fine for lessons; headphones help if there’s household noise.
    4. Internet: A standard home connection is sufficient for one-on-one video calls – lag is more often a camera placement issue than a bandwidth one.

    Lessons at Weaver Music run live and one-on-one over Zoom, and students local to the Bay Area can also have me come to them in person instead – some families mix the two depending on the week. All ages and levels are welcome, from a first lesson ever to advanced repertoire.

    Camera and tripod set up beside a piano for a remote lesson

    How do I know if online lessons are working?

    Online piano lessons are working for a child if they can play what was assigned the previous week with reasonable accuracy, if they bring questions or progress between sessions, and if they’re not dreading lesson day. Watch for steady small wins rather than dramatic weekly leaps – that’s normal progress, not a red flag.

    Signs to check after the first month:

    • The child can find notes and fingerings without constant re-explaining.
    • They remember what to practice without being reminded every single day.
    • They show you something, unprompted, that they learned or figured out.

    If none of that is happening after six to eight weeks, it’s worth a direct conversation with the teacher before assuming online lessons as a format are the problem. In my experience, the fix is almost always logistics – camera angle, lesson length, or practice routine – not the format itself.

    “Austin explains everything clearly and makes online piano lessons easy to follow.” – Emily Carter

    Lesson length matters here too: 30 minutes ($60) suits most kids under 9, 45 minutes ($80) fits many tweens, and 60 minutes ($99) works well for older kids or teens tackling more advanced repertoire. Books are the only added cost beyond the lesson itself. If you’re weighing lesson length against progress, our note on finger independence is a useful read for parents of intermediate players.

    Sheet music and headphones on a piano representing steady progress in lessons

    Common questions

    Is it harder for a teacher to correct hand position over video?

    It’s a little harder, but manageable with a good camera angle showing the full keyboard and the student’s hands. I ask parents to angle the device low and slightly to the side rather than straight-on, which makes wrist and finger position just as visible as it would be in person.

    Should my child switch to online lessons if we just moved?

    Yes, often. Online lessons let a child keep the same teacher and curriculum through a move instead of starting over with someone new. Continuity matters more for progress than physical location, especially for kids who’ve already built a rapport with their teacher.

    What if my child gets distracted during online lessons?

    Short attention spans are common early on and usually improve within a few sessions as the routine settles. Moving the keyboard to a quiet room, closing other tabs or apps, and keeping a parent nearby for the first few weeks solves most distraction issues I see.

    Can siblings share one online piano lesson?

    Weaver Music lessons are one-on-one, so siblings each get their own session rather than sharing a slot. This keeps the pace matched to each child’s actual level, which matters a lot between, say, a 7-year-old beginner and a 12-year-old intermediate sibling.

    Do online piano lessons work without owning a real piano?

    Yes, a 61-key keyboard is enough to start and learn the fundamentals. Many of my beginner students start on a basic keyboard and upgrade to a full 88-key piano later, once they know they’re sticking with it and want the extra range and weighted feel.

    How soon will I see if online lessons are a good fit for my child?

    Most parents have a clear sense within three to four lessons. By then you’ll see whether your child engages with the format, remembers practice assignments, and looks forward to lesson day – all stronger indicators than any single first impression.

    Ready to find out for yourself?

    Your first 30-minute lesson with me is completely free – we will evaluate where you are, talk through your goals, and map out your path.
    Book Your Free Trial Lesson

  • How to Motivate a Child to Practice Piano Without Nagging

    How to Motivate a Child to Practice Piano Without Nagging

    The short answer

    The best way to motivate a child to practice piano is to replace reminders with a fixed daily routine, keep sessions short (10-20 minutes for most beginners), let the child choose part of what they play, and praise effort over perfection. Nagging makes practice feel like a chore; structure and small wins make it feel like a habit.

    I’ve watched this play out in hundreds of households over 10+ years of experience teaching piano, and the pattern is consistent. If you want a second set of eyes on your specific situation, a free 30-minute trial lesson is a low-pressure way to get a read on your child’s level and a practice plan that actually fits your family’s schedule.

    Why does nagging about piano practice backfire?

    Nagging backfires because it turns practice into a power struggle instead of a personal habit. Once a child is only sitting at the bench to stop a parent from asking again, the motivation is external and disappears the moment the reminders stop – which is exactly why so many kids quit within the first year.

    I had a student, Lily, age 8, whose mom texted me every week asking how to get her to practice without a fight. We swapped the evening reminder for a sticky note on the piano lid that said “Pick 2: warm-up, song, or game” – no parent involved. Within three weeks, Lily was starting on her own most days. The note removed the parent as the enforcer and made the choice feel like hers.

    • Nagging puts the parent in the role of police officer, not supporter.
    • It teaches the child to resist rather than self-start.
    • It attaches negative emotion to the piano itself, not just the reminder.
    • It rarely changes behavior long-term – most parents report it gets worse, not better, after a few months.

    How long should a child practice piano each day?

    Most beginners age 5-9 do best with 10-15 minutes a day, and kids age 10 and up can usually handle 20-30 minutes once they have a few months of lessons behind them. Short, daily, and consistent beats long and sporadic almost every time I’ve tested it with students.

    I ask younger students to set a kitchen timer for 10 minutes rather than aiming for a certain number of pages or songs. This removes the moving target that makes practice feel endless to a 6-year-old. Once the timer goes off, they can stop – and most kids keep going anyway because the pressure is gone.

    1. Ages 5-7: 10 minutes, broken into two 5-minute chunks if needed.
    2. Ages 8-10: 15-20 minutes, one sitting.
    3. Ages 11+: 20-30 minutes, often split between technique and repertoire.

    A metronome app clicking quietly in the background can also help a distractible child stay anchored to the task instead of drifting off mid-song.

    Timer and metronome used to motivate a child to practice piano in short sessions

    How do I build a practice routine my child will actually follow?

    A practice routine that sticks is tied to an existing daily anchor – right after breakfast, right after homework, or right before screen time – at the same time every day, not “whenever there’s time.” Vague intentions like “sometime after dinner” are the single most common reason I see practice routines collapse within a month.

    I tell parents to treat piano practice like brushing teeth: same slot, no negotiation about whether it happens, only flexibility in exactly when within that window. One family I work with ties practice to right after the dog gets walked – it’s unrelated to piano, but it’s rock-solid every single day, so the habit attached itself easily.

    • Pick a time slot that already happens reliably every day.
    • Keep the piano visible and accessible – not covered in laundry or shoved in a corner.
    • Use a visual practice log or checklist the child marks themselves.
    • Let the child start the timer or app, not the parent.

    If you’re not sure your child’s practice routine matches what they’re actually working on in lessons, that’s an easy thing to fix together. Your first 30-minute lesson with Austin is free – no card, no pressure.

    Book your free trial →

    Should I reward my child for practicing piano?

    Small, occasional rewards can help kickstart a new habit, but they should fade out once practice becomes routine, since relying on prizes long-term teaches a child to play for the reward instead of for the music. I use rewards sparingly and always pair them with specific praise about what the child did well.

    A sticker chart for the first month of a new habit is fine. What I avoid is cash or screen-time bribes tied to every single session, because kids quickly start negotiating the price instead of sitting down to play. Praise that names something specific – “that left-hand part was smoother today” – does more for long-term motivation than any prize.

    “My confidence at the piano has grown so much since starting lessons.” – Mia Reynolds

    Letting a child choose a fun song alongside their assigned repertoire works better than material rewards. Pairing technique work with something they picked themselves – maybe a pop tune after reading about classical versus pop as a starting point – keeps practice feeling like their project, not an assignment handed down.

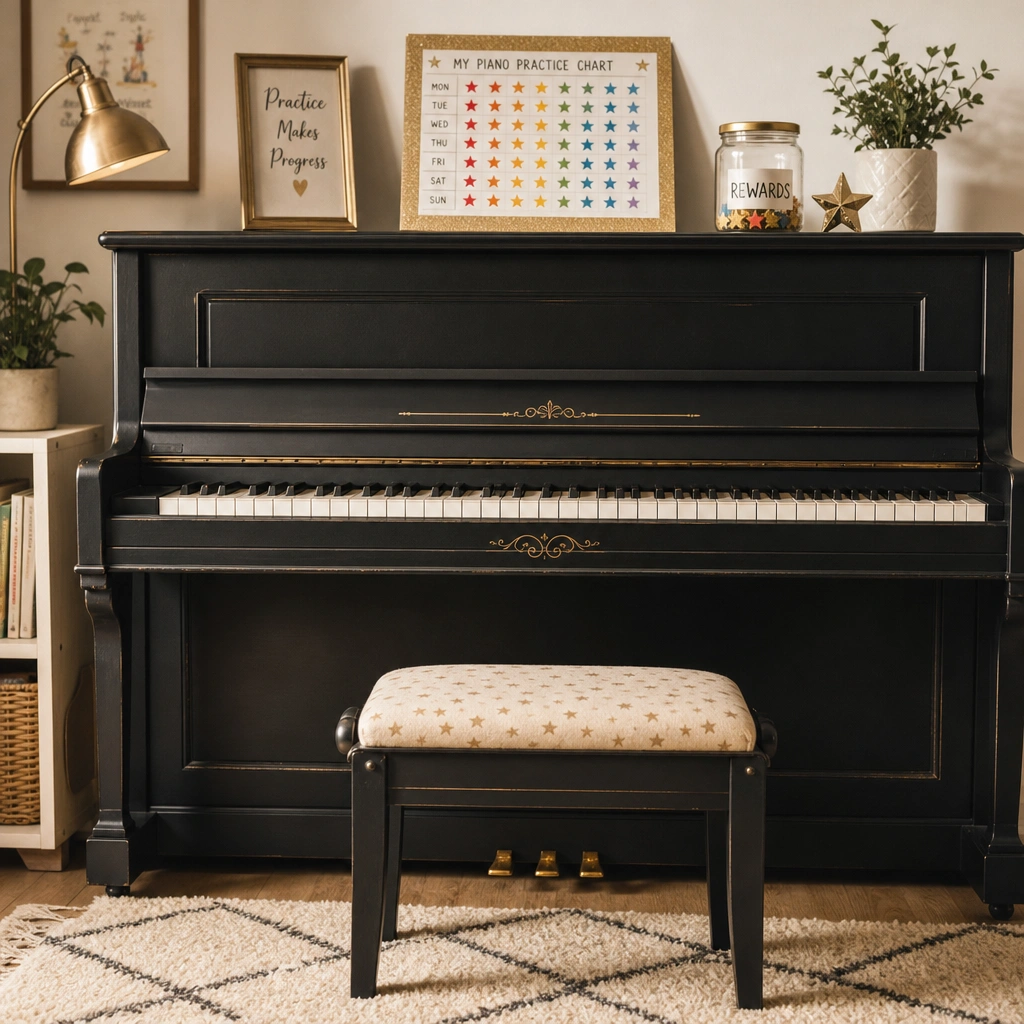
    Sticker chart and empty piano bench symbolizing rewards for piano practice motivation

    What should I do if my child wants to quit piano?

    When a child wants to quit piano, pause before agreeing or arguing and find out why first – boredom, frustration with a specific skill, or a scheduling conflict each need a different fix, and most “I want to quit” moments pass within two to three weeks once the real problem is addressed.

    In my experience, the quitting urge usually spikes around month three or four, right when the beginner novelty wears off and the material gets slightly harder. I’ve talked several families through this exact slump by temporarily lowering the bar – shorter sessions, easier songs, more games – for two weeks, then building back up. Almost every time, the urge to quit fades once the frustration does.

    • Ask what specifically feels hard or boring, not just “do you want to quit.”
    • Check if the current songs match their interests – a mismatch with repertoire is a common, fixable cause.
    • Consider whether the lesson format fits – some kids do better in person, others thrive over Zoom.
    • Give it two to three weeks of a lighter load before making a final decision.

    If the struggle seems tied to the teacher relationship rather than the instrument itself, it’s worth knowing that’s a solvable problem too, not a sign to abandon piano altogether.

    Common questions

    At what age should a child start piano lessons?

    Most children are ready for structured piano lessons between ages 5 and 7, once they can sit still for 15-20 minutes and recognize basic letters and numbers. Some kids start successfully at 4 with a playful, game-based approach, while others do better waiting until 7 or 8.

    Is it normal for kids to resist practicing even if they like piano?

    Yes, this is extremely common and doesn’t mean a child dislikes piano. Most kids resist practice at some point simply because it requires sitting still and repeating things, which feels less fun than free play – routine and short sessions usually resolve this within a few weeks.

    How do I know if my child is actually practicing correctly at home?

    Watch or listen for a few minutes without correcting – are they repeating the same section when it’s wrong, or just playing straight through and stopping? A short practice log from the teacher with specific tasks, not just “practice 15 minutes,” makes correct practice far easier to check.

    Should I sit with my child during every practice session?

    Not every session, but younger beginners (under age 8) usually benefit from a parent nearby for the first few months to help reset the timer or read instructions. By age 9 or 10, most kids can practice independently if the routine and tasks are clear.

    What if my child only wants to play songs they already know?

    This is normal and usually means new material feels too hard or unrewarding yet. Mix one comfortable, known song into each session alongside one new, slightly challenging piece so practice still feels enjoyable while progress continues.

    Can switching from in-person to online piano lessons help with motivation?

    Sometimes – kids who are shy in person sometimes relax more on Zoom, and the novelty itself can renew interest. Weaver Music offers both live one-on-one Zoom lessons and in-person visits for Bay Area families, so switching formats is possible without switching teachers.

    If you’d like help building a routine that fits your child’s age, attention span, and interests, Austin offers free 30-minute trial lessons with a skill check and a practice plan included – no card required. Lessons run $60 for 30 minutes, $80 for 45 minutes, or $99 for 60 minutes, live over Zoom or in person for Bay Area families, for all ages and levels.

    Ready to find out for yourself?

    Your first 30-minute lesson with me is completely free – we will evaluate where you are, talk through your goals, and map out your path.
    Book Your Free Trial Lesson

  • Is It Too Late to Learn Piano at 30, 40, 50 or 60?

    Is It Too Late to Learn Piano at 30, 40, 50 or 60?

    The short answer

    No, it is not too late to learn piano at 30, 40, 50, or 60. Adult brains absorb finger patterns, reading, and theory more slowly than a child’s, but adults learn more efficiently because they understand structure, stay motivated, and practice with purpose. I have started students in their 60s who played recognizable songs within two months.

    If you want a quick gut check before reading further, Weaver Music offers a free 30-minute trial lesson where I evaluate your hands, your goals, and your realistic timeline – no card required.

    Why do adults think it’s too late to learn piano?

    Adults believe it’s too late because they compare themselves to child prodigies, assume motor skills decline too much to learn an instrument, or remember quitting lessons as a kid and assume that failure predicts the future. None of these assumptions hold up in an actual lesson room.

    • They watched a viral video of a 7-year-old playing Chopin and concluded skill is only possible if you start young.
    • They tried lessons decades ago, hated the rigid method book, and never separated “I quit” from “I can’t.”
    • They assume stiff joints or less free time mean slower progress than it actually does.

    I’ve had students in their 50s apologize before their first lesson, convinced their fingers were “too old.” Within three lessons they’re playing a simple two-hand arrangement and the apology stops.

    Is 30 too old to start learning piano?

    Thirty is not too old to start piano – it’s arguably an ideal age. Your hands are fully developed, you can read instructions and theory without a parent translating, and you likely have enough income to invest in a decent keyboard and consistent lessons without financial strain.

    I taught a 31-year-old software engineer who started with zero musical background. He practiced 20 minutes a day, five days a week, and played a simplified version of “Clair de Lune” by month four. His advantage wasn’t talent – it was consistency and a clear book list from day one.

    At this age, the main risk isn’t ability, it’s scheduling. Thirty-somethings often juggle demanding jobs and young kids, so lessons need to fit real life. One-on-one lessons over Zoom solve a lot of that – no commute, no missed dinner.

    Can you learn piano at 40 or 50 and actually get good?

    Yes, adults at 40 and 50 absolutely learn to play piano well, often faster than people expect because they bring patience and discipline that teenagers rarely have. I’ve taught several 45-to-55-year-olds who went from no reading ability to playing hymns, pop songs, or simple Chopin pieces within a year of steady weekly lessons.

    What changes at this age isn’t capacity, it’s approach. Joint stiffness from years of typing or manual work means warm-ups matter more. I always start these students with a few minutes of slow stretching and scale work before anything technical – it prevents the wrist strain I see when someone skips straight to repertoire.

    Empty piano bench and cardigan suggesting an adult returning to learn piano later in life

    If you’re in your 40s or 50s and wondering whether your hands can still learn new patterns, the only real way to find out is to try one lesson and see. Your first 30-minute lesson with Austin is free – no card, no pressure.

    Book your free trial →

    Is 60 too late to start piano?

    Sixty is not too late to start piano. I’ve taught multiple students in their 60s and early 70s who went from never touching a keyboard to playing simple arrangements of songs they love within three to four months of weekly lessons and short daily practice.

    One student, a retired nurse in her late 60s, started lessons mainly for something to look forward to each week. She wasn’t chasing Beethoven – she wanted to play “Fly Me to the Moon” for her husband. Eight weeks in, she did, slightly slower than the original tempo, hands shaking a little from nerves, and it was genuinely moving to watch.

    “My confidence at the piano has grown so much since starting lessons.” – Mia Reynolds

    Realistic expectations matter most at this age. Progress is steady, not instant, and some students benefit from shorter, more frequent practice sessions – 10 minutes twice a day instead of one 20-minute block – to avoid hand fatigue.

    What actually slows adult beginners down?

    Adult beginners are slowed down far more by inconsistent practice and perfectionism than by age itself. The students who plateau aren’t the oldest ones – they’re the ones who practice erratically, skip fundamentals, or quit the moment a piece sounds imperfect.

    • Skipping technique basics. Jumping straight to a favorite song without learning hand position leads to tension and bad habits that take months to unlearn.
    • All-or-nothing practice. Twenty minutes a day beats a rushed two-hour session once a week, every time.
    • Fear of sounding bad. Adults judge themselves harder than kids do, and that self-judgment slows the repetition needed to actually improve.
    • No structured plan. Bouncing between random YouTube tutorials instead of following a sequence, like the first things worth learning on piano, wastes real time.

    I see the perfectionism issue constantly. A student in his 30s once refused to move past measure four of a piece because it “wasn’t perfect yet.” I had him record himself and listen back – he was shocked how close it already was. Recording yourself is one of the fastest fixes for this.

    How long does it realistically take an adult to play real songs?

    Most adult beginners play a simple two-hand song within six to eight weeks when practicing around 20 minutes a day, five days a week. Recognizable, polished performance-level pieces typically take six months to a year, depending on the song’s difficulty and how consistent practice stays.

    Timelines shift based on goals. Someone who wants to play basic chords and sing along might get there in a month. Someone aiming for an intermediate classical piece, or wanting to understand the circle of fifths and build real theory fluency, is looking at a longer runway – usually a year or more of steady lessons.

    Sheet music and metronome on a piano stand representing steady adult practice progress

    Here’s a rough benchmark I use with new adult students:

    1. Weeks 1-4: Note reading, hand position, first simple pieces with separate hands.
    2. Weeks 5-10: Hands together on simple songs, basic rhythm counting, first scales.
    3. Months 3-6: First full song learned to performance level, basic chord reading.
    4. Months 6-12: Intermediate repertoire, more music theory, playing by ear begins to develop.

    Every lesson at Weaver Music follows a curriculum covering technique, reading, theory, and repertoire built around what you actually want to play – whether that’s scales and classical pieces or pop songs you already love. Lessons run $60 for 30 minutes, $80 for 45 minutes, or $99 for a full hour, live and one-on-one over Zoom, or in person if you’re in the Bay Area.

    Adult seated at piano from behind in a warm studio, illustrating starting lessons later in life

    “I started as a complete beginner, and Austin made the learning process feel comfortable.” – Noah Peterson

    Common questions

    Is there an age where it actually becomes too late to learn piano?

    No specific age makes learning piano impossible. Physical limitations from certain conditions can require adapted technique, but healthy adults in their 70s and 80s still learn to play. Motivation and consistent practice matter far more than the number on your birthday.

    Do older adults learn piano differently than younger adults?

    Older adults often need more warm-up time for joint flexibility and may benefit from shorter, more frequent practice sessions rather than long single sessions. Mentally, older adults frequently grasp music theory faster because they’re comfortable with structured, patient learning.

    Should I buy a piano before starting lessons as an adult?

    A full piano isn’t necessary to start. A weighted 61- or 88-key keyboard works fine for the first months of lessons, and I help new students figure out exactly what they need during the free trial lesson before they spend any money.

    Is it harder to learn piano as an adult than as a child?

    Children often pick up listening skills faster, but adults learn reading, theory, and structured practice more efficiently because they already understand how to study. Overall learning speed between focused adults and children is closer than most people assume.

    Can adult beginners learn to play by ear instead of reading music?

    Yes, adult beginners can learn by ear, though combining ear training with basic reading gives the most flexibility long-term. Many adult students start with songs they already know, which makes playing by ear and improvising feel natural much sooner.

    What if I quit piano lessons once already as an adult?

    Quitting before doesn’t predict quitting again. Most adults who quit did so because of a rigid teaching style or an unrealistic practice schedule, not lack of ability. A different teaching approach and a free trial lesson often changes the outcome entirely.

    Ready to find out for yourself?

    Your first 30-minute lesson with me is completely free – we will evaluate where you are, talk through your goals, and map out your path.
    Book Your Free Trial Lesson

  • What Do Italian Tempo Markings Mean in Piano Music?

    What Do Italian Tempo Markings Mean in Piano Music?

    The short answer

    Italian tempo markings are words printed at the start of a piece of piano music that tell you how fast or slow to play, ranging from Largo (very slow, around 40-60 beats per minute) to Presto (very fast, around 168-200 beats per minute). Composers settled on Italian terms in the 1600s, and the tradition stuck worldwide. If you want a teacher to walk you through reading them in real time, Austin offers a free 30-minute trial lesson where tempo and rhythm basics are usually the first thing covered.

    I still remember a student, a retired engineer named Gary, who brought in a Chopin nocturne marked “Andante” and played it so slowly it nearly stopped moving. He had assumed slower always meant more expressive. Once he understood Andante actually means “at a walking pace,” the piece came alive. That mix-up is incredibly common, and it’s exactly why these terms deserve a plain explanation instead of a vague feeling.

    Why are tempo markings written in Italian instead of English?

    Italian tempo markings exist because Italy led the development of modern music notation during the Baroque era, and composers across Europe adopted Italian terms as a shared musical vocabulary. By the 1600s and 1700s, Italian was simply the professional language of music, the same way English is the professional language of aviation today.

    Even composers who didn’t speak Italian kept using Italian terms because musicians everywhere already understood them. This became a practical standard rather than a stylistic choice. A German, French, or English composer in 1750 wrote “Allegro” at the top of a score knowing that a performer in Vienna, Paris, or London would read it the same way.

    That convention has barely changed. Walk into any conservatory in 2026 and you’ll still see Italian tempo markings on nearly everything from Bach to contemporary film scores, though some modern composers now write tempo instructions in their own language alongside a metronome number for extra clarity.

    What are the most common Italian tempo markings and what do they mean?

    The most common Italian tempo markings, from slowest to fastest, are Largo, Adagio, Andante, Moderato, Allegro, Vivace, and Presto, each describing a general speed and feel rather than an exact number. Beginner method books usually introduce these in roughly this order as pieces get more advanced.

    • Largo – very slow and broad, often used for solemn or spacious pieces
    • Adagio – slow and leisurely, literally “at ease”
    • Andante – at a walking pace, unhurried but moving forward
    • Moderato – moderate speed, neither slow nor fast
    • Allegro – fast, lively, and bright
    • Vivace – lively and brisk, faster and more energetic than Allegro
    • Presto – very fast

    Most beginner and early-intermediate repertoire sticks to Andante, Moderato, and Allegro. I rarely see true Presto markings until a student is several years in, simply because the physical coordination required to play that fast accurately takes time to build. That’s one more reason rushing tempo too early tends to cause more harm than good – it’s worth pairing this with solid rhythm counting habits before chasing speed.

    Sheet music on a stand showing Italian tempo markings printed above the staff

    What BPM number does each tempo marking actually correspond to?

    Each Italian tempo marking corresponds to a general range of beats per minute rather than one fixed number, because tempo markings describe a character as much as a speed. A metronome gives you the precise range; the marking gives you the feeling within it.

    Here are the ranges I give students as a working reference:

    • Largo: 40-60 BPM
    • Adagio: 66-76 BPM
    • Andante: 76-108 BPM
    • Moderato: 108-120 BPM
    • Allegro: 120-156 BPM
    • Vivace: 156-176 BPM
    • Presto: 168-200 BPM

    Notice the overlap between Allegro and Vivace, and between Vivace and Presto – these aren’t strict boundaries. Two professional recordings of the same “Allegro” piece can differ by 20 BPM and both be perfectly valid interpretations. This is one area where real notation can feel looser than people expect; for more on how notation itself is structured, Wikipedia’s overview of tempo is a solid plain-language reference.

    If reading tempo markings and counting rhythm still feels like guesswork on your own sheet music, a second set of ears helps more than another app. Your first 30-minute lesson with Austin is free – no card, no pressure.

    Book your free trial →

    What do words like “poco,” “molto,” and “non troppo” add to a tempo marking?

    Modifier words attached to Italian tempo markings fine-tune the speed or mood without changing the core instruction, the way “slightly” or “very” modifies an English adjective. “Allegro ma non troppo” means fast, but not too fast – a direct caution against overdoing it.

    Common modifiers you’ll run into:

    • Poco – a little (poco allegro = a little fast)
    • Molto – very (molto adagio = very slow)
    • Non troppo – not too much
    • Assai – very, extremely
    • Meno – less (meno mosso = less motion)
    • Più – more (più mosso = more motion)

    You’ll also see tempo change markings mid-piece, like ritardando (gradually slowing) or accelerando (gradually speeding up). These aren’t fixed tempos at all – they’re instructions to move away from the current tempo smoothly. I tell students to think of these as a dimmer switch rather than an on/off switch; the change should feel gradual, not sudden. A student of mine, a teenager named Priya, used to hit a ritardando and slam the brakes all at once. We fixed it by having her silently count the gradual slowdown over four full beats before playing it, and it instantly sounded more musical.

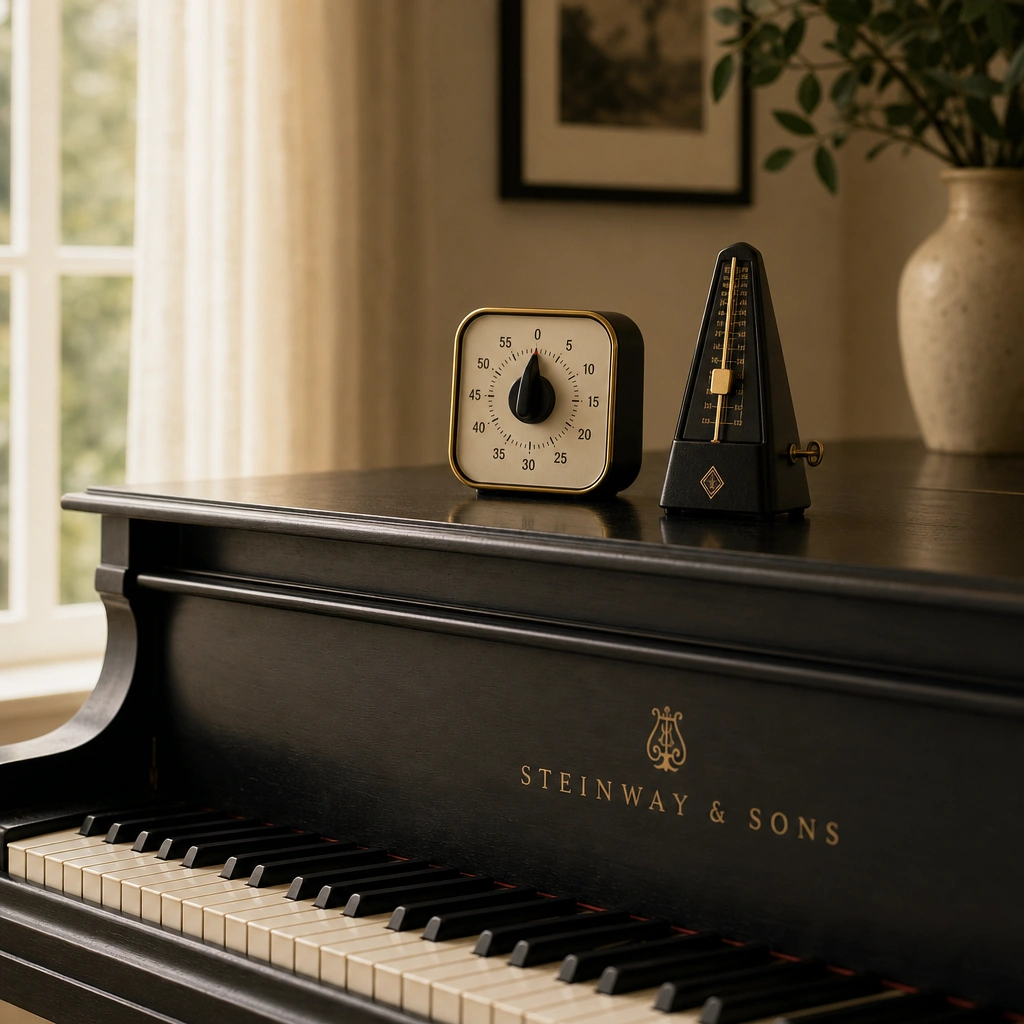
    Mechanical metronome on a piano bench representing tempo and beats per minute

    How can a beginner actually memorize these terms?

    Beginners memorize Italian tempo markings fastest by sorting them into three simple speed groups first – slow, medium, fast – before worrying about exact BPM numbers or rare terms. Trying to memorize all seven-plus markings with precise ranges on day one usually backfires.

    A few things that genuinely help:

    1. Group terms by speed category before learning exact BPM numbers
    2. Say the word out loud every time you see it in your music, not just read it silently
    3. Set a metronome to the marked tempo and physically feel the difference between Andante and Allegro
    4. Keep a small running list in your practice notebook of every new term you encounter
    5. Connect each term to a piece you already know well, as an anchor

    This pairs naturally with learning to count rhythm accurately and getting comfortable with a metronome, since tempo markings are meaningless without a steady internal pulse to measure them against. It also connects to broader reading fluency – once you’re comfortable with tempo words, the rest of early music reading tends to click faster too.

    “Austin explains everything clearly and makes online piano lessons easy to follow.” – Emily Carter

    At Weaver Music, these terms come up naturally within the first few weeks of the curriculum, folded into real repertoire rather than taught as a vocabulary list to memorize in isolation. Lessons run live, one-on-one, over Zoom anywhere in the world, or in person for students local to the Bay Area. A 60-minute Standard lesson is $99 ($60 for 30 minutes, $80 for 45 minutes), and every new student starts with a free 30-minute trial lesson including a skill check and a plan with a book list.

    Student seated at a piano from behind in a warm, cozy studio setting

    Common questions

    Is Moderato faster or slower than Andante?

    Moderato is faster than Andante. Andante sits around 76-108 BPM and feels like a relaxed walking pace, while Moderato runs about 108-120 BPM, a moderate, comfortable speed that’s quicker but still unhurried.

    What does “Allegretto” mean compared to “Allegro”?

    Allegretto means moderately fast, a notch slower and lighter than Allegro. Think of it as “a little bit Allegro” – cheerful and brisk but without the full energy or drive of a true Allegro marking.

    Do all pianists play the same tempo marking at the exact same speed?

    No. Tempo markings give a range and a character, not one fixed number, so interpretation varies. Two pianists can both play an authentic “Allegro” and differ by 15-20 BPM while still being musically correct.

    Why do some pieces have a metronome number next to the Italian word?

    Composers sometimes add a precise metronome marking, like “Allegro (quarter note = 132),” to remove ambiguity and specify an exact intended speed, especially in pieces from the 19th century onward when metronomes became widely available.

    Are Italian tempo markings still used in modern sheet music?

    Yes. As of 2026, Italian terms remain the standard across classical, film, and most printed sheet music worldwide, though many modern composers now pair them with an English description or exact BPM for extra clarity.

    What’s the difference between a tempo marking and a dynamic marking?

    A tempo marking tells you how fast to play, like Allegro or Adagio. A dynamic marking tells you how loud or soft to play, like forte or piano. They’re both written in Italian but control completely different aspects of the performance.

    Ready to find out for yourself?

    Your first 30-minute lesson with me is completely free – we will evaluate where you are, talk through your goals, and map out your path.
    Book Your Free Trial Lesson

  • What Are the Easiest Christmas Songs to Play on Piano?

    What Are the Easiest Christmas Songs to Play on Piano?

    The short answer

    The easiest Christmas songs on piano are “Jingle Bells,” “Hot Cross Buns”-style carols like “Mary Had a Little Lamb” adapted to “Jolly Old St. Nicholas,” “Ode to Joy” (used for many carol arrangements), and “We Wish You a Merry Christmas” in simplified form. All use five-finger hand positions, repetitive patterns, and mostly stepwise melodies that beginners can learn within one to two weeks.

    Every December I get the same message from students: “Can I learn a Christmas song for the holiday party?” The good news is that several beloved carols were written (or have been arranged) with simple, singable melodies that sit comfortably under five fingers. If you want a teacher to walk you through one of these note by note, book a free 30-minute trial lesson and we’ll pick one that fits your hands and your timeline.

    What makes a Christmas song easy on piano?

    An easy Christmas song on piano stays in one hand position, moves mostly by step (not big jumps), repeats the same rhythm pattern throughout, and uses a simple left-hand part like single bass notes or a basic chord. Songs that meet all four conditions can usually be learned in a handful of practice sessions.

    I look at four things before I recommend a carol to a new student:

    • Hand position: does the right hand stay in one five-finger spot, or does it require shifting up and down the keyboard?
    • Melodic motion: stepwise melodies (do-re-mi-fa-sol) are far easier than melodies with big leaps.
    • Rhythm: songs built from quarter notes and half notes are simpler than anything with dotted rhythms or syncopation. If rhythm notation trips you up, a quick refresher on counting rhythm at the piano helps a lot.
    • Left hand: a single held note or simple broken chord is much friendlier than a full chord progression.

    “Jingle Bells” checks every box in its basic form, which is exactly why it’s the first Christmas song I teach almost every beginner, kid or adult.

    Which Christmas songs can a total beginner play?

    A total beginner, meaning someone with zero to a few weeks of piano experience, can realistically play “Jingle Bells” (simplified), “Jolly Old St. Nicholas,” “Ode to Joy,” and “Up on the Housetop” within their first month. All four stay in a single five-finger hand position and use only quarter and half notes.

    Here is how I’d rank them from easiest to slightly harder:

    1. “Jingle Bells” (simplified): the right-hand melody uses only three notes (E-D-C) for most of the chorus. I’ve had six-year-olds play this confidently in their second lesson.
    2. “Jolly Old St. Nicholas”: entirely stepwise, five-finger position, no accidentals.
    3. “Ode to Joy”: not technically a Christmas song, but it’s arranged as a carol in many beginner books and is one of the most forgiving melodies in the beginner repertoire.
    4. “Up on the Housetop”: slightly more rhythmic variety but still stepwise and in one hand position.

    One of my adult students, a man in his 50s who’d never touched a piano, learned “Jingle Bells” well enough to play for his grandkids after four lessons spread over three weeks, about 15 minutes of practice most days. That’s a realistic timeline, not a best-case one.

    Keyboard decorated for the holidays, set up for practicing easy christmas songs on piano

    What Christmas songs work for someone with a few months of lessons?

    Someone with three to six months of lessons can usually handle “We Wish You a Merry Christmas,” “Deck the Halls,” “O Come All Ye Faithful” (simplified), and “Silent Night” with a basic left-hand chord accompaniment instead of single notes. These add hand independence and a bit more rhythmic variety.

    At this stage, students are usually comfortable with:

    • Playing a melody in the right hand while the left hand holds simple block chords (C, F, G)
    • Reading eighth notes and dotted quarter notes
    • Moving the hand out of a strict five-finger position for a note or two

    “Silent Night” is deceptively tricky for true beginners because of its 3/4 waltz time and the dotted rhythms in the melody, but once a student has a few months of counting practice under their belt, it becomes one of the most rewarding carols to play. I usually introduce it right after a student has gotten solid with basic chord shapes.

    If you’re picturing yourself playing a favorite carol by the fireplace this year, the fastest way to find out how close you are is a quick evaluation. Your first 30-minute lesson with Austin is free – no card, no pressure.

    Book your free trial →

    How do I simplify a Christmas song that looks too hard?

    A song can be simplified by dropping the left-hand part down to single root notes, removing chords above a basic triad, slowing the tempo by half, and playing only the melody for the first week before adding accompaniment. These four changes turn almost any intermediate carol into a beginner-friendly version.

    A mistake I see constantly: a student finds the “real” sheet music for a song like “O Holy Night” online, gets overwhelmed by the full chords and octave jumps, and gives up after one sitting. My fix is always the same – strip it down. Play right-hand melody alone for a few days, add one bass note per measure, then slowly build the left hand back up. This is also something I do in lessons: I’ll take whatever carol a student has their heart set on, write a simplified arrangement at their actual level, and then rewrite it harder over the following weeks as they improve, so the song grows with them instead of staying out of reach.

    If you’re also deciding whether to start with simpler pop-style arrangements or classical-style melodies in general, this comparison of starting with classical or pop piano first is a useful companion read.

    Simplified holiday sheet music on a stand next to a piano

    How long does it take to learn a Christmas song?

    Most beginners can learn a simplified one-page Christmas song in 7 to 14 days of practicing 15-20 minutes daily. A student with a few months of experience can usually learn a moderately arranged carol, chords and all, in about one to two weeks of the same daily practice.

    Three things speed this up more than anything else:

    • Practicing hands separately before combining them
    • Using a slow, steady tempo from day one rather than rushing
    • Repeating short four-measure sections instead of playing the whole song start to finish every time

    According to a Wikipedia overview of deliberate practice research, short, focused repetitions with specific goals produce faster skill gains than long unfocused sessions – which matches exactly what I see with students cramming a carol before a holiday gathering.

    “I started as a complete beginner, and Austin made the learning process feel comfortable.” – Noah Peterson

    Noah’s experience is typical – the students who feel most comfortable are the ones who start with a song genuinely matched to their level, not one picked because it’s a favorite on the radio.

    Student seated at a piano in a warm studio during the holiday season

    Common questions

    What is the single easiest Christmas song for a total beginner to start with?

    “Jingle Bells” is the easiest starting point for most beginners because its chorus melody uses only three notes (E, D, and C) in a row, stays in one hand position, and has a rhythm most people already know by heart from hearing it every year.

    Do I need to know how to read sheet music to play Christmas songs?

    No, many beginner Christmas song arrangements are available in letter-note format or simplified lead sheets that don’t require traditional notation. That said, learning basic note reading opens up far more arrangements and makes future songs easier to pick up on your own.

    Can kids learn Christmas songs on piano before they can read music?

    Yes, young children often learn Christmas songs by ear or with color-coded or letter-labeled sheets before formal reading skills develop. I regularly teach five- and six-year-olds “Jingle Bells” using finger numbers alone, with note reading introduced afterward.

    What key are most easy Christmas songs written in?

    Most beginner Christmas arrangements are in C major or G major because both keys use mostly white keys and simple five-finger hand positions, which keeps the sheet music approachable for new players.

    Is it better to learn Christmas songs by ear or from sheet music?

    Both work, and the better choice depends on the learner. Reading sheet music builds a transferable skill for future songs, while learning by ear can feel faster and more intuitive, especially for very familiar tunes like carols most people already know by heart.

    How many Christmas songs should a beginner try to learn in one season?

    One or two well-practiced songs beat five rushed ones. I usually recommend beginners pick a single carol, get it solid enough to play without stopping, and then add a second song only if there’s time left before the holidays.

    If your child (or you) wants to walk into a holiday gathering and actually play something recognizable, a short lesson now can make that realistic. Weaver Music offers live, one-on-one lessons over Zoom worldwide, or in person if you’re local to the Bay Area, for all ages and levels – lessons run $60 for 30 minutes, $80 for 45 minutes, and $99 for a full hour. For a broader foundation before diving into repertoire, it also helps to review the first things to learn on piano.

    Ready to find out for yourself?

    Your first 30-minute lesson with me is completely free – we will evaluate where you are, talk through your goals, and map out your path.
    Book Your Free Trial Lesson

  • Why Learn Piano Scales? What They Actually Do For You

    Why Learn Piano Scales? What They Actually Do For You

    The short answer

    Piano scales matter because they train your fingers, ears, and eyes all at once: they build the hand coordination needed for fast, even playing, they teach you the key signatures that explain most written music, and they train your ear to recognize patterns instantly, which makes sight-reading and improvising much faster to learn.

    I tell every new student the same thing in their free trial lesson: scales are not busywork, they are the shortcut. A student who drills a G major scale for two weeks will read a piece in G major noticeably faster than one who hasn’t, because their fingers already know where the black key goes.

    What do scales actually train?

    Scales train three things simultaneously: physical technique (even finger strength and smooth thumb crossings), music theory (key signatures, sharps and flats, and how melodies are built), and ear training (recognizing whether a note sounds “right” in a key). Few other exercises cover all three at once this efficiently.

    Here’s what I actually watch for when a student plays a scale in a lesson:

    • Evenness – are all eight notes the same volume and length, or does the thumb bang louder on the crossing?
    • Fingering – standard fingerings exist because they prevent awkward stretches later in real pieces.
    • Tempo control – can they speed up without falling apart, using a metronome?
    • Hand shape – relaxed wrist, curved fingers, no tension creeping into the forearm.

    I had a student, Daniel, who could play his assigned songs beautifully but froze the moment a piece modulated to a new key. Two months of daily scale practice later, he could feel a key change coming before he even read the key signature – his hands just knew the pattern. That’s the theory piece of scales working in real time, not from a textbook. If you want the full map of how keys relate to each other, our circle of fifths guide pairs well with scale practice.

    Piano keyboard and metronome illustrating why learn piano scales for technique

    Do you really need scales to play songs?

    Scales are not strictly required to play a specific song, but they dramatically shorten the time it takes to learn new songs overall. A student who knows their major scales recognizes scale-based runs in sheet music instantly instead of decoding each note one at a time.

    Think of it this way: a C major scale run buried in a pop song is just the scale you already practiced, rearranged. Students who skip scales tend to treat every new piece as a brand-new puzzle. Students who know their scales treat most new pieces as familiar patterns with a few surprises. That difference compounds over months and years of playing.

    This is also where scales connect directly to hand coordination. If your fingers trip over each other during scales, they will trip over each other in songs too – the fix is usually the same drills either way. Our guide on finger independence digs deeper into that connection.

    If scales feel like a mystery you’re practicing blind, a few minutes with a teacher can clear it up fast. Your first 30-minute lesson with Austin is free – no card, no pressure.

    Book your free trial →

    How much time should scales take in practice?

    Most students should spend 5 to 10 minutes on scales per practice session, which is roughly 15-25% of a typical 30-45 minute session. Beginners benefit from daily repetition at a slow, even tempo; intermediate players can rotate through scales across the week instead of drilling all of them every day.

    A realistic breakdown for a 30-minute practice session:

    1. 5 minutes: scales and technique warm-up
    2. 5 minutes: a focused exercise, like Hanon patterns
    3. 15 minutes: current repertoire
    4. 5 minutes: review of something already learned

    I’ve seen two common mistakes with timing. The first is students who skip scales entirely because they’re “boring” and then plateau on technique for months. The second, more common one, is students who spend 20 minutes on scales and leave no time for actual music – that’s just as unproductive. Scales should feel like a warm-up, not the whole workout. A metronome keeps this honest; without one, most people unconsciously speed up the easy parts and slow down the hard ones.

    Practice space with metronome and sheet music for piano scale practice

    What order should you learn scales in?

    Most teachers, myself included, start students with C major because it has no sharps or flats, then move to G major and F major, which each add just one accidental. From there, students progress around the circle of fifths, adding one sharp or flat at a time until all 12 major scales are covered.

    A typical first-year sequence looks like this:

    • C major, G major, F major (the easiest three)
    • D major, B-flat major (two accidentals each)
    • A major, E-flat major (three accidentals each)
    • Remaining majors, then natural minor scales once majors feel solid

    Minor scales usually come second because students need the major scale fingerings locked in first – the patterns share a lot of overlap, and introducing both at once tends to confuse beginners more than it helps. If you’re just starting out and not sure what belongs in week one versus month three, our first things to learn on piano guide lays out a broader roadmap.

    Can you skip scales and still get good?

    Skipping scales entirely is possible, especially for players who learn purely by ear, but it usually shows up later as shaky technique, slower sight-reading, and more time spent decoding what key a song is in. Scales aren’t the only way to build these skills, but they’re the fastest, most direct one.

    I’ve taught plenty of adult students who came to me after years of playing by ear with no formal scale work. They could often play beautifully, but asked to transpose a song up a step, or sight-read something new, they’d struggle in ways a scale-trained player wouldn’t. It’s not that ear-based players are worse musicians – it’s that scales fill a specific, narrow gap efficiently: muscle memory tied directly to music theory.

    “I started as a complete beginner, and Austin made the learning process feel comfortable.” – Noah Peterson

    According to the Wikipedia entry on musical scales, scales have formed the backbone of Western music pedagogy for centuries precisely because they distill pitch relationships into a repeatable, learnable pattern. That’s not a trend – it’s just how the physical and theoretical sides of music happen to line up.

    Student seated at the piano practicing scales from behind, hands out of frame

    Common questions

    Do scales help with sight-reading?

    Yes. Scales train your eyes and fingers to recognize stepwise note patterns instantly, so when sheet music shows a run of notes moving up or down a scale, you read it as one shape instead of six separate notes, which speeds up sight-reading significantly.

    Should kids learn scales before songs?

    Not necessarily first, but alongside songs. Most kids stay motivated by learning a simple song in their first few lessons, with basic five-finger scale patterns introduced in parallel once they’re comfortable finding notes and reading simple rhythms.

    How long does it take to learn all 12 major scales?

    With consistent practice of one new scale every two to three weeks, most students learn all 12 major scales within 6 to 9 months. Minor scales typically take another 4 to 6 months after that, depending on practice frequency.

    Are scales useful for improvising?

    Very useful. Scales are the raw material improvisers draw from – knowing a scale cold means your fingers can explore a key without you having to think about which notes are safe to play. Our improvisation guide builds directly on scale knowledge.

    Do scales cause hand tension or pain?

    Scales themselves shouldn’t cause pain if played with a relaxed hand and proper fingering, but rushing tempo before technique is solid often does. If you notice tightness, slow down and check your wrist position – our piano hand tension guide covers common fixes.

    Can adults learn scales as easily as kids?

    Adults often learn the theory behind scales faster than kids since they grasp key signatures conceptually right away, but the physical muscle memory can take a bit longer to build. Either way, consistent short daily practice gets there – age is rarely the limiting factor.

    Scales are one of those things that feel pointless for the first few weeks and then suddenly click – a student will play a new song and realize their hand already “knows” the shape because of scale practice. That moment of recognition is worth the repetition. Whether you practice over Zoom from anywhere or in person around the Bay Area, scales fit into every lesson plan at Weaver Music, from absolute beginners to advanced students polishing repertoire.

    Ready to find out for yourself?

    Your first 30-minute lesson with me is completely free – we will evaluate where you are, talk through your goals, and map out your path.
    Book Your Free Trial Lesson

  • Should You Learn Classical or Pop Songs First on Piano?

    Should You Learn Classical or Pop Songs First on Piano?

    The short answer

    Classical or pop piano first depends on your goal: classical method books build reading and technique fastest, while pop songs build motivation fastest. Most of my students do best starting with a classical-leaning method book but learning one simple pop song within the first month to stay excited about practicing.

    I say this after watching hundreds of students start from zero. Austin here, and I run a free 30-minute trial lesson for exactly this reason – I want to hear what a student actually wants to play before I hand them a method book, because the “right” answer changes person to person.

    Why does classical-first work for many beginners?

    Classical method books work well first because they introduce reading, hand position, and technique in a carefully graded sequence. Books like Faber’s Piano Adventures or Alfred’s Basic Piano build skills in an order that prevents bad habits, whereas pop sheet music often assumes skills a true beginner doesn’t have yet.

    Here’s what I mean in practice. A classical method book typically starts with five-finger patterns in one position, adds one new concept per page, and reinforces it across three or four short pieces before moving on. That repetition is boring to some adults, but it’s exactly why kids who stick with it read fluently by book three.

    I had a nine-year-old student, Lily, who wanted to skip straight to a pop song her older sister played. We compromised: she worked through Faber Level 1 for technique and sight-reading, and I arranged a simplified version of her favorite song as a side piece. She stayed motivated because she had both – structure and something recognizable.

    • Classical method books teach correct finger numbering and hand shape from page one.
    • They introduce rhythm notation gradually, so you’re not sight-reading syncopation on day three.
    • They use mostly two-hand independence exercises, which pop arrangements for beginners often skip or oversimplify with block chords only.

    If you want a deeper look at what a true beginner should tackle in week one regardless of genre, I wrote a full breakdown of the first things to learn on piano.

    Classical piano method book on a stand illustrating the classical or pop piano first approach

    When is starting with pop songs the better choice?

    Starting with pop songs is the better choice when motivation, not technique, is your biggest obstacle. Adult learners who return to piano after years away, or teens who only practice when they’re excited, often quit a classical method book within six weeks but will happily practice a pop song for months.

    I see this constantly with adult beginners. They sign up wanting to play one specific song – a wedding first dance, a favorite ballad, something from a show. If I hand them Hanon exercises in week one, half of them don’t come back. If I hand them a simplified arrangement of the song they love, even with just two or three chords, they practice daily because they’re emotionally invested.

    Pop-first also works because modern pop and film-score arrangements for beginners are genuinely easier than they used to be. Publishers now release “easy piano” versions with simplified left-hand patterns, which didn’t really exist in the same quantity twenty years ago.

    • Pop songs usually use repeating chord progressions, which teaches pattern recognition quickly.
    • A single familiar song can carry a beginner through weeks of practice without boredom.
    • Pop arrangements often lean on chord symbols rather than dense notation, which suits students who want to play by ear or by chords rather than read every note.

    The tradeoff is real, though: a student who only ever plays simplified pop arrangements can plateau because they never build the reading fluency or finger independence that classical technique work provides. I’ve had adult students hit a wall around month four for exactly this reason.

    What skills does each approach actually build?

    Classical study builds sight-reading, two-hand independence, dynamics, and precise technique, while pop study builds chord fluency, rhythm feel, and ear training. Neither path is complete on its own – most working pianists, including accompanists and session players, eventually need both skill sets.

    Think of it as two different muscle groups. A classical-trained beginner can usually read a new page of music faster but struggles to improvise over a chord chart. A pop-trained beginner can often play by ear and groove with a rhythm section but gets lost reading a Bach invention cold.

    1. Reading speed: classical method books win here, since they drill note-reading daily from the start.
    2. Rhythm and groove: pop songs win here, because syncopation and backbeat patterns show up immediately.
    3. Technique and hand shape: classical wins, since exercises isolate specific finger movements.
    4. Chord fluency and improvising: pop and lead-sheet work win, teaching you to hear harmony rather than just read it.

    If improvising or playing without sheet music interests you long-term, it’s worth reading about how to improvise on piano – it’s a skill pop-first students tend to pick up faster, almost by accident.

    Not sure which path fits your goals – or your child’s? Your first 30-minute lesson with Austin is free – no card, no pressure.

    Book your free trial →

    Can you mix classical and pop from the start?

    Mixing classical and pop from the start is not only possible, it’s what I do with most students. A typical lesson plan pairs a classical method book for technique and reading with one pop or film song, arranged at the student’s actual level, for motivation and fun.

    This is essentially why I built the Weaver Music curriculum the way I did. Lessons follow the structured method-book path – technique, reading, theory, repertoire – at $60 for 30 minutes, $80 for 45 minutes, or $99 for 60 minutes, with room for a song the student actually wants, arranged at their level.

    Books are the only extra cost. I’ve had students spend six months building foundations before taking on a specific wedding song. Others start on a song from lesson one because it’s the whole reason they signed up.

    “I started as a complete beginner, and Austin made the learning process feel comfortable.” – Noah Peterson

    One pattern I’ve noticed across roughly ten years of lessons: students who mix both genres from week one quit far less often than students locked into just one. Boredom and frustration are the two biggest reasons students stop playing, and a blended approach hedges against both.

    Student seated at piano with pop song sheet music on the stand in a warm studio setting

    How do I decide for my child or myself?

    Deciding between classical or pop first comes down to one honest question: what will keep you practicing most days? A student who practices an “easier” path consistently will always out-progress a student who abandons a “better” path after three weeks.

    For kids, I generally recommend leaning classical-first, because young children benefit from the gradual skill-building and because most elementary-age students don’t yet have a strong enough musical identity to demand one specific song. That said, if your child asks for a particular song by name repeatedly, that’s a signal worth listening to – motivation at that age is fragile and precious.

    For teens and adults, I lean toward starting with at least one pop or personally meaningful song immediately, layered with enough classical technique to avoid bad habits. Adults especially are paying for their own time and tend to disengage fast without a tangible, recognizable goal.

    • If you have zero musical goal beyond “learn piano generally,” start classical.
    • If you have one specific song driving you, start there and add technique work around it.
    • If you’re a parent of a reluctant child, alternate – one classical piece, one fun piece, every few weeks.

    Whichever path you pick, a solid rhythm foundation matters in both genres – if you’re shaky there, it’s worth a look at how to count rhythm on piano before you go much further. According to the Wikipedia overview of music education, balanced early training across repertoire styles is associated with stronger long-term retention of skills, which lines up with what I see in my own studio.

    Metronome and mixed classical and pop sheet music on a piano lid

    Common questions

    Is it harder to switch from pop to classical later, or classical to pop?

    Switching from classical to pop is usually easier. Classical students already read notation and have finger control, so chord-based pop music feels simpler by comparison. Pop-first students sometimes struggle initially with reading dense classical notation, since they never built that habit early on.

    Do I need to learn classical music to play pop well?

    No, you don’t need classical training to play pop well, but basic technique helps. Many skilled pop and session pianists never studied classical repertoire seriously. What matters more is solid hand position, steady rhythm, and enough theory to understand chord progressions.

    What’s a good first pop song for a true beginner?

    Good first pop songs use simple, repeating left-hand chord patterns and limited rhythmic complexity – think simplified arrangements of well-known ballads or film themes. I usually pick something the student already knows by ear, since recognizing the melody speeds up learning dramatically in the first few weeks.

    Will starting with pop songs limit my child long-term?

    Starting with pop songs alone can limit a child’s reading and technique if it’s the only material used. Pairing pop songs with a structured method book avoids this – the pop song keeps them motivated while the method book quietly builds the reading and hand skills they’ll need later.

    How quickly can a beginner learn a recognizable pop song?

    Most beginners practicing 15-20 minutes a day can play a simplified version of a recognizable pop song within 4-6 weeks. More complex arrangements with independent left-hand patterns typically take 2-3 months, depending on prior rhythm skills and how often they practice.

    Can adults who only want to play pop songs skip theory entirely?

    Adults can get by for a while without formal theory, but basic chord and key knowledge speeds everything up. Even a little theory – recognizing major versus minor chords, for example – helps you learn new pop songs faster and troubleshoot your own mistakes without a teacher.

    Whatever you choose, the real decision isn’t permanent – most of my students shift the balance between classical and pop over time as their goals change. If you want help figuring out where to start, book a free trial lesson and we’ll map it out together based on what you actually want to play.

    Ready to find out for yourself?

    Your first 30-minute lesson with me is completely free – we will evaluate where you are, talk through your goals, and map out your path.
    Book Your Free Trial Lesson

  • What Is the Circle of Fifths and Why Does It Matter?

    What Is the Circle of Fifths and Why Does It Matter?

    The short answer

    The circle of fifths is a diagram that arranges all 12 musical keys in a circle, each one a perfect fifth from its neighbor. Pianists use it to quickly find key signatures, understand which chords belong together, and recognize chord progressions by sight instead of guessing. It’s essentially a visual shortcut for how Western music organizes itself.

    I show this chart to almost every student within their first few months, right around the time they start asking why certain chords “just sound right” together. If you’re still working out the first things to learn on piano, this can wait – but once you’re reading notes comfortably, it’s worth a look. A free 30-minute trial lesson is a good place to find out exactly where you are and whether this is the right next step for you.

    How does the circle of fifths work?

    The circle of fifths works by placing C major at the top, then moving clockwise in jumps of a perfect fifth (seven semitones) – G, D, A, E, B, and so on – until it loops back to C. Each step clockwise adds one sharp to the key signature; each step counter-clockwise adds one flat.

    A perfect fifth is just the distance from one note up to the fifth note of its scale – C to G, G to D, D to A. Stack those intervals in order and you get every key that exists, sharps and flats included. The circle isn’t a metaphor or a simplification; it’s a literal map of how key signatures relate mathematically.

    • Clockwise from C: G (1 sharp), D (2 sharps), A (3 sharps), E (4 sharps), B (5 sharps)
    • Counter-clockwise from C: F (1 flat), B♭ (2 flats), E♭ (3 flats), A♭ (4 flats), D♭ (5 flats)
    • At the bottom, sharp keys and flat keys meet and overlap enharmonically, like F♯ and G♭

    For a deeper technical breakdown of the interval math behind this, Wikipedia’s circle of fifths article is a solid reference.

    Why should pianists care about it?

    Pianists should care about the circle of fifths because it turns key signatures and chord relationships from memorized trivia into something you can see and predict. Instead of flipping through a book to check how many sharps are in E major, you glance at the circle and know instantly.

    I had a student, Daniel, who spent weeks trying to memorize key signatures one at a time with flashcards. It wasn’t sticking. The week I drew the circle on a whiteboard and showed him the clockwise sharp pattern, something clicked – he stopped memorizing and started reasoning it out. That’s the real value: it replaces rote recall with logic.

    It also matters for sight-reading speed, for understanding chord progressions in pop and jazz, and for improvising with confidence instead of guesswork – which ties directly into learning to improvise on piano.

    Sheet music with chord diagrams on a piano stand, related to circle of fifths piano concepts

    How do I actually read the chart?

    Reading the circle of fifths chart means starting at the top with C major and tracking clockwise or counter-clockwise to find any key’s signature and its closest relatives. The keys right next to each other on the circle share almost all the same notes, which is exactly why they sound related.

    Here’s how I walk a student through it the first time:

    1. Find C at the top – no sharps, no flats, the reference point
    2. Move one step clockwise to G – that’s one sharp (F♯)
    3. Each additional clockwise step adds the next sharp in order: F♯, C♯, G♯, D♯, A♯
    4. Move counter-clockwise from C to F – one flat (B♭)
    5. Each additional counter-clockwise step adds the next flat: B♭, E♭, A♭, D♭, G♭
    6. Notice neighboring keys differ by only one note – that’s the whole trick

    Most students I’ve taught get the clockwise sharp order memorized within two or three practice sessions once they see the pattern repeats in a fixed sequence (F♯-C♯-G♯-D♯-A♯-E♯-B♯) every single time.

    How does it help with key signatures?

    The circle of fifths helps with key signatures by showing exactly how many sharps or flats a key has and in what order they appear, removing the need to memorize twelve separate signatures from scratch. Once you know the pattern, you can derive any key signature on the spot.

    A common mistake I see: students memorize “D major has two sharps” as an isolated fact, then forget it a month later because it was never connected to anything. On the circle, D is simply two steps clockwise from C – which also tells you those two sharps are F♯ and C♯, because that’s the fixed order sharps always appear in.

    This matters for sight-reading because recognizing a key signature instantly – rather than counting sharps one by one on the staff – is what lets you read ahead instead of decoding note by note, something I cover in more depth around counting rhythm on piano as well, since both skills rely on pattern recognition over memorization.

    If key signatures and chord patterns still feel like guesswork at the keyboard, a second pair of ears can save you months of confusion. Your first 30-minute lesson with Austin is free – no card, no pressure.

    Book your free trial →

    How does it help with chords and songwriting?

    The circle of fifths helps with chords because the three keys immediately around any given key on the circle – its neighbors and the key directly across – tend to form the most common chord progressions in popular music. That’s why so many songs share the same basic chord shapes transposed into different keys.

    Take the classic I-IV-V progression (think thousands of pop, blues, and folk songs). In the key of C, that’s C, F, and G – and on the circle, F and G sit directly on either side of C. This isn’t a coincidence; those three chords are harmonically the closest relatives C has, which is exactly why they sound so natural together. This same logic underlies the 12-bar blues progression, which leans on those same I-IV-V relationships.

    It also explains relative minors – the minor key sharing a key signature with a major key sits just inside the circle from its major partner (A minor shares no sharps or flats with C major, for example).

    “I started as a complete beginner, and Austin made the learning process feel comfortable.” – Noah Peterson

    If you’re working toward learning a specific song rather than general theory, that’s where a custom approach matters more than a chart – at Weaver Music the song can be arranged at the student’s level and made harder as they improve.

    Metronome and notebook with a circular music diagram on a closed piano lid

    What’s a good way to practice it?

    A good way to practice the circle of fifths is to draw it from memory a few times a week, then apply it directly at the keyboard by naming the key signature and the I-IV-V chords for each key as you go around. Passive memorization doesn’t stick; active recall and physical practice do.

    • Spend 5 minutes drawing the blank circle and filling in sharps/flats from memory
    • Play the I, IV, and V chords in every major key, moving clockwise around the circle
    • Say the key signature out loud before you play a new piece in that key
    • Practice relative minors alongside their major partners
    • Use a metronome and keep the pace slow – accuracy first, speed later

    One student, Mia, practiced this for about ten minutes a day for three weeks and went from needing 20-30 seconds to identify a key signature to doing it almost instantly. That speed shows up directly in sight-reading and in how fast she learns new pieces now. If tension creeps in while you’re drilling chord shapes quickly, it’s worth checking your setup against our notes on avoiding piano hand tension.

    Person seated at a piano from behind in a warm, cozy studio setting

    As of 2026, this is still taught the same way it has been for decades – the circle of fifths is a settled piece of music theory, not a trend, so there’s no newer “better” version to worry about missing.

    Common questions

    Do I need to understand the circle of fifths before I can play songs?

    No. Plenty of beginners play simple songs for months before ever seeing the circle of fifths. It becomes genuinely useful once you’re reading key signatures regularly and want to understand chords instead of just memorizing finger positions.

    Is the circle of fifths the same as the circle of fourths?

    They’re the same diagram read in opposite directions. Moving clockwise traces fifths (C to G to D); moving counter-clockwise traces fourths (C to F to B♭). Most teachers just call it the circle of fifths regardless of which direction you’re reading.

    Why do some keys have both a sharp and flat name, like F♯ and G♭?

    These are enharmonic keys – they sound identical on the piano but are written differently depending on the musical context. They sit at the bottom of the circle, where the sharp side and flat side meet and overlap.

    Can the circle of fifths help with improvising?

    Yes. Knowing which chords are harmonically closest to your key makes it much easier to guess what will sound good before you try it, rather than hunting for notes by trial and error. It’s one of the building blocks behind confident improvising.

    How long does it take to actually learn the circle of fifths?

    Most students I teach can recall the basic sharp and flat order within two or three short practice sessions, roughly a week. Applying it fluently at the keyboard – naming chords and key signatures instantly – usually takes a few more weeks of regular practice.

    Do I need a teacher to learn this, or can I just study a chart?

    A chart alone can teach you the pattern, but a teacher helps you apply it at the keyboard immediately and catches gaps before they become habits. That hands-on correction is often what makes the difference between memorizing a diagram and actually using it.

    Curious how this fits into a bigger learning plan? Our overview of what piano lessons typically include walks through where theory topics like this show up alongside technique and repertoire.

    Ready to find out for yourself?

    Your first 30-minute lesson with me is completely free – we will evaluate where you are, talk through your goals, and map out your path.
    Book Your Free Trial Lesson

  • How Do You Improvise On Piano As A Beginner?

    How Do You Improvise On Piano As A Beginner?

    The short answer

    Beginners improvise on piano by playing random notes from a five-note (pentatonic) scale with the right hand over a simple repeating left-hand pattern. There are no wrong notes within that scale, so anything you play sounds musical. Start with just five black keys – F#, G#, A#, C#, D# – and noodle freely while a steady left-hand rhythm keeps time underneath.

    I introduce this to almost every student in their first few months, even ones who can barely read music yet, and if you want someone to walk you through it in person, a free 30-minute trial lesson is a low-pressure way to try it with feedback in real time.

    What scale should a beginner use to improvise?

    The best scale for beginner piano improvisation is the black-key pentatonic scale – F#, G#, A#, C#, D#. Every note in this five-note set sounds good against every other note, which means you can press any combination in any order and it will never clash. This removes the fear of “wrong notes” completely.

    Here’s why this works so well for someone brand new: pentatonic scales skip the half-steps that create tension (the notes that sound “off” when played together). That’s the same reason so much blues, folk, and rock improvisation leans on pentatonic patterns – it’s forgiving by design, not a beginner trick you’ll outgrow.

    • Black-key pentatonic: F#, G#, A#, C#, D# – easiest starting point, works over almost any simple backing.
    • C major pentatonic: C, D, E, G, A – white keys only, good once you’re comfortable reading those note names.
    • A minor pentatonic: A, C, D, E, G – same white keys, different “home base” note, gives a sadder or bluesier color.

    Once a student can find these shapes without hunting, I’ll often point them toward basic music theory for piano concepts like scale degrees – but that’s a refinement, not a requirement to start.

    Piano keys lit softly, symbolizing finding notes when you improvise on piano

    How do you practice improvising if you’ve never done it?

    Practice improvising by separating the two hands: set a slow, repeating left-hand pattern first, then let the right hand explore the matching pentatonic scale on top, without planning notes in advance. Record yourself on your phone – hearing it back is often more useful than any instruction I can give in the room.

    I had a seven-year-old student, Lily, who froze the moment I said “make up a melody.” But when I covered the piano with a towel except for the five black keys and said “just hit any three of these, I don’t care which,” she played for four minutes straight and grinned the whole time. The scale restriction is what unlocks the freedom.

    A simple progression that works in lessons:

    1. Left hand plays a steady low note or simple two-note pattern, once per beat, using a metronome around 70-80 BPM.
    2. Right hand picks any note from the pentatonic scale and holds it for a full beat.
    3. Try two notes per beat, then add a rest, then try starting on a different note each time through.
    4. Record 60 seconds. Listen back. Notice what you liked – that’s your ear developing taste, which is the actual skill.

    This is also where basic rhythm matters more than people expect; if steady timing feels shaky, spending time on counting rhythm first will make your improvising sound far more confident almost immediately.

    If noodling at the keys has always felt intimidating, a short guided session can make it click faster than weeks of guessing alone. Your first 30-minute lesson with Austin is free – no card, no pressure.

    Book your free trial →

    Do you need to know chords to improvise?

    No, beginners do not need to know chords to start improvising on piano. A single left-hand note or a simple two-note pattern is enough to support a right-hand melody while you’re learning. Chords become useful later, once you want the improvisation to sound fuller or follow a song structure.

    That said, once the five-note melody approach feels easy, learning a handful of basic chords opens up a lot more sound. A simple I-IV-V progression in C major (C, F, and G chords) under a pentatonic melody starts to sound like real music within a single practice session for most of my adult students.

    “I started as a complete beginner, and Austin made the learning process feel comfortable.” – Noah Peterson

    If you’re curious how far this goes, the 12-bar blues structure is one of the most approachable frameworks for combining chords with pentatonic improvising, and it’s where I take most students next once the basics click.

    Student seated at the piano exploring improvisation in a warm studio

    What mistakes do beginners make when they first improvise?

    The most common beginner improvising mistake is trying to use all twelve notes at once instead of restricting to five, which leads to clashing sounds and a loss of confidence. The second most common mistake is rushing the right hand while ignoring the left-hand pulse entirely, which makes the result feel aimless rather than musical.

    • Playing too many notes: More notes per beat isn’t more musical – space and repetition are what make a melody memorable.
    • Dropping the left-hand pattern: Without a steady pulse underneath, even a good melody sounds like random noodling.
    • Tensing up the hand: I see this constantly with nervous beginners – gripping the keys instead of staying loose. If this sounds familiar, piano hand tension is worth addressing directly.
    • Judging it in real time: Improvising is not composing a finished piece. Treat early attempts as sketches, not performances.
    • Avoiding repetition: New improvisers often feel they must play something different every second. Repeating a short phrase three or four times actually sounds more intentional.

    One adult student, a retired engineer named Walter, kept apologizing mid-improvisation because he thought he’d made a mistake. There are no mistakes inside a pentatonic scale – that was the whole point of the exercise, and once that landed for him, his playing relaxed within the same lesson.

    How long does it take to feel comfortable improvising?

    Most beginners feel genuinely comfortable improvising within 3-4 weeks of practicing 10-15 minutes a day using the pentatonic method. Comfort doesn’t mean sounding polished – it means losing the self-consciousness and actually enjoying the process of exploring sound without a script.

    This timeline tracks with research on skill acquisition showing that short, frequent, low-pressure repetitions build confidence faster than occasional long sessions – a pattern well documented in motor learning studies, including work summarized on Wikipedia’s motor learning overview. For piano specifically, I’ve watched this play out the same way across dozens of students regardless of age.

    A few markers I watch for as a teacher:

    • Week 1: Hesitant, lots of starting and stopping, watching the hands too much.
    • Week 2-3: Starting to repeat phrases on purpose, less self-correction mid-phrase.
    • Week 3-4: Can improvise for a full minute without losing the beat, starts adding their own rhythmic ideas.

    Kids often get there faster than adults simply because they worry less about “doing it right.” If you’re working on this with your own child, pairing it with other first things to learn on piano keeps the whole experience playful rather than clinical.

    Metronome and headphones on a piano suggesting steady practice for improvising

    Common questions

    Can you improvise if you don’t read sheet music?

    Yes, reading sheet music is not required to improvise on piano. Improvisation is built on listening and pattern recognition rather than reading, which is actually why many ear-focused beginners take to it faster than students who are used to following notated music exactly.

    What’s the difference between improvising and composing?

    Improvising happens in the moment and is never played the same way twice, while composing involves refining and writing down a piece so it can be repeated exactly. Many composers, including jazz and classical greats, used improvisation as the first step toward a finished composition.

    Is improvising the same as playing by ear?

    Not quite – playing by ear means reproducing a song you’ve heard without sheet music, while improvising means creating new, unplanned melodies on the spot. The two skills overlap and reinforce each other, since both rely on recognizing sound patterns rather than reading notation.

    Can adults learn to improvise, or is it just for kids?

    Adults can absolutely learn to improvise on piano – age has far less impact than how willing someone is to tolerate “imperfect” sounds while practicing. Adult students sometimes need a few extra sessions to let go of the instinct to judge every note, but the skill develops at a similar pace once that shift happens.

    Do I need a specific keyboard or piano to practice improvising?

    No special instrument is required – any keyboard with working keys, weighted or not, is enough to practice the pentatonic improvising method described here. What matters far more is consistent short practice sessions than the specific instrument you’re using.

    Should I learn improvisation before or after learning songs?

    Improvisation and learning songs can happen side by side from the very beginning. In my own lesson plans, I usually introduce five-note improvising within the first month alongside simple repertoire, since each skill reinforces the other rather than competing for practice time.

    If you’d like direct feedback on your improvising, or want to turn it into playing a specific song you love, Weaver Music’s lesson curriculum covers this alongside technique and theory. Lessons run live, one-on-one over Zoom or in person for Bay Area students, for all ages and levels.

    “My confidence at the piano has grown so much since starting lessons.” – Mia Reynolds

    Ready to find out for yourself?

    Your first 30-minute lesson with me is completely free – we will evaluate where you are, talk through your goals, and map out your path.
    Book Your Free Trial Lesson