Blog

  • How Much Do Piano Lessons Cost? 7 Essential Factors

    How Much Do Piano Lessons Cost? 7 Essential Factors

    If you’re thinking about starting piano lessons for yourself or your child, one of the first questions that comes to mind is probably “how much do piano lessons cost?” It’s a fair question, and honestly, one that deserves a more nuanced answer than a simple number.

    Over my ten-plus years teaching piano in the Bay Area and online, I’ve seen pricing vary wildly, and I’ve learned that understanding what drives those differences helps families make much better decisions.

    The truth is, how much do piano lessons cost depends on a handful of key factors, from where you live to what you’re hoping to accomplish. In this guide, I’ll walk you through everything that affects piano lesson pricing, share typical ranges you can expect, and help you figure out what represents genuine value versus just a low sticker price.

    The short answer

    If you need a quick answer: how much do piano lessons cost typically falls between $30 and $150 per hour in the United States. Most private teachers charge between $50 and $100 per hour, with the average hovering around $60-75 for a quality instructor.

    Online lessons sometimes run slightly lower, and group classes can be considerably cheaper per student. At Weaver Music, for example, I charge $99 per 60-minute private lesson, whether we meet in person in the Bay Area or via Zoom anywhere in the world.

    Every new student gets a free 30-minute trial lesson first, so there’s no financial risk in finding out if we’re a good fit.

    But those numbers don’t tell the whole story. Let’s dig into what actually determines how much do piano lessons cost and what you’re really paying for.

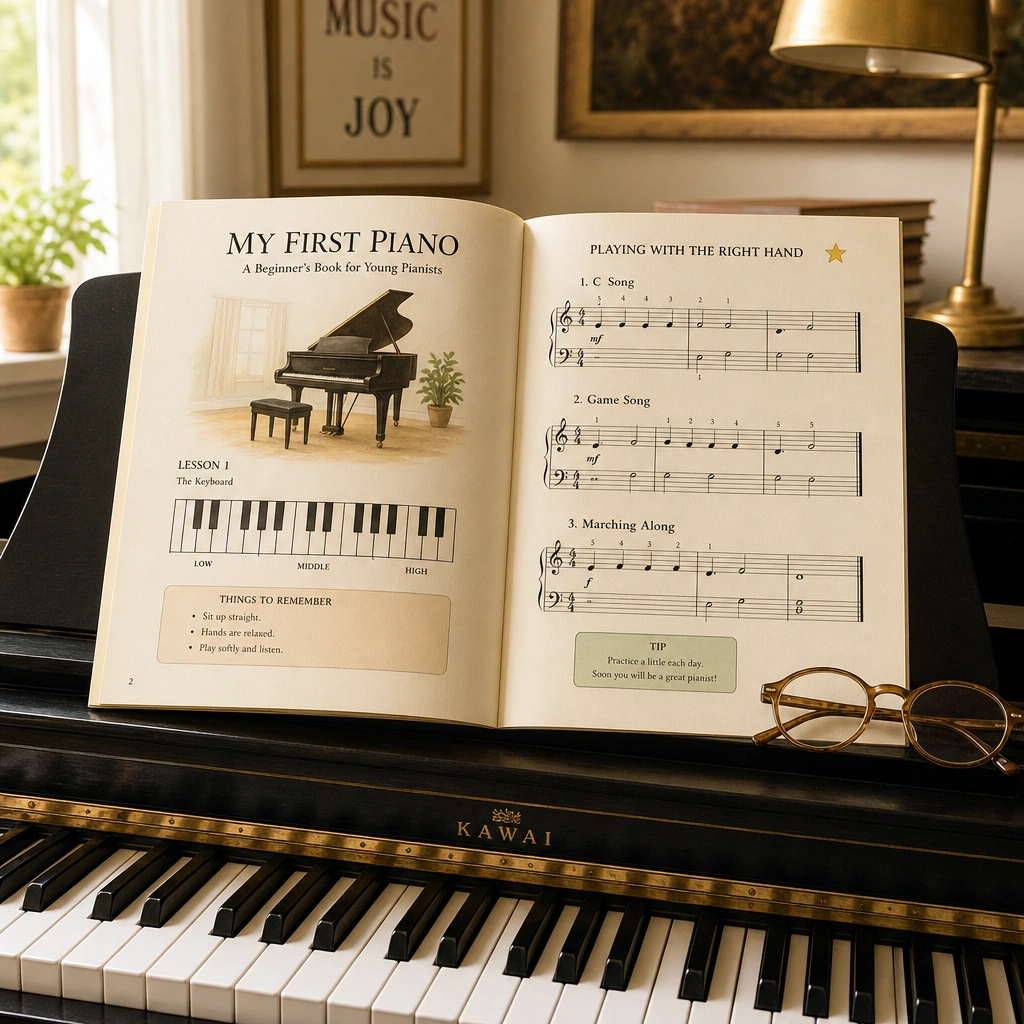
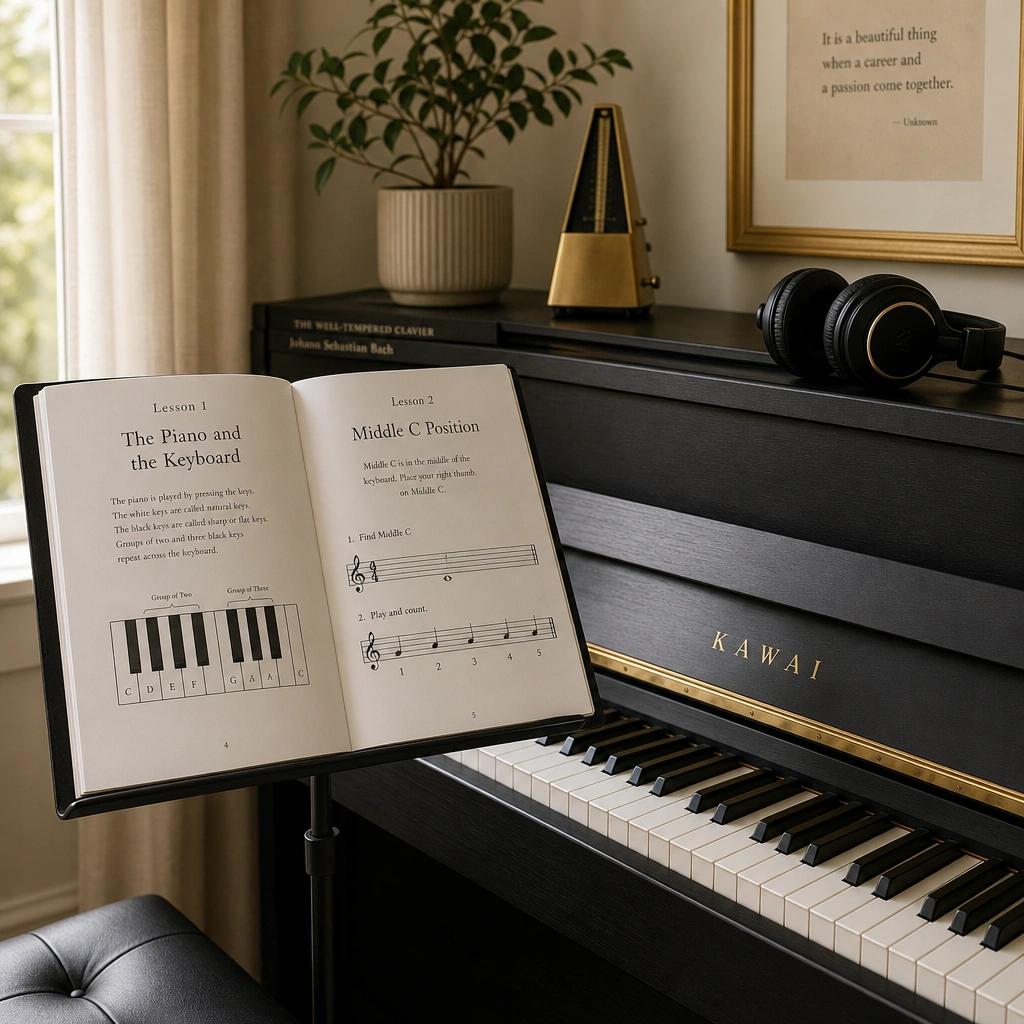
    Piano method books on stand illustrating how much do piano lessons cost includes materials

    Typical price ranges for piano lessons

    Before we explore the factors that drive pricing, it helps to know what’s out there. Here’s what you can generally expect when you start shopping around:

    • Budget options ($30-50/hour): Often newer teachers, college students, or group classes at community centers. Can be great for casual learners or very young beginners.
    • Mid-range ($50-85/hour): Experienced teachers without advanced degrees, or newer teachers with strong credentials. This is where most families find solid instruction.
    • Premium ($85-120/hour): Highly experienced teachers, those with advanced degrees in music or pedagogy, or teachers in high cost-of-living areas.
    • Elite ($120-150+/hour): Nationally recognized pedagogues, professors at conservatories, or specialists working with advanced/pre-professional students.

    Keep in mind these are general ranges for private, one-on-one instruction. When people ask how much do piano lessons cost, they’re usually thinking of this traditional format, but there are alternatives we’ll discuss later.

    Seven factors that affect how much do piano lessons cost

    Now let’s look at what actually drives those price differences. Understanding these factors helps you make apples-to-apples comparisons and spot genuine value.

    Teacher experience and credentials

    This is probably the biggest factor in determining how much do piano lessons cost. A teacher with fifteen years of experience and a master’s degree in piano pedagogy brings something fundamentally different to the table than a talented high school senior.

    Experienced teachers have seen hundreds of students. We’ve encountered every learning style, every motivation challenge, every technical problem.

    We know how to diagnose issues quickly and tailor our approach to each individual. We’ve developed comprehensive curricula and can guide students efficiently toward their goals.

    That said, credentials aren’t everything. I’ve known brilliant teachers without degrees and mediocre ones with impressive diplomas. What matters most is teaching skill, patience, and the ability to connect with students.

    When evaluating how much do piano lessons cost from different teachers, ask about:

    • Years of teaching experience (not just playing experience)
    • Educational background in music or pedagogy
    • Number of students taught and their outcomes
    • Specialized training in teaching methods (Suzuki, etc.)
    • Performance background and ongoing musical development

    A teacher charging $100/hour with ten years of experience and dozens of successful students often represents better value than someone charging $40/hour who started teaching last month.

    Empty piano bench in teaching studio representing private lesson setting and pricing

    Your geographic location

    Where you live dramatically affects how much do piano lessons cost. In major metropolitan areas like New York, San Francisco, or Los Angeles, everything costs more, including music lessons.

    Teachers in these areas face higher rent, higher cost of living, and often have more competition for premium rates.

    In the Bay Area where I’m based, in-person lessons typically run $80-120/hour for quality instruction. In smaller cities or rural areas, that same quality might cost $50-70/hour.

    The teacher isn’t necessarily better in the expensive market—they’re just operating in a different economic reality.

    This geographic disparity is one reason online lessons have become so popular. A student in rural Montana can now access a specialized teacher from anywhere in the world at rates that reflect the teacher’s value rather than just their zip code.

    According to a Bureau of Labor Statistics report on music teachers, geographic location can create up to a 40% variance in typical lesson rates across different regions of the United States.

    Lesson format: in-person vs online

    When considering how much do piano lessons cost, format makes a real difference. Online lessons via Zoom or similar platforms often cost 10-30% less than in-person instruction, though not always.

    Online lessons eliminate the teacher’s commute time and allow more flexible scheduling. Some teachers pass those savings to students.

    Others charge the same rate regardless of format, arguing that the instruction quality and preparation are identical.

    At Weaver Music, I charge the same rate for both in-person Bay Area lessons and online lessons worldwide because I put the same energy and customization into each format. The main difference is convenience, not quality.

    Group lessons represent another format consideration. Classes with 3-8 students typically cost $20-40 per student per hour.

    They work well for young beginners learning basics but lack the personalized attention that accelerates progress for most students.

    Lesson length and frequency

    How much do piano lessons cost also depends on lesson duration. Common options include:

    • 30-minute lessons: Good for young children (under 8) or absolute beginners. Usually $30-60 per lesson.
    • 45-minute lessons: A nice middle ground for elementary-age students. Usually $45-80 per lesson.
    • 60-minute lessons: Standard for teens and adults, or serious students of any age. Usually $50-120 per lesson.
    • 90-minute lessons: For advanced students or adults working intensively. Usually $90-180 per lesson.

    Longer lessons almost always offer better per-minute value. A 60-minute lesson might cost $80 while two 30-minute lessons cost $100 total.

    Plus, longer lessons allow time to dig deeper into concepts rather than rushing through basics.

    Most students take weekly lessons, but some teachers offer package discounts for twice-weekly instruction or monthly bulk purchases. When calculating how much do piano lessons cost for your budget, multiply the per-lesson rate by how many weeks you plan to study (typically 40-45 weeks per year, accounting for breaks).

    Student age and level

    Some teachers charge different rates based on the student’s age or advancement. Beginners, especially children, sometimes cost less because the material is more straightforward and requires less specialized expertise.

    Advanced students often pay premium rates because teaching them requires a higher skill level from the instructor. Preparing a student for conservatory auditions or advanced recitals demands deep knowledge of repertoire, technique, and interpretation that goes beyond beginner pedagogy.

    Personally, I charge the same rate regardless of level because every student deserves my full expertise, and honestly, teaching beginners well requires just as much skill as teaching advanced students—it’s just a different skill set.

    But when you’re researching how much do piano lessons cost, be aware that some teachers tier their pricing.

    If you’re wondering whether piano lessons are worth it for your child, I wrote a comprehensive guide about the benefits of piano lessons for kids that might help you decide.

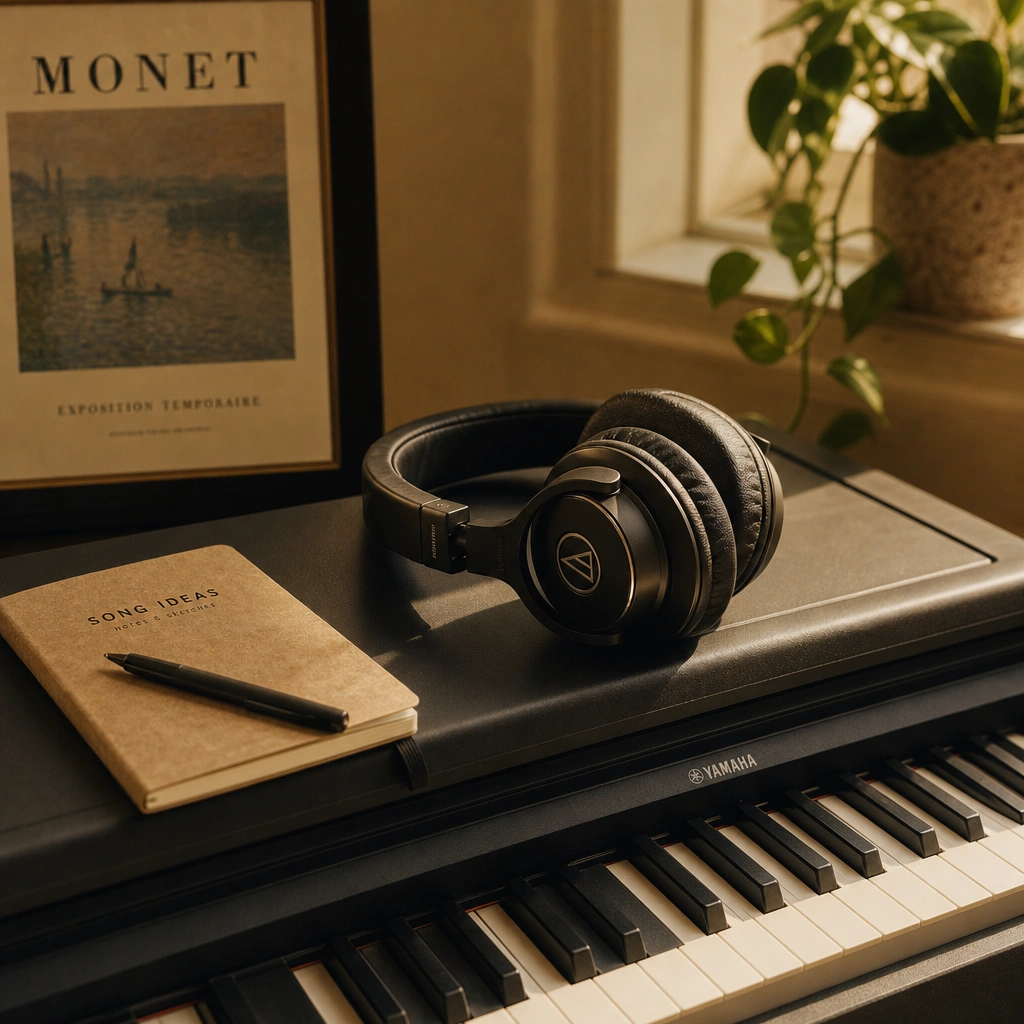
    Digital piano with headphones showing home practice setup for piano lessons

    Additional costs to consider

    When calculating how much do piano lessons cost, don’t forget these additional expenses:

    • Instrument purchase or rental: You’ll need a piano or keyboard at home. Budget digital pianos start around $300-500, while quality instruments run $800-2000. Acoustic pianos cost significantly more. Check out my digital piano buying guide for beginners for detailed recommendations.
    • Method books and sheet music: Expect $50-150 per year for books, especially in the first few years. Your teacher should guide these purchases.
    • Recital fees: Some teachers or studios charge $20-50 per recital to cover venue rental and refreshments.
    • Examination fees: If pursuing certifications like ABRSM or RCM, exam fees run $75-200 depending on level.
    • Piano maintenance: Acoustic pianos need annual tuning ($100-200). Digital pianos occasionally need repairs.

    These costs are the same regardless of your lesson rate, so they affect your total investment more significantly if you’re choosing budget lessons.

    Finding value, not just the lowest price

    Here’s what I’ve learned after teaching hundreds of students: when people ask how much do piano lessons cost, they’re really asking “what will I get for my money?” And that’s the right question.

    The cheapest lessons aren’t always the best value. A less expensive teacher who keeps you stuck at the same level for years costs you more in the long run—in both money and lost potential—than a skilled teacher who charges more but moves you forward efficiently.

    Look for these signs of genuine value when comparing how much do piano lessons cost from different teachers:

    • Clear methodology: The teacher can articulate their teaching approach and how they’ll help you progress.
    • Personalization: They ask about your goals and customize lessons accordingly, not just follow a rigid curriculum.
    • Progress tracking: Regular feedback on what you’re improving and what to focus on next.
    • Flexibility: Understanding when life gets busy and supporting consistent practice habits. My guide on how often beginners should practice piano addresses this balance.
    • Resources beyond lesson time: Some teachers, myself included, offer supplementary materials. At Weaver Music, all my students get access to my four-level lesson path that they can reference between lessons.

    Another value consideration: trial lessons. Any teacher confident in their approach should offer a way to try before committing to a package.

    That’s why I offer every prospective student a free 30-minute trial lesson. It’s a no-risk way to see if we’re a good match and if my teaching style works for you.

    For adults returning to piano after years away, I wrote a detailed article about getting back into piano as an adult that might resonate with your situation.

    Questions to ask before committing

    Before you decide based on how much do piano lessons cost, ask potential teachers:

    • What does a typical lesson look like?
    • How do you handle missed lessons or schedule changes?
    • What practice expectations do you have between lessons?
    • How do you measure and communicate progress?
    • What materials or method books will I need to buy?
    • Do you offer recitals or performance opportunities?
    • Can I try a lesson before committing to a package?

    The answers to these questions matter far more than a $10 difference in hourly rate. A teacher who communicates clearly, sets appropriate expectations, and creates a supportive learning environment will help you progress faster and enjoy the journey more.

    The hidden cost of stopping and starting

    One factor people rarely consider when asking how much do piano lessons cost is the cost of quitting and restarting. I’ve worked with many students who took lessons as kids, quit out of frustration or boredom, then came back as adults and had to relearn basics.

    Starting with the right teacher—someone patient, encouraging, and skilled at keeping students engaged—might cost more upfront but saves you the much higher cost of lost years and having to start over.

    The consistency of working with one quality teacher over years creates exponential progress that cheaper, less effective lessons simply can’t match.

    According to research from the National Association for Music Education, students who remain in music instruction for at least three years show significantly better outcomes in musical proficiency and cognitive benefits than those who stop and start. Finding a teacher you can stick with matters.

    Payment structures and packages

    How much do piano lessons cost also varies based on payment structure. Common models include:

    • Pay-per-lesson: Maximum flexibility but sometimes slightly higher per-lesson cost. Good if you’re testing the waters.
    • Monthly packages: Commit to 4-5 lessons per month at a set rate. Often includes better cancellation policies.
    • Semester packages: Prepay for 12-16 weeks of lessons, sometimes at a small discount. Shows commitment but less flexibility.
    • Subscription models: Some online platforms charge monthly for access to materials plus periodic live lessons.

    I use a flexible monthly model where students schedule lessons as needed and pay after each session. It provides accountability without requiring large upfront commitments that might feel risky when you’re just starting out.

    Are online courses a cheaper alternative?

    When calculating how much do piano lessons cost, some people consider pre-recorded online courses as a budget alternative. These typically cost $20-200 total and provide video instruction you can watch on your own schedule.

    Online courses can supplement lessons effectively, and I offer my own four-level lesson path to students for exactly that purpose. But as a complete replacement for personalized instruction, they have serious limitations.

    No course can watch you play and correct your hand position, notice the specific technical issue causing your stumble in measure 12, or adjust the pace and material based on your learning style.

    For most students, courses work best alongside lessons, not instead of them.

    That said, if budget is extremely tight, a quality online course plus occasional lessons (monthly instead of weekly) can work better than no instruction at all. Just be realistic about the pace of progress.

    The investment perspective

    Let me share how I think about how much do piano lessons cost from an investment perspective. If you take weekly hour-long lessons at $75 each for 45 weeks per year, that’s $3,375 annually.

    That might sound like a lot. But compare it to:

    • A year of club sports: $2,000-5,000+
    • A year of tutoring: $3,000-10,000+
    • A family streaming/entertainment budget: $1,000-2,000+
    • Dining out twice per month: $1,500-3,000+

    Piano lessons provide a lifetime skill, cognitive benefits, stress relief (check out my article on piano for stress relief), creative expression, and the deep satisfaction of mastery.

    The return on investment, measured in joy and personal growth rather than dollars, is extraordinary.

    Plus, unlike many other activities, piano is something you can enjoy and benefit from for your entire life. A 30-year-old who starts lessons today can still be playing beautifully at 80.

    Very few investments pay dividends for fifty years.

    Making your decision

    So, how much do piano lessons cost? By now you know the answer is “it depends”—but you also know what it depends on and how to evaluate your options intelligently.

    Here’s my honest advice: Start by defining your budget and your goals. If you or your child are genuinely curious about piano and willing to practice regularly, invest in the best teacher you can afford.

    If you’re not sure about commitment level yet, start with a mid-range teacher who offers trial lessons.

    Watch out for extremes. The cheapest option is rarely the best value, but the most expensive doesn’t guarantee results either.

    Look for the teacher whose experience, approach, and personality seem like the right fit for your situation, then make it work financially if you possibly can.

    And remember: most good teachers work with families on payment plans or timing if money is tight but commitment is strong. We got into teaching because we love sharing music, not because we’re maximizing profit.

    If you find the right teacher, have an honest conversation about what you can afford.

    When you’re ready to explore what lessons might look like for you or your family, I’d love to meet you. Your first 30-minute trial lesson is completely free—we’ll assess where you are, talk about your goals, and map out a realistic path forward.

    No pressure, no obligation, just a genuine conversation about whether working together makes sense.

    The question of how much do piano lessons cost is important, but the real question is: what’s possible when you find the right teacher and commit to the journey? That answer is worth far more than any price tag.

    Ready to find out for yourself?

    Your first 30-minute lesson with me is completely free – we will evaluate where you are, talk through your goals, and map out your path.

    Book Your Free Trial Lesson

  • 7 Proven Benefits of Piano Lessons for Kids Academically

    7 Proven Benefits of Piano Lessons for Kids Academically

    As a piano teacher in the Bay Area for over a decade, I’ve watched hundreds of children grow not just as musicians but as students. Parents often tell me their child’s grades improved after starting piano lessons, or that homework suddenly became easier. The benefits of piano lessons for kids extend far beyond the keyboard, creating ripples that touch every part of their academic life.

    The connection isn’t coincidental. Neuroscience research shows that learning piano activates and strengthens the same brain regions responsible for mathematical reasoning, reading comprehension, memory, and focus. When a child learns to read music, coordinate both hands, and listen critically, they’re building cognitive skills that translate directly to the classroom.

    In this article, I’ll walk you through seven specific ways the benefits of piano lessons for kids show up academically, backed by research and my own observations from years of teaching. Whether your child struggles in school or already excels, piano training offers unique cognitive advantages that traditional academics alone can’t provide.

    The short answer

    The benefits of piano lessons for kids academically include improved math skills, stronger reading and language abilities, enhanced memory, better focus and attention span, increased spatial reasoning, executive function development, and greater confidence. Research consistently shows that children who study piano perform better on standardized tests and develop cognitive skills that support learning across all subjects.

    Piano training activates multiple brain regions simultaneously, creating neural connections that strengthen the very skills children need to succeed in school. It’s not about making your child a concert pianist—it’s about giving them cognitive tools that last a lifetime.

    Sheet music and lesson materials showing benefits of piano lessons for kids

    How piano training strengthens the brain

    When a child sits down to practice piano, they’re doing something remarkable. They’re reading two lines of music simultaneously, translating symbols into finger movements, coordinating both hands independently, listening to what they produce, and adjusting in real time. Few activities demand this level of multitasking.

    This complexity is exactly what makes piano so powerful for cognitive development. Brain imaging studies show that musicians have stronger connections between the left and right hemispheres, larger motor cortex regions, and more developed auditory processing centers compared to non-musicians.

    The benefits of piano lessons for kids appear because learning music is fundamentally a brain-building activity. Every practice session strengthens neural pathways, much like lifting weights builds muscle. The skills developed at the piano—pattern recognition, sequential processing, fine motor control—are the same skills needed for reading, math, and problem-solving.

    What I find most encouraging as a teacher is that these benefits accumulate over time. A child doesn’t need to become a virtuoso. Consistent practice, even at a moderate level, produces measurable cognitive gains that support academic performance.

    Benefit 1: Improved math skills through the benefits of piano lessons for kids

    Mathematics and music share deep structural similarities. Both involve pattern recognition, proportional thinking, and abstract symbol manipulation. When children learn to count beats, understand note values, and navigate time signatures, they’re practicing mathematical concepts in a musical context.

    Consider what happens when a student learns that a whole note equals two half notes, or four quarter notes, or eight eighth notes. They’re learning fractions without a textbook. When they play in 3/4 time versus 4/4 time, they’re internalizing division and rhythmic patterns that strengthen numerical fluency.

    Research from the National Institutes of Health has documented correlations between music training and mathematical ability. Students with music education consistently score higher on math assessments, particularly in areas involving spatial-temporal reasoning and proportional math.

    I see this connection clearly in my studio. Students who initially struggle with rhythm often have difficulty with fractions in school. As their rhythmic accuracy improves through piano practice, parents frequently report that math homework becomes less frustrating. The benefits of piano lessons for kids show up in their ability to think proportionally and recognize numerical patterns.

    The spatial nature of the keyboard itself reinforces mathematical thinking. Students learn that intervals have specific distances, scales follow predictable patterns, and chords have mathematical relationships. This physical representation of mathematical concepts makes abstract ideas concrete.

    Empty piano bench in a home studio representing children's music education

    Benefit 2: Stronger reading and language

    Reading music and reading text engage remarkably similar cognitive processes. Both require decoding symbols, recognizing patterns, processing sequentially from left to right, and extracting meaning from visual information. Children who learn to read music notation develop skills that transfer directly to reading comprehension.

    Music training also enhances phonological awareness—the ability to distinguish and manipulate sounds. When students learn to hear the difference between major and minor thirds, or identify chord qualities by ear, they’re sharpening the same auditory discrimination skills needed to distinguish between similar phonemes in language.

    Several studies have shown that children with music training demonstrate stronger vocabulary, better verbal memory, and higher reading comprehension scores than peers without musical instruction. The benefits of piano lessons for kids include enhanced language processing that supports literacy development.

    In my teaching practice, I notice that students who progress quickly in reading music often excel at reading in school as well. They’ve developed strong pattern recognition skills, comfortable with the idea that symbols represent sounds and meaning. They understand that fluency requires practice, and that decoding becomes automatic over time.

    Learning to read music also builds patience with complex texts. Students learn that difficult passages require slow, careful reading before they can be performed fluently. This metacognitive awareness—understanding how to approach challenging material—transfers beautifully to academic reading.

    Benefit 3: Enhanced memory and recall

    Piano study is memory training in disguise. Students constantly memorize note names, finger patterns, chord shapes, scale formulas, and eventually entire pieces. This ongoing memorization work strengthens both working memory and long-term recall in ways that benefit all academic learning.

    Working memory—the ability to hold and manipulate information temporarily—is crucial for following multi-step instructions, solving complex problems, and understanding lengthy explanations. Piano practice develops working memory because students must remember what they just played while planning what comes next.

    The benefits of piano lessons for kids include this enhanced memory capacity. Research indicates that musicians outperform non-musicians on memory tasks, both musical and non-musical. The discipline of committing music to memory appears to strengthen general memory systems.

    I teach students specific memorization strategies that serve them well beyond music: chunking information into manageable sections, using multiple senses (visual, auditory, kinesthetic), creating mental associations, and practicing retrieval. These are the same techniques that support effective studying for exams.

    Parents often report that after starting piano, their child remembers homework assignments more reliably or recalls information more easily during tests. The systematic memory work inherent in piano practice strengthens the neural networks responsible for all types of learning and recall.

    Benefit 4: Better focus and attention

    In our distraction-filled world, the ability to focus deeply is increasingly valuable and increasingly rare. Piano practice demands sustained attention. Students must concentrate on rhythm, notes, dynamics, fingering, and phrasing simultaneously, filtering out distractions to hear what they’re actually producing.

    This type of focused attention is exactly what’s needed for academic success. Whether reading a challenging textbook chapter, solving a multi-step math problem, or writing an essay, students need the ability to maintain concentration despite competing demands on their attention.

    The benefits of piano lessons for kids include this trained attention capacity. Unlike passive entertainment, playing piano requires active engagement every moment. Students can’t zone out or let their minds wander—mistakes immediately reveal lapses in focus.

    Over years of teaching, I’ve noticed that students who practice regularly develop noticeably longer attention spans. They can work through difficult passages without giving up, stay focused during entire lessons, and approach challenges with patience rather than frustration.

    This improved focus isn’t just about duration—it’s also about quality. Musicians develop the ability to attend to multiple streams of information simultaneously, switching attention flexibly between different elements. This cognitive flexibility supports learning across all academic subjects, where students must often juggle multiple concepts at once.

    Metronome and piano books representing structured music education for children

    Benefit 5: Increased spatial reasoning

    Spatial reasoning—the ability to visualize and manipulate objects mentally—underlies success in mathematics, science, engineering, and many other fields. Piano training develops spatial skills in several ways, from understanding the physical layout of the keyboard to visualizing how musical patterns unfold over time.

    When students learn that moving right on the keyboard produces higher pitches, or that octaves have the same letter name but different positions, they’re building spatial understanding. When they visualize finger patterns or predict where a melody will go, they’re exercising mental rotation and spatial memory.

    Research has documented connections between music training and spatial-temporal reasoning—the ability to visualize spatial patterns and mentally manipulate them over time. This type of reasoning is essential for geometry, physics, architecture, and many other disciplines.

    The benefits of piano lessons for kids include these strengthened spatial abilities. I see students become more comfortable with abstract spatial concepts as they advance musically. They can visualize interval relationships, understand inversions, and navigate the keyboard with increasing spatial awareness.

    This spatial training has practical academic applications. Students with strong spatial reasoning often excel at geometry, understand graphs and diagrams more easily, and demonstrate better problem-solving skills in science and mathematics. The spatial understanding developed through piano study transfers to these academic domains.

    Benefit 6: Executive function development

    Executive functions are the mental processes that enable planning, organization, self-control, and flexible thinking. These skills are critical for academic success, yet they’re often not explicitly taught in school. Piano study develops executive functions naturally through the demands of practice and performance.

    Consider what’s required to learn a new piece. Students must set goals, create a practice plan, monitor their progress, identify problems, adjust their approach, and persist through difficulties. These are exactly the executive function skills needed for long-term academic projects and independent learning.

    Self-regulation—the ability to control impulses and manage emotions—develops through the discipline of regular practice. Students learn to delay gratification, working patiently toward distant goals rather than expecting immediate results. They develop frustration tolerance, understanding that struggle is part of learning.

    The benefits of piano lessons for kids extend to these crucial executive skills. Research shows that music training is associated with improved executive function across multiple domains. Students who study music demonstrate better planning, inhibitory control, and cognitive flexibility than peers without musical training.

    In my studio, I explicitly teach metacognitive skills: how to practice effectively, how to identify and fix problems, how to prepare for challenges, how to recover from mistakes. These strategies transfer directly to academic work, helping students become more independent and effective learners.

    Parents often tell me that after starting piano, their child becomes better at managing homework, organizing their schedule, and following through on commitments. The executive function development that occurs through music study supports success in school and beyond.

    Benefit 7: Confidence and academic motivation

    Success at the piano builds confidence that extends far beyond music. When students master a difficult piece, perform in a recital, or achieve a technical goal, they internalize a powerful message: effort leads to achievement. This growth mindset supports academic motivation and resilience.

    Piano study provides clear, measurable progress. Students can hear themselves improve, complete increasingly challenging pieces, and accomplish specific technical goals. This tangible success builds self-efficacy—the belief that one’s efforts matter and that challenges can be overcome.

    The benefits of piano lessons for kids include this enhanced confidence and motivation. Students who experience success in music often approach academic challenges with greater optimism and persistence. They’ve learned that difficulty is temporary and that consistent effort produces results.

    I’ve watched shy students blossom through piano study, gaining confidence that transforms their approach to school. When a child who once doubted their abilities performs confidently at a recital, something shifts. They begin to see themselves as capable, and this new self-concept influences how they approach all learning.

    Piano study also provides a healthy outlet for achievement outside traditional academics. For students who struggle in school, success at the piano can be transformative, proving that they are capable learners and rebuilding damaged academic self-esteem.

    The experience of working toward long-term goals develops grit—the combination of passion and perseverance that predicts success across many domains. Students learn that meaningful achievement requires sustained effort over time, a lesson that serves them throughout their academic career and beyond.

    What the research tells us about the benefits of piano lessons for kids

    The academic benefits of music education aren’t just anecdotal—they’re supported by decades of research. Multiple studies have documented correlations between music training and enhanced cognitive abilities, academic performance, and brain structure.

    A longitudinal study published in the Journal of Educational Psychology found that students with music training showed greater improvements in mathematics over time compared to peers without musical instruction. The effect was particularly strong for students from lower socioeconomic backgrounds, suggesting that music education may help narrow achievement gaps.

    Neuroscience research using brain imaging has revealed that musicians have measurably different brain structure and connectivity compared to non-musicians. These differences appear in regions associated with motor control, auditory processing, executive function, and memory—precisely the areas that support academic learning.

    The benefits of piano lessons for kids are supported by research showing that music training enhances IQ, verbal memory, and executive function. A meta-analysis examining multiple studies concluded that music instruction produces small to medium improvements in cognitive abilities and academic achievement.

    Important research from cognitive neuroscience suggests that these benefits result from the unique demands of music training rather than simply from general enrichment. The specific cognitive processes involved in learning music—reading notation, coordinating motor movements, processing auditory feedback—appear to strengthen skills that transfer to academic domains.

    While researchers continue to investigate the mechanisms behind these effects, the evidence is clear: music education, and particularly piano instruction, supports cognitive development in ways that benefit academic performance. The benefits of piano lessons for kids are real, measurable, and long-lasting.

    When to start and what to expect

    Parents often ask me when their child should start piano lessons to maximize academic benefits. While children can begin at various ages, most develop the necessary fine motor skills, attention span, and symbol recognition abilities between ages five and seven.

    That said, the benefits of piano lessons for kids accumulate over time. Starting at eight, ten, or even older still provides significant cognitive advantages. The key is consistent, regular practice rather than starting at a magical age. I’ve taught beginning students of all ages who’ve experienced substantial growth.

    Initial progress may be slow as students learn basic concepts: note reading, hand position, rhythm, and coordination. Academic benefits typically become noticeable after six months to a year of regular instruction, though individual timelines vary. The cognitive advantages build gradually as neural connections strengthen through repeated practice.

    Parents should expect an initial period of adjustment as children learn to incorporate practice into their routine. Most students need parental support to establish consistent practice habits, especially in the first year. At Weaver Music, we work with families to create realistic practice schedules that fit their lives.

    The academic benefits of piano study don’t require intensive practice or virtuoso-level achievement. Studies suggest that even moderate amounts of music training—two to three years of regular instruction with consistent practice—produce measurable cognitive gains. The goal isn’t to create professional musicians but to provide cognitive enrichment through musical learning.

    If you’re curious about what those first steps look like, I’ve written about what to expect in a first piano lesson, which covers how we assess where a child is and begin building those foundational skills.

    How we approach lessons at Weaver Music

    At Weaver Music, I structure lessons to maximize both musical growth and cognitive development. The benefits of piano lessons for kids are greatest when instruction is patient, encouraging, and individually tailored. I’ve spent over a decade refining my approach based on what actually works for real students with busy lives and diverse learning styles.

    Every new student starts with a free 30-minute trial lesson where we evaluate their current level, discuss goals, and explore whether we’re a good fit. This trial is completely free and creates no obligation—it’s simply a chance to see how I teach and whether my approach resonates with your family.

    My regular lessons are 60 minutes long at $99 per session, offered either in-person in the Bay Area or via Zoom for students worldwide. The online format works surprisingly well, especially with the teaching techniques I’ve developed over years of remote instruction. Students receive the same quality instruction regardless of format.

    I work with students of all ages and levels, from total beginners to advanced players. My teaching emphasizes understanding over rote memorization, helping students develop musical intelligence alongside technical skills. I want students to understand what they’re playing, why it works, and how to think independently at the piano.

    Beyond individual lessons, I’ve created a four-level lesson path that students can access between lessons. These courses provide structured learning paths, supplemental exercises, and theory concepts that reinforce what we cover during lessons. The combination of live instruction and self-paced video content gives students multiple learning modalities.

    You can explore the courses in detail at our lesson plan, which covers everything from absolute beginner concepts through advanced repertoire and technique.

    My teaching philosophy centers on building confidence through achievable challenges. I meet students where they are, celebrate their progress, and create a supportive environment where mistakes are learning opportunities rather than failures. The benefits of piano lessons for kids flourish when students feel safe to experiment, ask questions, and develop at their own pace.

    Making it work at home

    The academic benefits of piano study depend largely on what happens between lessons. Consistent practice is where real learning occurs, and parents play a crucial role in helping children establish effective practice routines.

    For beginners, I typically recommend 15-20 minutes of practice five to six days per week. This might seem modest, but consistency matters more than duration. Short, focused practice sessions build skills more effectively than occasional long sessions. As students advance and develop greater attention spans, practice duration naturally increases.

    Creating a dedicated practice space helps establish routine. The piano should be in a relatively quiet area where students can focus, with good lighting and comfortable seating. If you’re just starting out and considering what instrument to purchase, my digital piano buying guide for beginners walks through the key features to look for.

    Young students benefit from parental involvement during practice, especially in the first year. Parents don’t need musical knowledge—they simply need to help their child review lesson notes, stay focused, and work through assigned material. This supportive presence makes practice more consistent and effective.

    I recommend establishing practice at the same time each day, creating a routine that becomes automatic. Some families practice right after school, others before dinner, still others in the morning. The specific time matters less than the consistency of the routine.

    Understanding realistic practice expectations helps prevent frustration. I’ve written about how often beginners should practice piano, which addresses common questions about building sustainable practice habits that support long-term growth.

    The benefits of piano lessons for kids multiply when practice is approached positively rather than as a chore. Celebrate small victories, focus on progress rather than perfection, and remember that the goal is long-term development rather than immediate mastery. The cognitive and academic advantages build gradually through patient, consistent work.

    Ready to find out for yourself?

    Your first 30-minute lesson with me is completely free – we will evaluate where you are, talk through your goals, and map out your path.
    Book Your Free Trial Lesson

  • Getting Back Into Piano as an Adult: 7 Proven Steps That Actually Work

    Getting Back Into Piano as an Adult: 7 Proven Steps That Actually Work

    If you’re thinking about getting back into piano as an adult after years away from the instrument, you’re not alone. I’ve worked with dozens of returning pianists over the past decade, and almost every single one shares the same mix of excitement and anxiety about starting again.

    The truth is, getting back into piano as an adult is different from learning as a child. Your brain works differently now. Your time is more limited. But you also have patience, self-awareness, and genuine motivation that most children lack—and those advantages make all the difference.

    This guide will walk you through exactly how to return to piano in a way that’s realistic, enjoyable, and sustainable. These aren’t theoretical tips; they’re the same strategies I use with my returning students, many of whom haven’t touched a piano in ten, twenty, or even thirty years.

    The short answer

    Getting back into piano as an adult requires three things: honest assessment of where you are now (not where you were), patient rebuilding of fundamentals through simple exercises, and a sustainable practice schedule of 15-30 minutes most days. Start easier than you think you should, focus on technique over repertoire for the first month, and consider lessons to avoid relearning bad habits.

    Why adults return to piano after years away

    Before we dive into the how, it’s worth acknowledging the why. Understanding your motivation helps you stay committed when progress feels slow.

    Most of my returning students fall into one of these categories:

    • Life finally has space for music again after years of career-building or raising children
    • A desire for creative expression that work and daily responsibilities don’t provide
    • Recognition that piano offers genuine stress relief and mental health benefits
    • Regret over quitting as a child and wanting to reclaim something lost
    • Watching their own children learn and feeling inspired to join them
    • Simply missing the feeling of playing music

    Whatever your reason, hold onto it. Getting back into piano as an adult will have frustrating moments, and your “why” will carry you through them.

    Piano method book and coffee showing the journey of getting back into piano as an adult

    Set realistic expectations for getting back into piano as an adult

    Here’s what I tell every returning student on day one: you will not pick up where you left off. And that’s completely okay.

    Your muscle memory has faded. Your sight-reading speed has dropped. Pieces that felt comfortable ten years ago will feel challenging now. This isn’t failure—it’s biology. Motor skills atrophy without use, especially the fine motor control that piano requires.

    The good news? Skills come back faster the second time around. Your brain already has neural pathways for reading music, understanding rhythm, and coordinating your hands. You’re not starting from zero; you’re dusting off and rebuilding.

    Timeline expectations

    Most returning players see noticeable progress within 4-6 weeks of consistent practice. Within 3-4 months, you’ll likely surpass what you remember being able to do comfortably. By six months, many of my students are playing pieces they never would have attempted during their first go-round.

    The key word is consistent. Practicing 20 minutes five days a week will get you much further than practicing two hours on Saturday. Adult brains consolidate motor learning during sleep, so regular practice across multiple days beats cramming every time.

    Understanding the neuroscience

    Your adult brain has advantages your childhood brain didn’t. You understand abstract concepts better. You can identify patterns more quickly. You have metacognitive awareness—meaning you can think about your own thinking and adjust your approach when something isn’t working.

    These cognitive strengths compensate for the slower motor learning that comes with age. Where a child might mindlessly repeat passages, you can strategically problem-solve technical challenges. This makes getting back into piano as an adult not just possible, but potentially more efficient than your original learning experience.

    Assess where you actually are today

    One of the biggest mistakes I see when adults start getting back into piano as an adult is overestimating their current level. I understand the impulse—you remember playing intermediate repertoire, so you pull out a Chopin waltz. Three days later you’re frustrated and discouraged.

    Do yourself a favor: start with an honest assessment. Sit down at the piano and try these diagnostics:

    • Can you comfortably play a two-octave C major scale hands together at a moderate tempo?
    • Can you sight-read a simple hymn or folk song without stopping?
    • Can you play a basic I-IV-V-I chord progression in a major key?
    • Do your fingers naturally curve, or have they forgotten proper hand position?

    If you struggled with any of these, that’s your starting point. Not where you were at your peak, but where you are today. Getting back into piano as an adult means meeting yourself where you are with compassion, not judgment.

    Test your reading skills

    Pull out an easy method book—something rated early intermediate or even late beginner. Can you play through a page at tempo on first read? If not, your sight-reading needs work before you tackle more complex repertoire.

    This isn’t discouraging news. It’s clarifying. Once you know what needs attention, you can address it systematically instead of spinning your wheels on pieces that are currently out of reach.

    Physical assessment matters too

    Pay attention to any physical discomfort. Adult bodies often carry tension differently than they did years ago. Do your shoulders creep up toward your ears? Does your lower back ache after ten minutes? Are your wrists properly aligned or collapsing?

    These physical habits need addressing early. Bad posture and tension not only limit your technical progress but can lead to repetitive strain injuries. Getting back into piano as an adult successfully means building healthy physical habits from day one.

    Rebuild your fundamentals patiently when getting back into piano as an adult

    I know fundamentals sound boring when what you really want is to play beautiful music. But here’s what I’ve observed: students who spend their first month rebuilding technique progress three times faster than those who jump straight into repertoire.

    Getting back into piano as an adult with a foundation-first approach means you’re building on solid ground, not on the shaky habits of a decade ago.

    Scales and arpeggios

    Yes, really. Start with C major, hands separately, one octave, at a comfortable tempo. Focus on even tone, curved fingers, and smooth thumb crossings. When that feels solid, add the second octave. Then hands together. Then increase tempo gradually.

    Once C major is comfortable, add G major. Then F major. Work through the circle of fifths methodically. This isn’t glamorous work, but it’s rebuilding the neural pathways and muscle memory that support everything else.

    Aim for 5-10 minutes of scales and arpeggios at the start of each practice session. Use a metronome (here’s how if you need a refresher) and increase tempo by only 2-4 bpm per week.

    Hand independence exercises

    Your hands have forgotten how to do different things simultaneously. Rebuild this with simple exercises: right hand plays quarter notes while left hand plays half notes. Then swap. Then try different rhythms, different intervals, different patterns.

    If you’re looking for structured exercises, left hand exercises can help strengthen your weaker hand independently before coordinating both hands together.

    Metronome on piano for practice while getting back into piano as an adult learner

    Hanon and finger exercises

    Hanon exercises get mixed reviews in the piano world, but for returning players, they’re genuinely useful. They’re repetitive patterns that rebuild finger independence and strength without requiring you to focus on reading complex music.

    Start with exercises 1-5. Play them slowly, focusing on evenness of tone and lifting each finger deliberately. This is physical therapy for your hands, not performance preparation.

    Don’t neglect music theory review

    While you’re rebuilding physical skills, refresh your theory knowledge. Can you identify intervals by sight? Do you remember key signatures? Can you recognize common chord progressions?

    Theory knowledge accelerates everything else. When you understand what you’re playing structurally, you learn faster and remember better. Spend 5-10 minutes a few times per week reviewing theory concepts. There are excellent free resources online, or consider a review book designed for returning students.

    Create a sustainable practice routine

    Adult life is busy. You’re not going to practice two hours a day, and you don’t need to. What you need is consistency over intensity.

    When someone asks me about getting back into piano as an adult, my standard recommendation is 15-30 minutes, five to six days per week. That’s enough for steady progress without burning out. (Here’s more on practice frequency if you’re curious about the research behind this.)

    Structure your practice session

    A typical 30-minute session might look like this:

    • 5 minutes: Scales and arpeggios
    • 5 minutes: Technical exercises (Hanon or similar)
    • 15 minutes: Repertoire work on 1-2 pieces
    • 5 minutes: Sight-reading something new

    If you only have 15 minutes, cut each segment in half. The proportions matter more than the duration. You’re balancing technique, repertoire, and reading skills so all three develop together.

    Find your practice time

    Morning practice before work tends to stick better than “whenever I have time” practice. Life will always fill available time with something urgent. Treat practice like a recurring appointment.

    If noise is an issue, consider practicing on a digital piano with headphones. If you’re shopping for an instrument, understanding weighted versus unweighted keys will help you make the right choice for serious practice.

    Practice techniques that maximize your limited time

    As an adult getting back into piano as an adult, you need efficient practice strategies. Don’t just play through pieces start to finish repeatedly. That’s not practice—that’s performance.

    Real practice isolates problem spots. Identify the two or three measures that trip you up, then work those in isolation. Slow them down to half tempo. Practice hands separately. Vary the rhythm. Work backward from the last measure of the difficult passage.

    These focused techniques accomplish in 20 minutes what mindless repetition can’t achieve in an hour.

    Track your practice

    Keep a simple log—date, duration, what you worked on, and one thing that went well. This creates accountability and helps you see patterns. Maybe you’re consistently avoiding technique work. Maybe you practice less on Wednesdays. These insights let you adjust your approach strategically.

    Choose the right pieces for your level

    This is where ego and practicality collide. You want to play Clair de Lune. I’m going to suggest you start with Burgmüller.

    Getting back into piano as an adult means choosing repertoire that’s achievable within a reasonable timeframe—say, 2-4 weeks for a piece. If you’re still struggling after a month, the piece is too hard for your current level, no matter what you could play in high school.

    Where to find appropriate repertoire

    Look for anthologies labeled “easy classics” or “intermediate favorites.” Collections from publishers like Alfred, Faber, or Hal Leonard often include graded compilations that work well for returning players.

    Start one level below where you think you should. If you breeze through a piece in a week, great—bump up the difficulty next time. But most returning students find they need to spend time at easier levels rebuilding fluency before tackling the repertoire they remember.

    Learning how to play by ear can also supplement your repertoire work and make practice feel more creative and less like a chore.

    Popular pieces for returning adults

    These pieces hit the sweet spot of musically satisfying without being technically overwhelming for someone getting back into piano as an adult:

    • Burgmüller’s “Arabesque” or “Ballade”
    • Bach’s “Minuet in G Major”
    • Beethoven’s “Für Elise” (the A section, at least)
    • Chopin’s Prelude in E Minor (Op. 28, No. 4)
    • Yiruma’s “River Flows in You”
    • Comptine d’un autre été (from Amélie)

    Notice these pieces have recognizable melodies and emotional depth despite being technically accessible. That combination keeps you motivated through the rebuilding phase.

    Balance challenge and enjoyment

    You need a mix in your repertoire rotation. One piece that stretches you technically, one that you can play comfortably and enjoy, and one that you’re sight-reading for fun. This variety prevents burnout and ensures you’re always making progress somewhere.

    The stretching piece builds your skills. The comfortable piece maintains your confidence. The sight-reading piece develops your fluency. All three are essential to successfully getting back into piano as an adult.

    Piano keyboard with headphones showing adult piano practice setup for returning players

    Consider working with a teacher

    You can absolutely teach yourself, especially if you had solid training originally. But here’s what a teacher offers that self-study doesn’t: someone to catch bad habits before they solidify, someone to troubleshoot when progress stalls, and someone to hold you accountable to your goals.

    I’m biased, obviously—I make my living teaching piano. But I’ve also seen the difference between self-taught returning players and those who work with a teacher, even just for a few months. The teacher-guided students progress faster and with less frustration.

    What to look for in a teacher

    You need someone who works with adults and understands the unique challenges of getting back into piano as an adult. You don’t need someone who specializes in preparing children for competitions.

    Ask about their experience with returning students. Ask about their teaching philosophy and how they structure lessons. And don’t be afraid to try a trial lesson before committing. (At Weaver Music, I offer a free 30-minute trial lesson specifically so we can both assess whether we’re a good fit—book yours here if you’re curious.)

    In-person versus online lessons

    Both can work beautifully. I teach students worldwide via Zoom as well as in person here in the Bay Area. Online lessons require decent internet and a camera angle that lets your teacher see your hands and posture, but they eliminate commute time and open up teacher options beyond your immediate geography.

    If you’ve never taken an online lesson, here’s what to expect in a first lesson so you can prepare your space appropriately.

    Alternatives to private lessons

    If budget or schedule makes private lessons difficult, lessons can bridge the gap. At Weaver Music, I’ve created a four-level lesson path that covers everything from absolute basics to intermediate repertoire. (Explore the courses here.) It’s not the same as personalized feedback, but it provides structure and guidance when self-teaching.

    YouTube can also be valuable, but be selective. Look for channels run by actual teachers with credentials, not just enthusiastic amateurs. Quality matters when you’re rebuilding technique.

    The value of short-term instruction

    Even if you don’t want ongoing weekly lessons, consider working with a teacher for just a few months while getting back into piano as an adult. Those initial sessions can set you on the right path, correct problematic habits, and give you a roadmap for independent practice.

    Many teachers offer package deals or monthly commitments rather than year-long contracts. This flexibility works well for adults who want expert guidance without long-term obligation.

    Celebrate your progress along the way

    Adult learners are terrible at celebrating wins. You’ll master a scale pattern, then immediately focus on what you still can’t do. I see this constantly.

    Getting back into piano as an adult requires cultivating self-compassion and actually noticing progress. Keep a practice journal. Record yourself playing the same piece once a week—you’ll be amazed at the improvement that’s invisible day-to-day but obvious over a month.

    Dealing with frustration

    There will be days when your hands won’t cooperate, when your brain can’t decode the notes, when you feel like you’re moving backward. This is normal. Motor learning isn’t linear. You plateau, then jump forward, then plateau again.

    On frustrating days, return to something you’ve already mastered. Play that C major scale beautifully. Revisit a piece from two months ago that felt hard then but feels easy now. Remind yourself that progress is happening even when it’s not obvious.

    If you’re also dealing with nerves about performing or playing for others (even just family), strategies for managing performance anxiety can help. Many returning players feel vulnerable sharing their renewed hobby, and that’s worth addressing.

    Avoiding burnout

    One reason people abandon piano the first time is burnout—pressure, joyless practice, focus on perfection over expression. Don’t repeat that pattern.

    Make sure some of your practice time is purely for enjoyment. Play carols in December even if they’re technically beneath you. Mess around with improvisation. Learn the theme song from a TV show you love. Piano should fit into your life as a source of joy, not another obligation on an endless to-do list.

    Understanding why students quit piano can help you structure your return in a way that avoids common pitfalls and keeps you engaged for the long term.

    Joining a community

    Isolation makes it easy to quit. Connection makes it easier to persist. Look for adult piano groups in your area, online forums for returning players, or regular jam sessions where people share what they’re working on.

    Many of my students connect with each other through group classes or informal recitals. There’s something powerful about realizing you’re not the only person struggling to relearn something you used to know.

    According to research from the American Psychological Association, adult music learners who engage with communities of fellow learners show significantly higher persistence rates and report greater satisfaction with their progress.

    The long view

    Getting back into piano as an adult isn’t a sprint to recover lost skills. It’s a lifelong practice that will grow and change with you. Some seasons you’ll practice daily and make rapid progress. Other seasons you’ll maintain with 15 minutes three times a week. Both are valid.

    The goal isn’t to become a concert pianist. The goal is to integrate music back into your life in a sustainable, meaningful way. That might mean playing for ten minutes before bed to decompress. It might mean working toward a single dream piece over a year. It might mean playing hymns at church or accompanying your kid’s school musical.

    There’s no single correct version of what getting back into piano as an adult should look like. The only version that matters is the one that fits your life and brings you joy.

    When to push and when to ease up

    Learning to read your own energy and motivation is crucial. Some days you need to push through resistance because you know you’ll feel better after practicing. Other days, forcing it will only build resentment.

    A good rule of thumb: if you haven’t wanted to practice for three or four days in a row, something needs to adjust. Maybe the pieces are too hard. Maybe your practice schedule is unrealistic. Maybe you need to reconnect with why you’re doing this in the first place.

    Piano should be challenging, but it shouldn’t feel like punishment. Check in with yourself regularly and make adjustments as needed.

    Milestone celebrations

    Set concrete milestones and celebrate when you reach them. Finished your first complete piece? Treat yourself to dinner out. Mastered all major scales? Buy that music anthology you’ve been eyeing. Practiced consistently for three months? Share a video with friends.

    These celebrations aren’t silly—they’re psychological reinforcement that makes long-term habit formation more likely. Getting back into piano as an adult is a significant accomplishment. Honor it.

    You already have what it takes

    If you’re still reading, you’re serious about getting back into piano as an adult. That commitment alone puts you ahead of most people who only think about returning but never actually sit down at the keys.

    The path forward is simple, even if it’s not always easy: assess honestly, start appropriately, practice consistently, choose repertoire wisely, and be patient with yourself. You’re not trying to become who you were ten years ago. You’re becoming a new kind of pianist—one with adult discipline, genuine motivation, and the life experience to truly feel the music you play.

    The piano is waiting. It doesn’t care how long you’ve been gone. It’s ready whenever you are.

    Ready to find out for yourself?

    Your first 30-minute lesson with me is completely free – we will evaluate where you are, talk through your goals, and map out your path.
    Book Your Free Trial Lesson

  • Weighted Keys vs Unweighted: 5 Essential Facts Every Beginner Should Know

    Weighted Keys vs Unweighted: 5 Essential Facts Every Beginner Should Know

    When you’re just starting out at the piano, one of the first decisions you’ll face is choosing between weighted keys vs unweighted keyboards. I’ve been teaching piano for over a decade, both in-person here in the Bay Area and online via Zoom to students worldwide, and this question comes up in nearly every conversation I have with beginners and their parents.

    The difference between weighted keys vs unweighted isn’t just about preference or budget. It fundamentally affects how you learn to play, the technique you develop, and whether you’ll be able to transition smoothly to an acoustic piano down the road. Let me walk you through everything you need to know.

    The Short Answer

    If you’re serious about learning piano properly, choose weighted keys. Weighted keys simulate the hammer action of an acoustic piano, which builds proper finger strength and technique from day one.

    Unweighted keys (like those on most cheap keyboards) feel like switches—they don’t teach your fingers the muscle memory needed for real piano playing. For beginners who want to develop good habits and eventually play on acoustic pianos, the debate between weighted keys vs unweighted really isn’t close. Weighted wins almost every time.

    What Are Weighted Keys?

    Weighted keys are designed to replicate the mechanical resistance you feel when pressing a key on an acoustic piano. When you press a key on a real piano, you’re actually lifting a small hammer that strikes a string. That hammer has mass, and your finger has to overcome that resistance.

    Digital pianos with weighted keys use internal mechanisms to recreate this feeling. There are several types:

    • Fully weighted: Keys have resistance similar to an acoustic piano
    • Semi-weighted: Some resistance, but lighter than fully weighted (less common)
    • Graded hammer action: Heavier in the bass, lighter in the treble, just like a real piano
    • Hammer action: Uses actual hammers inside to create authentic feel

    When we talk about weighted keys vs unweighted, the weighted option gives you tactile feedback. You can feel the difference between playing softly and loudly. You develop control over dynamics and expression from the very beginning.

    The technology behind weighted keys has evolved significantly over the past two decades. According to research published by the International Music Products Association, modern digital piano key actions can replicate up to 95% of the physical characteristics of acoustic piano hammers. This means today’s weighted keyboards offer unprecedented realism for home practice.

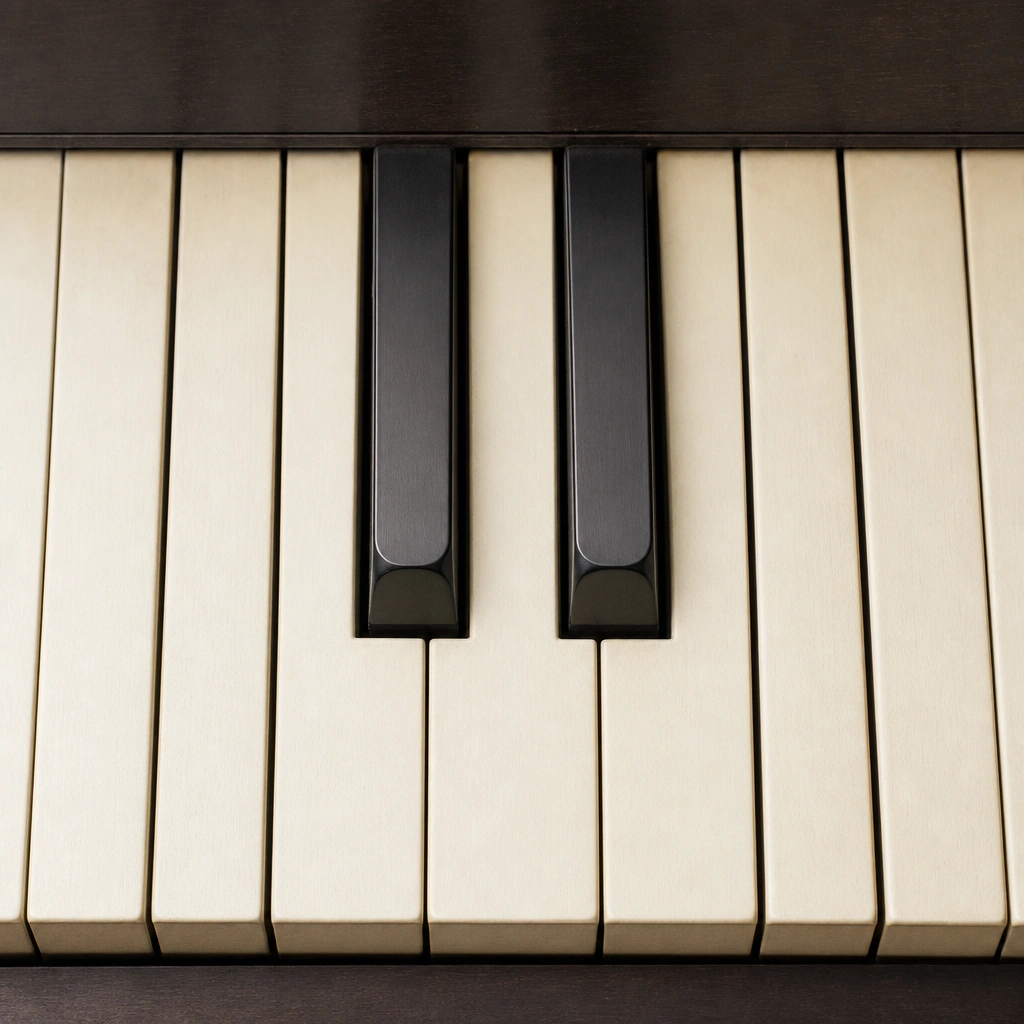
    Close-up comparison showing weighted keys vs unweighted piano keyboard design

    What Are Unweighted Keys?

    Unweighted keys, sometimes called synth-action keys, are what you find on most portable keyboards, synthesizers, and budget instruments. These keys are essentially spring-loaded switches. Press them down and they trigger a sound, but there’s virtually no resistance.

    Playing on unweighted keys feels more like typing on a computer keyboard than playing a piano. The key goes down when you apply even the slightest pressure, and it springs right back up. There’s no correlation between how hard you press and how loud the note sounds in most cases.

    Some unweighted keyboards do have velocity sensitivity, meaning they can detect how fast you press the key and adjust volume accordingly. But that’s still quite different from the weighted keys vs unweighted experience, where true weighted keys give you graduated resistance throughout the entire key press.

    The manufacturing cost difference is substantial. Unweighted key mechanisms might cost manufacturers $20-40 per keyboard, while quality weighted actions cost $150-300 or more. This explains why budget keyboards universally use unweighted keys—it’s an economic decision that unfortunately compromises the learning experience.

    Why Weighted Keys Matter for Technique

    Here’s where the rubber meets the road. I’ve taught hundreds of students over the years, and I can spot someone who learned on unweighted keys within about thirty seconds of hearing them play on a real piano.

    Proper piano technique requires finger strength, hand position, and touch control. When you practice on weighted keys, you’re building all three simultaneously. Your fingers learn how much pressure to apply, how to shape your hand, and how to create different tones and dynamics.

    With unweighted keys, none of that happens. Students develop what I call “typewriter fingers”—they peck at the keys with flat fingers and no dynamic control.

    When they finally sit down at a real piano, their fingers aren’t strong enough to press the keys properly, their hand position collapses, and they sound clunky and mechanical.

    The choice between weighted keys vs unweighted directly impacts your progress. Students who practice on properly weighted instruments typically advance 30-40% faster in my experience, simply because they’re building the right muscle memory from day one.

    Think of it like learning to write. Would you rather practice your handwriting with a proper pencil or with a feather that requires no pressure at all? The feather might be easier at first, but it won’t prepare you for real writing.

    The Neuroscience Behind Muscle Memory

    Recent studies in motor learning show that our brains create neural pathways based on the specific physical actions we practice. When you practice weighted keys vs unweighted keyboards, you’re literally building different neural connections.

    The proprioceptive feedback—the sensation of resistance and weight—helps your brain map the correct movements more accurately. This is why students who learn on weighted keys can transfer their skills to any piano, while those who learn on unweighted keys struggle with the transition.

    The 5 Essential Differences Between Weighted Keys vs Unweighted

    Let me break down the practical differences you’ll actually notice when playing and learning:

    1. Resistance and Finger Strength

    Weighted keys require real finger strength. Your hand muscles will actually get a workout, especially in the first few weeks. This is good—it means you’re building the strength you need for piano playing.

    Unweighted keys require almost no strength. A toddler can press them with a pinky finger. This might seem like an advantage for young beginners, but it’s actually a disadvantage because it doesn’t prepare them for the real thing.

    Professional pianists develop specific muscle groups in their fingers, hands, and forearms through years of practice on properly weighted keys. Starting with unweighted keys is like trying to train for a marathon by walking—the motion might be similar, but the conditioning is completely different.

    2. Dynamic Control

    This is huge. On weighted keys, you can play the same note a hundred different ways—whisper-soft to thunderously loud—all by controlling your touch. This is essential for musical expression.

    On unweighted keys, even with velocity sensitivity, you get maybe three or four levels of volume, and the control feels artificial. The difference between weighted keys vs unweighted is like comparing a dimmer switch to a simple on-off toggle.

    Dynamic control separates mechanical note-playing from genuine musical performance. Without it, you’re limited in your ability to convey emotion, phrasing, and interpretation—the very things that make music beautiful.

    3. Hand Position Development

    Weighted keys encourage proper hand position because you need good form to play effectively. Your fingers naturally curve, your wrist finds the right height, and your arm weight supports your hand.

    Unweighted keys let you get away with terrible hand position. Students often develop flat fingers, collapsed knuckles, and tense wrists because the keys don’t provide enough feedback to correct these issues.

    I spend considerable time in lessons addressing hand position, and the keyboard type makes an enormous difference in how quickly students internalize these concepts. On weighted keys, poor hand position simply doesn’t work well, so students naturally self-correct. On unweighted keys, students can play with terrible form and never realize there’s a problem.

    4. Transferability to Acoustic Pianos

    Practice on weighted keys and you can sit down at any piano in the world and play comfortably. The transition is seamless.

    Practice on unweighted keys and your first encounter with a real piano will be frustrating. Your fingers will feel weak, the keys will seem impossibly heavy, and pieces you thought you’d mastered will suddenly feel impossible.

    This transferability matters more than many beginners realize. Piano opportunities arise unexpectedly—a piano at a friend’s house, an open mic night, a community center instrument. If you’ve practiced on weighted keys vs unweighted options, you’ll be ready to play anywhere. Otherwise, you’re limited to your specific keyboard.

    5. Price and Portability

    Here’s the one area where unweighted keyboards win: they’re cheaper and lighter. A decent unweighted keyboard might cost $100-200 and weigh 10 pounds. A quality digital piano with weighted keys starts around $400-500 and weighs 25-40 pounds.

    But when you’re comparing weighted keys vs unweighted, you’re really comparing a serious learning instrument to a toy. The investment difference is modest when you consider you’re setting up your entire learning foundation.

    Consider this: if you take lessons at $99 per hour, that unweighted keyboard saves you maybe $300 initially. But if it slows your progress by even three or four lessons worth of development, you’ve actually lost money—not to mention time and motivation.

    Piano practice space setup for learning on quality weighted keyboard

    When Unweighted Might Work (and When It Won’t)

    I’m not going to tell you that unweighted keyboards are always wrong for everyone. There are a few specific situations where they might be acceptable as a temporary solution:

    • A young child (under 5) who’s just exploring sounds and isn’t ready for formal lessons
    • Someone who wants to learn synthesizer or electronic music production, not traditional piano
    • A temporary practice solution while traveling, with the understanding that you have weighted keys at home
    • Extreme budget constraints where any keyboard is better than none, with plans to upgrade soon

    But even in these cases, I encourage families to stretch for weighted if at all possible. The question of weighted keys vs unweighted becomes critical the moment you’re taking lessons or trying to learn proper technique.

    Here’s when unweighted absolutely won’t work:

    • When you’re taking regular piano lessons and trying to build technique
    • When you’re preparing for performances, exams, or recitals
    • When you’re learning classical pieces or any music that requires dynamic control
    • When you eventually want to play on acoustic pianos at all

    I’ve had students come to their first lesson with unweighted keyboards, and we have to have an honest conversation. I can teach them music theory, note reading, and rhythm on any instrument. But I can’t teach them proper piano technique on unweighted keys. It’s like trying to teach swimming on dry land.

    What I Tell My Students About Weighted Keys vs Unweighted

    When families book their free 30-minute trial lesson with me, the keyboard question almost always comes up. Here’s exactly what I tell them:

    Get the best weighted digital piano you can afford. Don’t think of it as buying a keyboard—think of it as investing in your learning. A good weighted digital piano will serve you well for 5-10 years or more, taking you from complete beginner through intermediate and even advanced levels.

    The decision between weighted keys vs unweighted is one of the few things in piano learning where there’s a genuinely right answer for most people. I’ve been teaching students of all ages and levels for over a decade, and the pattern is crystal clear: students with weighted keys progress faster, sound better, and enjoy playing more.

    For adults returning to piano or starting for the first time, weighted keys are absolutely non-negotiable. Adult learners are often juggling limited practice time, and they need every advantage they can get. Why handicap yourself with inferior equipment?

    For children, I understand budget constraints are real. But I’ve watched too many promising young students struggle and eventually give up because their unweighted keyboard wasn’t building the skills they needed.

    If you need help choosing an appropriate instrument, I cover this extensively in my digital piano buying guide.

    During our lessons (whether in-person here in the Bay Area or via Zoom anywhere in the world), we work on exercises that specifically develop finger independence and strength. These exercises—similar to the targeted work in my left hand piano exercises article—only work properly on weighted keys.

    Digital piano with headphones ready for quiet practice session on weighted keys

    Choosing Your First Keyboard: Practical Advice

    So you’re convinced that weighted is the way to go. What should you actually buy? Here are my practical recommendations based on years of helping students find the right instrument:

    For Tight Budgets ($400-600): Weighted Keys vs Unweighted Matters Most

    Look for entry-level digital pianos from major brands like Yamaha, Casio, or Roland. Models like the Yamaha P-45 or Casio PX-160 offer fully weighted keys at accessible prices. They won’t have all the bells and whistles, but they have the most important thing: proper key action.

    When evaluating weighted keys vs unweighted at this price point, always choose weighted, even if it means fewer features. Fewer sounds and rhythms don’t matter. The key action matters enormously.

    At this budget level, you might encounter “semi-weighted” keys marketed as a compromise. In my experience, semi-weighted is closer to unweighted than to fully weighted. Don’t be fooled by marketing language—test the keys yourself or stick with models known for full hammer action.

    For Moderate Budgets ($600-1200)

    This is the sweet spot where you get excellent key action, good sound quality, and useful features. The Yamaha P-125, Roland FP-30X, or Kawai ES110 are all outstanding choices with graded hammer action that closely mimics acoustic piano feel.

    At this price range, you’ll also get better speakers, more realistic piano sounds, and useful connectivity options for recording or using learning apps. But the primary value is in the superior key action—these instruments feel remarkably close to acoustic pianos.

    For Serious Students ($1200+)

    If you’re committed for the long haul, instruments like the Yamaha P-515, Roland FP-90X, or Kawai CA series offer premium key action that’s virtually indistinguishable from acoustic pianos. These will take you all the way to advanced levels.

    Some models in this range include wooden keys, escapement mechanisms (the slight “click” you feel in acoustic piano keys), and ivory-feel surfaces. These details might seem minor, but they contribute to the most realistic weighted keys vs unweighted comparison possible.

    What to Test In the Store

    When you’re comparing weighted keys vs unweighted in person, here’s what to try:

    • Play the same note very softly, then very loudly—do you hear a clear difference?
    • Play rapid repeated notes—do the keys respond quickly and accurately?
    • Play in the low bass and high treble—do the keys feel appropriately heavier and lighter?
    • Play for 10-15 minutes—do your fingers feel like they’re working, or is it effortless?

    If the keys feel like they require some effort and you can control dynamics effectively, you’ve found weighted keys. If they feel like calculator buttons, that’s unweighted.

    Bring a piece of music you know (or ask the store staff to play if you don’t play yet) and listen to how the instrument responds to expressive playing. Quality weighted keys should allow for beautiful, nuanced performances, not just loud and soft notes.

    Common Mistakes Beginners Make

    After teaching hundreds of students through Weaver Music, I’ve seen these mistakes repeated over and over. Let me help you avoid them:

    Mistake #1: Assuming All 88-Key Keyboards Are Equal

    Some students think that if a keyboard has 88 keys (the full piano range), it must be like a real piano. Not true. The number of keys tells you nothing about whether they’re weighted.

    I’ve seen 88-key unweighted keyboards that feel nothing like pianos. When comparing weighted keys vs unweighted, the number of keys is a separate question entirely. You need both 88 keys AND proper weighting for a legitimate piano learning experience.

    Mistake #2: Buying Based on Features Instead of Key Action

    Beginners get seduced by hundreds of sounds, built-in rhythms, light-up keys, and learning apps. These features are fun but ultimately irrelevant if the key action is poor. Always prioritize key quality over feature quantity.

    I’ve had students show up with keyboards that can make orchestra sounds, drum beats, and animal noises—but can’t teach proper piano technique. Those extra features add maybe $50 of value while distracting from the $300 difference between weighted keys vs unweighted action.

    Mistake #3: Planning to Upgrade “Later”

    Many families start with an unweighted keyboard thinking they’ll upgrade once the student proves they’re serious. The problem? Bad habits form within the first few months.

    By the time they upgrade, they’re fighting ingrained technique problems. The time to get weighted keys is before you start lessons, not after you’ve been practicing incorrectly for six months.

    I often tell families: if you’re not sure your child will stick with piano, rent a quality weighted digital piano for three months. Many music stores offer rental programs with rent-to-own options. This lets you try proper equipment without full commitment.

    Mistake #4: Not Trying Before Buying

    Weighted keys vs unweighted is something you need to feel for yourself. Online reviews help, but there’s no substitute for putting your hands on the actual instrument. Even if you ultimately buy online for a better price, visit a store first to test the specific model.

    Key actions can vary significantly even within the same brand and price range. The Yamaha P-45 feels different from the Yamaha P-125, which feels different from the Yamaha P-515. You need to know which specific feel works for you.

    Mistake #5: Ignoring the Stand and Pedal

    Proper piano technique requires proper posture, which requires an instrument at the right height with a pedal positioned correctly. Don’t buy a beautiful weighted digital piano and then set it on your dining table with no pedal.

    Get the matching stand and pedal, or at minimum a sturdy adjustable keyboard stand and a universal sustain pedal. These setup details matter almost as much as the weighted keys vs unweighted decision itself.

    I discuss this in detail during lessons because positioning affects everything from hand position to performance confidence.

    Mistake #6: Not Asking Their Teacher

    If you’re taking lessons with me or any qualified teacher, ask before you buy. We’ve seen countless instruments and can give you specific recommendations based on your budget, space, and goals.

    My students have access to detailed guidance through our four-level lesson path, which includes equipment recommendations.

    For my $99 per 60-minute lesson, you’re not just getting instruction time—you’re getting ongoing support for every aspect of your piano journey, including equipment decisions. The weighted keys vs unweighted question is foundational, and I want every student set up for success from day one.

    The Long-Term Value Proposition

    According to research from the National Piano Foundation, students who practice on appropriate equipment are significantly more likely to continue long-term. That aligns completely with what I see: students on weighted keyboards stick with piano, while students on unweighted instruments often quit within the first year, wondering why piano feels so frustrating.

    The truth is that the instrument itself can be either a tool for success or a barrier to progress. When you’re deciding between weighted keys vs unweighted, you’re really deciding whether to give yourself the proper foundation or to make learning unnecessarily difficult.

    I teach students of all ages and abilities, from complete beginners taking their first lesson to advanced players refining their interpretation. Across all these students, the one commonality is that they all need an instrument that responds properly to their touch. Weighted keys provide that. Unweighted keys simply don’t.

    If you’re exploring piano for the first time, the question of weighted keys vs unweighted might seem like a minor technical detail. I promise you it’s not. It’s one of the most important decisions you’ll make, right up there with finding the right teacher and committing to consistent practice.

    Why the Investment Pays Off

    The beautiful thing about modern digital pianos with quality weighted keys is that they’re more accessible than ever. You can have an instrument with excellent touch and tone for less than the cost of a few months of lessons. That instrument will serve you for years, growing with you as you progress from simple melodies to complex repertoire.

    In my studio—whether I’m teaching in-person or via Zoom—I work with students on developing musical expression and individual style. We explore everything from classical technique to playing by ear.

    None of that work translates well to unweighted keys because expression requires touch control, and touch control requires resistance.

    The weighted keys vs unweighted debate ultimately comes down to this: do you want to learn piano, or do you want to learn to press buttons that make piano sounds? They’re not the same thing. Real piano playing is a physical, expressive, dynamic art form. It requires an instrument that can respond to the full range of your musical intentions.

    Real Student Success Stories

    I’ve had the privilege of watching students transform from hesitant beginners to confident players. I’ve seen children develop discipline and adults discover creative outlets they never knew they had. But I’ve never—not once—seen someone develop into a truly skilled pianist while practicing exclusively on unweighted keys.

    One of my adult students started with an unweighted keyboard because she wasn’t sure she’d continue past a few months. After six weeks, she was hooked—but also frustrated that her hands hurt whenever she played at my studio on the weighted digital piano.

    We had an honest conversation about weighted keys vs unweighted, and she invested in a proper instrument. Within two weeks, her playing transformed. Her tone improved, her dynamics became more controlled, and she stopped complaining about hand fatigue. Three years later, she’s working through intermediate classical repertoire and regularly plays piano at community events.

    That pattern repeats constantly in my teaching experience. Students who start on weighted keys or upgrade early tend to progress steadily and stick with piano long-term. Those who resist upgrading eventually hit a wall where their technique simply can’t develop further without proper equipment.

    Making the Decision

    If you’re ready to start this journey the right way, with the right equipment and the right guidance, I’m here to help. My free 30-minute trial lesson is designed to meet you exactly where you are, assess your goals, and create a personalized path forward.

    We’ll talk about repertoire, technique, practice strategies, and yes, we’ll make sure you have the right instrument to support your learning. The weighted keys vs unweighted question is just the beginning—there’s an entire world of musical possibility waiting for you, and having the proper tools makes all the difference.

    Whether you’re a complete beginner, an adult returning to piano after years away, or a parent researching options for your child, the equipment decision matters profoundly. Choose weighted keys, invest in proper setup, find a qualified teacher who understands technique development, and commit to consistent practice. Do these things, and you’ll be amazed at what you can achieve.

    The journey of learning piano is one of the most rewarding experiences available to us as humans. Music connects us to emotion, culture, history, and our own creative potential in ways few other activities can match. But that journey requires the right foundation, and for piano, that foundation begins with weighted keys.

    Ready to find out for yourself?

    Your first 30-minute lesson with me is completely free – we will evaluate where you are, talk through your goals, and map out your path.
    Book Your Free Trial Lesson

  • How to Play Piano by Ear: 7 Proven Steps for Beginners

    How to Play Piano by Ear: 7 Proven Steps for Beginners

    If you’ve ever wondered how to play piano by ear, you’re not alone. Over my ten years of teaching piano, I’ve had countless students ask me this question—often with a mix of wonder and skepticism, as if playing by ear were some mystical gift reserved for the musically anointed.

    The truth is much more encouraging: how to play piano by ear is a learnable skill, not an inborn talent. It takes time, yes, and consistent practice, but anyone with patience and a bit of guidance can develop this ability.

    In this article, I’m going to walk you through a practical, step-by-step roadmap that I’ve refined with hundreds of students. Whether you’re a complete beginner or someone who’s been reading sheet music for years and wants to break free from the page, this guide will help you start hearing music differently and translating what you hear directly to the keys.

    The Short Answer

    How to play piano by ear involves three core skills: recognizing intervals and melodies, understanding chord structures, and knowing common chord progressions. Start by training your ear to identify single notes and intervals, then learn to pick out simple melodies.

    Once you can play a melody, add chords underneath using your knowledge of basic harmony. Practice with songs you know well, and build your skills gradually over weeks and months.

    The process isn’t instant, but it’s far more accessible than most people think. Let’s break it down into manageable steps.

    What Does It Mean to Play Piano by Ear?

    Before we dive into the practical steps of how to play piano by ear, let’s clarify what we mean by the term. Playing by ear means listening to a piece of music and reproducing it on the piano without reading sheet music.

    You’re using your ears and your understanding of music theory—even if it’s intuitive rather than formal—to figure out the notes, chords, and rhythms.

    This doesn’t mean you’re memorizing every note perfectly. Often, playing by ear involves:

    • Identifying the melody line
    • Figuring out the underlying chord progression
    • Adding your own interpretation or arrangement
    • Improvising embellishments or variations

    Some people who play by ear can’t read music at all. Others, like many of my students, use both skills interchangeably. There’s no right or wrong approach—the goal is musical freedom and expression.

    Why Learn to Play Piano by Ear?

    Learning how to play piano by ear opens up your musical world in ways that reading alone never will. When you can play by ear, you’re no longer dependent on having the “right” sheet music in front of you.

    You can sit down at any piano and play a song you heard on the radio that morning, jam with friends, or create your own arrangements.

    Here are some of the benefits I’ve seen in my students who develop this skill:

    • Musical independence: You can learn any song you want, anytime
    • Deeper understanding: You start to hear how music works, not just read it
    • Creativity: Playing by ear naturally leads to improvisation and composition
    • Confidence: There’s something empowering about trusting your ears
    • Social music-making: You can play at gatherings without preparation

    That said, learning how to play piano by ear doesn’t mean abandoning sheet music. The strongest musicians I know can do both.

    If you’re interested in structured learning that incorporates both skills, you might find value in exploring our lesson plan, which covers everything from technique to theory.

    Sheet music for practicing how to play piano by ear skills

    Step 1: Train Your Ear to Recognize Intervals

    The foundation of learning how to play piano by ear is interval recognition. An interval is simply the distance between two notes. When you can hear the difference between a major third and a perfect fifth, you’re well on your way to playing by ear.

    Start with these common intervals:

    • Unison: Two of the same note (no distance)
    • Octave: Eight notes apart—sounds “complete”
    • Perfect fifth: Seven half-steps—sounds strong and open
    • Major third: Four half-steps—sounds happy
    • Minor third: Three half-steps—sounds sad

    A practical exercise: Play middle C on your piano. Now play another note somewhere on the keyboard. Can you tell if it’s higher or lower?

    Now try to sing the distance between them. Then try to find that second note by ear. Do this daily for five minutes.

    Many students find it helpful to associate intervals with familiar songs. The beginning of “Twinkle, Twinkle, Little Star” is a perfect fifth. The first two notes of “Happy Birthday” are a major second. These reference points stick in your memory.

    Step 2: Learn the Major Scale in One Key

    To truly understand how to play piano by ear, you need a framework—and that framework is the major scale. Start with C major because it uses only white keys, making it the simplest to visualize and hear.

    The C major scale is: C – D – E – F – G – A – B – C.

    Play it ascending and descending until it’s completely automatic. Listen to how each note relates to the others. The first note (C) is called the root or tonic—it feels like “home.”

    The fifth note (G) feels stable. The seventh note (B) wants to resolve up to C.

    Once you know the C major scale inside and out, you’ll find that most simple melodies in the key of C use only these notes. This dramatically narrows down your options when trying to figure out a melody by ear.

    Understanding scales also helps with left hand coordination, since you’ll start to see patterns in how bass lines and accompaniments are constructed.

    Step 3: Understand Basic Chord Structures

    Chords are the backbone of most music, and understanding them is essential when learning how to play piano by ear. A chord is simply three or more notes played together. The most common type is the triad—a three-note chord built in thirds.

    In C major, here are the basic triads:

    • C major: C – E – G
    • D minor: D – F – A
    • E minor: E – G – B
    • F major: F – A – C
    • G major: G – B – D
    • A minor: A – C – E
    • B diminished: B – D – F

    Start by learning the three most common: C major, F major, and G major. These three chords alone will let you play hundreds of songs. Practice moving smoothly between them, keeping your hand position efficient.

    The difference between major and minor chords is just one note—the middle note (the third). Major chords sound bright and happy; minor chords sound darker and more introspective.

    Being able to hear this difference is crucial for playing by ear.

    Piano keyboard in warm studio lighting for ear training practice

    Step 4: Start with Melody First

    When you’re learning how to play piano by ear, always start with the melody. The melody is the most recognizable part of a song—the part you sing along to. It’s also usually the easiest to pick out by ear.

    Choose a very simple song you know well. I often start students with “Mary Had a Little Lamb,” “Ode to Joy,” or “Happy Birthday.” Listen to the song (or sing it in your head). Then try to find the first note on the piano.

    Here’s my process:

    1. Sing or hum the melody
    2. Find the starting note by trial and error
    3. Play that note and sing the next note
    4. Ask yourself: does the next note go up or down?
    5. Try a few notes until you find it
    6. Continue note by note until you have the whole melody

    Don’t worry about rhythm at first—just focus on getting the pitches right. Once you have the melody, you can refine the timing.

    This methodical approach has worked for hundreds of my students who initially thought playing by ear was impossible.

    For beginners who want more structured guidance on establishing consistent practice habits, I recommend checking out resources on how often you should practice as you develop this skill.

    Step 5: Add Simple Harmony and Chords

    Once you can play a simple melody by ear, the next step in learning how to play piano by ear is adding chords with your left hand. This is where your knowledge of chord structures from Step 3 becomes practical.

    Most simple songs use just a few chords that repeat. Listen to the song and ask yourself: when does the harmony change? You’ll often hear it change every bar or two, sometimes every two or four bars in slower songs.

    Start by trying the three main chords in the key. If you’re in C major, try C, F, and G. Play the melody with your right hand and experiment with these chords in your left hand underneath.

    One of them will sound “right” at each point in the song.

    Here’s a trick: the chord often matches the melody note. If your melody note is a C, E, or G, try a C major chord. If it’s an F, A, or C, try F major. This won’t always work, but it’s a good starting point.

    The more you do this, the faster you’ll get at hearing which chord fits. Your ear will start to recognize the sound of a I chord (C) versus a IV chord (F) versus a V chord (G).

    Step 6: Practice Common Chord Progressions

    One of the biggest shortcuts in learning how to play piano by ear is understanding that most popular music uses the same handful of chord progressions over and over. Once you know these patterns, you can often predict what chord comes next.

    The most common progression is I – IV – V – I. In C major, that’s C – F – G – C. You’ll find this in thousands of songs across every genre. Other common progressions include:

    • I – V – vi – IV: C – G – Am – F (extremely common in pop music)
    • I – vi – IV – V: C – Am – F – G (the “50s progression”)
    • ii – V – I: Dm – G – C (jazz and standards)
    • I – IV – I – V: C – F – C – G (blues and rock)

    Spend time playing these progressions in different keys. Feel how they sound. Sing melodies over them. The more familiar these patterns become, the easier it will be to recognize them in songs you’re trying to learn by ear.

    According to music theory research, the vast majority of Western popular music relies on these diatonic progressions, making pattern recognition one of the most efficient paths to playing by ear.

    Piano student practicing music by ear in a comfortable studio environment

    Step 7: Build Your Repertoire Gradually

    The final step in mastering how to play piano by ear is simple: keep doing it. Start with easy songs and gradually work your way up to more complex pieces. Each song you learn by ear strengthens your skills and makes the next one easier.

    I recommend creating a progression like this:

    • Beginner ear repertoire: Children’s songs, folk songs, simple hymns
    • Intermediate ear repertoire: Pop songs with clear chord changes, Beatles songs, classic rock
    • Advanced ear repertoire: Jazz standards, contemporary pop with complex harmony, classical themes

    Keep a list of songs you’ve learned by ear. You’ll be surprised how quickly it grows. Many of my students who commit to learning just one new song by ear each week have dozens of songs in their repertoire within a year.

    If you’d like personalized guidance on your journey to learning how to play piano by ear, I offer a free 30-minute trial lesson where we can assess your current ear training level and create a customized plan.

    You can book your free trial lesson here.

    Common Mistakes When Learning to Play Piano by Ear

    After years of teaching students how to play piano by ear, I’ve noticed some common pitfalls that can slow progress or cause frustration. Being aware of these can help you avoid them.

    Starting with songs that are too complex: Many students want to jump straight to their favorite contemporary pop song with intricate production. Start simpler—you’ll get there faster by building a strong foundation first.

    Giving up too quickly: The first few times you try to figure out a song by ear, it will feel slow and frustrating. This is normal. Your ear-brain-fingers connection needs time to develop. Stick with it.

    Ignoring rhythm: Some students focus so much on pitches that they neglect rhythm. Both matter. Use your voice to internalize the rhythm before trying to play it.

    A metronome can be helpful once you have the basic melody down.

    Not singing: Your voice is your best ear training tool. If you can’t sing it, you’ll have a much harder time playing it. Sing the melody, sing the bass line, sing the chord roots—even if you think you can’t sing.

    Trying to play everything at once: Melody first, then chords, then bass line, then embellishments. Layer your arrangement gradually rather than trying to capture everything simultaneously.

    How Long Does It Take to Learn How to Play Piano by Ear?

    One of the most common questions I get about how to play piano by ear is: how long until I can do it? The honest answer is that it varies widely depending on your starting point, natural aptitude, and practice consistency.

    Here’s what I typically see with students who practice ear training deliberately for 10-15 minutes daily:

    • 2-4 weeks: Can find simple melodies by trial and error
    • 2-3 months: Can play basic songs with melody and simple chords
    • 6 months: Can learn simple to intermediate songs relatively quickly
    • 1-2 years: Comfortable with most popular music, beginning to hear more complex harmony
    • 3+ years: Can tackle complex arrangements, improvise confidently, transpose on the fly

    Remember, these are rough guidelines. Some students progress faster, others need more time. What matters most is consistent practice and patience with yourself.

    Playing by ear is a skill that continues to develop over your entire musical life.

    The journey of learning how to play piano by ear is also complementary to formal lessons. At Weaver Music, we work with students of all ages and levels, both in-person in the Bay Area and via Zoom worldwide.

    Lessons are $99 for 60 minutes, and we incorporate ear training naturally into our curriculum.

    Best Practice Tips for How to Play Piano by Ear

    To accelerate your progress in learning how to play piano by ear, incorporate these practice strategies into your routine. These are the same techniques I use with my students who want to develop their ear quickly.

    Daily interval training: Spend five minutes each day on interval recognition. Play two notes and identify the interval. There are free apps and websites that can help with this, but your piano and your own experimentation are just as effective.

    Transcribe bass lines: Don’t just focus on melody. Try to figure out what the bass is doing in songs you know. This will strengthen your understanding of chord progressions and improve your left hand skills simultaneously.

    Sing everything: Before you play it, sing it. This creates a stronger connection between what you hear in your mind and what comes out of your fingers. Singing is the bridge between ear and execution.

    Use the same key initially: When you’re starting out, transpose everything to C major. This removes the complexity of different key signatures and lets you focus purely on ear training. You can learn to transpose later.

    Record yourself: Play what you’ve figured out by ear and record it. Then listen back and compare it to the original.

    You’ll hear discrepancies you didn’t notice while playing, which helps refine your ear further.

    Learn music theory: I know some people think theory will make them less intuitive, but it’s the opposite. Understanding how music works gives your ear a framework to organize what it hears. Theory and ear training are partners, not enemies.

    Be patient and consistent: Like any skill worth having, learning how to play piano by ear takes time. Fifteen minutes of focused ear training daily will yield better results than an hour once a week. Consistency builds neural pathways.

    If you’re feeling stressed about the learning process, remember that piano should be enjoyable. Many of my students find that piano is actually a wonderful stress reliever, especially when you give yourself permission to experiment and play without judgment.

    Learning how to play piano by ear is one of the most liberating skills you can develop as a pianist. It transforms you from someone who can only play what’s written in front of you to someone who can engage with music directly and creatively.

    The roadmap I’ve laid out here—from interval training to melody recognition to chord progressions—is the same path I’ve guided hundreds of students through over the past decade.

    Yes, it takes time. Yes, there will be moments of frustration when you can’t quite find that note or figure out that chord. But there will also be moments of pure joy when you sit down and play a song you just heard, when your ears and fingers work together seamlessly, when you realize you’re making music without any sheet music in front of you.

    That’s the goal: musical freedom. And it’s absolutely within your reach. Start with step one today—just five or ten minutes of interval training. Tomorrow, try to pick out a simple melody.

    Build the habit, trust the process, and be patient with yourself. Before you know it, you’ll be playing piano by ear, wondering why you ever thought it was so mysterious.

    Ready to find out for yourself?

    Your first 30-minute lesson with me is completely free – we will evaluate where you are, talk through your goals, and map out your path.
    Book Your Free Trial Lesson

  • 7 Essential Left Hand Piano Exercises for Beginners

    7 Essential Left Hand Piano Exercises for Beginners

    If you’re like most beginners I’ve taught over the past decade, your left hand feels like it belongs to someone else. It’s slower, clumsier, and seems to have a mind of its own. The good news? With the right left hand piano exercises, you can transform your weak hand into a confident, capable partner at the keyboard.

    I’ve worked with hundreds of students who struggled with left hand coordination, and I’ve seen firsthand which exercises actually work. In this guide, I’ll share the seven essential left hand piano exercises that every beginner should master, along with practical tips for making the most of your practice time.

    The short answer

    The most important left hand piano exercises for beginners are five-finger patterns, octave jumps, blocked and broken chords, scales, and independence drills. Start with simple five-finger exercises in C position, gradually add octave bass patterns, then layer in chord shapes and arpeggios.

    Practice each exercise slowly with a metronome, focusing on evenness and relaxation before speed. The key is consistent daily practice, even just 10-15 minutes focused entirely on left hand work. Most beginners see noticeable improvement within 2-3 weeks of dedicated left hand training.

    Why your left hand needs special attention

    Your left hand isn’t inherently less capable than your right. The problem is that most of us are right-hand dominant in daily life, so our right hand has years of fine motor development that our left hand simply hasn’t experienced.

    At the piano, the left hand typically handles different tasks than the right. While the right hand often plays melody, the left hand provides:

    • Bass notes and harmonic foundation
    • Rhythmic accompaniment patterns
    • Chord progressions and harmonic movement
    • Counter-melodies and inner voices

    These roles require strength, independence, and accuracy. Without targeted left hand piano exercises, your left hand will always lag behind, limiting what you can play and how musically you can express yourself.

    I’ve noticed that students who dedicate even 20% of their practice time to isolated left hand work progress significantly faster than those who only practice hands together. The investment pays off quickly.

    Piano keys in warm window light ready for left hand piano exercises five-finger practice

    Five-finger patterns in different positions

    Five-finger patterns are the foundation of all left hand piano exercises. They develop finger independence, strength, and position awareness without requiring hand movement.

    Basic C position pattern

    Place your left hand in C position: pinky (finger 5) on C below middle C, and fingers 4-3-2-1 on D-E-F-G. Play up and down: 5-4-3-2-1-2-3-4-5. Focus on even tone and timing.

    Start at 60 beats per minute, one note per beat. When you can play it smoothly for a full minute without tension or errors, increase the metronome by 4 beats per minute. If you’re new to metronome work, this guide will help you get started.

    Adding rhythm variations

    Once you’re comfortable with the basic pattern, try these rhythm variations on the same five-finger pattern:

    • Long-short pattern: quarter-eighth-eighth repeated
    • Dotted rhythms: dotted quarter followed by eighth
    • Triplet patterns: three notes per beat
    • Accents: emphasize every third note

    These variations are crucial left hand piano exercises because they train your fingers to respond to different rhythmic demands, not just play mechanically.

    Moving to other positions

    Practice the same five-finger pattern starting on G (below middle C), F, and D. This develops position awareness and prepares you for pieces that change hand positions. Each new position will feel awkward at first, which is exactly why you need to practice it.

    Octave jumps and bass line patterns

    Many beginner pieces use a simple left hand pattern: bass note, chord, bass note, chord. This requires accurate octave jumps, which are essential left hand piano exercises to master early.

    Simple octave exercise

    Start with your left hand pinky on the C below middle C. Play C with your pinky, then jump up an octave and play the C above with your thumb. Return to the lower C with your pinky. Repeat this pattern until the jump feels natural and accurate.

    The key is not looking at your hand while jumping. Use muscle memory and spatial awareness. Start very slowly, and only increase speed when you can hit the target note accurately every time.

    Bass-chord pattern in C

    This is one of the most practical left hand piano exercises because it appears in countless songs. Play low C with your pinky, then play a C major chord (C-E-G) with fingers 5-3-1. Repeat steadily with a metronome.

    Once comfortable in C, practice the same pattern with G major (G-B-D), F major (F-A-C), and A minor (A-C-E). These are the most common chords you’ll encounter in beginner repertoire.

    Empty piano bench in front of an upright piano ready for a left hand practice session

    Chord progressions and blocked chords

    Blocked chords—playing all notes simultaneously—are fundamental left hand piano exercises that build hand shape, strength, and harmonic understanding.

    Basic major and minor triads

    Learn to play these blocked chords with your left hand (5-3-1 fingering):

    • C major: C-E-G
    • G major: G-B-D
    • F major: F-A-C
    • A minor: A-C-E
    • D minor: D-F-A
    • E minor: E-G-B

    Play each chord four times slowly, focusing on playing all three notes exactly together, not rolled or staggered. Listen for evenness of volume across all three notes.

    Common progressions

    Practice these common chord progressions as left hand piano exercises. Each chord gets four beats:

    • C – G – F – C (I-V-IV-I)
    • C – Am – F – G (I-vi-IV-V)
    • C – F – C – G (I-IV-I-V)

    These progressions appear in thousands of songs. When you internalize them in your left hand, you’ll be able to accompany yourself or others much more easily.

    Broken chord patterns and arpeggios

    Broken chords—playing chord notes sequentially rather than simultaneously—are among the most musical left hand piano exercises you can practice. They appear in everything from classical to contemporary music.

    Basic arpeggio pattern

    Using the C major chord shape (C-E-G), play the notes in sequence: 5-3-1-3-5-3-1-3. This creates a flowing, harp-like pattern. Keep the tempo steady and the notes even in volume and timing.

    The challenge is maintaining a smooth legato sound while your fingers move. Avoid accenting the thumb note, which beginners tend to do naturally.

    Alberti bass pattern

    This classical left hand pattern is one of the most important left hand piano exercises for developing agility. Using a C major chord, play: 5-3-1-3 repeated. The pattern is named after composer Domenico Alberti who used it extensively.

    Start slowly enough that every note is clear and even. This pattern appears in countless classical pieces and is worth mastering thoroughly. Practice it with C, G, F, and A minor chords.

    Waltz pattern

    In 3/4 time, play bass note on beat 1, then chord notes on beats 2 and 3. For C major: low C (beat 1), then E-G together (beat 2), then E-G again (beat 3). This creates the characteristic “oom-pah-pah” waltz accompaniment.

    These accompaniment patterns as left hand piano exercises serve double duty: they strengthen your hand while teaching you musical styles you’ll actually use in real pieces.

    Sheet music, pencil and coffee on a wooden table for planning left hand chord practice

    Scales with left hand focus

    Scales are classic left hand piano exercises that develop technique, finger coordination, and key familiarity. But most beginners practice them wrong—too fast, uneven, and with tension.

    One octave C major scale

    Starting on C below middle C, play up one octave with left hand fingering: 5-4-3-2-1-3-2-1. The thumb crosses under after finger 3. Play down: 1-2-3-1-2-3-4-5.

    The thumb crossover is the technical challenge. Keep your wrist flexible and relaxed. The thumb should tuck under smoothly, not with a jerky motion. Practice just the transition point (3-2-1 and 1-2-3) slowly until it’s fluid.

    Left hand scale practice tips

    When using scales as left hand piano exercises, follow these guidelines:

    • Start at 60 bpm, one note per beat
    • Play each note with identical volume and length
    • Keep your wrist loose and level
    • Listen critically for evenness
    • Only increase speed when perfect for one week

    Many students rush scales, which defeats the purpose. The goal isn’t speed—it’s control, evenness, and relaxation. Speed comes naturally after you’ve developed proper technique.

    Adding G major and F major

    Once C major feels comfortable, add G major (one sharp) and F major (one flat). These three scales cover the vast majority of beginner repertoire. The fingering stays the same: 5-4-3-2-1-3-2-1 going up.

    Learning scales in the left hand specifically, rather than always practicing hands together, is one of the most effective left hand piano exercises for building independence and confidence.

    Left hand piano exercises for independence

    True left hand mastery means your left hand can function independently while your right hand does something completely different. These left hand piano exercises challenge your brain as much as your fingers.

    Different rhythms exercise

    Play a C major scale slowly with your left hand (one note per beat) while your right hand plays the same scale in a different rhythm (two notes per beat). This forces each hand to maintain its own rhythm independently.

    This exercise feels nearly impossible at first. That’s normal. Your brain wants to synchronize both hands. Start extremely slowly and be patient. The breakthrough comes suddenly after consistent practice.

    Static and moving exercise

    Hold a C major chord with your right hand while your left hand plays a five-finger pattern. Then switch: hold a chord with the left while the right plays the pattern. This trains independent hand control.

    These kinds of left hand piano exercises might seem abstract, but they directly translate to playing real music where your hands need to function autonomously.

    Easy repertoire for independence

    Apply your left hand piano exercises to simple pieces. Look for beginner music where the left hand has a steady, repetitive pattern while the right hand plays melody. Folk songs, hymns, and simple classical pieces are ideal.

    Actually playing music—even simple music—is more motivating than exercises alone. It gives context and purpose to the technical work you’re doing. For guidance on structuring your practice time effectively, this article on practice frequency offers helpful frameworks.

    Crossover technique and thumb control

    The thumb is the most important finger in your left hand for fluid playing. These left hand piano exercises specifically develop thumb flexibility and crossover technique.

    Thumb crossing drill

    Play fingers 5-4-3 descending (C-D-E), then cross your thumb under to play F. Return with 1-3-4-5. Repeat this small pattern, focusing entirely on the thumb’s smooth motion under the hand.

    Your thumb should move independently of your wrist. Beginners often twist their entire wrist when moving the thumb, creating tension and limiting speed. Practice the thumb motion in isolation until it’s smooth and relaxed.

    Extended crossover pattern

    Expand the pattern: 5-4-3-2-1-4-3-2-1-4-3-2-1, descending from C to low F. This exercises multiple thumb crossovers in sequence. It’s challenging but excellent for developing fluid left hand technique.

    These technical left hand piano exercises might not sound musical, but they’re building the mechanics you need for actual pieces. Think of them as stretching before a workout—not the main event, but essential preparation.

    How to practice these exercises effectively

    Having a collection of left hand piano exercises only helps if you practice them correctly. Here’s how to structure your left hand practice for maximum benefit.

    Daily routine structure

    Dedicate 15 minutes of every practice session exclusively to left hand piano exercises. Do this before working on pieces, when your focus is freshest. A sample routine might include:

    • 5-finger patterns in two positions (3 minutes)
    • One scale, focus on evenness (3 minutes)
    • Octave jump pattern (2 minutes)
    • Chord progression (3 minutes)
    • One broken chord pattern (2 minutes)
    • Independence drill (2 minutes)

    Rotate which specific exercises you use, but maintain the structure. Consistency matters more than variety. If you’re wondering how much practice time you need overall, this practice schedule guide provides realistic frameworks for different lifestyles.

    Slow practice principle

    The single most important principle for effective left hand piano exercises is this: practice slowly enough that you can play perfectly. If you make mistakes, you’re practicing too fast.

    Most beginners practice two to three times faster than they should. They think faster practice is more efficient. It’s not. You’re training muscle memory, and mistakes get memorized just as easily as correct movements.

    Set your metronome slower than feels necessary. Play each exercise perfectly for one full week at that tempo before increasing by just 4 beats per minute. This approach feels painfully slow but produces results far faster than sloppy speed practice.

    Recording yourself

    Record your left hand piano exercises on your phone once per week. Listening back reveals unevenness, rushing, and tension that you don’t notice while playing. It’s uncomfortable but incredibly valuable feedback.

    Compare recordings from week to week. You’ll hear tangible progress, which is motivating when daily practice feels tedious. Small improvements compound over time into significant skill development.

    Relaxation check

    Every 2-3 minutes during left hand piano exercises, stop and check for tension. Shake out your hand. Roll your shoulders. Tension is the enemy of technique, and beginners unconsciously tense up when concentrating.

    Your hand should feel strong but relaxed, never gripped or rigid. If you feel fatigue or pain, you’re using too much tension. Back off, slow down, and focus on playing with minimum effort.

    Working with a teacher

    While these left hand piano exercises are effective for self-study, a teacher provides invaluable feedback on technique, posture, and tension that you can’t easily assess yourself. Even occasional check-ins make a significant difference.

    At Weaver Music, we work with students at all levels, from total beginners to advanced players. Our lessons are available worldwide via Zoom or in-person in the Bay Area, with flexible scheduling at $99 per 60-minute lesson. We also offer a comprehensive four-level lesson path you can access anytime to supplement your practice.

    The patient, supportive teaching approach we use helps students build technique properly from the start, avoiding bad habits that are much harder to fix later. Our free 30-minute trial lesson gives you a chance to experience this approach firsthand—we’ll assess your current level, discuss your goals, and create a personalized path forward.

    Integration with repertoire

    Don’t practice left hand piano exercises in isolation from actual music. Choose pieces where you can apply what you’re drilling technically. If you’re working on alberti bass patterns, find a Mozart sonatina that uses them. If you’re drilling chord progressions, learn a folk song that uses those chords.

    This connection between technique and music keeps practice purposeful. You’re not just doing exercises—you’re building skills for specific musical goals. That mental connection makes practice more engaging and effective.

    Patience with progress

    Left hand development takes time. Most students need 4-6 weeks of consistent left hand piano exercises before they notice significant improvement, and 3-4 months before their left hand feels truly comfortable and independent.

    This timeline frustrates beginners who want immediate results. But developing fine motor control and neural pathways simply takes time. Trust the process. Show up daily, practice mindfully, and the results will come.

    According to research from educational institutions like the University of Texas, motor skill acquisition follows a predictable pattern: slow progress at first, then a sudden leap in ability, followed by a plateau before the next leap. Don’t judge your practice effectiveness by day-to-day progress. Look at month-to-month development instead.

    Common mistakes to avoid

    In my years of teaching, I’ve seen students make the same mistakes with left hand piano exercises repeatedly:

    • Practicing too fast too soon
    • Only practicing left hand in easy keys (C major)
    • Neglecting rhythm and playing mechanically
    • Practicing with tension and ignoring discomfort
    • Giving up after 1-2 weeks without dramatic results
    • Never applying exercises to actual repertoire

    Avoid these pitfalls by staying mindful during practice. Quality practice minutes matter far more than quantity. Fifteen minutes of focused, slow, intentional left hand piano exercises beats an hour of mindless repetition every time.

    Celebrating small wins

    Track your progress explicitly. Keep a practice journal noting which exercises you’re working on and at what tempo. When you increase the metronome by 4 bpm, write it down. When an exercise that felt impossible three weeks ago now feels comfortable, acknowledge that win.

    Learning piano is a long journey made up of thousands of small victories. These left hand piano exercises represent foundational skills that will support everything you play for years to come. The investment you’re making now pays dividends throughout your entire musical life.

    Many students tell me they almost quit piano during the frustrating early months when their left hand felt hopelessly clumsy. But those who persisted with dedicated left hand piano exercises broke through that barrier and went on to play music they never imagined possible. You can be one of those students.

    Beyond beginner exercises

    As you master these fundamental left hand piano exercises, you’ll naturally progress to more advanced patterns: stride bass, complex arpeggios, polyrhythms, and contrapuntal independence. But everything builds on these seven foundational exercises.

    Don’t rush past the basics. A rock-solid foundation in simple five-finger patterns, scales, and chord progressions will support your playing for life. I still practice variations of these left hand piano exercises myself as warmups, even after decades at the piano.

    The exercises in this guide will serve you well for your first 1-2 years of piano study. Master them thoroughly, and you’ll have the left hand technique needed for intermediate repertoire and beyond.

    Your left hand isn’t your weak hand—it’s simply your less-trained hand. With consistent, mindful practice of these left hand piano exercises, you’ll develop the strength, independence, and control that separate struggling beginners from confident, capable pianists. The work you put in now builds the foundation for everything you’ll play in the future.

    Ready to find out for yourself?

    Your first 30-minute lesson with me is completely free – we will evaluate where you are, talk through your goals, and map out your path.
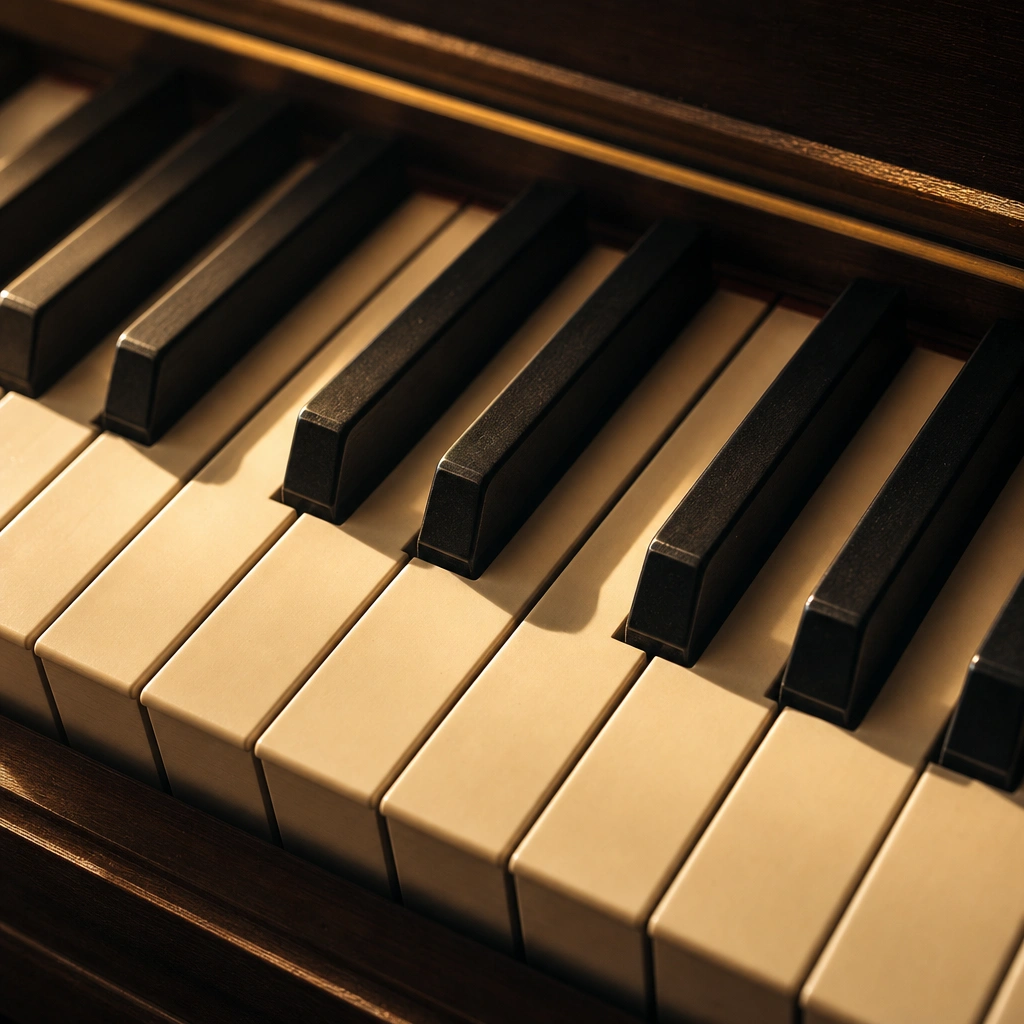
    Book Your Free Trial Lesson

  • Piano Performance Anxiety: 7 Proven Strategies to Overcome Nerves

    Piano Performance Anxiety: 7 Proven Strategies to Overcome Nerves

    If your hands shake before a recital, your mind goes blank when you sit at the bench, or you’ve ever considered skipping a performance altogether, you’re dealing with piano performance anxiety. This challenge affects nearly every pianist at some point, from beginners playing their first simple piece to advanced musicians tackling complex repertoire.

    The good news? With the right strategies, you can transform that nervous energy into focused, confident playing.

    Over my decade of teaching piano to hundreds of students, I’ve seen every shade of performance anxiety. I’ve also discovered what actually works to overcome it, and what’s just well-meaning advice that doesn’t hold up in the real world.

    The Short Answer

    Piano performance anxiety stems from our brain’s threat response kicking in when we feel judged or fear making mistakes. To overcome it, combine thorough preparation with physical calming techniques (like breathing exercises), mental reframing strategies, and gradual exposure to performance situations.

    The key is addressing both the physical symptoms and the underlying thoughts that trigger them.

    Most importantly, understand that some nervousness is normal and even helpful. The goal isn’t to eliminate anxiety completely, but to manage it so it doesn’t interfere with your playing.

    Why Piano Performance Anxiety Happens

    Before we tackle solutions, it helps to understand what’s happening in your body and mind when piano performance anxiety strikes. This isn’t weakness or a character flaw—it’s your brain doing exactly what evolution designed it to do.

    The Biology of Performance Nerves

    When you face an audience, your amygdala (the brain’s threat-detection center) can interpret the situation as dangerous. It floods your system with adrenaline and cortisol, triggering the fight-or-flight response.

    Your heart races, your hands might shake or sweat, and blood flow redirects from fine motor control to major muscle groups.

    This response helped our ancestors escape predators, but it’s less helpful when you need delicate finger control for a Chopin nocturne. Understanding this biology is the first step in managing piano performance anxiety, because you realize your body isn’t malfunctioning—it’s just responding to perceived threat.

    Pianist seated calmly at a grand piano viewed from behind while using piano performance anxiety relief techniques

    Common Mental Triggers

    Several thought patterns intensify piano performance anxiety:

    • Perfectionism: Believing you must play flawlessly or you’ve failed
    • Catastrophizing: Imagining worst-case scenarios (forgetting the piece, public humiliation)
    • Comparison: Measuring yourself against other performers
    • External validation: Tying your self-worth to audience approval
    • Inexperience: Fear of the unknown when you haven’t performed much

    Many students I work with at Weaver Music discover that their piano performance anxiety actually has little to do with their playing ability. It’s rooted in these thought patterns, which means it can be addressed through specific mental strategies.

    Preparation Strategies That Build Real Confidence

    The foundation for managing piano performance anxiety is laid weeks before the performance. Thorough preparation doesn’t just improve your playing—it gives you genuine confidence that withstands pressure.

    Master Your Piece Beyond Performance Level

    I tell my students to prepare their recital piece to about 120% of what they need. If you can play it perfectly in your studio, you might manage 80% of that quality under performance stress.

    But if you’ve practiced it until you can play it in your sleep, that 80% will still sound great.

    This means continuing work on a piece long after you can “play it through.” Polish every phrase, nail every transition, and practice until your fingers know the music so deeply that even when your conscious mind panics, muscle memory carries you through.

    Simulate Performance Conditions

    Piano performance anxiety spikes when the performance environment feels unfamiliar. Combat this by recreating performance conditions during practice:

    • Play through your piece without stopping, even if you make mistakes
    • Practice on different pianos when possible
    • Record yourself and listen back
    • Perform for family members or friends
    • Practice in “concert dress” if your outfit might affect your playing
    • Stand up, bow, sit down, and begin—practice the whole ritual

    At Weaver Music, I encourage students to schedule mini-performances during their practice routine. Even playing for your cat while imagining an audience helps your brain normalize the performance experience.

    Develop a Pre-Performance Routine

    Athletes use pre-performance routines to trigger focus and calm. Pianists can too. Create a sequence you do before every practice run-through and every actual performance.

    This might include specific stretches, breathing patterns, or mental visualization.

    When piano performance anxiety rises before a recital, this familiar routine signals to your brain: “We’ve done this many times before. We know what to do.” The familiarity itself is calming.

    Understanding the Practice-Performance Connection

    Research from the American Psychological Association shows that performance anxiety decreases significantly when musicians practice under varied conditions rather than only in comfortable settings.

    This means occasionally practicing when you’re tired, in different rooms, or with minor distractions present.

    The more your practice incorporates variety and challenge, the more adaptable you become under pressure. Your brain learns that it can play this piece under different circumstances, which builds genuine resilience against piano performance anxiety.

    Cozy piano practice space where students prepare and overcome performance challenges

    Physical Techniques to Calm Your Body

    When piano performance anxiety triggers physical symptoms, you need tools to bring your body back to baseline. These techniques work because they directly influence your nervous system.

    Breathing Exercises That Actually Help

    Controlled breathing is one of the fastest ways to signal safety to your nervous system. When you’re anxious, breathing becomes shallow and rapid. Deliberately slowing it down tells your brain the threat has passed.

    Try box breathing: Inhale for four counts, hold for four, exhale for four, hold for four. Repeat five times.

    I’ve seen students go from shaking hands to steady calm in just two minutes using this technique backstage.

    Another effective approach is the 4-7-8 breath: inhale for four counts, hold for seven, exhale slowly for eight. The extended exhale activates your parasympathetic nervous system, the “rest and digest” mode that counteracts anxiety.

    Progressive Muscle Relaxation

    Piano performance anxiety often manifests as tension—tight shoulders, clenched jaw, rigid fingers. Progressive muscle relaxation teaches you to recognize and release this tension.

    Starting at your toes, deliberately tense each muscle group for five seconds, then release and notice the difference. Work up through your legs, torso, arms, hands, neck, and face.

    This practice helps you identify where you hold tension and consciously let it go.

    Before a performance, a quick version focusing just on your shoulders, arms, and hands can make an immediate difference in your playing comfort.

    Physical Warm-Up Routines

    Never go into a performance cold. A physical warm-up serves multiple purposes: it prepares your muscles, occupies your anxious mind, and establishes your routine. Your warm-up might include:

    • Gentle hand and wrist stretches
    • Shoulder rolls and neck stretches
    • Playing scales or arpeggios (not your performance piece)
    • Simple exercises to get blood flowing to your fingers

    Many pianists find that establishing a consistent warm-up routine helps manage piano performance anxiety by giving them something concrete to focus on rather than spiraling worry.

    The Role of Physical Health

    Your overall physical condition affects how intensely you experience piano performance anxiety. Regular exercise, adequate sleep, and proper nutrition all contribute to a more resilient nervous system.

    According to research published in the National Institutes of Health, regular aerobic exercise can reduce general anxiety levels by up to 20%, which translates to lower baseline anxiety when you approach performances.

    You don’t need to become an athlete, but basic self-care genuinely impacts your ability to manage performance nerves.

    Mental Approaches That Actually Work

    Physical techniques help, but piano performance anxiety lives primarily in your mind. These mental strategies address the root of the problem.

    Reframe Your Relationship with Mistakes

    Much of piano performance anxiety comes from fear of mistakes. But here’s the truth: every performer makes mistakes. Every single one.

    The difference is how they respond.

    Professional pianists develop the skill of recovering smoothly when something goes wrong. They don’t stop, grimace, or apologize—they keep the musical line going and most audience members never notice.

    Practice making intentional mistakes during run-throughs, then continuing without breaking character. This sounds strange, but it’s incredibly liberating. When you know you can recover from errors, they become much less frightening.

    Students in my lesson plan often tell me this single shift—from “mistakes are disasters” to “mistakes are manageable”—transforms their relationship with piano performance anxiety.

    Visualization and Mental Rehearsal

    Your brain doesn’t fully distinguish between vividly imagined experiences and real ones. This means mental rehearsal creates real neural pathways.

    Spend time visualizing your performance from start to finish. Imagine walking to the piano, feeling the bench beneath you, seeing the keys, and hearing yourself play beautifully.

    Include sensory details—the temperature of the room, the sound of your breathing, the satisfaction of a well-executed passage.

    Also visualize handling challenges. Imagine making a small mistake and recovering gracefully. Picture piano performance anxiety symptoms arising—and then using your breathing technique to calm down.

    Mental rehearsal of both success and recovery builds comprehensive confidence.

    Shift Your Focus from Self to Music

    Piano performance anxiety intensifies when you’re focused on yourself: “How do I look? What are they thinking? Am I good enough?” This self-focused attention creates a vicious cycle of anxiety.

    Instead, commit to serving the music. Your job isn’t to prove your worth or be perfect—it’s to share something beautiful.

    When you shift focus from “me” to “the music,” the pressure transforms into purpose.

    Before you perform, remind yourself: “I’m here to share this piece I’ve grown to love. The audience wants to receive it.” This subtle mental shift can dramatically reduce piano performance anxiety.

    Cognitive Restructuring Techniques

    Cognitive-behavioral approaches to piano performance anxiety involve identifying and challenging unhelpful thoughts. When you notice catastrophic thinking (“If I mess up, everyone will think I’m terrible”), deliberately counter it with evidence.

    “I’ve recovered from mistakes before. Most audience members won’t notice small errors. My worth isn’t determined by one performance.”

    This isn’t about positive thinking—it’s about realistic thinking. You’re training your brain to assess situations accurately rather than defaulting to worst-case scenarios.

    Sheet music on piano stand in peaceful studio setting for focused practice

    Day-of-Performance Strategies

    The day of your recital requires specific strategies to manage piano performance anxiety as it peaks.

    Morning and Afternoon Preparation

    How you spend performance day matters. Avoid over-practicing—this usually increases anxiety and tires your muscles. Instead:

    • Play through your piece once or twice in the morning, slowly and mindfully
    • Engage in calming activities—walk, read, listen to music you love
    • Eat regular, balanced meals (skip heavy foods that make you sluggish)
    • Stay hydrated but not over-caffeinated
    • Avoid other pianists’ performances on YouTube—comparison fuels anxiety

    One student told me she used to spend recital day frantically practicing, which amplified her piano performance anxiety. When she switched to one calm morning run-through followed by a nature walk, her performance quality improved dramatically.

    Right Before You Perform

    In the final minutes before your performance, piano performance anxiety may peak. Have a plan.

    Find a quiet space if possible. Do your breathing exercises. Run through your pre-performance routine. Some pianists benefit from listening to their piece one final time; others prefer silence.

    Know what works for you.

    Importantly, accept the nervousness rather than fighting it. Tell yourself, “My body is energized and ready. This nervousness is excitement. It will help me play with intensity and focus.”

    Research shows that reframing anxiety as excitement actually improves performance.

    The Walk to the Piano

    Your walk to the piano sets the tone. Move deliberately, not rushed. Breathe. Remind yourself of your intention—to share the music.

    Settle at the bench without hurrying. Adjust if needed. Place your hands.

    Before you begin, take one full breath. This pause—just three or four seconds—allows your nervous system to settle and signals to the audience that you’re in control. Then begin with commitment.

    Many pianists battling piano performance anxiety rush this moment, starting before they’re truly ready. The pause is powerful.

    Managing Unexpected Challenges

    Sometimes performance day brings surprises: a different piano than you expected, an uncomfortably warm room, or an unexpected delay. Piano performance anxiety can spike when things don’t go as planned.

    Build flexibility into your mental approach. Remind yourself that professional musicians perform under varied conditions all the time. Your preparation is solid enough to handle variations.

    Having a flexible mindset—”I can adapt to whatever comes”—reduces the impact of surprises on your nerves.

    After the Performance: Learning and Growing

    How you process a performance affects your future relationship with piano performance anxiety.

    Realistic Self-Assessment

    After performing, your brain may fixate on mistakes while ignoring everything that went well. This negativity bias is normal but unhelpful.

    Deliberately practice balanced assessment. Write down three things that went well and one or two things to improve next time.

    Notice what you did right—maintained tempo through a tricky section, recovered smoothly from a memory slip, connected emotionally with the music.

    In my experience teaching at Weaver Music, students who practice this balanced reflection develop much healthier relationships with performance than those who focus only on what went wrong.

    Gathering Useful Feedback

    If you’re working with a teacher, discuss the performance. At Weaver Music, I help students process performances during their lessons, identifying both strengths and specific areas to address.

    Audience feedback can be tricky—people are usually kind but vague (“Great job!”). The most useful feedback comes from musicians who can offer specific observations while remaining supportive.

    Planning Your Next Performance

    One of the best ways to overcome piano performance anxiety is to perform regularly. Each performance provides data and experience that inform the next one.

    Don’t wait a year between performances. Look for lower-stakes opportunities: play at an open mic, perform for a community group, organize a small house concert, or even go live on social media.

    Frequency builds comfort.

    The students I work with who perform every few months develop resilience around piano performance anxiety that those who perform once yearly never quite achieve. Exposure is genuinely therapeutic.

    Celebrating Progress, Not Just Perfection

    Each performance is a learning opportunity. Maybe this time you managed your breathing better than last time. Perhaps you recovered more smoothly from a mistake. Or you simply felt more present with the music.

    These incremental improvements matter. Celebrating them reinforces positive patterns and gradually reshapes your relationship with piano performance anxiety.

    Long-Term Solutions for Piano Performance Anxiety

    While the strategies above help with specific performances, addressing piano performance anxiety in the long term requires deeper work.

    Build Performance Into Regular Practice

    Make performance mode part of your regular practice routine, not something you only do right before a recital. Once or twice a week, do a complete run-through as if you’re performing.

    Some pianists even dress up for these practice performances.

    This regular exposure normalizes the performance state. Your brain stops treating it as a rare, threatening event and starts seeing it as just another thing you do.

    Address Underlying Perfectionism

    If piano performance anxiety is severe and persistent, it may be rooted in perfectionism or deeper self-worth issues. This is common among serious musicians and nothing to be ashamed of.

    Working with a teacher who understands these dynamics can help. In my free 30-minute trial lessons, I often discuss not just technique but the mental game of piano playing, because the two are inseparable.

    For some pianists, working with a therapist alongside a piano teacher provides the most comprehensive support for piano performance anxiety. Cognitive-behavioral therapy has strong research support for performance anxiety specifically.

    Develop Multiple Identities

    When your entire self-worth rests on piano performance, the stakes of any single recital become unbearably high. Piano performance anxiety often decreases when you cultivate a rich life with multiple sources of meaning and accomplishment.

    You are not just a pianist. You’re also a friend, perhaps a parent, a professional in another field, someone with hobbies and interests beyond music.

    This broader identity provides perspective: a less-than-perfect recital doesn’t define you.

    I’ve written before about why students quit piano, and often it’s because the pressure became too intense. Keeping piano in healthy perspective—something you love and work hard at, but not the sole source of your worth—actually improves both your enjoyment and your performance.

    Understand That Growth Takes Time

    Managing piano performance anxiety is a skill like any other—it develops with practice over time. Your first few performances might still involve significant nerves. That’s okay.

    Each one teaches you something.

    Be patient with yourself. Notice the small improvements: “Last time my hands shook through the whole piece; this time they settled after the introduction.” Progress isn’t always linear, but it is real.

    Students who work with me long-term, whether through online courses or regular Zoom lessons, consistently report that piano performance anxiety diminishes as they gain experience and implement these strategies.

    It’s not about becoming fearless—it’s about becoming capable even in the presence of fear.

    Consider the Role of Preparation Consistency

    Inconsistent practice schedules often worsen piano performance anxiety because you’re never quite sure how prepared you really are. When you maintain a steady practice routine, you build reliable competence that withstands pressure.

    Many adult students benefit from structured approaches to practice. I’ve found that students who follow a consistent schedule—even if it’s just 20-30 minutes daily—report less anxiety than those who cram before performances.

    Know When to Seek Additional Support

    For most pianists, the strategies in this article will significantly reduce piano performance anxiety. But if your anxiety is severe—causing panic attacks, making you avoid all performance opportunities, or significantly impacting your quality of life—consider seeking support from a mental health professional who specializes in performance anxiety.

    There’s no shame in this. Professional athletes, actors, and musicians often work with sports psychologists or therapists to optimize their performance mindset.

    You deserve the same level of support.

    Additionally, working with an experienced teacher can make a tremendous difference. At Weaver Music, I’ve helped hundreds of students work through piano performance anxiety, and because I offer lessons both in-person in the Bay Area and via Zoom worldwide, location is rarely a barrier.

    The investment in quality instruction—$99 for a 60-minute lesson—often pays dividends in both your playing and your confidence.

    The Power of Community and Shared Experience

    Connecting with other pianists who understand piano performance anxiety can be remarkably healing. You realize you’re not alone in this struggle, and you can learn from how others manage their nerves.

    Consider joining piano groups, online forums, or attending masterclasses where performance anxiety is discussed openly. The more normalized these conversations become, the less shame and isolation you’ll feel around your own experience.

    Celebrate the Courage It Takes

    Finally, recognize that stepping onto a stage or even performing for a small group requires genuine courage. Piano performance anxiety is your brain trying to protect you from perceived threat.

    The fact that you do it anyway—that you share your music despite the fear—is worthy of respect.

    Every performance, regardless of outcome, is an act of vulnerability and bravery. Over time, as you implement these strategies and gain experience, piano performance anxiety typically lessens.

    But even if it doesn’t disappear entirely, you’ll develop the skills to perform well anyway.

    That’s the real goal: not to eliminate fear, but to make music regardless. And that’s absolutely achievable for every pianist willing to do the work.

    Ready to find out for yourself?

    Your first 30-minute lesson with me is completely free – we will evaluate where you are, talk through your goals, and map out your path.
    Book Your Free Trial Lesson

  • Digital Piano Buying Guide Beginners: 7 Essential Tips for Your First Instrument

    Digital Piano Buying Guide Beginners: 7 Essential Tips for Your First Instrument

    If you’re reading this digital piano buying guide beginners rely on, you’re probably standing in that exciting (and slightly overwhelming) moment: you’ve decided to learn piano, but now you need an instrument. Over my ten-plus years teaching piano to hundreds of students across the Bay Area and worldwide via Zoom, I’ve watched people make brilliant choices and costly mistakes when buying their first digital piano. This guide will help you make the right decision for your budget and goals.

    The good news is that you have more excellent options today than ever before. The challenging news is that you have more options today than ever before. Whether you have $200 or $2,000 to spend, I’ll walk you through exactly what to look for, what to skip, and which specific models I recommend to my own students.

    The short answer

    For most beginners, I recommend spending $400-$800 on a digital piano with fully weighted keys, at least 88 keys, and a sustain pedal. The sweet spot is around $500-$600, where you’ll find instruments like the Yamaha P-45, Roland FP-30X, or Casio Privia PX-160. These will serve you well for years without breaking the bank.

    If your budget is tighter, you can start with a quality 61-key or 76-key semi-weighted keyboard around $200-$300, but plan to upgrade within a year if you stay committed. If you have more to invest, the $1,000-$1,500 range offers console-style digital pianos that feel remarkably close to acoustic instruments.

    Why this digital piano buying guide beginners need matters more than you think

    Your first instrument shapes your entire learning experience. I’ve seen talented students struggle unnecessarily on inadequate instruments, and I’ve watched beginners thrive because they invested wisely from day one.

    The instrument you practice on affects your finger strength, your touch sensitivity, your dynamics, and ultimately your musicality. It also affects your motivation. An instrument that feels good under your fingers makes you want to play. One that feels cheap or sounds tinny makes practice feel like a chore.

    But here’s what I tell every new student: you don’t need to spend a fortune. You need to spend wisely. This digital piano buying guide beginners can trust is designed to help you do exactly that, regardless of your budget.

    Weighted keys on a digital piano with headphones resting on top, a quality choice for digital piano buying guide beginners

    What makes a digital piano good for learning

    Before we dive into specific models and prices, let’s talk about what actually matters. When students ask me what to look for, I always come back to these core elements.

    Weighted or semi-weighted keys

    This is non-negotiable for serious learning. Acoustic piano keys have hammers inside that create resistance. Your fingers need to build the strength and control to manage that resistance. Non-weighted “synth-action” keys feel like pressing buttons. They won’t prepare you for playing a real piano.

    Fully weighted keys (sometimes called “graded hammer action”) mimic acoustic pianos most closely. The lower keys feel slightly heavier than the higher keys, just like on a real piano. Semi-weighted keys offer some resistance but less realism. For this digital piano buying guide beginners use, I recommend fully weighted whenever your budget allows.

    88 keys versus fewer

    A full acoustic piano has 88 keys. Most serious digital pianos match this. Some budget models offer 76, 61, or even 49 keys. For absolute beginners on a tight budget, you can start with 61 keys. But you’ll outgrow it quickly. Most intermediate repertoire requires more range.

    If you’re an adult learner or a parent buying for a child you expect to continue, invest in 88 keys from the start. It eliminates the need to upgrade later.

    Touch sensitivity

    Your digital piano should respond to how hard or soft you press the keys. This is called velocity sensitivity or touch sensitivity. It’s how you create dynamics—the difference between loud and soft, gentle and powerful. Every piano I recommend in this guide includes this feature, but cheaper keyboards sometimes don’t.

    Sound quality

    You’ll be hearing this instrument for hours every week. Tinny, artificial piano sounds are fatiguing and uninspiring. Look for pianos with sampled acoustic piano sounds. The samples should have natural decay, resonance, and warmth. You can usually test this in online videos or in-store demonstrations.

    Budget breakdown: What you can expect at every price point

    Let’s talk real numbers. I’ve organized this digital piano buying guide beginners follow into realistic budget tiers based on what I’ve seen work for hundreds of students.

    Under $300: The starting point

    At this price, you’re looking at 61-key or 76-key keyboards with semi-weighted keys. These aren’t ideal long-term solutions, but they can get you started. Expect basic sounds, minimal features, and an instrument you’ll likely upgrade within 6-12 months if you stick with lessons.

    This tier works for young children (under age 7) who are just exploring, or adults who aren’t yet sure of their commitment. Just know the limitations going in.

    $400-$800: The sweet spot

    This is where I steer most new students. You’ll find quality 88-key digital pianos with fully weighted keys, good sound samples, and built-in speakers. These instruments will serve you well through several years of learning, from beginner through early intermediate repertoire.

    Models in this range often include headphone jacks (crucial for apartment living), sustain pedal inputs, and sometimes Bluetooth or USB connectivity. The build quality is solid, and the touch is respectable.

    $900-$1,500: The upgrade tier

    Here you’ll find console-style digital pianos with wooden keys, better speaker systems, and more nuanced hammer action. The sound engines are more sophisticated, often with multiple piano voices sampled from concert grands.

    If you’re committed to years of study or you’re a returning player, this investment makes sense. The improved touch and tone will accelerate your development and increase your enjoyment.

    $1,500-$3,000+: Professional territory

    These instruments rival acoustic pianos in feel and tone. They often include actual wooden hammers, advanced modeling technology, and premium speaker systems. Unless you’re already an intermediate or advanced player, or you have specific professional needs, you probably don’t need this tier as a beginner.

    Complete digital piano setup with bench and pedal in an inviting practice space for beginner pianists

    Weighted keys: The most important feature

    I’m dedicating a whole section to this because it’s the single factor that matters most, and it’s often misunderstood. When I teach students who practiced all week on a non-weighted keyboard, I can tell immediately. Their fingers collapse, their wrists tense up, and they struggle with control.

    Weighted keys build proper finger strength and technique from day one. They teach you to play from your arm and shoulder, not just your fingers. They allow you to develop the subtle control needed for beautiful tone and expressive playing.

    There are different weighting mechanisms. Graded hammer action is best—heavier in the bass, lighter in the treble. Hammer action is good. Semi-weighted is acceptable for short-term use. Non-weighted should be avoided for serious learning.

    When you test a piano in person, the keys should offer noticeable resistance. They should return to position smoothly. You should be able to play very quietly and very loudly by adjusting your touch. If the keys feel mushy, sticky, or uniform regardless of how you press them, keep looking.

    Essential features every beginner needs

    Beyond the keys themselves, certain features make learning easier and more enjoyable. This part of the digital piano buying guide beginners trust focuses on the practical elements you’ll use constantly.

    Sustain pedal input

    A sustain pedal (also called damper pedal) is essential for playing real music. It lets notes ring together, creates smooth connections between chords, and adds depth to your sound. Make sure your digital piano has a sustain pedal input jack, and ideally, make sure a pedal is included or plan to buy one separately for about $15-$40.

    Headphone jack

    This might be the most-used feature on any digital piano. It lets you practice at midnight without disturbing anyone. It’s perfect for apartments, shared housing, or families with different schedules. Most digital pianos include this, but always confirm.

    Built-in speakers

    You want to be able to play without headphones too. Built-in speakers should be clear and reasonably powerful. Bigger instruments generally have better speakers because there’s more room for them. Portable models sometimes compromise here.

    Metronome

    Many digital pianos include a built-in metronome. This is incredibly useful for practice. If you’re curious about how to use one effectively, I’ve written about how to use a metronome for piano practice.

    Simple controls

    As a beginner, you don’t need 500 sounds and rhythms. You need easy access to a good piano sound, volume control, and maybe a couple of other voices (electric piano, strings). Overly complex interfaces are distracting and overwhelming.

    Nice-to-have features (not deal-breakers)

    These features add convenience or expand possibilities, but they’re not essential for learning. Don’t sacrifice key quality or your budget for these extras.

    USB or Bluetooth connectivity

    Useful if you want to connect to learning apps, recording software, or online lessons. I teach many students via Zoom, and USB connectivity can improve audio quality. But it’s not required, especially at the beginning.

    Recording function

    Some pianos let you record and play back your playing. This is helpful for self-evaluation but not critical. You can always record with your phone if needed.

    Multiple voices and rhythms

    Organs, strings, synthesizers, and drum beats can be fun for exploration. But they’re not why you’re buying the instrument. Focus on piano sound quality first.

    Lesson modes and light-up keys

    Some beginner models include teaching modes or keys that light up to show you what to play. These sound appealing but rarely help with real learning. Proper instruction (whether through structured lessons or private lessons) is far more effective.

    Three pedals versus one

    Acoustic pianos have three pedals, but beginners use mainly the sustain pedal on the right. The soft pedal and sostenuto pedal come into play with intermediate and advanced repertoire. One pedal is fine to start.

    Specific recommendations by budget

    Now for the part you’ve been waiting for: specific models I recommend. These are pianos I’ve seen students use successfully, models I’ve tested myself, or instruments that consistently receive strong reviews from piano teachers. This digital piano buying guide beginners need wouldn’t be complete without real-world recommendations.

    Best under $300

    Casio CT-S300 or CT-S500: 61 keys, touch-sensitive, decent sound for the price. Good for young children or testing the waters. Not fully weighted, so plan to upgrade.

    Alesis Recital Pro: 88 keys, semi-weighted, under $300 when on sale. A surprisingly solid option for tight budgets. The action isn’t great, but it’s functional for early learning.

    Best $400-$600 (the sweet spot)

    Yamaha P-45 or P-125: These are the models I recommend most often. 88 weighted keys, Graded Hammer Standard action, clean piano tone, reliable build. The P-125 adds better speakers and more features, but the P-45 is excellent for the price.

    Casio Privia PX-160 or PX-770: Great value, solid weighted action, good sound. The PX-770 is a console-style version with a stand and three-pedal unit. Both are reliable workhorses.

    Roland FP-30X: Slightly more expensive but worth it. Superb sound engine, excellent key action, Bluetooth connectivity. This piano punches above its weight class.

    Best $700-$1,200

    Yamaha P-515: Wooden keys, flagship sound engine, sophisticated touch. This is where portable digital pianos get serious.

    Roland FP-90X: Exceptional action and sound, professional features, still portable. A fantastic instrument for committed learners.

    Kawai ES920: Responsive Hammer Compact action, beautiful tone, underrated gem in this price range.

    Yamaha YDP-165 (Arius series): Console-style with cabinet and three pedals. Great for home use when you want furniture-quality design.

    Best $1,200-$2,000

    Kawai CA49 or CA59: These console digitals have wooden-key actions that feel remarkably like acoustic pianos. The sound is rich and dimensional.

    Roland RP701 or HP704: Beautiful cabinets, excellent sound, solid educational features. These feel like real furniture and play like serious instruments.

    Yamaha CLP-745 (Clavinova series): Top-tier digital piano with grand-piano-style action and modeling technology. An investment that will serve you for a decade or more.

    Comparison of different digital piano models at various price points for beginner piano students

    Where to buy and what to avoid

    Where you buy matters almost as much as what you buy. Here’s what I’ve learned from students’ experiences and my own instrument purchases.

    Best places to buy

    Local music stores: You can test the instruments, get expert advice, and often negotiate bundles (stand, bench, headphones). Support local when possible. Plus, if something goes wrong, you have a relationship and a place to go.

    Dedicated online music retailers: Sweetwater, Guitar Center, Sam Ash, and others offer good prices, detailed specs, and customer support from actual musicians. They usually pack well and handle returns professionally.

    Manufacturer websites: Yamaha, Roland, Kawai, and Casio sometimes offer refurbished models or direct sales with warranties. Refurbished can save you 20-30% on a like-new instrument.

    Amazon: Convenient and often competitive pricing, but read reviews carefully and confirm the seller is authorized. Unauthorized dealers sometimes don’t honor manufacturer warranties.

    Places to be cautious

    Used marketplaces (Craigslist, Facebook Marketplace): You can find deals, but you can also find broken instruments, missing parts, or obsolete models. If you buy used, test thoroughly in person, and research the model’s age and common issues first.

    Big-box retailers (Costco, Target, Walmart): They occasionally carry decent beginner keyboards, but selection is limited and staff knowledge is often minimal. Fine for budget starter keyboards, not for serious instruments.

    Unfamiliar online brands: If you’ve never heard of the brand and can’t find reviews from piano teachers or established music sites, be skeptical. Some off-brand “88-key weighted digital pianos” use misleading terminology and poor-quality components.

    What to check before buying

    Confirm the warranty and who honors it. Check return policies—ideally 30-45 days. Read reviews from actual piano students and teachers, not just casual users. Look for bundles that include bench, stand, and headphones. Compare prices across 3-4 retailers, including shipping costs.

    Common mistakes I see new students make

    I’ve watched hundreds of students navigate this decision. Here are the pitfalls to avoid, straight from real experience.

    Buying based on number of sounds

    “This one has 600 sounds!” means nothing if the piano sound—the one you’ll use 99% of the time—is mediocre. Focus on quality of the core piano voice, not quantity of novelty sounds.

    Choosing non-weighted keys to save $100

    This saves money in the short term but costs you in development. You’ll either plateau quickly or need to upgrade soon. It’s a false economy. If budget is truly tight, buy used or wait and save a bit more.

    Underestimating space requirements

    An 88-key digital piano is about 52 inches wide. Make sure you have space for the instrument, a bench, and room to sit comfortably. Cramped practice spaces create bad posture and tension.

    Skipping the bench

    A proper piano bench at the correct height is crucial for good technique. Dining chairs, office chairs, and couches all create problems. If the piano doesn’t come with a bench, budget for one. You want a bench that’s 19-20 inches high, with a flat, stable top.

    Forgetting about ongoing costs

    Digital pianos don’t need tuning (a huge advantage), but you might need replacement pedals, music stands, or eventually new speakers. Budget a small cushion for accessories and eventual maintenance.

    Buying too much piano too soon

    The flip side: sometimes students get intimidated by fancy features they don’t need yet. A $1,500 piano won’t make you learn faster than a good $600 piano. Buy for your current level and near-future needs, not for aspirations five years away.

    What about keyboards versus digital pianos?

    Let me clarify this common confusion. People often use “keyboard” and “digital piano” interchangeably, but they’re different instruments with different purposes.

    Digital pianos are designed to replicate acoustic pianos. They have weighted keys, piano-focused sounds, and learning-appropriate features. This entire digital piano buying guide beginners use focuses on these instruments.

    Keyboards (or synthesizers) are designed for versatility, performance, and sound creation. They usually have non-weighted or semi-weighted keys, hundreds of sounds, rhythm tracks, and portability. They’re excellent for composition, performance, and exploration—but not ideal for learning classical or traditional piano technique.

    If your goal is to learn piano—to play classical pieces, jazz standards, pop songs with proper technique—choose a digital piano. If your goal is electronic music production, live performance with a band, or sound design, then a keyboard might be appropriate. But for traditional piano learning, stick with actual digital pianos.

    The exception is very young children (ages 4-6) or absolute beginners who aren’t yet sure of their commitment. A basic 61-key touch-sensitive keyboard can serve as a short-term entry point. But expect to upgrade to a proper digital piano within a year if you continue. I discuss commitment and practice frequency in my article on how often beginners should practice piano.

    Bringing it all together: Your action plan

    Let’s make this practical. Here’s your step-by-step action plan based on everything we’ve covered in this digital piano buying guide beginners can follow.

    Step 1: Set your budget. Be realistic about what you can afford, but remember that $500-$600 is the sweet spot for quality and value. If you can stretch to that range, do it. If not, $300-$400 can still work.

    Step 2: Prioritize weighted keys and 88 keys. These are your non-negotiables if you’re serious about learning. Everything else is secondary.

    Step 3: Research 3-4 specific models in your price range from the recommendations above. Read reviews, watch YouTube demos, compare specifications.

    Step 4: Test in person if possible. Visit a music store and play the models you’re considering. Feel the key weight, listen to the sound, check the interface. Even ten minutes of hands-on testing is valuable.

    Step 5: Check for bundles and deals. Many retailers offer packages with stands, benches, headphones, and pedals. These bundles often save $50-$100 versus buying separately.

    Step 6: Confirm warranty and return policy. Make sure you’re covered if something goes wrong, and that you can return or exchange if the piano doesn’t meet your needs.

    Step 7: Set up your practice space thoughtfully. Good lighting, comfortable seating, minimal distractions. Your environment affects your practice quality. For more on building effective practice habits, check out my piano practice schedule for adults.

    Step 8: Start with good instruction. The best piano in the world won’t teach you proper technique. Whether you learn through online piano lessons, lessons, or in-person teaching, invest in quality instruction from the start. At Weaver Music, we offer a free 30-minute trial lesson so you can experience our teaching approach with no commitment.

    Final thoughts from the piano bench

    After teaching hundreds of students at every level—from complete beginners to advanced players returning after years away—I’ve learned that the right instrument makes an enormous difference. Not because expensive pianos magically make you better, but because the right piano removes obstacles and makes practice enjoyable.

    This digital piano buying guide beginners depend on is built on real teaching experience, real student feedback, and real musical outcomes. The recommendations aren’t based on affiliate commissions or marketing hype. They’re based on what I’ve seen work, week after week, lesson after lesson, across every age and background.

    Your piano will be your partner in this journey. It will witness your frustrations and your breakthroughs. It will be there at 6 AM when you practice before work and at 10 PM when you unwind with music. It deserves thoughtful consideration.

    The beautiful thing about digital pianos today is that you truly can find an excellent instrument at almost any budget. Yes, there are differences between a $500 piano and a $1,500 piano. But both can serve you well if chosen wisely. Both can help you grow into the musician you want to become.

    Start where you are. Buy the best instrument your budget allows, prioritizing key action and sound quality above features and extras. Then show up consistently, practice with intention, and trust the process. That combination—a decent instrument and dedicated practice—will take you remarkably far.

    If you’re feeling overwhelmed, remember: you don’t have to figure this out alone. Many of my students begin their journey with questions exactly like yours. We discuss instrument options, practice strategies, and musical goals in that very first lesson. Sometimes just talking through your situation with an experienced teacher clarifies everything.

    Our lessons are available worldwide via Zoom or in-person here in the Bay Area, and we work with students of all ages and levels at $99 per 60-minute session. We also maintain a four-level lesson path that can supplement your learning and provide structured guidance between lessons—or serve as a standalone learning resource if you prefer self-paced study.

    The most important decision isn’t which specific model you choose from this digital piano buying guide beginners trust. It’s the decision to begin. To commit to this beautiful, challenging, rewarding instrument. To give yourself the gift of music.

    Everything else—the gear, the technique, the repertoire—unfolds from that one decision.

    Ready to find out for yourself?

    Your first 30-minute lesson with me is completely free – we will evaluate where you are, talk through your goals, and map out your path.
    Book Your Free Trial Lesson

  • How to Use a Metronome Piano: 7 Proven Ways to Master Timing

    How to Use a Metronome Piano: 7 Proven Ways to Master Timing

    If you’ve ever felt like your metronome is mocking you—clicking away smugly while you struggle to stay in time—you’re not alone. Learning how to use a metronome piano practice can feel like rubbing your head and patting your stomach simultaneously while reciting the alphabet backwards.

    It’s one of those skills that separates disciplined pianists from the rest, yet it’s also one of the most universally dreaded tools in music education. I’ve been teaching piano for over a decade, and I’ve watched hundreds of students go from metronome-haters to metronome-believers.

    The difference isn’t talent or discipline. It’s approach. Most people use metronomes wrong from day one, which creates frustration that compounds over time.

    But when you understand how to use a metronome piano techniques correctly, the clicking transforms from enemy to ally. This comprehensive guide will show you exactly how to make that transformation happen in your own practice sessions.

    In this guide, I’ll walk you through seven practical strategies that make metronome practice actually work. These aren’t theoretical music school concepts—they’re methods I use every day with real students at Weaver Music, from total beginners to advanced players preparing for performances.

    The short answer

    To use a metronome effectively at the piano, start at a tempo where you can play the passage perfectly with zero mistakes. Then practice the section multiple times at that tempo until it feels easy.

    Only then should you increase by 5 BPM. Use subdivision clicks (eighth notes or sixteenth notes) instead of just quarter notes, and alternate between practicing with the metronome and without it to develop both external and internal timing.

    The key insight: the metronome isn’t there to push you faster. It’s there to build consistency at tempos you’ve already mastered. Think of it as a mirror for your rhythm, not a drill sergeant.

    Understanding how to use a metronome piano practice tool correctly will transform your playing faster than almost any other single technique adjustment. The metronome reveals timing inconsistencies you might not hear otherwise and helps build the muscle memory needed for professional-level playing.

    When used properly, this simple tool becomes your most reliable partner in developing rock-solid rhythm, even tempo control, and the confidence to tackle increasingly challenging repertoire. The strategies that follow will show you exactly how to harness that power.

    Digital metronome on piano keys showing how to use a metronome piano techniques

    Why metronomes feel awful at first

    Before we dive into technique, let’s acknowledge why metronomes trigger such visceral reactions. Understanding the psychology helps you work with your brain instead of against it.

    The metronome exposes every imperfection. When you practice without one, your brain smooths over rhythmic inconsistencies. You slow down during hard parts and speed up during easy sections, but it feels smooth to you.

    The metronome reveals this truth brutally. It creates cognitive overload for beginners. You’re already managing notes, fingering, hand position, dynamics, and pedaling.

    Adding a relentless external timekeeper feels like one task too many. Your brain literally doesn’t have enough processing power yet to handle everything at once.

    Here’s what most teachers don’t tell you: this feeling is temporary. As technical skills become automatic, your brain frees up capacity for timing.

    The metronome gets easier not because you “get better at metronomes” but because everything else becomes less demanding. Many students also start at the wrong tempo.

    They set the metronome to the target performance speed, then try to play along. This guarantees failure and frustration. We’ll fix that in the next section.

    The clicking sound itself can be psychologically challenging. According to music theory research on rhythm perception, our brains naturally want to interpret and adjust rhythm based on musical context, which is why the strict, unforgiving click of a metronome feels so unnatural at first.

    Another psychological barrier is the fear of judgment. The metronome doesn’t care about your excuses or explanations—it simply reveals whether you’re on the beat or not. This objective feedback can feel harsh, especially for perfectionists who struggle with making mistakes.

    But here’s the reframe that helps my students: the metronome isn’t judging you. It’s just providing data. That data is incredibly valuable because it shows you exactly where to focus your practice energy.

    Start slower than you think

    This is the single most important principle for how to use a metronome piano practice effectively. You must start slower than feels necessary. Much slower.

    Here’s my rule: set the metronome to a tempo where you can play the passage perfectly ten times in a row without a single mistake, hesitation, or stumble.

    For most students learning a new piece, this ends up being 40-60% of the target tempo. Yes, really. I had a student recently working on a Chopin Nocturne.

    She wanted to practice it at 120 BPM because that’s how her favorite recording sounded. At that speed, she made mistakes in nearly every measure. We dropped it to 50 BPM.

    She hated how it felt at first—”It’s too slow, I can’t feel the music!” But here’s what happened: at 50 BPM, she could play it perfectly.

    After three practice sessions at that glacial pace, we bumped it to 55 BPM. Then 60. Then 65. Within two weeks, she was at 90 BPM playing more musically than she ever had at 120 with mistakes.

    Slow practice with a metronome builds three things simultaneously:

    • Muscle memory that’s accurate from the start
    • Mental clarity about every note and rhythm
    • Confidence that you can execute the passage reliably

    Fast practice with mistakes builds muscle memory for the mistakes. You’re literally training your fingers to play wrong notes. Slow, perfect repetition is exponentially more effective than fast, sloppy repetition.

    One more thing: don’t judge the musicality of slow practice. It won’t sound beautiful at 50 BPM. That’s not the point. You’re building a foundation.

    The music comes later, and it comes more reliably because the foundation is solid. This approach to how to use a metronome piano slow practice creates neural pathways that lock in accuracy before speed.

    Think of it like building a house. You wouldn’t rush through the foundation to get to the pretty parts faster. The same principle applies to piano technique.

    Neuroscience research shows that slow, deliberate practice with immediate feedback (which the metronome provides) creates stronger neural connections than fast, error-prone repetition. You’re not just training your fingers—you’re rewiring your brain for precision.

    When students understand this scientific basis, they’re more willing to embrace the slow tempos that feel uncomfortable at first. The patience pays dividends in the form of faster long-term progress and fewer ingrained bad habits to unlearn later.

    Use subdivision, not just quarter notes

    Most beginners set their metronome to click on quarter notes. This is fine for simple pieces, but it’s actually one of the biggest obstacles to understanding how to use a metronome piano technique for anything moderately complex.

    Instead, set your metronome to click on the smallest rhythmic value you’re playing. If your passage has sixteenth notes, set the metronome to click sixteenth notes.

    If you’re playing eighth-note triplets, use triplet clicks. Why does this work so much better? Because it removes ambiguity.

    When the metronome only clicks quarters, you have to subdivide in your head to place the eighths and sixteenths accurately. For beginners, this is asking your brain to do two hard things at once: play the passage and calculate subdivision.

    When the metronome clicks the subdivision, you just match the clicks. One action, not two. Your fingers and the clicks line up directly. This dramatically reduces cognitive load.

    Here’s how I teach this: let’s say you’re playing a C major scale in sixteenth notes. Instead of setting the metronome to quarter note = 60, set it to sixteenth note = 60 (which many metronomes display as quarter = 60 but in sixteenth-note mode).

    Now every note of your scale gets its own click. Practice it until every finger attack aligns perfectly with a click. Then, gradually turn off some of the subdivision.

    Maybe switch to eighth-note clicks. Your internal sense of sixteenth notes will be much stronger because you built it with complete external support first.

    This is especially powerful for dotted rhythms, syncopation, and any passage where students “feel” the rhythm wrong. The subdivision clicks force you to place notes exactly where they belong mathematically, which often differs from where they feel like they should go.

    Professional pianists use this subdivision technique constantly when learning complex contemporary works. It’s not a beginner crutch—it’s a professional tool that happens to be especially helpful for developing players.

    I’ve seen subdivision clicking transform students’ understanding of complex rhythmic patterns in just a single practice session. What felt impossibly complicated suddenly becomes clear when every note division has its own audible reference point.

    This technique is particularly valuable for passages with mixed rhythms—say, triplets in one hand against straight eighths in the other. Setting the metronome to click the lowest common denominator (often sixteenth-note triplets in this case) makes the mathematical relationship crystal clear.

    Metronome app on smartphone with piano sheet music for practice guidance

    Practice with it, then without it, then with it again

    One of the biggest mistakes students make is practicing exclusively with the metronome or exclusively without it. Both approaches have problems. Only practicing with the metronome makes you dependent on external timekeeping.

    You develop the skill of following a click, but not the skill of generating steady time internally. The moment you perform without a metronome, your timing falls apart.

    Only practicing without a metronome means you never get objective feedback. You develop an internal sense of time, but it might be inaccurate. You’ll slow down in difficult passages and rush through easy ones without realizing it.

    The solution is alternation. Here’s the practice cycle I teach at Weaver Music, and it’s transformed how to use a metronome piano students approach this essential tool:

    • Phase 1: Practice the passage with metronome subdivision clicks at a very slow tempo until perfect (5-10 repetitions)
    • Phase 2: Turn off the metronome and play the passage twice, trying to maintain that exact tempo internally
    • Phase 3: Turn the metronome back on at the same tempo and check whether you stayed consistent
    • Phase 4: If you stayed consistent, increase by 5 BPM and repeat. If not, stay at the current tempo for another cycle

    This builds both external and internal timing skills. You learn to follow an external pulse and to generate a steady internal pulse. Most importantly, you learn whether your internal sense matches reality.

    I’ve had countless students swear they maintained tempo during Phase 2, only to discover in Phase 3 that they slowed down by 15-20 BPM without realizing it.

    This awareness is valuable. It tells you where your practice needs to focus. Over time, the gap closes. Your internal tempo becomes more accurate.

    Eventually, you can play entire pieces at steady tempo without external support—but you’ll have developed that skill by regularly checking it against objective measurement.

    This alternating approach is one of the most effective ways to internalize rhythm while maintaining accountability. It trains independence while preventing the drift that happens when you never check your assumptions against reality.

    The alternation method also prevents metronome dependency, which is a real concern for students who use the tool too consistently. You want the metronome to be a training partner, not a permanent crutch.

    By regularly practicing without it and then verifying your accuracy, you build genuine internal timing that will serve you in performance situations where no external click track is available.

    Let the metronome follow you first

    Here’s a technique I don’t see enough teachers using: before you try to follow the metronome, let it follow you. This works especially well for expressive pieces where strict tempo feels wrong, or for students who tense up the moment the clicking starts.

    It reverses the power dynamic and removes the performance anxiety. Here’s how: play through the passage at whatever tempo feels natural and comfortable.

    Don’t try to be steady; just play musically. Record yourself or have someone tap along to find your natural tempo. Then set the metronome to that exact speed.

    Suddenly, the metronome isn’t an adversary. It’s simply reflecting what you’re already doing. This creates a feeling of alignment instead of conflict.

    Practice at this “natural tempo” with the metronome until it feels easy and collaborative. Then—and only then—start making small adjustments.

    Maybe your natural tempo was 76 BPM but the target is 80. Instead of jumping straight to 80 and struggling, you’ve built comfort at 76 first. Moving to 77, then 78, then 79, then 80 happens organically.

    This approach is particularly effective for adults who come to piano later in life. Many of my adult students at Weaver Music have spent decades in careers where they were competent and in control.

    The metronome makes them feel incompetent, which triggers avoidance. Starting with “the metronome matching you” instead of “you matching the metronome” preserves that sense of agency.

    It’s also psychologically easier. You’re not learning a new skill (following external time); you’re just adding external validation to something you already do (playing at your natural pace).

    Once that foundation exists, expanding the skill becomes less threatening. This reverse-engineering approach to how to use a metronome piano practice sessions creates confidence instead of anxiety.

    I’ve used this technique with students who had developed almost phobic reactions to metronomes after years of frustrating experiences. By letting them “teach” the metronome their tempo first, we removed the emotional charge and created a neutral starting point.

    Within a few weeks, these same students were comfortably using metronomes in the traditional way because the initial psychological barrier had been dismantled.

    How to use a metronome piano scales and technical work

    Scales, arpeggios, and technical exercises are where metronome work pays the biggest dividends. This is also where understanding how to use a metronome piano students can achieve the fastest progress.

    For scales, start with one octave at a time. Set the metronome to click on every note (subdivision clicks, as discussed earlier). Play the scale up and down, ensuring every finger strikes exactly with a click. This builds evenness.

    Once one octave is even, extend to two octaves. You’ll notice certain transitions—often the thumb-under at the octave break—tend to rush or drag.

    The metronome exposes this immediately. Isolate those transitions and drill them separately at the same tempo. Here’s a specific how to use a metronome piano scales technique I use constantly: the accent drill.

    Play your scale with the metronome, but accent every fourth note. Then every third note. Then every fifth note. This forces you to maintain steady time while adding rhythmic complexity, which builds polyrhythmic awareness and strengthens your sense of pulse.

    For arpeggios, the same principles apply, but the technical challenge is often greater because of the wider hand position changes. Start absurdly slow—maybe one note per second.

    Make every position shift deliberate and exactly timed. Speed comes from accuracy, not from trying to go fast. Technical exercises like Hanon or Czerny are metronome goldmines.

    These are specifically designed to be practiced slowly for accuracy, then gradually increased in speed. Track your progress by writing down the date and tempo in your practice journal.

    Seeing “Hanon #1: 60 BPM” grow to “Hanon #1: 100 BPM” over weeks provides tangible evidence of improvement. One mistake to avoid: don’t practice scales and technical work exclusively at one tempo.

    Vary it. Some days, practice scales at a very slow tempo with perfect articulation and dynamics. Other days, push the tempo to your current maximum. This builds both control and speed, and prevents boredom.

    When working on how to use a metronome piano scales practice, consistency matters more than intensity. Five minutes of focused, metronome-guided scale work every day produces better results than thirty minutes once a week.

    The daily repetition builds automaticity in your fingers and deepens your internalized sense of steady pulse. Over time, you’ll notice that even your sight-reading improves because your rhythmic foundation is so much stronger.

    Another powerful technique for scale practice: play your scales in different rhythmic patterns while maintaining steady clicks. Try long-short patterns (dotted eighth-sixteenth), then short-long (sixteenth-dotted eighth), then triplet groupings.

    This transforms boring scale practice into genuinely engaging rhythmic training while the metronome keeps you honest about maintaining the underlying pulse. The combination builds both technical facility and rhythmic sophistication simultaneously.

    Classic mechanical metronome standing on top of a piano during practice session

    The 5-BPM rule for building speed

    I’ve mentioned this a few times already, but it deserves its own section because it’s that important. When you’re ready to increase tempo, increase by exactly 5 BPM. Not 10. Not “a little faster.” Exactly 5.

    Why 5? It’s small enough that your fingers and brain can adapt without struggle, but large enough that you’re making real progress. Jumps of 10 or more BPM often reintroduce mistakes, which means you’re back to practicing errors.

    Here’s the protocol: once you can play a passage perfectly five times in a row at a given tempo, you’re ready to move up 5 BPM. Not three times. Not “pretty well most of the time.” Five perfect repetitions.

    This patience is hard for students who are goal-oriented. You want to play Für Elise at 120 BPM, and you’re stuck at 75 BPM. The temptation is to jump ahead. Resist it.

    Every time you jump ahead and practice with mistakes, you’re taking two steps back. I promise you: slow, incremental progress is faster in the long run.

    A student who increases 5 BPM every few days will reach the target tempo weeks before a student who keeps attempting the target tempo and making mistakes.

    Track your progress. Write down the date and tempo every time you increase. This creates motivation and accountability. When you see “October 15: 75 BPM, October 18: 80 BPM, October 21: 85 BPM,” you have proof that the system works, which makes it easier to trust the process during the slow middle stages.

    Also, understand that progress isn’t always linear. Some weeks you’ll increase 10-15 BPM total. Other weeks you’ll stay at the same tempo, consolidating. Both are valuable.

    The metronome shows you exactly where you are, without judgment or wishful thinking. This gradual building approach is central to how to use a metronome piano technique development at every level.

    Professional concert pianists use the exact same 5-BPM increment method when learning new repertoire. It’s not a beginner technique—it’s simply the most efficient way the human brain and fingers learn complex motor patterns at increasing speeds.

    Some students find it helpful to use even smaller increments—2 or 3 BPM—especially when working on particularly challenging passages or when approaching the upper limits of their current technical ability. There’s no prize for rushing the process.

    The goal is sustainable progress that sticks, not temporary speed gains that collapse under performance pressure. I’ve watched students reach impressive tempos through patient 5-BPM increments and maintain those speeds reliably for months or years.

    Meanwhile, students who try to force faster progress often find themselves stuck at the same tempo for weeks because they keep introducing errors that have to be corrected before real advancement can happen.

    Choose the right metronome for you

    Not all metronomes are created equal, and finding one that doesn’t irritate you makes a huge difference in whether you’ll actually use it. Traditional mechanical metronomes have a visual component (the swinging pendulum) that some students find helpful.

    Watching the motion creates a secondary sensory input beyond just sound. However, they’re not portable, they can’t do subdivision clicks easily, and the ticking sound drives some people crazy.

    Digital metronomes offer more features: subdivision settings, different sound options, visual flashing lights, and precise BPM control. They’re also usually cheaper and more portable. The downside is they can feel less “organic” and the beeping sounds are sometimes harsh.

    Smartphone apps are what most of my students use now. Apps like Soundbrenner, Pro Metronome, or even the built-in metronome in GarageBand offer incredible flexibility.

    You can choose different sounds (wood block, hi-hat, beep), set complex subdivision patterns, create tempo changes within a single session, and even use vibration mode if sound is distracting.

    Here’s my advice: try several. The “best” metronome is the one you’ll actually use. If the sound of one app annoys you, try another.

    If you love the aesthetic of a wooden mechanical metronome and it makes you more likely to practice with it, get that instead of the “technically superior” digital option.

    One feature I strongly recommend: visual feedback in addition to audio. Many apps flash the screen in time with the beat. This visual pulse helps some students sync up more easily than audio alone, especially students who are more visually oriented or who struggle with auditory processing.

    Whatever you choose, keep it easily accessible. If your metronome is buried in a drawer or requires five minutes of app navigation to start, you won’t use it.

    Put it on your music stand, on your piano, or keep the app on your phone’s home screen. Making it easy to start your metronome practice removes one more barrier to consistent training.

    Some advanced metronome apps even offer features like gradual tempo acceleration (automatically increasing BPM over time), programmable tempo maps for pieces with multiple tempo changes, and practice mode features that can help you track your progress over weeks and months.

    These features can be valuable for advanced students, but beginners should stick with basic functionality—just a steady click at adjustable tempos with subdivision options. Don’t let feature overload prevent you from using the tool at all.

    Common metronome mistakes to avoid

    Even when students commit to using a metronome, certain mistakes undermine the effectiveness. Let’s address the most common ones I see in my teaching practice.

    Mistake 1: Starting too fast. I’ve mentioned this already, but it bears repeating because it’s the most common error. Your ego wants to practice at performance tempo. Your fingers need to practice at learning tempo. Trust the process.

    Mistake 2: Only using it on pieces you’re learning. The metronome is equally valuable—maybe more valuable—for pieces you’ve already “finished.” It reveals tempo fluctuations you’ve stopped noticing.

    Record yourself playing an old piece without metronome, then check it against a metronome. You’ll be surprised how much you’re rushing or dragging in familiar passages.

    Mistake 3: Treating it as a performance tool rather than a practice tool. Some students think they’ve “failed” if they can’t perform with a metronome clicking. That’s not the goal.

    The metronome is training wheels. It helps you build steady internal time. Once built, you remove it for performance.

    Mistake 4: Using it for every piece, every time. Some music is meant to be rhythmically flexible. Romantic-era pieces, for instance, often use rubato (expressive tempo changes) as a core musical element.

    Using a metronome on Chopin’s Nocturne in E-flat major, for example, can strip away the interpretive freedom that makes the piece beautiful. We’ll discuss this more in the next section.

    Mistake 5: Not adjusting for different practice goals. If you’re working on dynamics and phrasing, maybe you don’t need the metronome that day. If you’re working on evenness and rhythm, you definitely do. Match the tool to the goal.

    Mistake 6: Giving up after one bad session. Your first few attempts with a metronome will probably feel awful. That’s normal. It takes several sessions before your brain adapts. Don’t judge the tool based on day one. Give it a full week of honest effort.

    If you’re struggling with consistency in your practice overall, not just with metronome work, you might find my article on creating a piano practice schedule for adults helpful for building sustainable habits.

    Another common mistake is fighting the click instead of listening to it. When you notice you’re off the beat, many students try to force their fingers back in sync mid-phrase, which creates tension and usually makes things worse.

    Instead, if you fall out of sync, finish the phrase, stop, reset, and start again from a convenient musical entry point. Don’t try to “catch up” to the metronome—that’s not how motor learning works.

    Mistake 7: Ignoring your body’s tension signals. If you notice your shoulders rising, your jaw clenching, or your breathing becoming shallow while practicing with a metronome, that’s a sign you need to slow down or take a break.

    Physical tension actively interferes with motor learning and can lead to injury over time. The metronome should support relaxed, efficient technique, not create stress that compromises it.

    When NOT to use a metronome

    I’ve spent this entire article teaching you how to use a metronome piano practice effectively. Now I’m going to tell you when to ignore everything I just said and not use one at all.

    Metronomes are tools, not rules. There are legitimate times when practicing without one is better for your musical development.

    When learning a brand-new piece in the first reading: When you’re sight-reading through something for the first time, your goal is to get a general sense of the music—the melody, harmony, structure, and character.

    Adding a metronome at this stage adds unhelpful pressure. Just play through it at whatever tempo works, stopping when you need to, getting familiar with the landscape.

    When working on musical expression: If your focus today is on phrasing, dynamics, pedaling, or emotional interpretation, the metronome can actually get in the way.

    These elements often require subtle tempo fluctuations—a slight ritardando at the end of a phrase, a slight acceleration into a climax. Strict tempo prevents you from exploring these expressive tools.

    When practicing deliberately flexible music: As mentioned earlier, some pieces are meant to be played with rubato. Debussy’s “Clair de Lune,” many Chopin pieces, improvisatory-style works—these require rhythmic freedom.

    You might use a metronome to learn the notes and basic rhythms accurately, then set it aside for interpretive work.

    When you’re mentally exhausted: Metronome practice requires focused concentration. If you’re practicing at the end of a long day and your brain is fried, sometimes it’s better to just play for enjoyment without the cognitive load of strict timekeeping.

    Playing piano for stress relief is valuable too, as I discuss in this article, and the metronome isn’t always compatible with that goal.

    When it’s creating more frustration than value: If you’ve spent 20 minutes trying to sync with the metronome and you’re on the verge of throwing it across the room, stop. Take a break. Practice something else.

    Come back to it tomorrow. Frustration creates tension, and tension in your hands and shoulders creates bad technique.

    The goal is to develop strong internal timing that doesn’t depend on external tools. The metronome helps you build that skill, but it’s not meant to be a permanent crutch.

    Think of it like training wheels on a bicycle—essential for learning balance, but eventually you need to ride without them.

    In my teaching at Weaver Music, I use metronomes strategically, not universally. In a typical lesson, we might use it for 10-15 minutes on specific technical passages or scales, then set it aside for the rest of the hour while we work on musicality, interpretation, and the joy of making music.

    If you’re curious about what a lesson with me actually looks like, you can read more about what to expect in a first piano lesson.

    Balance is everything. Use the metronome enough to build accurate timing. Don’t use it so much that it kills your musical spirit. You’ll know you’ve found the right balance when your playing is both rhythmically solid and emotionally alive.

    One final thought: if you’re working with a teacher—whether in person in the Bay Area or via Zoom anywhere in the world—they can help you determine when metronome work is appropriate for your current pieces and goals.

    At Weaver Music, personalized guidance on practice strategies is a core part of every lesson, and you can also access structured practice guidance through our four-level lesson path that breaks down exactly how to practice effectively at each stage of development.

    The metronome is powerful when used wisely. It’s just one tool among many in your practice toolkit. Master it, use it strategically, and you’ll see dramatic improvements in rhythmic accuracy, technical evenness, and confidence.

    But never forget that the ultimate goal isn’t perfect time—it’s beautiful music. The metronome serves that goal; it doesn’t replace it.

    When you truly understand how to use a metronome piano practice sessions become more productive, less frustrating, and ultimately more musical. The click that once felt like criticism becomes a supportive partner in your journey toward mastery.

    According to research from the Berklee College of Music on rhythm training, consistent metronome practice over weeks and months literally rewires your brain’s internal timing mechanisms, making you a better musician even when you’re not using the tool.

    That’s the real power of this simple clicking device—it’s building skills that last far beyond the practice session itself.

    The transformation that happens when you master how to use a metronome piano techniques extends beyond just the pieces you’re currently learning. You’ll find that your sight-reading becomes more accurate because you’re better at anticipating and maintaining steady rhythmic patterns.

    Your ensemble playing improves because you can lock into a shared pulse more reliably. Even your improvisational skills benefit because you have a stronger internal framework for organizing musical ideas in time.

    These compound benefits make the initial discomfort of learning to work with a metronome worthwhile many times over. The students who push through the awkward early stages and develop genuine facility with this tool consistently outpace their peers in overall musicianship development.

    So yes, the metronome might feel like your enemy at first. But with the seven strategies outlined in this guide, you can transform it into one of your most valuable practice partners.

    Start slower than feels comfortable, use subdivision clicks for clarity, alternate between guided and independent practice, let the tool match your natural tempo before pushing you faster, apply it systematically to scales and technical work, increase tempo in small increments, and choose a metronome you’ll actually enjoy using.

    Follow these principles consistently, and within weeks you’ll notice the difference—not just in the pieces you’re practicing with the metronome, but in every aspect of your playing that depends on solid rhythmic foundation and steady tempo control.

    Ready to find out for yourself?

    Your first 30-minute lesson with me is completely free – we will evaluate where you are, talk through your goals, and map out your path.
    Book Your Free Trial Lesson

  • How Often Should a Beginner Practice Piano? 5 Proven Tips

    How Often Should a Beginner Practice Piano? 5 Proven Tips

    When students ask me how often should a beginner practice piano, I can see the worry in their eyes. They’re afraid I’ll say two hours a day, or that anything less means failure. Here’s the truth I’ve learned after teaching hundreds of students: consistency beats heroic effort every single time.

    The beginner who practices 15 minutes daily will outpace the one who crams an hour on Sundays, and I’ve watched this play out year after year. The question of how often should a beginner practice piano deserves an honest answer, not an idealized one.

    I’m going to share what actually works in the real world, for real people with jobs and families and busy lives. Understanding how often should a beginner practice piano is the foundation of sustainable progress and long-term success at the instrument.

    The Short Answer: How Often Should a Beginner Practice Piano

    For most beginners, the ideal practice schedule is 5-6 days per week, 20-30 minutes per session. That’s it. Not two hours. Not until your fingers bleed. Just 20-30 minutes, almost every day.

    This schedule works because your brain needs regular reinforcement to build new neural pathways. When you’re learning piano, you’re literally rewiring your brain to coordinate complex movements, read a new language (music notation), and process auditory feedback simultaneously.

    If you can only manage 15 minutes a day, that’s absolutely fine for the first month or two. If you’re a younger student (under 10), 15-20 minutes is actually more appropriate than longer sessions.

    The key principle: how often should a beginner practice piano is more important than how long. Daily short sessions trump weekly marathons every time. When considering how often should a beginner practice piano, think about frequency first and duration second.

    Practice timer and sheet music helping plan how often should a beginner practice piano each week

    Why Frequency Matters More Than Duration

    I’ve had students apologize to me: “I could only practice 10 minutes each day this week.” Meanwhile, they’ve made more progress than the student who practiced one 90-minute session. Why?

    Understanding the science behind practice frequency helps answer how often should a beginner practice piano in a way that actually produces results.

    How Your Brain Learns Motor Skills

    Piano playing is a motor skill, similar to learning to write or ride a bicycle. Motor learning research shows that distributed practice (spread over time) is vastly more effective than massed practice (crammed together).

    Each time you sit at the piano, your brain strengthens the neural connections related to finger movement, reading notes, and hand coordination. These connections need time to consolidate—that happens during sleep and rest periods between practice sessions.

    When you practice daily, you give your brain multiple opportunities to consolidate learning. You’re essentially pressing “save” on your progress every single day. This biological reality fundamentally shapes how often should a beginner practice piano for optimal learning.

    The Muscle Memory Myth

    People often talk about “muscle memory,” but that’s not quite accurate. Your muscles don’t have memory—your brain does. What we call muscle memory is actually procedural memory, stored in the cerebellum and motor cortex.

    Building procedural memory requires repetition over time. Five 20-minute sessions spread across a week will build stronger procedural memory than one 100-minute session. Understanding this changes how we think about how often should a beginner practice piano.

    Preventing Burnout and Injury

    Shorter, frequent sessions also protect beginners from two common problems: mental burnout and physical strain. Your hands, wrists, and forearms need time to adapt to new movements.

    Overdoing it in one session can lead to tension or even repetitive strain injuries. I’ve seen too many enthusiastic beginners flame out after two months because they pushed too hard, too fast. Sustainable progress is always better than spectacular burnout.

    Realistic Practice Schedules: How Often Should a Beginner Practice Piano

    Let me break down what how often should a beginner practice piano looks like for different situations. These are the schedules I actually recommend to my students, not some idealized fantasy.

    Piano with timer showing recommended beginner practice session length

    The Absolute Minimum (Maintenance Mode)

    • Frequency: 4 days per week
    • Duration: 15 minutes
    • Total weekly time: 60 minutes
    • Expected progress: Slow but steady; you’ll improve but not quickly

    This is your fallback during crazy-busy life seasons. It’s enough to maintain skills and inch forward. I often recommend this for adult beginners who are testing the waters or going through a particularly demanding work period.

    The Sweet Spot (Recommended)

    • Frequency: 5-6 days per week
    • Duration: 20-30 minutes
    • Total weekly time: 100-180 minutes
    • Expected progress: Steady, satisfying improvement; noticeable month-to-month gains

    This is what I recommend to almost every beginner. It’s sustainable, effective, and fits into most lives. At this pace, you’ll typically work through a beginner method book in 6-9 months and be playing recognizable simple songs within 8-12 weeks.

    This schedule aligns with what I teach in my four-level lesson path, where each level is designed around this practice frequency. When people ask how often should a beginner practice piano, this is the gold standard answer.

    The Accelerated Track (for Highly Motivated Students)

    • Frequency: 6-7 days per week
    • Duration: 30-45 minutes
    • Total weekly time: 180-315 minutes
    • Expected progress: Rapid improvement; you’ll advance quickly through material

    Some beginners have the time, motivation, and frankly the obsession to practice more. If that’s you, wonderful—but I’d still cap sessions at 45 minutes for the first six months. Your hands need time to adapt, regardless of your enthusiasm.

    For Young Children (Ages 5-9)

    • Frequency: 5-6 days per week
    • Duration: 10-20 minutes
    • Total weekly time: 50-120 minutes

    Young children have shorter attention spans but can still make excellent progress. For parents wondering how often should a beginner practice piano when that beginner is seven years old, this is your answer. Better to keep it short and successful than long and frustrating.

    For more guidance on young students, check out my article on the best age to start piano lessons.

    What to Do in Those Practice Sessions

    Knowing how often should a beginner practice piano is only half the equation. The other half is knowing what to do during that time. A focused 20-minute session beats an aimless 45-minute session every time.

    A Simple Practice Structure

    Here’s the basic structure I teach all my beginners:

    • Warm-up (3-5 minutes): Scales, simple five-finger patterns, or easy pieces you already know well
    • Technique work (5-7 minutes): Specific technical exercises from your lesson—hand position, finger independence, chord changes
    • New material (10-15 minutes): The piece or pieces you’re currently learning, working slowly through trouble spots
    • Review (2-3 minutes): Play through something you learned a few weeks ago to maintain it

    This structure ensures balanced development. You’re warming up your hands, building foundational technique, pushing into new territory, and maintaining past gains. This framework answers not just how often should a beginner practice piano, but how to make that practice maximally effective.

    The Power of Focused Repetition

    In a 20-minute practice session, it’s tempting to just play through pieces from beginning to end repeatedly. That’s not efficient. Instead, identify the 2-4 measures giving you trouble and repeat just those measures 5-10 times.

    If you’re working on a piece and stumbling at measure 12, don’t restart from measure 1 every time. Practice measures 11-13 in isolation until they’re smooth, then integrate them back into the full piece.

    What Your Teacher Assigns Matters

    When I work with students—whether in-person in the Bay Area or via Zoom worldwide—I tailor assignments to their practice schedule. If someone can only practice 15 minutes a day, I’m not going to assign three new pieces. One piece practiced well beats three pieces practiced poorly.

    During your free 30-minute trial lesson, we talk about your realistic practice availability, and I structure your learning path accordingly. We’ll discuss how often should a beginner practice piano in your specific situation.

    Quality Over Quantity, Always

    I need to emphasize this: how often should a beginner practice piano matters, but how you practice matters even more. I’ve taught students who practiced 45 minutes daily but developed bad habits that took months to undo.

    I’ve also taught students who practiced 20 focused minutes and progressed beautifully. The quality of your practice time determines whether you’re building skills or just reinforcing mistakes.

    Piano sheet music with practice notes emphasizing quality focused practice

    Signs of Quality Practice

    • You’re working slowly enough to play correctly
    • You’re noticing and correcting mistakes, not just repeating them
    • You’re focusing on your hand position and posture
    • You’re practicing with intention, not just running through motions
    • You’re following your teacher’s specific instructions

    Signs of Low-Quality Practice

    • You’re playing too fast and making the same mistakes repeatedly
    • You’re multitasking (TV on, half-focused)
    • You’re tensing up—shoulders hunched, wrists locked
    • You’re frustrated but not changing your approach
    • You can’t remember what your teacher asked you to work on

    One quality 20-minute session is worth three unfocused 20-minute sessions. That’s why the answer to how often should a beginner practice piano must always include the caveat: with focus and intention.

    The Role of Mindfulness

    Piano practice can be meditative when done right. You’re fully present, listening carefully, feeling the keys, noticing every detail. Many of my adult students discover that piano practice becomes their daily mindfulness anchor.

    If you’re interested in this aspect, I’ve written about using piano for stress relief. When you understand how often should a beginner practice piano and combine it with mindful practice, the results can be transformative both musically and personally.

    Common Mistakes Beginners Make

    After 10+ years of teaching, I’ve seen the same practice mistakes repeatedly. Let me help you avoid them so you can truly benefit from knowing how often should a beginner practice piano.

    Mistake 1: The Weekend Warrior Approach

    Some beginners practice zero minutes Monday through Friday, then try to “make up for it” with a two-hour Saturday session. This doesn’t work. By Saturday, you’ve lost most of what you practiced the previous weekend. You’re essentially starting over each week.

    When students ask me how often should a beginner practice piano, I’m explicit: distributed practice is non-negotiable for effective learning. If you can truly only practice on weekends, piano might not be the right hobby right now—and that’s okay.

    Mistake 2: Practicing Without a Plan

    Sitting down and noodling around isn’t practice. Real practice is directed work toward specific goals. Before each session, you should know: “Today I’m working on measures 9-12 of this piece and getting the left-hand rhythm steady.”

    I send my students home from each lesson (whether that’s a $99 sixty-minute session in my studio or online) with written practice instructions. If you’re teaching yourself, write your own. Knowing how often should a beginner practice piano is meaningless without knowing what to practice.

    Mistake 3: Never Taking a Day Off

    Some overachievers practice all seven days, every single week, and wonder why they’re burned out after three months. Rest matters. Your brain consolidates learning during rest. Taking one day off per week isn’t slacking—it’s strategic.

    I recommend six days maximum for beginners, with that seventh day completely piano-free. This prevents mental and physical burnout and keeps the joy alive.

    Mistake 4: Comparing Yourself to Others

    Your practice schedule should fit your life. If your friend practices 45 minutes daily and you practice 20, that doesn’t make you less dedicated. Comparison is the thief of joy—and it’s a major reason why students quit piano.

    The question of how often should a beginner practice piano has a different answer for different people. The right answer is whatever you can sustain long-term while continuing to enjoy the process.

    Adjusting Your Schedule as You Progress

    The practice schedule that works for your first three months won’t be the same one you need after a year. As you advance, your needs change. Understanding how often should a beginner practice piano means also understanding how those needs evolve.

    Months 1-3: Building the Habit

    In the early months, how often should a beginner practice piano is primarily about habit formation. You’re training yourself to sit at the piano regularly. Even 15 minutes daily is a win if you do it consistently.

    Focus on making practice a non-negotiable part of your routine, like brushing your teeth. I encourage new students to practice at the same time each day—mornings before work, lunch breaks, or evenings after dinner. Routine reduces friction.

    Months 4-6: Increasing Duration

    Once daily practice feels automatic, you can gradually extend session length. If you started at 15 minutes, try 20. If you started at 20, try 25-30. Your hands are adapting, your focus is improving, and you probably have more material to work on.

    This is also when some students start exploring different styles or working on pieces that genuinely excite them. That intrinsic motivation makes longer practice sessions feel less like work.

    Months 7-12: Deepening Practice

    By now, you’re no longer a true beginner. You might naturally want to practice longer because you’re engaged with more complex pieces. Thirty to forty minutes might start feeling normal. That’s great—just keep one day off per week.

    For adult learners wondering about this progression, I cover realistic timelines in my article on how long it takes to learn piano as an adult.

    When You Hit a Plateau

    Everyone hits plateaus. You’ll practice the same amount with seemingly no progress for a few weeks. This is normal. Your brain is consolidating complex learning under the surface.

    Don’t increase practice time dramatically in frustration—that rarely helps. Instead, evaluate practice quality. Are you working slowly and deliberately? Are you isolating problem areas? Sometimes a conversation with your teacher is the best remedy. This is exactly the kind of thing we troubleshoot together in lessons.

    When Life Gets in the Way

    Real talk: some weeks, life explodes. Work deadlines, family emergencies, illness, travel. You’re not going to practice five days that week. What do you do? How often should a beginner practice piano when normal routines fall apart?

    The Two-Day Rule

    I teach all my students the two-day rule: never let more than two days pass without touching the piano. If you miss Monday and Tuesday, you absolutely practice on Wednesday, even if it’s just 10 minutes.

    Why? Because three days becomes four, four becomes a week, and a week becomes “I guess I don’t play piano anymore.” The two-day rule keeps you connected to the instrument even during chaos.

    The 5-Minute Emergency Session

    On truly insane days, practice for just five minutes. Play one scale and one piece you already know. That’s it. It keeps the habit alive and your hands somewhat warm. It counts.

    When thinking about how often should a beginner practice piano, remember that consistency across months and years matters more than perfection in any given week.

    Bouncing Back After a Break

    If you miss a full week (it happens), don’t try to cram extra practice the following week to “catch up.” Just resume your normal schedule. You might be a bit rusty for a few days, but you’ll bounce back quickly if the break was short-term.

    If the break extends beyond three weeks, you’ve lost some progress. Be patient with yourself. Review easier material for a few sessions before tackling where you left off.

    Scheduling Practice Like an Appointment

    The students who succeed are those who treat practice like any other important appointment. It goes on the calendar. If someone asks, “Can you meet Tuesday at 6:30?” and that’s your practice time, the answer is, “No, I have a commitment then.”

    This isn’t selfishness—it’s self-respect. Your musical development matters. Protect that time. This mindset is essential for anyone serious about answering how often should a beginner practice piano with consistent action.

    Making It Stick: Long-Term Success

    So, how often should a beginner practice piano for long-term success? The answer is consistent, sustainable practice that fits your life—not someone else’s ideal.

    Here’s what I’ve observed in hundreds of students: the ones still playing five years later aren’t necessarily the ones who practiced the most in month one. They’re the ones who found a sustainable rhythm and stuck with it.

    They’re the ones who gave themselves grace during hard weeks and showed up again when life calmed down. Piano is a lifetime pursuit. There’s no finish line where you “complete” piano and move on. It’s a practice in the truest sense—something you return to, again and again, that grows with you.

    The Joy Factor

    Finally, I’ll share something I tell every new student: if you’re not enjoying the process at least 80% of the time, something’s wrong. Maybe you’re practicing too much and burning out. Maybe you’re practicing too little and feeling frustrated by lack of progress. Maybe your practice approach needs adjustment.

    Piano should be challenging, yes. It should require focus and effort, absolutely. But it should also bring you joy, satisfaction, and moments of genuine beauty. If it doesn’t, let’s figure out why.

    Working with a Teacher

    One of the best ways to answer how often should a beginner practice piano for your specific situation is to work with a teacher who knows you. I adjust practice recommendations constantly based on what I see in lessons—how someone’s hands are developing, how they’re managing the workload, whether they’re frustrated or flourishing.

    Whether you work with me (offering lessons worldwide via Zoom or in-person in the Bay Area) or another teacher, that personalized feedback is invaluable. We can spot issues you can’t see yourself and adjust your practice plan in real-time.

    If you’ve never experienced professional piano instruction, I encourage you to learn what to expect in your first piano lesson and consider trying it. The difference between self-teaching and working with an experienced guide is profound.

    Recommended Resources

    For more structured guidance, consider exploring comprehensive approaches to learning. Research from music education consistently shows that beginners benefit from systematic instruction combined with regular practice habits.

    The National Association for Music Education has published studies indicating that students who maintain consistent practice schedules, even brief ones, show significantly better retention and progress than those with irregular patterns. You can explore more about the science of music learning through academic resources on motor learning and skill acquisition.

    These research-based insights confirm what experienced teachers observe: how often should a beginner practice piano is answered not by arbitrary rules, but by understanding how the brain actually learns complex motor skills.

    Your Personal Practice Philosophy

    Ultimately, you need to develop your own practice philosophy—one that honors your goals, your schedule, and your well-being. For some people, piano is a serious pursuit and they’ll happily dedicate 45 minutes daily. For others, it’s a joyful hobby worth 20 minutes most days. Both are valid.

    The question of how often should a beginner practice piano isn’t about judgment or comparison. It’s about finding what works for you and committing to it fully, whatever that looks like.

    Moving Forward

    If you take nothing else from this article, remember these three things:

    • Frequency matters most: 20 minutes six times a week beats 90 minutes twice a week
    • Consistency beats intensity: Sustainable practice wins long-term
    • Quality over quantity: Focused, intentional practice is what actually builds skill

    Start where you are. If you can commit to 15 minutes five days a week, start there. As it becomes habit, you can extend and expand. The important thing is to start—and to keep showing up.

    Teaching piano for over a decade has shown me that success isn’t about talent or massive time investment. It’s about showing up consistently, practicing intelligently, and staying patient with yourself. Every single student I’ve seen succeed has followed this path.

    Now you know the answer to how often should a beginner practice piano: 5-6 days per week, 20-30 minutes per session, with focused intention and sustainable commitment. This isn’t just theory—it’s proven practice wisdom from years of watching students transform from absolute beginners into confident players.

    The question isn’t really how often should a beginner practice piano in some abstract sense. The question is: how often will you practice? Because your answer to that question, followed by consistent action, will determine your entire piano journey.

    You can do this. The path is clear, the schedule is reasonable, and the rewards are immeasurable. Start today, practice tomorrow, and keep going. That’s how pianists are made—one consistent practice session at a time.

    Ready to find out for yourself?

    Your first 30-minute lesson with me is completely free – we will evaluate where you are, talk through your goals, and map out your path.
    Book Your Free Trial Lesson