
If you’ve ever felt like your metronome is mocking you—clicking away smugly while you struggle to stay in time—you’re not alone. Learning how to use a metronome piano practice can feel like rubbing your head and patting your stomach simultaneously while reciting the alphabet backwards.
It’s one of those skills that separates disciplined pianists from the rest, yet it’s also one of the most universally dreaded tools in music education. In my 10+ years of experience, I’ve watched hundreds of students go from metronome-haters to metronome-believers.
The difference isn’t talent or discipline. It’s approach. Most people use metronomes wrong from day one, which creates frustration that compounds over time.
But when you understand how to use a metronome piano techniques correctly, the clicking transforms from enemy to ally. This comprehensive guide will show you exactly how to make that transformation happen in your own practice sessions.
In this guide, I’ll walk you through seven practical strategies that make metronome practice actually work. These aren’t theoretical music school concepts—they’re methods I use every day with real students at Weaver Music, from total beginners to advanced players preparing for performances.
The short answer
To use a metronome effectively at the piano, start at a tempo where you can play the passage perfectly with zero mistakes. Then practice the section multiple times at that tempo until it feels easy.
Only then should you increase by 5 BPM. Use subdivision clicks (eighth notes or sixteenth notes) instead of just quarter notes, and alternate between practicing with the metronome and without it to develop both external and internal timing.
The key insight: the metronome isn’t there to push you faster. It’s there to build consistency at tempos you’ve already mastered. Think of it as a mirror for your rhythm, not a drill sergeant.
Understanding how to use a metronome piano practice tool correctly will transform your playing faster than almost any other single technique adjustment. The metronome reveals timing inconsistencies you might not hear otherwise and helps build the muscle memory needed for professional-level playing.
When used properly, this simple tool becomes your most reliable partner in developing rock-solid rhythm, even tempo control, and the confidence to tackle increasingly challenging repertoire. The strategies that follow will show you exactly how to harness that power.
Why metronomes feel awful at first
Before we dive into technique, let’s acknowledge why metronomes trigger such visceral reactions. Understanding the psychology helps you work with your brain instead of against it.
The metronome exposes every imperfection. When you practice without one, your brain smooths over rhythmic inconsistencies. You slow down during hard parts and speed up during easy sections, but it feels smooth to you.
The metronome reveals this truth brutally. It creates cognitive overload for beginners. You’re already managing notes, fingering, hand position, dynamics, and pedaling.
Adding a relentless external timekeeper feels like one task too many. Your brain literally doesn’t have enough processing power yet to handle everything at once.
Here’s what most teachers don’t tell you: this feeling is temporary. As technical skills become automatic, your brain frees up capacity for timing.
The metronome gets easier not because you “get better at metronomes” but because everything else becomes less demanding. Many students also start at the wrong tempo.
They set the metronome to the target performance speed, then try to play along. This guarantees failure and frustration. We’ll fix that in the next section.
The clicking sound itself can be psychologically challenging. Our brains naturally want to interpret and adjust rhythm based on musical context, which is why the strict, unforgiving click of a metronome feels so unnatural at first.
Another psychological barrier is the fear of judgment. The metronome doesn’t care about your excuses or explanations—it simply reveals whether you’re on the beat or not. This objective feedback can feel harsh, especially for perfectionists who struggle with making mistakes.
But here’s the reframe that helps my students: the metronome isn’t judging you. It’s just providing data. That data is incredibly valuable because it shows you exactly where to focus your practice energy.
Start slower than you think
This is the single most important principle for how to use a metronome piano practice effectively. You must start slower than feels necessary. Much slower.
Here’s my rule: set the metronome to a tempo where you can play the passage perfectly ten times in a row without a single mistake, hesitation, or stumble.
For most students learning a new piece, this ends up being 40-60% of the target tempo. Yes, really. I had a student recently working on a Chopin Nocturne.
She wanted to practice it at 120 BPM because that’s how her favorite recording sounded. At that speed, she made mistakes in nearly every measure. We dropped it to 50 BPM.
She hated how it felt at first—”It’s too slow, I can’t feel the music!” But here’s what happened: at 50 BPM, she could play it perfectly.
After three practice sessions at that glacial pace, we bumped it to 55 BPM. Then 60. Then 65. Within two weeks, she was at 90 BPM playing more musically than she ever had at 120 with mistakes.
Slow practice with a metronome builds three things simultaneously:
- Muscle memory that’s accurate from the start
- Mental clarity about every note and rhythm
- Confidence that you can execute the passage reliably
Fast practice with mistakes builds muscle memory for the mistakes. You’re literally training your fingers to play wrong notes. Slow, perfect repetition is exponentially more effective than fast, sloppy repetition.
One more thing: don’t judge the musicality of slow practice. It won’t sound beautiful at 50 BPM. That’s not the point. You’re building a foundation.
The music comes later, and it comes more reliably because the foundation is solid. This approach to how to use a metronome piano slow practice creates neural pathways that lock in accuracy before speed.
Think of it like building a house. You wouldn’t rush through the foundation to get to the pretty parts faster. The same principle applies to piano technique.
Neuroscience research shows that slow, deliberate practice with immediate feedback (which the metronome provides) creates stronger neural connections than fast, error-prone repetition. You’re not just training your fingers—you’re rewiring your brain for precision.
When students understand this scientific basis, they’re more willing to embrace the slow tempos that feel uncomfortable at first. The patience pays dividends in the form of faster long-term progress and fewer ingrained bad habits to unlearn later.
Use subdivision, not just quarter notes
Most beginners set their metronome to click on quarter notes. This is fine for simple pieces, but it’s actually one of the biggest obstacles to understanding how to use a metronome piano technique for anything moderately complex.
Instead, set your metronome to click on the smallest rhythmic value you’re playing. If your passage has sixteenth notes, set the metronome to click sixteenth notes.
If you’re playing eighth-note triplets, use triplet clicks. Why does this work so much better? Because it removes ambiguity.
When the metronome only clicks quarters, you have to subdivide in your head to place the eighths and sixteenths accurately. For beginners, this is asking your brain to do two hard things at once: play the passage and calculate subdivision.
When the metronome clicks the subdivision, you just match the clicks. One action, not two. Your fingers and the clicks line up directly. This dramatically reduces cognitive load.
Here’s how I teach this: let’s say you’re playing a C major scale in sixteenth notes. Instead of setting the metronome to quarter note = 60, set it to sixteenth note = 60 (which many metronomes display as quarter = 60 but in sixteenth-note mode).
Now every note of your scale gets its own click. Practice it until every finger attack aligns perfectly with a click. Then, gradually turn off some of the subdivision.
Maybe switch to eighth-note clicks. Your internal sense of sixteenth notes will be much stronger because you built it with complete external support first.
This is especially powerful for dotted rhythms, syncopation, and any passage where students “feel” the rhythm wrong. The subdivision clicks force you to place notes exactly where they belong mathematically, which often differs from where they feel like they should go.
Professional pianists use this subdivision technique constantly when learning complex contemporary works. It’s not a beginner crutch—it’s a professional tool that happens to be especially helpful for developing players.
I’ve seen subdivision clicking transform students’ understanding of complex rhythmic patterns in just a single practice session. What felt impossibly complicated suddenly becomes clear when every note division has its own audible reference point.
This technique is particularly valuable for passages with mixed rhythms—say, triplets in one hand against straight eighths in the other. Setting the metronome to click the lowest common denominator (often sixteenth-note triplets in this case) makes the mathematical relationship crystal clear.
Practice with it, then without it, then with it again
One of the biggest mistakes students make is practicing exclusively with the metronome or exclusively without it. Both approaches have problems. Only practicing with the metronome makes you dependent on external timekeeping.
You develop the skill of following a click, but not the skill of generating steady time internally. The moment you perform without a metronome, your timing falls apart.
Only practicing without a metronome means you never get objective feedback. You develop an internal sense of time, but it might be inaccurate. You’ll slow down in difficult passages and rush through easy ones without realizing it.
The solution is alternation. Here’s the practice cycle I teach at Weaver Music, and it’s transformed how to use a metronome piano students approach this essential tool:
- Phase 1: Practice the passage with metronome subdivision clicks at a very slow tempo until perfect (5-10 repetitions)
- Phase 2: Turn off the metronome and play the passage twice, trying to maintain that exact tempo internally
- Phase 3: Turn the metronome back on at the same tempo and check whether you stayed consistent
- Phase 4: If you stayed consistent, increase by 5 BPM and repeat. If not, stay at the current tempo for another cycle
This builds both external and internal timing skills. You learn to follow an external pulse and to generate a steady internal pulse. Most importantly, you learn whether your internal sense matches reality.
I’ve had countless students swear they maintained tempo during Phase 2, only to discover in Phase 3 that they slowed down by 15-20 BPM without realizing it.
This awareness is valuable. It tells you where your practice needs to focus. Over time, the gap closes. Your internal tempo becomes more accurate.
Eventually, you can play entire pieces at steady tempo without external support—but you’ll have developed that skill by regularly checking it against objective measurement.
This alternating approach is one of the most effective ways to internalize rhythm while maintaining accountability. It trains independence while preventing the drift that happens when you never check your assumptions against reality.
The alternation method also prevents metronome dependency, which is a real concern for students who use the tool too consistently. You want the metronome to be a training partner, not a permanent crutch.
By regularly practicing without it and then verifying your accuracy, you build genuine internal timing that will serve you in performance situations where no external click track is available.
Let the metronome follow you first
Here’s a technique I don’t see enough teachers using: before you try to follow the metronome, let it follow you. This works especially well for expressive pieces where strict tempo feels wrong, or for students who tense up the moment the clicking starts.
It reverses the power dynamic and removes the performance anxiety. Here’s how: play through the passage at whatever tempo feels natural and comfortable.
Don’t try to be steady; just play musically. Record yourself or have someone tap along to find your natural tempo. Then set the metronome to that exact speed.
Suddenly, the metronome isn’t an adversary. It’s simply reflecting what you’re already doing. This creates a feeling of alignment instead of conflict.
Practice at this “natural tempo” with the metronome until it feels easy and collaborative. Then—and only then—start making small adjustments.
Maybe your natural tempo was 76 BPM but the target is 80. Instead of jumping straight to 80 and struggling, you’ve built comfort at 76 first. Moving to 77, then 78, then 79, then 80 happens organically.
This approach is particularly effective for adults who come to piano later in life. Many of my adult students at Weaver Music have spent decades in careers where they were competent and in control.
The metronome makes them feel incompetent, which triggers avoidance. Starting with “the metronome matching you” instead of “you matching the metronome” preserves that sense of agency.
It’s also psychologically easier. You’re not learning a new skill (following external time); you’re just adding external validation to something you already do (playing at your natural pace).
Once that foundation exists, expanding the skill becomes less threatening. This reverse-engineering approach to how to use a metronome piano practice sessions creates confidence instead of anxiety.
I’ve used this technique with students who had developed almost phobic reactions to metronomes after years of frustrating experiences. By letting them “teach” the metronome their tempo first, we removed the emotional charge and created a neutral starting point.
Within a few weeks, these same students were comfortably using metronomes in the traditional way because the initial psychological barrier had been dismantled.
Learning this goes faster with a teacher watching your hands. Your first 30-minute lesson with Austin is free — no card, no pressure.
How to use a metronome piano scales and technical work
Scales, arpeggios, and technical exercises are where metronome work pays the biggest dividends. This is also where understanding how to use a metronome piano students can achieve the fastest progress.
For scales, start with one octave at a time. Set the metronome to click on every note (subdivision clicks, as discussed earlier). Play the scale up and down, ensuring every finger strikes exactly with a click. This builds evenness.
Once one octave is even, extend to two octaves. You’ll notice certain transitions—often the thumb-under at the octave break—tend to rush or drag.
The metronome exposes this immediately. Isolate those transitions and drill them separately at the same tempo. Here’s a specific how to use a metronome piano scales technique I use constantly: the accent drill.
Play your scale with the metronome, but accent every fourth note. Then every third note. Then every fifth note. This forces you to maintain steady time while adding rhythmic complexity, which builds polyrhythmic awareness and strengthens your sense of pulse.
For arpeggios, the same principles apply, but the technical challenge is often greater because of the wider hand position changes. Start absurdly slow—maybe one note per second.
Make every position shift deliberate and exactly timed. Speed comes from accuracy, not from trying to go fast. Technical exercises like Hanon or Czerny are metronome goldmines.
These are specifically designed to be practiced slowly for accuracy, then gradually increased in speed. Track your progress by writing down the date and tempo in your practice journal.
Seeing “Hanon #1: 60 BPM” grow to “Hanon #1: 100 BPM” over weeks provides tangible evidence of improvement. One mistake to avoid: don’t practice scales and technical work exclusively at one tempo.
Vary it. Some days, practice scales at a very slow tempo with perfect articulation and dynamics. Other days, push the tempo to your current maximum. This builds both control and speed, and prevents boredom.
When working on how to use a metronome piano scales practice, consistency matters more than intensity. Five minutes of focused, metronome-guided scale work every day produces better results than thirty minutes once a week.
The daily repetition builds automaticity in your fingers and deepens your internalized sense of steady pulse. Over time, you’ll notice that even your sight-reading improves because your rhythmic foundation is so much stronger.
Another powerful technique for scale practice: play your scales in different rhythmic patterns while maintaining steady clicks. Try long-short patterns (dotted eighth-sixteenth), then short-long (sixteenth-dotted eighth), then triplet groupings.
This transforms boring scale practice into genuinely engaging rhythmic training while the metronome keeps you honest about maintaining the underlying pulse. The combination builds both technical facility and rhythmic sophistication simultaneously.
The 5-BPM rule for building speed
I’ve mentioned this a few times already, but it deserves its own section because it’s that important. When you’re ready to increase tempo, increase by exactly 5 BPM. Not 10. Not “a little faster.” Exactly 5.
Why 5? It’s small enough that your fingers and brain can adapt without struggle, but large enough that you’re making real progress. Jumps of 10 or more BPM often reintroduce mistakes, which means you’re back to practicing errors.
Here’s the protocol: once you can play a passage perfectly five times in a row at a given tempo, you’re ready to move up 5 BPM. Not three times. Not “pretty well most of the time.” Five perfect repetitions.
This patience is hard for students who are goal-oriented. You want to play Für Elise at 120 BPM, and you’re stuck at 75 BPM. The temptation is to jump ahead. Resist it.
Every time you jump ahead and practice with mistakes, you’re taking two steps back. I promise you: slow, incremental progress is faster in the long run.
A student who increases 5 BPM every few days will reach the target tempo weeks before a student who keeps attempting the target tempo and making mistakes.
Track your progress. Write down the date and tempo every time you increase. This creates motivation and accountability. When you see “October 15: 75 BPM, October 18: 80 BPM, October 21: 85 BPM,” you have proof that the system works, which makes it easier to trust the process during the slow middle stages.
Also, understand that progress isn’t always linear. Some weeks you’ll increase 10-15 BPM total. Other weeks you’ll stay at the same tempo, consolidating. Both are valuable.
The metronome shows you exactly where you are, without judgment or wishful thinking. This gradual building approach is central to how to use a metronome piano technique development at every level.
Professional concert pianists use the exact same 5-BPM increment method when learning new repertoire. It’s not a beginner technique—it’s simply the most efficient way the human brain and fingers learn complex motor patterns at increasing speeds.
Some students find it helpful to use even smaller increments—2 or 3 BPM—especially when working on particularly challenging passages or when approaching the upper limits of their current technical ability. There’s no prize for rushing the process.
The goal is sustainable progress that sticks, not temporary speed gains that collapse under performance pressure. I’ve watched students reach impressive tempos through patient 5-BPM increments and maintain those speeds reliably for months or years.
Meanwhile, students who try to force faster progress often find themselves stuck at the same tempo for weeks because they keep introducing errors that have to be corrected before real advancement can happen.
Choose the right metronome for you
Not all metronomes are created equal, and finding one that doesn’t irritate you makes a huge difference in whether you’ll actually use it. Traditional mechanical metronomes have a visual component (the swinging pendulum) that some students find helpful.
Watching the motion creates a secondary sensory input beyond just sound. However, they’re not portable, they can’t do subdivision clicks easily, and the ticking sound drives some people crazy.
Digital metronomes offer more features: subdivision settings, different sound options, visual flashing lights, and precise BPM control. They’re also usually cheaper and more portable. The downside is they can feel less “organic” and the beeping sounds are sometimes harsh.
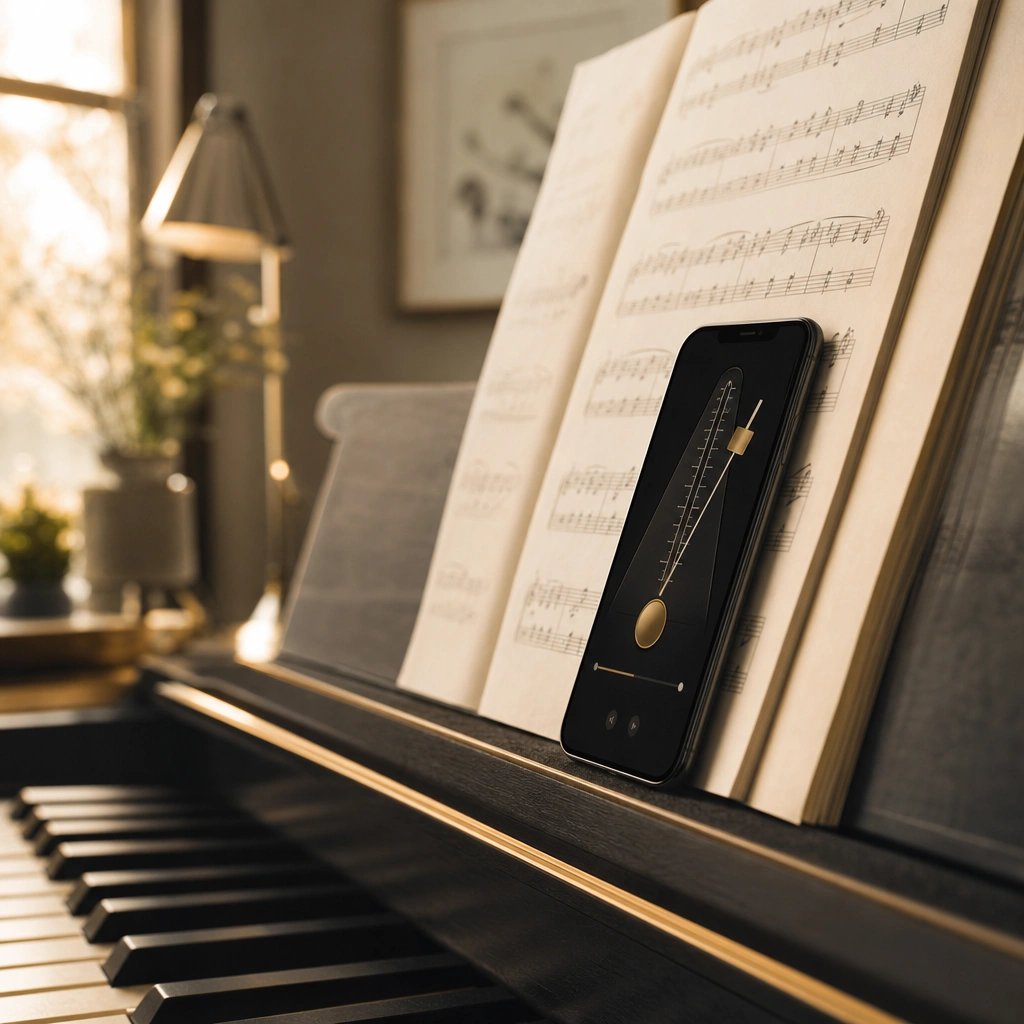
Smartphone apps are what most of my students use now. Apps like Soundbrenner, Pro Metronome, or even the built-in metronome in GarageBand offer incredible flexibility.
You can choose different sounds (wood block, hi-hat, beep), set complex subdivision patterns, create tempo changes within a single session, and even use vibration mode if sound is distracting.
Here’s my advice: try several. The “best” metronome is the one you’ll actually use. If the sound of one app annoys you, try another.
If you love the aesthetic of a wooden mechanical metronome and it makes you more likely to practice with it, get that instead of the “technically superior” digital option.
One feature I strongly recommend: visual feedback in addition to audio. Many apps flash the screen in time with the beat. This visual pulse helps some students sync up more easily than audio alone, especially students who are more visually oriented or who struggle with auditory processing.
Whatever you choose, keep it easily accessible. If your metronome is buried in a drawer or requires five minutes of app navigation to start, you won’t use it.
Put it on your music stand, on your piano, or keep the app on your phone’s home screen. Making it easy to start your metronome practice removes one more barrier to consistent training.
Some advanced metronome apps even offer features like gradual tempo acceleration (automatically increasing BPM over time), programmable tempo maps for pieces with multiple tempo changes, and practice mode features that can help you track your progress over weeks and months.
These features can be valuable for advanced students, but beginners should stick with basic functionality—just a steady click at adjustable tempos with subdivision options. Don’t let feature overload prevent you from using the tool at all.
Common metronome mistakes to avoid
Even when students commit to using a metronome, certain mistakes undermine the effectiveness. Let’s address the most common ones I see in my teaching practice.
Mistake 1: Starting too fast. I’ve mentioned this already, but it bears repeating because it’s the most common error. Your ego wants to practice at performance tempo. Your fingers need to practice at learning tempo. Trust the process.
Mistake 2: Only using it on pieces you’re learning. The metronome is equally valuable—maybe more valuable—for pieces you’ve already “finished.” It reveals tempo fluctuations you’ve stopped noticing.
Record yourself playing an old piece without metronome, then check it against a metronome. You’ll be surprised how much you’re rushing or dragging in familiar passages.
Mistake 3: Treating it as a performance tool rather than a practice tool. Some students think they’ve “failed” if they can’t perform with a metronome clicking. That’s not the goal.
The metronome is training wheels. It helps you build steady internal time. Once built, you remove it for performance.
Mistake 4: Using it for every piece, every time. Some music is meant to be rhythmically flexible. Romantic-era pieces, for instance, often use rubato (expressive tempo changes) as a core musical element.
Using a metronome on Chopin’s Nocturne in E-flat major, for example, can strip away the interpretive freedom that makes the piece beautiful. We’ll discuss this more in the next section.
Mistake 5: Not adjusting for different practice goals. If you’re working on dynamics and phrasing, maybe you don’t need the metronome that day. If you’re working on evenness and rhythm, you definitely do. Match the tool to the goal.
Mistake 6: Giving up after one bad session. Your first few attempts with a metronome will probably feel awful. That’s normal. It takes several sessions before your brain adapts. Don’t judge the tool based on day one. Give it a full week of honest effort.
If you’re struggling with consistency in your practice overall, not just with metronome work, you might find my article on creating a piano practice schedule for adults helpful for building sustainable habits.
Another common mistake is fighting the click instead of listening to it. When you notice you’re off the beat, many students try to force their fingers back in sync mid-phrase, which creates tension and usually makes things worse.
Instead, if you fall out of sync, finish the phrase, stop, reset, and start again from a convenient musical entry point. Don’t try to “catch up” to the metronome—that’s not how motor learning works.
Mistake 7: Ignoring your body’s tension signals. If you notice your shoulders rising, your jaw clenching, or your breathing becoming shallow while practicing with a metronome, that’s a sign you need to slow down or take a break.
Physical tension actively interferes with motor learning and can lead to injury over time. The metronome should support relaxed, efficient technique, not create stress that compromises it.
When NOT to use a metronome
I’ve spent this entire article teaching you how to use a metronome piano practice effectively. Now I’m going to tell you when to ignore everything I just said and not use one at all.
Metronomes are tools, not rules. There are legitimate times when practicing without one is better for your musical development.
When learning a brand-new piece in the first reading: When you’re sight-reading through something for the first time, your goal is to get a general sense of the music—the melody, harmony, structure, and character.
Adding a metronome at this stage adds unhelpful pressure. Just play through it at whatever tempo works, stopping when you need to, getting familiar with the landscape.
When working on musical expression: If your focus today is on phrasing, dynamics, pedaling, or emotional interpretation, the metronome can actually get in the way.
These elements often require subtle tempo fluctuations—a slight ritardando at the end of a phrase, a slight acceleration into a climax. Strict tempo prevents you from exploring these expressive tools.
When practicing deliberately flexible music: As mentioned earlier, some pieces are meant to be played with rubato. Debussy’s “Clair de Lune,” many Chopin pieces, improvisatory-style works—these require rhythmic freedom.
You might use a metronome to learn the notes and basic rhythms accurately, then set it aside for interpretive work.
When you’re mentally exhausted: Metronome practice requires focused concentration. If you’re practicing at the end of a long day and your brain is fried, sometimes it’s better to just play for enjoyment without the cognitive load of strict timekeeping.
Playing piano for stress relief is valuable too, as I discuss in this article, and the metronome isn’t always compatible with that goal.
When it’s creating more frustration than value: If you’ve spent 20 minutes trying to sync with the metronome and you’re on the verge of throwing it across the room, stop. Take a break. Practice something else.
Come back to it tomorrow. Frustration creates tension, and tension in your hands and shoulders creates bad technique.
The goal is to develop strong internal timing that doesn’t depend on external tools. The metronome helps you build that skill, but it’s not meant to be a permanent crutch.
Think of it like training wheels on a bicycle—essential for learning balance, but eventually you need to ride without them.
In my teaching at Weaver Music, I use metronomes strategically, not universally. In a typical lesson, we might use it for 10-15 minutes on specific technical passages or scales, then set it aside for the rest of the hour while we work on musicality, interpretation, and the joy of making music.
If you’re curious about what a lesson with me actually looks like, you can read more about what to expect in a first piano lesson.
Balance is everything. Use the metronome enough to build accurate timing. Don’t use it so much that it kills your musical spirit. You’ll know you’ve found the right balance when your playing is both rhythmically solid and emotionally alive.
One final thought: if you’re working with a teacher—in person or over Zoom, they can help you determine when metronome work is appropriate for your current pieces and goals.
At Weaver Music, personalized guidance on practice strategies is a core part of every lesson, and you can also access structured practice guidance through our four-level lesson path that breaks down exactly how to practice effectively at each stage of development.
The metronome is powerful when used wisely. It’s just one tool among many in your practice toolkit. Master it, use it strategically, and you’ll see dramatic improvements in rhythmic accuracy, technical evenness, and confidence.
But never forget that the ultimate goal isn’t perfect time—it’s beautiful music. The metronome serves that goal; it doesn’t replace it.
When you truly understand how to use a metronome piano practice sessions become more productive, less frustrating, and ultimately more musical. The click that once felt like criticism becomes a supportive partner in your journey toward mastery.
Consistent metronome practice over weeks and months trains your internal sense of timing, making you a steadier musician even when you’re not using the tool.
That’s the real power of this simple clicking device—it’s building skills that last far beyond the practice session itself.
The transformation that happens when you master how to use a metronome piano techniques extends beyond just the pieces you’re currently learning. You’ll find that your sight-reading becomes more accurate because you’re better at anticipating and maintaining steady rhythmic patterns.
Your ensemble playing improves because you can lock into a shared pulse more reliably. Even your improvisational skills benefit because you have a stronger internal framework for organizing musical ideas in time.
These compound benefits make the initial discomfort of learning to work with a metronome worthwhile many times over. The students who push through the awkward early stages and develop genuine facility with this tool consistently outpace their peers in overall musicianship development.
So yes, the metronome might feel like your enemy at first. But with the seven strategies outlined in this guide, you can transform it into one of your most valuable practice partners.
Start slower than feels comfortable, use subdivision clicks for clarity, alternate between guided and independent practice, let the tool match your natural tempo before pushing you faster, apply it systematically to scales and technical work, increase tempo in small increments, and choose a metronome you’ll actually enjoy using.
Follow these principles consistently, and within weeks you’ll notice the difference—not just in the pieces you’re practicing with the metronome, but in every aspect of your playing that depends on solid rhythmic foundation and steady tempo control.
Ready to find out for yourself?
Your first 30-minute lesson with me is completely free – we will evaluate where you are, talk through your goals, and map out your path.