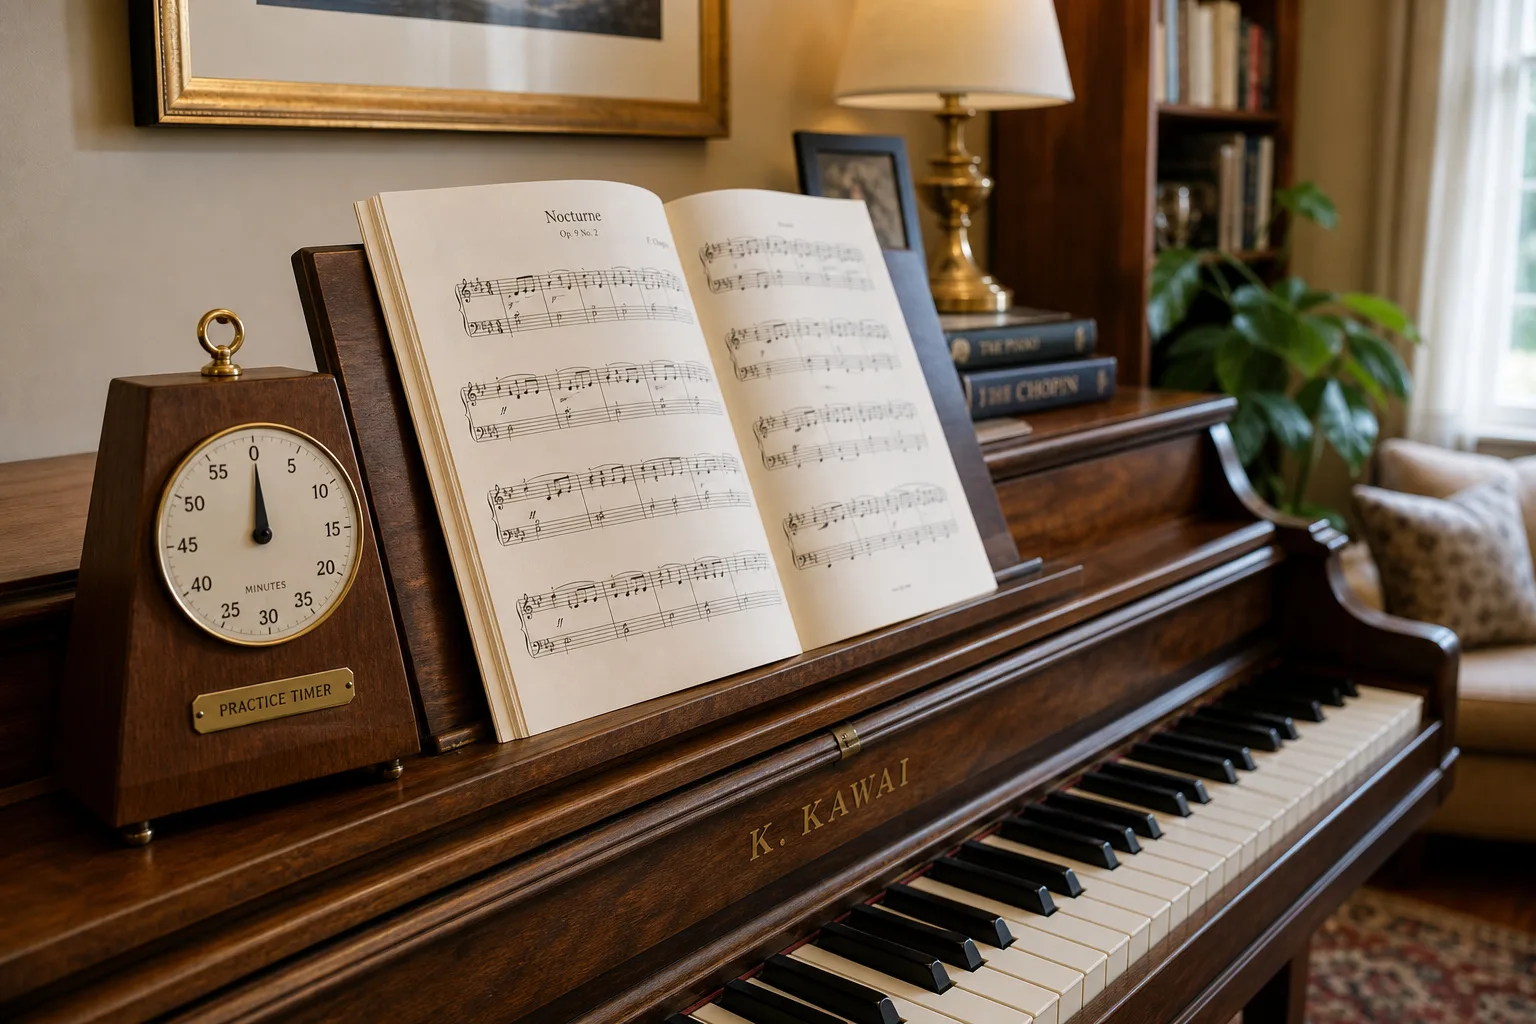
Practicing piano effectively means using a focused 20-minute session split into four parts: a two-minute warm-up, eight minutes on the hardest new material, six minutes fixing one or two specific trouble spots slowly, and four minutes replaying something you already know well. Structure matters more than total time. I’ve watched students with 15 focused minutes outpace students who “practiced” for an hour with no plan.
If you want someone to watch you practice and tell you exactly what to adjust, that’s literally what a free 30-minute trial lesson is for – no card, no pressure, just an honest look at your routine.
What should the first five minutes look like?
The first five minutes of an effective piano session should be a physical and mental warm-up, not song practice: a scale or five-finger pattern in both hands, a few chords, and a slow read-through of whatever piece you’re currently learning. This wakes up your hands and your ear before you ask them to solve a hard problem.
I tell students to treat this like a runner’s stretch. Skipping it doesn’t ruin one session, but skip it for a month and technique gets sloppy – fingers collapse, wrists tense up, and mistakes that were never there start showing up in easy passages.
Play a C major scale, one octave, hands separately, then together
Play the I-IV-V chords in whatever key your current song uses
Read through your piece once at half speed, no stopping for mistakes
This whole block should take two to three minutes tops. If it’s eating ten minutes of your twenty, you’re overdoing the warm-up and shortchanging the part that actually moves you forward.
How do I know what to actually work on?
Effective piano practice targets the single hardest measure or phrase in your current piece, not the whole song from the top. Pick the spot where your hands hesitate, where you always slow down, or where you’d guess wrong if someone stopped you and asked what note comes next.
A student of mine, Daniel, used to play his whole piece start to finish every single practice, mistakes and all, for a full week. When we isolated just the four measures giving him trouble, he fixed them in one 20-minute session. Playing a piece straight through feels productive because it’s satisfying, but it mostly rehearses what you already know and repeats what you don’t.
Play the piece through once to locate the rough spot
Mark it with a pencil circle or sticky note
Spend the bulk of your session there, not on the easy parts
This is also where a decision about reading chords versus notes tends to surface – trouble spots often trace back to a gap in one or the other.
Should I practice slowly or at full speed?
New or difficult material should always be practiced slowly at first – slow enough that you play it correctly three times in a row before speeding up at all. A tempo you can play cleanly at half speed will get you to full speed faster than repeatedly stumbling through it fast.
This is opinion shaped by experience rather than a universal law, but I’ve seen it hold true across ten years of teaching: rushing a passage before your hands know it locks in errors that are miserable to undo later. Musicians sometimes call this “practicing mistakes into the music,” and once a wrong finger pattern is automatic, it takes three or four times longer to correct than it would have taken to learn it right the first time.
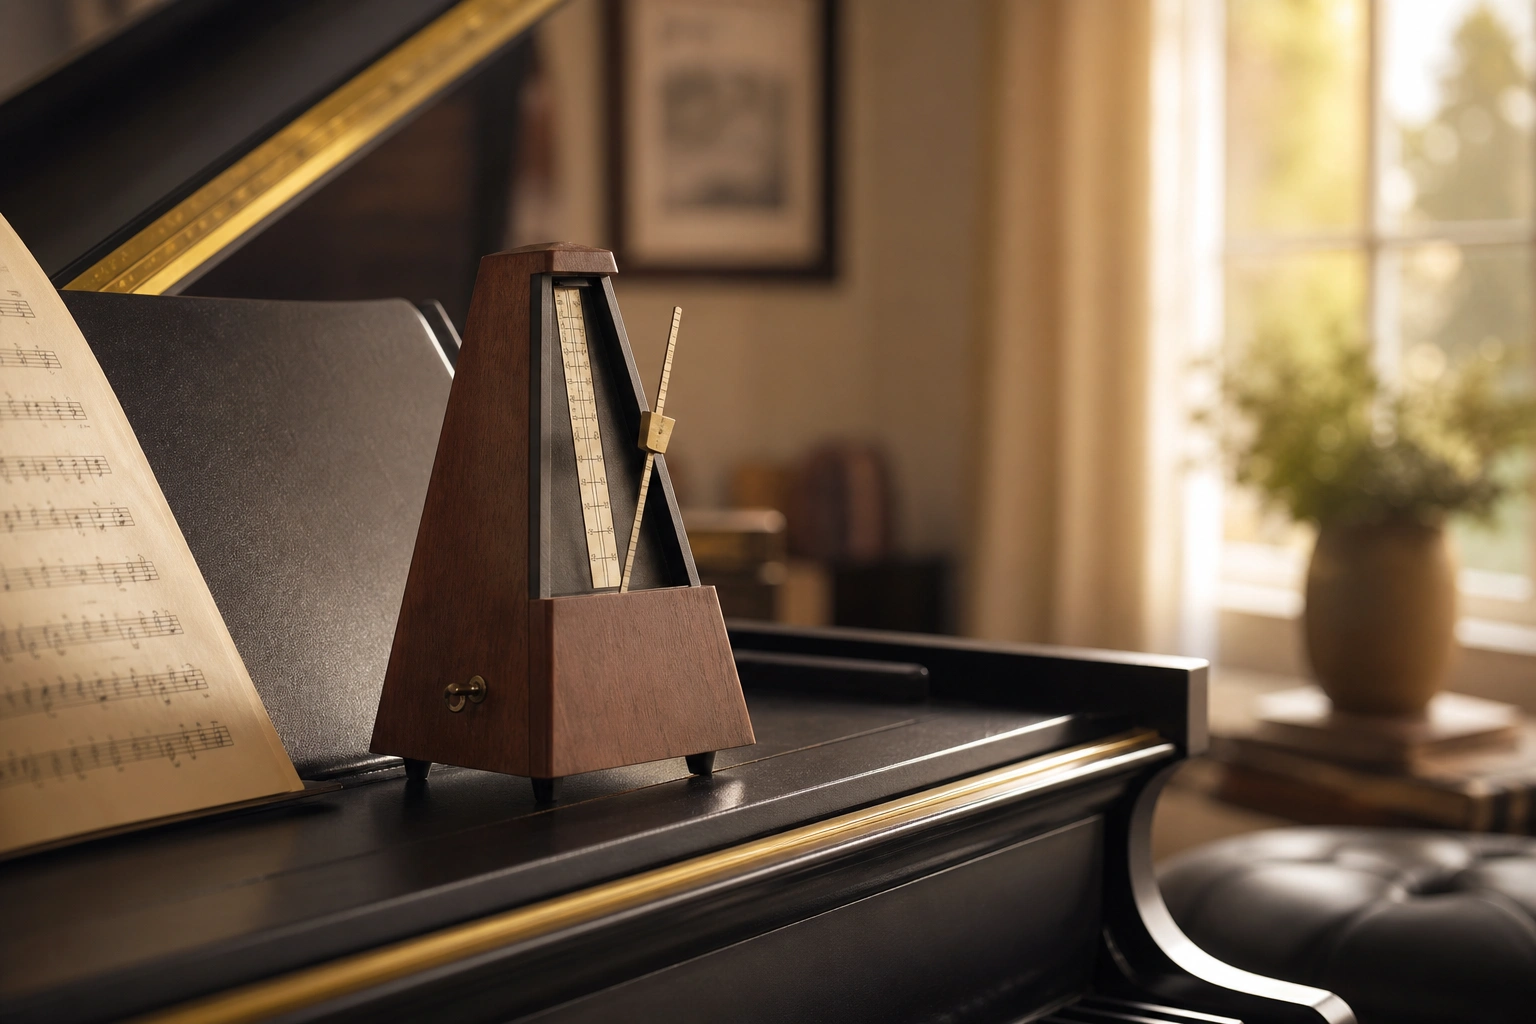
Use a metronome and start at a tempo where zero mistakes happen
Increase speed in small steps, only after three clean repetitions
If mistakes return at a new tempo, drop back down – don’t push through
There’s decent research behind this too. Studies on motor skill acquisition, summarized well on Wikipedia’s motor learning page, back up what teachers have said for generations: accuracy before speed builds a more durable skill than speed before accuracy.
If your practice sessions feel busy but nothing is actually improving, a second set of eyes usually finds the fix in minutes. Your first 30-minute lesson with Austin is free – no card, no pressure.
How do I fix a tricky spot instead of just replaying it?
Fixing a tricky spot on piano means isolating the exact beat or note where the error happens, not just replaying the whole measure and hoping it lands. Break the passage into the smallest unit that contains the mistake, sometimes just two or three notes, and repeat that unit until it’s automatic.
I see this mistake constantly: a student plays a four-measure phrase, fumbles beat three of measure two, and goes right back to the top of the phrase to try again. By the time they reach the trouble spot, their hands are already tired and their focus has drifted. Isolating the actual problem is faster and far less frustrating.
Identify the exact beat, not just the measure, where things go wrong
Loop just that beat plus one note before and after it
Repeat five times slowly, then reconnect it to the full phrase
Hands separately is another underused tool here. Isolating the left hand alone for a tricky bass line, something covered in more depth on our page about lesson length and pacing, often reveals that one hand is doing fine and the other is the actual bottleneck.
What should the last few minutes be for?
The final four minutes of a practice session should be spent playing something you already know well and enjoy, ending the session on a feeling of success rather than struggle. This isn’t wasted time – it reinforces retention and keeps you wanting to come back tomorrow.
This is the part beginners skip most often, and it’s the one I push back on hardest. Ending every session mid-struggle on the hard new piece is a quiet but real reason students quit. Noah, one of my longtime online students, started closing every session with a song he’d already mastered, and he told me it changed how he felt about sitting down to practice at all.
“I started as a complete beginner, and Austin made the learning process feel comfortable.” – Noah Peterson
Most adult beginners can play a simple two-hand song cleanly within six to eight weeks at 20 minutes a day, and that’s largely because the daily win at the end of each session keeps motivation intact. If you’re practicing in a shared space, our guide on practicing piano in an apartment has useful tips for keeping this last stretch enjoyable without disturbing neighbors.
Common questions
Is 20 minutes a day actually enough to improve?
Yes, for most beginners and intermediate players, 20 focused minutes a day beats an hour once a week. Consistency builds the muscle memory and ear training that piano depends on. As of 2026, this is still the routine I recommend to nearly every new student regardless of age.
What if I only have time to practice three days a week?
Three days a week still works, but expect roughly half the progress speed of daily practice. On practice days, stretch each session to 30 minutes and keep the same structure – warm-up, hard spot, slow work, easy finish – rather than trying to cram a week’s worth of practice into one long sitting.
Should I practice with a metronome every single day?
Not every day, but often. Use a metronome specifically when learning new material or working on a tricky rhythm, and skip it when you’re playing pieces you already know for enjoyment. Overusing it can make your playing feel mechanical rather than musical.
Does it matter what time of day I practice?
Not much, as long as it’s consistent. Some students focus better in the morning before mental fatigue sets in; others do best unwinding in the evening. What matters far more than the clock time is doing it at roughly the same point in your day so it becomes a habit rather than a decision.
Can I split my 20 minutes into two shorter sessions?
Yes, and for young kids or very busy adults this often works better than one block. Two 10-minute sessions, one focused on the hard spot and one on review, still cover the same ground. The warm-up and hard-spot work matter most in whichever session comes first.
How do I know if my practice routine needs adjusting?
If you’ve spent two or more weeks on the same passage with no improvement, or if you dread sitting down to practice, your routine likely needs a change. That’s usually a sign to isolate smaller sections, slow the tempo further, or get feedback from a teacher on what’s actually going wrong.
If your current routine isn’t quite clicking, it’s worth comparing structured lessons against solo practice with apps – our breakdown of piano lessons vs piano apps covers when each approach makes sense. And if you’ve been considering a change of teacher or format, how to choose a piano teacher walks through what to look for.
Ready to find out for yourself?
Your first 30-minute lesson with me is completely free – we will evaluate where you are, talk through your goals, and map out your path.
If you’re trying to practice piano in apartment settings, you’re facing a challenge that millions of urban pianists know all too well. The sound of even gentle practice can travel through walls and ceilings, creating anxiety about disturbing neighbors or family members. But you don’t have to sacrifice your musical dreams just because you live in shared housing.
I’ve worked with countless students navigating exactly this situation, and I can tell you there are real, practical solutions that work. The good news is that learning to practice piano in apartment environments doesn’t require expensive renovations or giving up on your musical goals. You can develop real skill and musicality even in the most sound-sensitive living situations.
With the right combination of equipment choices, timing strategies, and creative techniques, you can maintain a consistent, productive practice routine without constant worry. If you’re just starting out and want guidance tailored to your living situation, I offer a free 30-minute trial lesson where we can discuss what will work best for your space.
The short answer
To practice piano in apartment settings effectively, your best option is a digital piano with headphones, allowing completely silent practice at any hour. If you have an acoustic piano, a practice mute pedal can reduce volume by 80-90%.
Combine equipment solutions with strategic practice timing, basic soundproofing like rugs and wall padding, and open communication with neighbors to create a sustainable routine. When you practice piano in apartment spaces thoughtfully, you respect everyone’s peace while achieving your musical goals.
Why apartment piano practice feels impossible
The anxiety around apartment piano practice is real and legitimate. Piano is one of the louder instruments, and modern apartment construction often features minimal sound insulation. Even modest practice volumes can carry through shared walls, floors, and ceilings.
Many of my students describe the psychological burden of constantly worrying whether they’re bothering someone. This worry creates tension that actually interferes with learning—you can’t relax into technique work or expression when you’re worried about every note.
The challenge intensifies if you keep irregular hours, share walls with young families or shift workers, or live in buildings with strict quiet hours. Some students have told me they’ve avoided learning piano entirely because they assumed apartment living made it impossible.
But here’s what I’ve observed over hundreds of students: the ones who succeed aren’t necessarily those with the most space or the most tolerant neighbors. They’re the ones who approach the challenge strategically and use the right tools for their specific situation.
When you practice piano in apartment conditions with the right approach, the environment becomes manageable rather than prohibitive. The key is understanding that apartment piano practice isn’t about eliminating sound completely—it’s about managing it intelligently.
Sound management becomes easier when you understand how sound travels through buildings. Low frequencies travel through structures more readily than high frequencies, which is why bass notes often bother downstairs neighbors more than treble passages.
Sound also travels through air gaps like doors and windows, through shared ventilation systems, and through vibrations in floors and walls. Each transmission path requires different mitigation strategies, which we’ll explore throughout this guide.
Invest in a quality digital piano with headphones
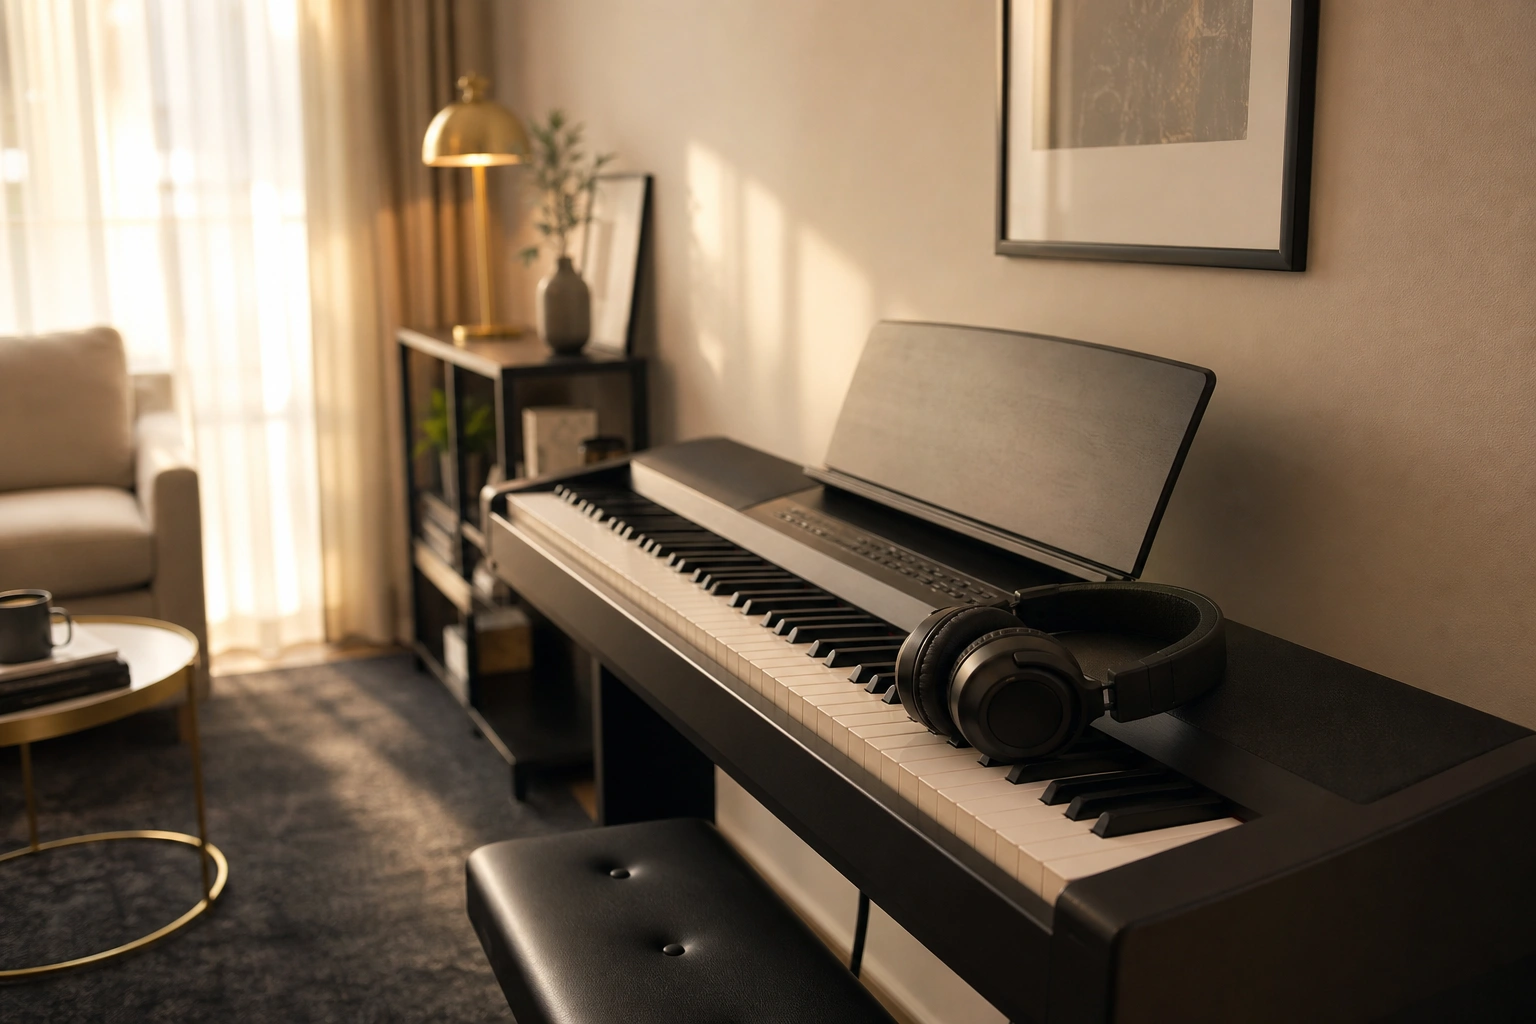
The single most effective solution to practice piano in apartment spaces is a digital piano with weighted keys and a good pair of headphones. This setup allows you to practice at any hour with zero sound leakage—something no acoustic solution can truly match.
Modern digital pianos have come remarkably far in replicating the feel and response of acoustic instruments. Look for models with fully weighted, hammer-action keys. The weight and resistance matter enormously for developing proper technique that will transfer to acoustic pianos.
When choosing a digital piano for apartment practice, prioritize:
A quiet key mechanism (some cheaper models are mechanically noisy even without speakers)
Quality piano samples that inspire you to practice
You don’t need to spend thousands. Many excellent digital pianos in the $500-$1200 range offer everything you need to practice piano in apartment settings effectively. I’ve seen students make tremendous progress on modest digital instruments when they practice consistently.
Brands like Yamaha, Kawai, Roland, and Casio all offer reliable entry-level and mid-range models. The Yamaha P-125 and P-515, Kawai ES110 and ES520, and Roland FP-30X and FP-60X are all popular among my students who practice piano in apartment environments.
The headphone choice matters too. Closed-back headphones prevent sound from leaking out and bothering anyone nearby. They also create better isolation, helping you focus on what you’re playing.
You don’t need studio-grade monitoring headphones—comfortable, closed-back models from reputable audio brands work beautifully. Many students find that over-ear designs provide better comfort for longer practice sessions than on-ear models.
Popular headphone choices for piano practice include the Audio-Technica ATH-M40x and M50x, Sony MDR-7506, and AKG K371. These range from $80-$200 and provide excellent sound quality with the comfort needed for hour-long practice sessions.
One often-overlooked benefit of digital piano practice: the ability to record yourself easily, adjust volumes for left and right hand separately, and even layer in a metronome without external equipment. These features accelerate learning in ways that have nothing to do with apartment living.
Some modern digital pianos also include educational features like built-in lessons, the ability to slow down recordings without changing pitch, and USB connectivity for learning software. These extras aren’t essential, but they can enhance your practice when you practice piano in apartment spaces where external resources might be limited.
Recording your practice sessions and listening back through headphones provides invaluable feedback. You’ll hear mistakes and musical opportunities you miss while playing. This self-assessment accelerates improvement significantly.
The Bluetooth connectivity available on many modern digital pianos also lets you play along with backing tracks, streaming lessons, or recordings wirelessly. This integration creates a rich practice environment even in the smallest apartment spaces.
Digital piano placement tips for apartments
Even silent digital pianos benefit from thoughtful placement. Position your instrument where you have good lighting and a comfortable practice environment. Natural light helps maintain energy during practice sessions, while good artificial lighting reduces eye strain when reading music.
Consider room acoustics even when using headphones. Practicing in a pleasant-sounding space improves your experience when you occasionally practice without headphones during permitted hours.
If you live with roommates, positioning your digital piano away from bedroom walls shows consideration, even though the sound through headphones won’t disturb them. The mechanical clicking of keys can still be audible in very quiet environments.
Use practice mutes for acoustic pianos
If you already own or have access to an acoustic piano and want to practice piano in apartment conditions, a practice mute system is your best option. These systems dramatically reduce volume while preserving the acoustic piano touch you need for technique development.
There are two main types of practice mutes:
Rail-mounted practice pedals: These aftermarket systems install a felt rail between the hammers and strings, similar to what many upright pianos have built in as a middle pedal. When engaged, the felt muffles the sound by 80-90%.
Quality systems like those from Kawai or Yamaha cost $200-$600 depending on your piano model and whether you hire installation help. The reduction is substantial—a piano that would normally carry through walls becomes just audible in the same room.
You won’t achieve truly silent practice, but you can practice during reasonable hours without creating a disturbance. Many of my students who practice piano in apartment buildings find that practice mutes provide the perfect balance between acoustic feel and volume control.
Built-in silent systems: Many modern acoustic pianos come with or can be retrofitted with true silent systems. When activated, these stop the hammers from striking the strings entirely and instead use optical sensors to trigger digital samples through headphones.
You get the exact touch and action of your acoustic piano with zero acoustic sound. These systems are expensive—often $2000-$4000 for retrofit installation—but they’re transformative if you’re committed to acoustic piano and need to practice piano in apartment environments without compromise.
I have students who swear by them. The Yamaha TransAcoustic and Silent Piano systems are particularly well-regarded, as are PianoDisc’s SilentDrive systems for retrofitting existing instruments.
One important note: practice mutes and silent systems don’t eliminate the mechanical sound of the keys themselves. A practice mute will still produce some sound from the key action, loud enough that practicing at 2 AM in a quiet apartment probably isn’t advisable.
But for evening and daytime practice, they make acoustic piano genuinely viable in shared living spaces. The mechanical noise is typically comparable to typing on a keyboard—noticeable if you’re listening for it, but not disturbing through walls.
Installation of practice mute systems typically requires a piano technician, though some systems are designed for DIY installation if you’re mechanically inclined. Factor in installation costs when budgeting—professional installation typically adds $100-$300 to the system cost.
Finding the right practice setup for your apartment is much easier when a teacher understands your constraints. Your first 30-minute lesson with Austin is free – no card, no pressure.
Even with equipment solutions in place, being strategic about when you practice piano in apartment settings shows respect for neighbors and reduces anxiety. I always encourage students to think about their practice schedule as part of their overall approach.
Most apartment buildings and rental agreements specify quiet hours, typically from 10 PM to 8 AM on weekdays. Obviously, if you’re using headphones with a digital piano, these restrictions don’t apply to you. But if you’re using any acoustic sound—even a muted acoustic piano—staying well within permitted hours is essential.
Beyond official quiet hours, consider the rhythms of your neighbors’ lives. Early morning practice before 9 AM on weekends might be technically allowed but still frustrating to people trying to sleep in.
Evening practice between 6-8 PM, when many people are home and cooking dinner, is often more acceptable than late-night sessions. The background noise of daily life provides some natural sound masking during these hours.
If you’re working or have an unpredictable schedule, this is where digital piano with headphones becomes invaluable. The freedom to practice piano in apartment settings at 6 AM or 11 PM without any concern is worth the investment for many urban pianists.
I’ve also found that consistency helps. If neighbors know you practice Monday, Wednesday, and Friday from 7-8 PM, the predictability makes it easier for them to plan around. Random, scattered practice sessions at different hours can be more disruptive than regular, predictable ones.
Consider creating a practice schedule that accounts for your neighbors’ patterns. If you know the family next door puts their children to bed at 8 PM, ending your acoustic practice by 7:30 PM shows consideration.
These small adjustments make it much easier to practice piano in apartment environments harmoniously. Building goodwill through respectful timing creates space for occasional flexibility when you really need extra practice time.
Maximizing limited practice windows
When you can only practice piano in apartment settings during specific time windows, efficiency becomes crucial. Structure your practice sessions to maximize learning in limited time.
Start with technical warm-ups to prepare your fingers and mind. Spend the middle portion on challenging repertoire that requires full concentration. End with material you know well to finish on a positive, confident note.
This structure ensures you address difficult material when your focus is sharpest, while still covering the full range of practice activities your development requires. Even 30-minute sessions can be highly productive with this approach.
Soundproofing solutions that actually work
True soundproofing is expensive and usually impractical for renters, but there are modest interventions that help when you practice piano in apartment spaces. These won’t create a silent practice room, but they reduce sound transmission enough to make a real difference.
Strategic furniture placement: Positioning your piano against an exterior wall rather than a shared wall reduces neighbor disturbance significantly. If you must place it against a shared wall, adding a bookshelf filled with books between the piano and the wall creates a sound buffer.
Mass absorbs and blocks sound—a packed bookshelf provides meaningful mass. Heavy furniture like dressers or storage units can serve the same purpose. The goal is to create layers of dense material between your piano and your neighbors’ living spaces.
Rugs and underlayment: If you’re on an upper floor, the sound traveling downward is often your biggest concern. A thick rug or carpet under and around your piano, ideally with dense rubber underlayment, reduces vibration transmission through the floor.
This is especially important for bass notes, which travel through building structures more readily than higher frequencies. Some students invest in specialized acoustic isolation pads designed for studio equipment, which work well under digital pianos and keyboard stands.
Products like the Auralex SubDude or similar isolation platforms cost $40-$80 and significantly reduce vibration transmission when you practice piano in apartment buildings with sensitive downstairs neighbors.
According to research on soundproofing methods, adding mass and decoupling vibration are the two most effective strategies for reducing sound transmission in existing structures.
Acoustic panels and curtains: While these don’t prevent sound from leaving your apartment, they reduce echo and reverberation within your space. This makes your practice sound less harsh and percussive, which can make it more tolerable if some sound does carry.
Inexpensive foam panels or heavy curtains on walls and windows help absorb reflections. Even hanging a thick blanket or tapestry on the wall behind your piano can soften the sound noticeably when you practice piano in apartment settings with hard, reflective surfaces.
Acoustic treatment also improves your practice experience. Reducing excessive reverberation helps you hear your playing more clearly, making it easier to identify mistakes and refine your technique.
Door seals and weatherstripping: Sound escapes easily through gaps around doors. Adding weatherstripping or a door sweep to your practice room door won’t create a soundproof seal, but it noticeably reduces sound leakage to other parts of your apartment, which matters if you have roommates or family.
These interventions cost between $50-$300 total for most apartment setups. They’re not transformative by themselves, but combined with equipment choices and good timing, they create enough sound reduction that you can practice piano in apartment environments without constant worry.
The cumulative effect of multiple small interventions can be surprisingly effective—rugs, strategic placement, door seals, and some acoustic treatment together might reduce perceived volume by 30-40%, which often makes the difference between disruptive and tolerable.
Understanding sound transmission in apartments
Sound travels through apartment buildings via two main paths: airborne transmission (through air spaces) and structure-borne transmission (through physical building materials). Piano sound uses both paths, which is why it’s challenging to contain.
Airborne transmission carries through doorways, windows, ventilation ducts, and any gaps in walls. Structure-borne transmission vibrates through floors, walls, and the building frame itself, especially with bass frequencies.
Effective solutions address both paths. Rugs and isolation pads reduce structure-borne transmission. Door seals and acoustic treatment reduce airborne transmission. Understanding these principles helps you prioritize interventions when you practice piano in apartment buildings.
Mental practice and silent techniques
One of the most underutilized strategies to practice piano in apartment situations is incorporating silent practice techniques. These aren’t substitutes for regular practice, but they’re powerful supplements that can happen anytime without disturbing anyone.
Score study away from the piano: Spend time studying your sheet music in detail without playing. Analyze the harmonic structure, mark fingerings, identify patterns and repetitions. This mental work accelerates learning and can be done silently on your couch, at a coffee shop, or during a commute.
I often find that students who study their music away from the instrument learn pieces faster because they understand the structure before their fingers learn the patterns. This is especially valuable when you practice piano in apartment spaces with limited available keyboard time.
Try marking your scores with analytical notes: circle repeated motifs, label chord progressions, highlight dynamic changes. This deep engagement with the music creates mental pathways that translate directly to better performance when you return to the keys.
Visualization and mental rehearsal: Top-level musicians regularly practice mentally, visualizing and hearing passages in their mind. Research shows this activates similar neural pathways to physical practice.
When you can’t make sound, mentally rehearsing challenging sections—imagining the feel of the keys, the sound, the fingerings—provides real learning benefit. Some students set aside five minutes before bed to mentally rehearse their current pieces, reinforcing memory and musical understanding.
Start by visualizing your hands on the keyboard. Imagine playing through a passage slowly, seeing each finger movement, hearing each note. This technique becomes more powerful with practice and can significantly supplement physical practice time.
Tabletop finger exercises: You can practice finger independence, strength, and coordination on any flat surface without sound. Hanon exercises, scales, and technical patterns done on a table don’t provide the resistance of piano keys, but they reinforce muscle memory and finger patterns.
I often recommend this for students who travel or have very limited practice windows. You can do finger exercises while watching television, during breaks at work, or anywhere you have a flat surface and a few spare minutes.
Focus on maintaining proper hand position and finger curves even on a flat surface. The mental focus and muscle coordination translate meaningfully to the piano when you can practice piano in apartment settings with actual sound.
Rhythm and theory work: Practice counting rhythms, clapping patterns, or working through music theory exercises. These foundational skills directly support your piano playing but require no instrument.
Fifteen minutes of rhythm practice with a metronome and a pencil can happen in any apartment at any hour. Ear training apps on your phone with headphones provide silent practice that builds critical listening skills.
Apps like EarMaster, Perfect Ear, and Tenuto offer comprehensive ear training that directly improves your musical understanding and piano playing. These silent practice tools let you learn even when you absolutely cannot make piano sounds.
Silent practice techniques won’t replace time at the keyboard, but they meaningfully extend your practice capacity when you’re trying to practice piano in apartment spaces with limited available hours for making sound.
Some of my most dedicated students spend nearly as much time on silent practice as they do at the instrument, and their progress shows it. The combination of physical and mental practice creates deeper, more durable learning than either approach alone.
Communicate with neighbors and housemates
I’ve seen situations transform when students simply talked to their neighbors about their practice plans. Open communication reduces anxiety on both sides and often reveals more flexibility than you’d expect when you practice piano in apartment settings.
Consider introducing yourself to immediate neighbors and explaining that you’re learning piano. Ask if there are times that would be particularly inconvenient for them, and share when you typically plan to practice piano in apartment hours.
Most people are remarkably accommodating when approached respectfully and given some control over the situation. The key is making the conversation collaborative rather than confrontational.
You might say something like: “I’m learning piano and want to be respectful of your schedule. I’m planning to practice weekday evenings around 7 PM for about 45 minutes. Would that work for you, or are there times that would be better or worse?”
This approach invites collaboration rather than creating conflict. It positions you as considerate and reasonable, which encourages neighbors to respond in kind.
Some students have even invited neighbors to hear them play after months of practice—turning potential annoyance into genuine interest and support. I’ve heard stories of neighbors who started asking about progress and became informal cheerleaders, genuinely invested in seeing the student succeed.
If you share your apartment with roommates or family, the same principle applies. Establish clear expectations about practice times, and honor them consistently. If you commit to not practicing after 9 PM, stick to it.
Reliability builds trust and goodwill that makes everyone more comfortable when you practice piano in apartment settings. Broken promises create resentment; consistent consideration builds lasting goodwill.
Consider offering something in return for flexibility—maybe you adjust your practice schedule around your roommate’s important work calls, and they’re understanding about weekend morning practice. Reciprocity strengthens household harmony.
In rare cases where a neighbor is genuinely unreasonable—complaining about modest, reasonable-hour practice even after respectful communication—document your efforts and, if necessary, involve your landlord or building management.
Most lease agreements and local ordinances protect reasonable daytime activities, including musical practice during non-quiet hours. But in my experience, these situations are uncommon.
Most conflicts around apartment piano practice come from uncertainty and surprise, not from the practice itself. When people know what to expect and feel their concerns are heard, they’re usually quite reasonable.
Building goodwill with neighbors over time
Small gestures build significant goodwill. If you practice piano in apartment settings long-term, consider occasional friendly gestures toward neighbors who accommodate your practice schedule.
A simple thank-you note, holiday cookies, or helping carry groceries builds positive relationships that make everyone more tolerant of minor inconveniences. When neighbors see you as a friendly, considerate person, they’re far more understanding of practice sounds.
Some of my students have created informal “practice agreements” with neighbors, where they trade flexibility. “I’ll keep my piano practice to early evenings if you can keep your guitar practice to afternoons.” These mutual accommodations work beautifully.
Working with a teacher who understands your constraints
When you’re figuring out how to practice piano in apartment settings, working with an experienced teacher who understands your constraints makes the journey much smoother. A good teacher can structure lessons and practice assignments around your actual available practice conditions rather than assuming unlimited access to a grand piano in a soundproof room.
For instance, if you’re limited to headphone practice on a digital piano, I adjust technical work to emphasize what transfers well from digital to acoustic instruments. If you can only practice for 30 minutes a day during specific hours, we focus on high-efficiency practice strategies that maximize those limited windows.
“My confidence at the piano has grown so much since starting lessons.” – Mia Reynolds
I’ve also helped students troubleshoot their practice setups—recommending specific digital piano models for tight budgets, suggesting furniture arrangements to reduce sound transmission, or structuring practice schedules around work and household rhythms. These practical elements often get overlooked, but they’re fundamental to consistent progress.
Students who practice piano in apartment buildings face unique challenges that traditional piano pedagogy doesn’t always address. A teacher who understands these constraints can help you work around them effectively rather than treating them as insurmountable obstacles.
If you’re considering lessons but worried about equipment or space constraints, these are exactly the kinds of real-world challenges we address together. My students practice in all kinds of situations—tiny studios, shared apartments, houses with young children. The constraints are workable when you have a plan.
You can work with me via Zoom from anywhere in the world, or in person if you’re in the Bay Area. Lessons are $99 for 60 minutes, and you get access to my four-level video course library to supplement our work together.
But we always start with a free 30-minute trial where we can talk through your specific situation, including your practice space and schedule. This trial gives us a chance to discuss how you’ll practice piano in apartment conditions specific to your building, your neighbors, and your daily routine.
Many students find that even just one lesson provides clarity about practice strategies that would have taken months to figure out alone. We look at your space, your instrument, your schedule, and your goals, and build a realistic practice plan that actually fits your life.
That’s particularly valuable when you’re trying to practice piano in apartment conditions where you can’t just play freely whenever inspiration strikes. We create structure that works within your reality, not despite it.
Whether you choose to work with me or another teacher, look for someone who asks about your practice environment and helps you optimize it. Teaching that ignores your real-world constraints isn’t truly practical teaching.
The best instruction meets you where you are and helps you succeed with the resources and space you actually have available. Learning to practice piano in apartment environments requires adapting traditional teaching to modern urban realities.
A teacher who understands apartment constraints can also help you set realistic expectations. Progress might look slightly different when you practice piano in apartment settings compared to students with unlimited access to acoustic grands, but the progress is absolutely real and meaningful.
I’ve seen students in tiny apartments with modest digital pianos develop beautiful technique, deep musicality, and genuine performance ability. The environment doesn’t determine your potential—your approach and consistency do.
Ready to find out for yourself?
Your first 30-minute lesson with me is completely free – we will evaluate where you are, talk through your goals, and map out your path.
If you’ve ever sat down to play a piece from memory only to have your mind go completely blank halfway through, you’re not alone. Learning how to memorize piano pieces is one of the most common challenges my students face, whether they’re preparing for a recital or simply want the freedom to play without the sheet music in front of them. The good news? Memorization isn’t about having a photographic memory or special talent—it’s a skill you can develop with the right techniques.
Over my years of teaching hundreds of students, I’ve tested every memorization method out there. Some work brilliantly, others waste time. In this guide, I’m sharing the seven techniques that consistently help my students understand how to memorize piano pieces faster and more securely, so you can walk into any performance with confidence.
The short answer
To memorize piano pieces effectively, use multiple memory pathways: learn hands separately first, break the piece into small phrases, understand the harmonic structure, engage visual memory by picturing the keys, build kinesthetic memory through repetition, develop aural memory by singing along, and practice strategically with targeted repetition of trouble spots. Combining these approaches creates redundant memory pathways that stick.
The key insight about how to memorize piano pieces is that relying on just one type of memory is risky. When you engage visual, kinesthetic, analytical, and aural memory together, you build a safety net. If one pathway fails during performance, the others catch you.
Why memorization matters (and when it doesn’t)
Let me be honest: not every piece needs to be memorized. If you’re playing for your own enjoyment at home, there’s zero shame in keeping the music in front of you. Some of the world’s finest accompanists perform with sheet music their entire careers.
But memorization offers real benefits. First, it frees you to focus entirely on musical expression rather than reading. Your eyes aren’t glued to the page, so you can watch your hands, connect with an audience, or simply close your eyes and feel the music.
Second, the process of memorizing forces you to understand a piece deeply. You can’t memorize what you don’t truly know. This deeper understanding makes you a better musician overall.
Third, for performances and recitals, memorization is often expected. More importantly, it eliminates the anxiety of page turns and the possibility of losing your place on the page. When you know how to memorize piano pieces securely, you’re prepared for anything.
That said, I never force beginners to memorize. For students just learning how to read sheet music, keeping their eyes on the page reinforces reading skills. Timing matters.
Technique #1: Hands separate, always
This is where memorization truly begins. Before you even think about putting hands together from memory, each hand needs to be rock-solid on its own. I’ve seen countless students skip this step because it feels tedious, and they always regret it later.
When you learn how to memorize piano pieces hands separately, you’re isolating each melodic line and giving your brain a manageable task. Your right hand often carries the melody, which might seem easier to remember, but your left hand deserves equal attention. Many memory slips happen in the left hand because students under-practice it.
Here’s my process:
Practice the right hand alone until you can play it perfectly from memory three times in a row
Do the same with the left hand—no shortcuts here
Only then begin combining hands, section by section
Regularly return to hands-separate practice even after the piece feels secure
Some students resist this because it feels like extra work. But trust me: this is the fastest path. Working on left hand exercises separately builds both technical skill and memory security that will serve every piece you learn.
According to research published in the journal Frontiers in Psychology, practicing hands separately activates different neural pathways and strengthens motor learning more effectively than hands-together practice alone. This scientific backing confirms what I’ve observed in my studio for years.
Technique #2: Chunking – memorize in musical phrases
Your brain doesn’t memorize a piece as one long stream of notes. It groups information into meaningful chunks. Understanding how to memorize piano pieces through chunking means working with your brain’s natural wiring instead of against it.
Think of it like memorizing a phone number. You don’t remember ten individual digits; you remember them in groups: (415) 555-1234. Music works the same way.
I teach students to identify natural musical phrases—usually 2 to 4 measures—and treat each as a single unit. These phrases typically correspond to melodic or harmonic ideas that have a beginning, middle, and end.
Here’s the chunking process:
Identify where phrases begin and end (often at breathing points in the melody)
Memorize one phrase completely, hands separate, then together
Practice starting from different phrases, not always from the beginning
Link phrases together gradually: first phrase + second phrase, then second + third, etc.
The ability to start from any phrase is crucial. If you always practice from the beginning, that’s the only place you’ll be confident starting. During performance, if you stumble, you need anchor points throughout the piece.
Chunking also helps you identify patterns. Many pieces repeat the same melodic or harmonic idea in different sections. Once you recognize these repetitions, you’re not memorizing new material—you’re recognizing familiar patterns in new contexts. This dramatically reduces the actual amount of unique material you need to commit to memory.
Technique #3: Visual memory – what it looks like
Visual memory means picturing the keyboard geography and the physical patterns your hands make. When I close my eyes and think of a piece I know well, I can see my hands moving across the keys—even though I’m not touching a piano.
This is different from reading the sheet music visually (though that helps too). I’m talking about spatial memory: knowing that your hand jumps up to the black keys in this section, that you’re playing in the middle of the keyboard here, or that your thumb lands on middle C at this moment.
To develop visual memory while learning how to memorize piano pieces:
Pay attention to the physical shapes and patterns on the keyboard
Notice landmarks: “This phrase starts on F,” “This chord has three black keys”
Visualize the patterns away from the piano—in bed before sleep, or during a walk
Practice the piece in your mind, watching your imaginary hands play
Mental practice strengthens memory without physical fatigue. Athletes use this technique constantly, and it works brilliantly for musicians too. Studies show that mental rehearsal activates many of the same neural pathways as physical practice.
I encourage students to visualize not just the notes, but the full context: what does the keyboard look like from your seated position? Where do your hands move in relation to each other? These spatial relationships become powerful memory anchors.
Kinesthetic memory—sometimes called muscle memory—is what happens when your fingers seem to know where to go without conscious thought. This is powerful, but also risky if it’s your only memorization strategy.
I’ve had students who could play a piece perfectly from muscle memory, but the moment they thought about what they were doing, or someone asked them to start from the middle, they fell apart completely. That’s kinesthetic memory working in isolation.
Used correctly, though, it’s an essential component of how to memorize piano pieces. Your fingers develop motor patterns through repetition. These patterns are efficient and reliable, especially for fast passages where you don’t have time to think about every note.
To build healthy kinesthetic memory:
Practice slowly and correctly—repetitions matter, so make them accurate
Focus on the physical sensation of movements: what does this chord feel like? How does your hand move to the next position?
Practice in different tempos to avoid becoming tempo-dependent
Combine with other memory types—never rely on muscle memory alone
The danger with kinesthetic memory is that it’s fragile when disrupted. In performance situations where nerves strike or you make a mistake, muscle memory can abandon you. That’s why layering memory types matters so much.
I also recommend practicing with different touch and dynamics occasionally. If you always practice a passage the same way, your muscle memory becomes tied to that specific execution. Varying your approach builds more flexible, resilient motor patterns.
Technique #5: Analytical memory – understand the structure
This is the most underused technique among amateur pianists, yet it’s the one professional musicians rely on most. Analytical memory means understanding the music theory behind what you’re playing: the chords, the key changes, the harmonic progressions, the form.
When you know how to memorize piano pieces analytically, you’re not just memorizing notes—you’re memorizing musical logic. You understand why a certain note comes next, not just that it does.
Here’s what I look for with students:
Identify the key and any modulations
Analyze the chord progressions (even if it’s just I-IV-V-I)
Recognize patterns and sequences that repeat
Understand the formal structure (verse-chorus, ABA, sonata form, etc.)
Notice where the music does something unexpected
This approach works especially well for adult learners who enjoy understanding the “why” behind the music. Even basic theory knowledge helps. If you recognize that a passage is just a I-V-vi-IV progression in C major, you’re not memorizing 16 individual notes—you’re memorizing one harmonic concept.
Don’t worry if theory isn’t your strength yet. My lesson plan includes theory fundamentals that make analytical memorization accessible even for beginners.
Analytical understanding also helps you reconstruct passages if memory fails. If you know the harmonic progression and general melodic shape, you can often figure out what comes next even if you temporarily forget the exact notes. This safety net has saved countless performances.
Technique #6: Aural memory – sing and hear it
Can you hear the piece in your head when you’re away from the piano? If you can, you have strong aural memory. If you can’t, it’s time to develop it, because this is one of the most reliable memory pathways.
Aural memory means knowing how the music sounds—not just the melody, but the harmony, the bass line, the inner voices, everything. When you truly know how to memorize piano pieces aurally, you can sing or hum any part of the piece.
Here’s how to build aural memory:
Sing the melody while you practice (even if you don’t consider yourself a singer)
Hum or sing the bass line separately
Listen to recordings of the piece, but also listen to your own playing
Try to hear the piece in your mind before you play it
Practice away from the piano: can you “play” the piece in your head?
Aural memory connects beautifully with playing by ear. Students who develop their ear tend to memorize faster and more securely. They also recover from mistakes more gracefully, because they can hear where the music needs to go next.
If you work with a teacher during lessons, ask them to help you develop this skill. At Weaver Music, I incorporate ear training into lessons at every level because it transforms how students relate to music.
One effective exercise: try playing through a memorized piece in your mind while away from the piano, hearing every note. When you get stuck, make a note of that spot and give it extra attention during your next practice session. This mental practice reveals weak spots in your memory before they become performance problems.
Technique #7: Strategic practice and repetition
Not all repetitions are created equal. Mindlessly playing through a piece ten times won’t help you understand how to memorize piano pieces effectively. Strategic practice targets your weak spots and builds memory systematically.
Here’s my strategic approach:
Identify trouble spots—usually transitions between sections or technically demanding passages
Practice these spots more than the easy sections (3:1 ratio at minimum)
Use the “random start” method: practice starting from different points in the piece
Practice backwards: start with the last phrase, then add the second-to-last, and so on
Use distributed practice: shorter sessions over more days beat marathon cramming
Research on memory consolidation shows that sleep plays a crucial role. When you practice a section today and then sleep on it, your brain consolidates that memory overnight. This is why cramming the day before a performance doesn’t work—there’s no time for consolidation.
I recommend practicing a piece you’re memorizing at least five days a week, even if some sessions are brief. Twenty minutes of focused practice beats two hours of distracted playing. Quality matters more than quantity.
Also, test your memory regularly by playing without the music. Don’t wait until you “feel ready.” Testing is part of learning. You’ll discover weak spots early when there’s still time to fix them.
The backward practice method deserves special mention. By starting with the ending and working backward, you ensure that the end of your piece is just as secure as the beginning. This also means that as you practice, you’re always moving toward familiar territory rather than into the unknown, which builds confidence.
Common mistakes that sabotage memorization
I’ve seen certain memorization mistakes repeatedly over the years. Avoiding these will save you enormous frustration when you’re figuring out how to memorize piano pieces:
Mistake #1: Starting memorization too late. Don’t wait until a piece is “performance ready” to start memorizing. Begin the memorization process from day one. As you learn each phrase, learn it from memory.
Mistake #2: Always practicing from the beginning. If you only practice starting from the top, the opening will be rock-solid but the middle and end will be shaky. Vary your starting points constantly.
Mistake #3: Never practicing without the music. Some students use the sheet music as a security blanket even when they technically know the notes. Force yourself to practice without it.
Mistake #4: Relying on one memory type. If muscle memory is your only tool, you’re in trouble. Layer multiple memory pathways for security.
Mistake #5: Skipping the slow practice. Fast, sloppy repetitions don’t build reliable memory. Slow, accurate practice does. You can gradually increase tempo after the memory is secure.
Mistake #6: Not reviewing old material. Memory fades without maintenance. Even after a piece is memorized, review it weekly or it will deteriorate.
Mistake #7: Practicing only when fresh. Occasionally practice when you’re tired or distracted. Performance conditions aren’t always ideal, and your memory needs to be robust enough to handle less-than-perfect mental states.
What to do when memory slips during performance
Even with perfect preparation, memory slips happen. Understanding how to memorize piano pieces includes knowing how to recover gracefully when things go wrong. This skill matters just as much as the memorization itself.
If you experience a memory slip during performance:
Keep the rhythm going—play something, even if it’s just a simplified version
Don’t stop and announce the mistake; most audiences won’t notice if you keep moving
Jump to the next section you remember clearly rather than trying to reconstruct exactly where you were
Use your aural memory: what should happen next harmonically?
Breathe and stay calm; panic makes memory worse
This is where having multiple memory pathways proves its worth. If your muscle memory fails, your analytical understanding of the chord progression might save you. If visual memory abandons you, your ear might guide you home.
I always tell students that how you recover from a mistake matters more than whether you make one. Professionals make mistakes too—they just recover so smoothly you don’t notice. Managing performance anxiety and building recovery skills go hand in hand with memorization.
Practice recovery strategies during your preparation. Deliberately introduce disruptions: have someone call out a random measure number and start from there, or intentionally play a wrong note and practice continuing smoothly. These drills build recovery skills that serve you when unexpected problems arise.
Building long-term retention
Learning how to memorize piano pieces for a performance next month is one thing. Keeping pieces in your permanent repertoire is another. If you want music to stay with you for years, you need a maintenance strategy.
Here’s what works for long-term retention:
Review memorized pieces at least once a month, even after the performance is over
Keep a “repertoire rotation” where you cycle through old pieces regularly
Record yourself playing from memory periodically to identify weak spots
Perform pieces multiple times in different contexts (informal gatherings, recordings, etc.)
Accept that some forgetting is normal and re-memorizing is faster the second time
I maintain a personal repertoire of about 30 pieces that I can perform at any time. But this requires ongoing work. I cycle through them systematically, spending 10-15 minutes a week on each. This maintenance practice is much easier than learning from scratch, but it’s not optional.
For students working on building repertoire, I incorporate review into our lesson structure. During your weekly lessons—whether that’s in-person here in the Bay Area or via Zoom anywhere in the world—we make time for both new learning and repertoire maintenance. This balanced approach, part of the teaching philosophy at Weaver Music, ensures your hard work doesn’t evaporate.
The truth is, memorization is a skill that improves with practice. Your tenth memorized piece will come easier than your first. Your brain actually gets better at the process, building more efficient pathways. This is one reason why starting piano at any age works—the brain remains capable of this kind of learning throughout life.
Creating a repertoire journal can help with long-term retention. Note when you first memorized each piece, common trouble spots, and the specific techniques that worked best for that particular piece. This record becomes invaluable when you need to refresh a piece months or years later.
How to memorize piano pieces at different skill levels
The techniques for how to memorize piano pieces remain consistent across skill levels, but the application differs. Let me share how memorization approaches adapt as you progress.
For beginners: Start with very short pieces or even individual sections. A beginner might spend several weeks memorizing a 16-measure piece, and that’s perfectly appropriate. Focus heavily on hands-separate practice and chunking. At this stage, kinesthetic and visual memory will likely dominate, with analytical memory developing as theory knowledge grows.
Simple folk songs, easy classical pieces, and method book repertoire provide ideal memorization practice for beginners. The limited technical demands let you focus on the memorization process itself.
For intermediate players: You’re ready to memorize longer, more complex pieces with multiple sections. This is when analytical memory becomes increasingly important. Understanding form (ABA, rondo, theme and variations) helps you organize larger structures mentally.
Intermediate students should begin building a performing repertoire of 5-10 memorized pieces that they maintain over time. This stage is also when you can start using more sophisticated practice techniques like backward practice and random starting points throughout entire pieces, not just small sections.
For advanced players: Memorization becomes more efficient as pattern recognition improves. You’ve internalized so many musical structures that new pieces often contain familiar elements. Advanced players can often memorize significant portions of a piece while learning it initially, rather than memorizing as a separate step.
At this level, analytical memory typically leads the process, with other memory types reinforcing it. Advanced students should maintain a substantial repertoire of 15-30 pieces and develop the ability to memorize complete movements or multi-movement works.
Regardless of level, the fundamental principle remains: layer multiple memory types for security. A beginner using three memory pathways for a simple piece has more reliable memorization than an advanced player using only muscle memory for a complex work.
Whether you’re a returning adult who is getting back into piano or a young student preparing for your first recital, these seven techniques for how to memorize piano pieces will serve you for every piece you learn. The key is patience with the process and trust that layered memory pathways will hold when you need them most.
At Weaver Music, whether students join me for in-person lessons in the Bay Area or connect via Zoom from anywhere in the world, I guide them through these memorization techniques tailored to their learning style and goals. The first 30-minute trial lesson is free, giving us time to assess where you are and create a personalized plan. Regular lessons are $99 for 60 minutes, and students of all ages and levels—from complete beginners to advanced players—benefit from patient, supportive instruction that builds both technical skill and musical confidence.
Memorization transforms your relationship with a piece of music. What starts as dots on a page becomes something that lives inside you, something you can share without barriers. That transformation is worth the effort. With these seven proven techniques for how to memorize piano pieces, you have everything you need to build a secure, lasting memory of the music you love.
Ready to find out for yourself?
Your first 30-minute lesson with me is completely free – we will evaluate where you are, talk through your goals, and map out your path.
If you’ve ever felt frustrated watching your eyes crawl slowly across the page while your brain struggles to translate those dots into music, you’re not alone. Learning how to read sheet music faster is one of the most common challenges I hear from students at every level. The good news? Sight reading speed isn’t a talent you’re born with—it’s a skill you can systematically improve with the right approach.
Over my years teaching piano in the Bay Area and on Zoom, I’ve helped hundreds of students transform from hesitant note-by-note readers into confident sight readers. The strategies I’m sharing today aren’t theory—they’re the same practical techniques I use in my studio every week, and they work whether you’re a complete beginner or returning to piano after years away.
The short answer
To learn how to read sheet music faster, you need to shift from reading individual notes to recognizing patterns and intervals. Practice sight reading material that’s slightly easier than your current level for 5-10 minutes daily, train your eyes to read ahead of where you’re playing, and focus on maintaining forward momentum rather than perfection.
Speed comes from pattern recognition, not faster note identification. The real breakthrough happens when you stop treating every note as a separate puzzle to solve and start seeing music the way fluent readers see words—in chunks, shapes, and familiar patterns.
Why sight reading speed matters
Before we dive into the how, let’s talk about why improving your sight reading speed is worth the effort. When you can read sheet music faster, you unlock a completely different relationship with the piano.
First, it dramatically expands your repertoire. Instead of spending weeks laboriously learning a single piece, you can explore dozens of compositions. You can sight read through new music to decide what you actually want to learn deeply.
Second, faster reading means more musical playing. When your brain isn’t consumed with “what note is this,” you have mental bandwidth for dynamics, phrasing, and expression—the things that actually make music beautiful.
Third, it makes playing more enjoyable. Let’s be honest: the stop-and-start, hunt-and-peck approach to reading music is frustrating. When you can read fluently enough to maintain the flow of a piece, practice becomes genuinely fun.
I see this transformation constantly in my students. The moment someone breaks through to faster reading, their whole attitude toward practice changes. They start choosing more adventurous pieces and actually enjoying their time at the keyboard.
Understand what you’re actually reading
One of the biggest obstacles to learning how to read sheet music faster is treating notation like a foreign alphabet. Many students spend years at the piano still thinking “that note on the line is E” every single time they see it.
But music notation isn’t really an alphabet—it’s a visual map of pitch and time. The faster you can internalize this spatial relationship, the faster you’ll read.
The geography of the staff
Think of the grand staff as a landscape. Middle C sits right in the middle, and everything extends up and down from there. Notes on lines versus spaces, the distance between notes, the shape of a chord—these are all visual information your brain can process much faster than verbal labels.
I encourage students to practice seeing intervals visually. A third has one note in between. A fifth spans five letter names. Instead of naming each note in a C major chord (C-E-G), see it as a stack of thirds with a specific visual shape.
Key signatures as context, not obstacles
Many pianists waste enormous mental energy double-checking key signatures for every note. Instead, internalize the key signature as the “home base” for the piece. If you’re in D major, your default assumption is F# and C# unless you see a natural sign.
This shift—from constantly checking to having the key signature as background context—is a game-changer for reading speed. Your brain stops interrupting the flow to verify and starts trusting the framework.
Understanding music theory fundamentals doesn’t just help you play better—it directly accelerates how to read sheet music faster by giving you context for what you’re seeing. When you understand the underlying harmonic structure, your eyes can predict what’s coming next on the page.
Train your eyes to read ahead: How to read sheet music faster
Here’s something most students don’t realize: when you read text, your eyes are always several words ahead of what your mouth is saying. Fluent music reading works exactly the same way.
The technical term is “eye-hand span,” and it’s the secret weapon of strong sight readers. Your eyes should be reading the next measure while your hands are playing the current one.
The look-ahead exercise
Here’s a practical drill I use with students who want to learn how to read sheet music faster. Choose a very simple piece—something well below your level. Play it while consciously forcing your eyes to stay one or two beats ahead of your hands.
At first this feels impossibly awkward. Your eyes want to follow your hands. But stick with it. Start with just one beat ahead, then gradually increase the distance.
Try this variation: place a blank card or piece of paper to cover the notes you’re currently playing, so you literally cannot look at them. You must rely on what you’ve already read and what’s coming next.
Trust your peripheral vision
You don’t need to stare directly at every note to read it. Your peripheral vision can catch an enormous amount of information—the general contour of a melody, whether it’s moving up or down, the rhythm pattern.
Strong sight readers use their central vision for reading ahead and their peripheral vision to confirm what their hands are currently doing. This takes practice, but it’s trainable. The key is resisting the urge to look down at your hands or back at notes you’ve already played.
Recognize patterns, not individual notes
This is perhaps the single most important concept for how to read sheet music faster: you must shift from note-by-note reading to pattern recognition.
Think about how you read this sentence. You didn’t decode it letter by letter—you recognized whole words, maybe even whole phrases, in a single glance. Music reading works the same way.
Common patterns to internalize
Start by learning to instantly recognize these musical “words”:
Scales and scale fragments – ascending or descending runs
Arpeggios – broken chords in various patterns
Triads – three-note chords in root position and inversions
Repeated notes – same pitch multiple times
Stepwise motion – melodies moving by adjacent notes
Octave doublings – the same note in both hands
Common chord progressions – I-IV-V-I and similar patterns
When you see a measure filled with sixteenth notes that outline a C major arpeggio, you don’t need to read each note individually. Your brain should register “C arpeggio, ascending” and your hands already know what to do.
Interval reading versus note naming
Here’s a technique that dramatically improved my own sight reading: stop naming notes and start reading intervals.
Instead of “that’s G, then B, then D,” think “starting note, up a third, up a third.” Your fingers can execute “up a third” much faster than they can translate “G to B” into a physical motion. This is especially powerful for how to read sheet music faster in unfamiliar keys.
This connects beautifully with ear training. If you’re developing skills in how to play piano by ear, you’re already training your brain to hear and execute intervals—sight reading just adds the visual component.
Practice with easier material
Here’s a mistake I see constantly: students try to improve their sight reading by struggling through music at or above their current level. This actually slows down your progress.
To genuinely learn how to read sheet music faster, you need to practice sight reading with material that’s significantly easier than what you can already play. I’m talking two or three levels below your current repertoire.
Why easier material works
When the technical demands are low, your brain can focus entirely on the reading process. You’re training your eyes and your pattern recognition, not wrestling with difficult fingerings or stretches.
Think of it like learning to speed-read text. You don’t practice with dense academic papers—you practice with simple, clear writing so you can focus on the mechanics of reading faster.
I recommend keeping a stack of easy method books around for this exact purpose. Adult beginners returning to piano often have old lesson books from childhood that work perfectly. The goal is to sight read through one or two pages daily of material you can almost play at tempo on the first read.
The fresh music rule
True sight reading means reading something you’ve never seen before. Once you’ve played through a piece even once, it’s no longer pure sight reading—your brain has started to memorize it.
This means you need a constant supply of fresh material. Libraries are fantastic for this. Borrow a book, sight read through it over a week, return it, get another. You’re not trying to perfect these pieces—you’re using them as reading practice.
For students working on consistent practice habits, I often recommend incorporating sight reading into your routine. If you’re wondering how often should a beginner practice piano, daily sessions with even 5-10 minutes of sight reading practice will yield remarkable results over time.
Use rhythm first, then add pitches
Many students trying to figure out how to read sheet music faster are actually struggling with two separate skills at once: reading rhythm and reading pitch. When you’re overwhelmed, separate them.
The rhythm-only approach
Before you play a new piece, try this: tap or clap the rhythm while counting out loud, ignoring the pitches entirely. This lets you absorb the rhythmic structure without the cognitive load of finding notes.
Once the rhythm feels comfortable, add the pitches. You’ll be amazed how much easier it is when you’re not simultaneously decoding both elements.
I use this constantly with students learning pieces with complex rhythms—syncopation, dotted rhythms, triplets. Get the rhythm in your body first, then add the notes. It’s not slower overall; it’s actually much faster than trying to do everything at once and making mistakes.
Subdivision and counting
A metronome isn’t just for keeping tempo—it’s a reading tool. When you practice sight reading with a metronome, you’re training your eyes to move in consistent time units.
If you haven’t explored this yet, I have detailed guidance on how to use a metronome piano practice effectively. For sight reading specifically, set it slower than you think you need. The goal is steady, continuous reading, not speed.
Count subdivisions out loud while you play: “one-and-two-and” for eighth notes, “one-ee-and-ah” for sixteenths. This keeps your brain locked into the rhythmic grid and prevents the drifting tempo that plagues many sight readers.
Build a consistent sight reading routine
Knowing the techniques for how to read sheet music faster is one thing. Actually improving requires consistent, deliberate practice. Here’s the routine I recommend to students, and it takes just 10 minutes a day.
The daily sight reading practice plan: How to read sheet music faster with focused sessions
Minutes 1-2: Warm-up scan. Before you play anything, scan through the piece. Look at the key signature, time signature, tempo marking. Notice any repeated sections, patterns, or tricky spots. This preview primes your brain.
Minutes 3-8: First read-through. Play the piece at a slow, steady tempo. Do not stop for mistakes. Do not go back. If you fumble a note, keep going. The cardinal rule of sight reading practice is forward momentum.
Minutes 9-10: Reflection. What patterns did you recognize? Where did you get tripped up? Was it rhythm, pitch, or hand position? This reflection is where the learning solidifies.
Then tomorrow, use completely different music. Remember: sight reading practice requires fresh material every time.
Track your progress
Keep a simple log. Note the date, the piece, and your subjective difficulty rating (easy/medium/hard). Over weeks and months, you’ll notice that pieces you rated “hard” are now “medium,” or you’re successfully sight reading more complex material.
This visible progress is incredibly motivating. Sight reading improvement can feel invisible day-to-day, but over time the gains are substantial.
If you’re working with a teacher—whether through our free trial lesson or regular lessons—bring your sight reading log. We can identify patterns in your challenges and tailor exercises to address them.
Develop strong hand position awareness
Here’s something that dramatically affects how to read sheet music faster: the less you look at your hands, the more you can focus on the page.
Strong sight readers develop what I call “keyboard geography”—a physical sense of where notes are without visual confirmation. Your hands know where to go because they’ve internalized the spatial relationships.
Practice without looking
Spend part of your regular practice time playing familiar pieces, scales, or exercises without looking at your hands at all. Keep your eyes on the music or even close them entirely.
At first, you’ll make mistakes. That’s fine. You’re training your proprioception—your body’s sense of where it is in space. Over time, your hands develop reliable muscle memory for intervals, hand shapes, and positions.
This is especially important for pieces with hand position changes. Strong sight readers see a position shift coming in the music, execute it without looking down, and keep their eyes moving forward on the page.
Five-finger positions and beyond
Beginners often learn in five-finger positions—each finger assigned to one note. While this is limiting long-term, it’s actually a useful concept for developing hand position awareness.
Even in advanced playing, you’re often in some kind of hand position or shape. Maybe it’s an octave span, maybe it’s a particular chord voicing. The faster you can recognize “this passage is in C position” or “this is D major arpeggio shape,” the less you need to verify individual notes.
Technique exercises aren’t separate from sight reading—they’re foundational to it. When your hands are comfortable with common patterns, your eyes can race ahead. For students working on technical development, I often recommend focused work on left hand piano exercises since the left hand is often weaker at pattern recognition.
Managing the mental game
Finally, let’s address something that doesn’t get talked about enough: the psychological component of learning how to read sheet music faster.
Many students experience genuine anxiety around sight reading. They feel exposed, embarrassed by mistakes, pressured to perform. This anxiety actively interferes with the reading process—stress narrows your focus and disrupts the pattern recognition we’ve been discussing.
If you experience performance anxiety more broadly, you might find useful strategies in my article on piano performance anxiety. Many of the same principles apply to sight reading pressure.
Permission to make mistakes is essential. In my studio, I tell students that sight reading practice is the one time mistakes don’t just not matter—they’re actually expected and useful. Every stumble tells you something about what patterns you need to work on.
The compound effect of small improvements
Here’s what keeps me passionate about teaching this skill: small improvements in sight reading have outsized effects on your overall musicianship.
When you can read faster, you learn pieces faster. When you learn pieces faster, you play more repertoire. When you play more repertoire, you encounter more patterns. When you know more patterns, you read even faster. It’s a beautiful upward spiral.
I’ve watched adult students who were convinced they’d never be “natural” sight readers transform into confident readers within six months of consistent practice. I’ve seen kids who struggled with note reading suddenly take off once these concepts clicked.
The difference isn’t talent. It’s approach. It’s understanding what sight reading actually is—pattern recognition, eye-hand span, rhythmic structure—and practicing those specific skills deliberately.
Resources and continued learning
While this article covers the core strategies for how to read sheet music faster, there’s always more to explore. If you’re working on your own, consider supplementing with music theory study to deepen your pattern recognition.
The Wikipedia article on sight-reading offers interesting historical and theoretical context if you want to dive deeper into how this skill develops across different instruments and musical traditions.
For those interested in structured learning, our four-level lesson path includes dedicated sight reading exercises integrated with technique and repertoire development. Each level builds the specific skills we’ve discussed here in a systematic progression.
Of course, working with a teacher provides personalized feedback that’s invaluable for sight reading development. In lessons—whether you’re joining us for our $99 60-minute sessions on Zoom or in person here in the Bay Area—I can watch exactly where your eyes go, identify the specific patterns you’re missing, and assign targeted exercises.
Your next steps
If you’re ready to seriously improve how to read sheet music faster, here’s what I recommend you do this week:
Acquire a stack of easy sight reading material—two or three levels below your current playing ability
Schedule 10 minutes of sight reading into your daily practice, ideally at the beginning when your mind is fresh
Focus on one technique at a time: this week, maybe it’s reading ahead; next week, recognizing intervals instead of naming notes
Keep a simple practice log to track your progress and challenges
Be patient and kind with yourself—this is a skill that develops over months, not days
Remember, every expert sight reader you’ve ever admired started exactly where you are now. They just practiced the right things consistently. You can absolutely do the same.
Whether you’re a parent researching benefits of piano lessons for kids and want your child to develop strong reading skills from the start, an adult getting back into piano as an adult and rediscovering this skill, or an active student looking to break through a plateau—these strategies work.
The journey to fluent sight reading is one of the most rewarding aspects of piano study. There’s something almost magical about that moment when the dots on the page flow directly into music under your hands, when you stop translating and start simply playing. That’s what we’re working toward, and it’s absolutely within your reach.
Ready to find out for yourself?
Your first 30-minute lesson with me is completely free – we will evaluate where you are, talk through your goals, and map out your path.
The best left hand piano exercises for beginners are five-finger patterns, octave jumps, blocked chords, broken chords, scales, independence drills and thumb crossings. Give them 15 minutes a day before your pieces, start at 60 beats per minute, and speed up only when an exercise feels clean and relaxed. Most beginners notice improvement within 2-3 weeks.
If your left hand feels like it belongs to someone else, you’re in good company. To have me watch it and show you what to fix, book a free 30-minute trial lesson.
Why is my left hand weaker on piano?
Your left hand feels weaker on piano because it is less trained, not less capable. Roughly 90% of people are right-handed, so the right hand gets years of extra fine-motor practice from everyday tasks. At the piano, the left hand handles bass notes and chords, jobs beginners rarely drill on their own.
That 90% figure is one of the most consistent findings in handedness research. The piano also gives the left hand different work. While the right hand carries the melody, the left hand provides:
Bass notes and the harmonic foundation
Rhythmic accompaniment patterns
Chord progressions and harmonic movement
Counter-melodies and inner voices
Those jobs don’t develop by accident. I’ve noticed that students who give even 20% of their practice time to isolated left hand work progress noticeably faster than those who only practice hands together.
Exercise 1: How do you play five-finger patterns?
A left hand five-finger pattern starts with your pinky (finger 5) on the C below middle C and fingers 4-3-2-1 on D, E, F and G. Play up and down, 5-4-3-2-1-2-3-4-5, at 60 beats per minute with one note per beat, listening for even tone and timing.
Builds: finger independence, strength and position awareness
Time: 3 minutes a day, in two positions
Move on when: a full minute is smooth, relaxed and error-free. Then add 4 beats per minute.
Next, play the same five notes in these rhythms so your fingers stop playing mechanically:
Long-short: quarter, eighth, eighth, repeated
Dotted: a dotted quarter followed by an eighth
Triplets: three notes per beat
Accents: emphasize every third note
Move to other positions
Then start the same pattern on the G below middle C, then on F and D. Each new position feels awkward at first, which is exactly why it’s worth practicing before pieces ask you to change positions.
Exercise 2: How do you practice octave jumps and bass patterns?
Octave jumps start with your left pinky on the C below middle C. Play that C, jump up to play the next C with your thumb, then return to the low C with your pinky. Once the jump is accurate, add the bass-chord pattern behind countless beginner songs: bass note, chord, bass note, chord.
Builds: accurate jumps, spatial awareness and a core accompaniment pattern
Time: 2 minutes a day
Move on when: you hit the target note every time without looking, using muscle memory instead of your eyes. Only then speed up.
Bass-chord pattern in C
Play low C with your pinky, then a C major chord (C-E-G) with fingers 5-3-1. Repeat steadily with a metronome. Once that’s comfortable, use the same pattern with G major (G-B-D), F major (F-A-C) and A minor (A-C-E), the chords you’ll meet most in beginner repertoire.
Exercise 3: How do blocked chords train the left hand?
Blocked chords train the left hand by making three fingers land at exactly the same moment with equal weight. Using 5-3-1 fingering, play each chord four times slowly. The drill builds hand shape, strength and a feel for harmony, and it leads straight into the chord progressions most songs are built on.
Builds: hand shape, strength and harmonic understanding
Time: 3 minutes a day
Move on when: all three notes sound exactly together, never rolled or staggered, at even volume. Then start the progressions.
Six triads to learn first
C major: C-E-G
G major: G-B-D
F major: F-A-C
A minor: A-C-E
D minor: D-F-A
E minor: E-G-B
Common progressions
Give each chord four beats. Once these live in your left hand, accompanying yourself or others gets much easier:
C – G – F – C (I-V-IV-I)
C – Am – F – G (I-vi-IV-V)
C – F – C – G (I-IV-I-V)
Exercise 4: Which broken chord patterns should you learn?
The three broken chord patterns a beginner’s left hand should learn are a flowing 5-3-1-3 arpeggio, the Alberti bass (5-1-3-1) and the waltz “oom-pah-pah.” Each plays chord notes one after another instead of together, which builds agility and teaches accompaniment styles you’ll use in real classical and popular pieces.
Builds: agility, smooth legato and real accompaniment skills
Time: 2 minutes a day, one pattern per session
Move on when: every note is clear and even with no bump on the thumb. Then move the pattern to G, F and A minor.
Basic arpeggio pattern
Using the C major chord shape (C-E-G), play 5-3-1-3-5-3-1-3 for a flowing, harp-like legato with even notes. The mistake I hear most here is an accented thumb note, which beginners do without noticing.
Alberti bass pattern
The Alberti bass, named after composer Domenico Alberti, runs through countless classical pieces. On a C major chord, play bottom, top, middle, top: C-G-E-G with fingers 5-1-3-1, repeated, slowly enough that every note is clear.
Waltz pattern
In 3/4 time, play a bass note on beat 1 and chord notes on beats 2 and 3. For C major: low C on beat 1, E-G together on beat 2, and E-G again on beat 3. That’s the classic “oom-pah-pah” waltz accompaniment.
If your left hand keeps lagging no matter how much you drill, a teacher can usually spot the habit behind it in one lesson. Your first 30-minute lesson with Austin is free – no card, no pressure.
Exercise 5: How should you practice left hand scales?
Left hand scales should be practiced slowly and evenly, not fast. Start the C major scale on the C below middle C at 60 beats per minute, one note per beat, with fingering 5-4-3-2-1-3-2-1 going up and 1-2-3-1-2-3-4-5 coming down. Control, evenness and a relaxed wrist matter far more than speed.
Builds: finger coordination, smooth crossings and key familiarity
Time: 3 minutes a day, one scale per session
Move on when: the scale has been perfect for a full week at one tempo. Then add 4 beats per minute or the next key.
The crossing point
The hard part is where finger 3 and your thumb meet. Going up, finger 3 crosses over your thumb from G to A; coming down, your thumb tucks under finger 3 from A to G. Keep your wrist loose, level and flexible, and practice just that spot slowly until it’s fluid. Listen critically for identical volume and length on every note.
Add G major and F major
Once C major is comfortable, add G major (one sharp) and F major (one flat) with the same 5-4-3-2-1-3-2-1 fingering going up. These three scales cover the vast majority of beginner repertoire.
Exercise 6: How do you build hand independence?
Hand independence on piano comes from drills where each hand does something different on purpose. Play a C major scale with your left hand at one note per beat while your right hand plays the same scale at two notes per beat, or hold a chord in one hand while the other plays a five-finger pattern.
Builds: independent control of each hand, which real music demands
Time: 2 minutes a day
Move on when: each hand keeps its own rhythm without copying the other. Then apply it to simple pieces.
The two-speed scale drill feels nearly impossible at first because your brain wants to synchronize both hands. That’s normal. Start extremely slowly; the breakthrough usually arrives suddenly.
Static and moving exercise
Hold a C major chord with your right hand while your left hand plays a five-finger pattern. Then switch: hold the chord with your left hand while your right hand plays the pattern.
Easy repertoire for independence
Look for pieces where the left hand repeats a steady pattern under the melody: folk songs, hymns and simple classical pieces. Our easiest piano songs for beginners list is a good start.
Exercise 7: How do you practice thumb crossings?
Left hand thumb crossings are practiced with a short drill: play C-D-E with fingers 5-4-3, tuck your thumb in under your hand to play F, then come back with 1-3-4-5. The goal is a thumb that moves on its own while your wrist stays still, which makes every scale and run smoother.
Builds: thumb flexibility and smooth crossovers
Time: 2 minutes a day, rotated with scales
Move on when: the thumb moves smoothly with no wrist twist. Then try the extended pattern.
Beginners often twist the whole wrist to move the thumb, which creates tension and limits speed. Practice the thumb motion in isolation until it’s smooth and relaxed.
Extended crossover pattern
Put your pinky on the C below middle C and climb with 5-4-3-2-1-4-3-2-1-4-3-2-1. Finger 4 crosses over your thumb twice, and you finish on A. Reverse the fingering to come back down, tucking your thumb under finger 4 each time.
How long should you practice left hand piano exercises?
Beginners should practice left hand piano exercises for about 15 minutes a day, at the start of the session before pieces, when focus is freshest. On busy days, 10 focused minutes still counts. Consistent daily practice matters far more than long, occasional sessions, and most beginners notice improvement within 2-3 weeks.
That figure is my teaching recommendation, not a scientific rule. Here’s how I’d fill it:
Most students need 4-6 weeks of consistent left hand work for significant improvement, and 3-4 months before the left hand feels truly comfortable. In my experience, progress comes in leaps with plateaus between, so judge it month to month.
What mistakes keep the left hand from improving?
The mistakes that most often stop left hand piano exercises from working are practicing too fast, staying only in C major, playing mechanically, pushing through tension, quitting after a week or two, and never using the drills in real music. Nearly every one comes down to rushing a skill that needs slow, deliberate repetition.
Slow down more than feels necessary. Most beginners practice two to three times faster than they should, and mistakes get memorized as easily as correct movements.
Check for tension every 2-3 minutes. Shake out your hand and roll your shoulders. Your hand should feel strong but relaxed, never gripped. Fatigue or pain means too much effort.
Record your left hand piano exercises weekly. Playback reveals unevenness, rushing and tension you miss while playing. Log exercises and tempos in a practice journal.
Connect drills to real music. Working on Alberti bass? Find a Mozart sonatina that uses it. Drilling progressions? Learn a folk song built on those chords.
Be patient. Many students tell me they almost quit when their left hand felt hopelessly clumsy, and the ones who kept showing up broke through.
“I have improved more with Weavers Music than I expected. Austin is patient and encouraging.” – Daniel Brooks
Common questions
How do I make my left hand stronger on piano?
You make your left hand stronger on piano through short, daily, isolated practice rather than force. Blocked chords, five-finger patterns and octave bass patterns build strength, while slow tempos and a relaxed wrist keep it usable. Piano strength really means control and endurance, so 10-15 relaxed minutes beats pressing harder.
Should I practice left hand alone or hands together?
Practice the left hand alone first, then combine hands. Isolated left hand work lets you hear unevenness and fix fingering that gets buried when both hands play. Once the left hand part is steady at a slow tempo, put hands together at that same tempo, and keep some left-hand-only time every day.
Is it normal for my left hand to ache after exercises?
Aching, fatigue or pain after left hand exercises usually means you’re using too much tension, not that you’re building strength. Stop, shake out your hand, slow the tempo and play with less effort. If pain continues after you relax your technique and rest for a day, check with a doctor before practicing more.
When should I move beyond beginner left hand piano exercises?
Most students work on beginner left hand exercises through their first one to two years of piano. Move beyond them once five-finger patterns, scales and chord progressions feel automatic and relaxed. The next steps are stride bass, longer arpeggios, polyrhythms and contrapuntal independence, which all build directly on these foundations.
Can a piano teacher help my left hand improve faster?
A piano teacher helps the left hand improve faster by catching tension, wrist twisting and fingering habits you can’t easily see while playing. At Weaver Music, lessons are live and one-on-one over Zoom, starting at $60 for 30 minutes, and every new student starts with a free 30-minute trial lesson, no card required.
Ready to give your left hand a plan?
Your first 30-minute lesson with me is completely free – we will check your left hand technique, answer your questions, and map out a practice plan with a book list.
If your hands shake before a recital, your mind goes blank when you sit at the bench, or you’ve ever considered skipping a performance altogether, you’re dealing with piano performance anxiety. This challenge affects nearly every pianist at some point, from beginners playing their first simple piece to advanced musicians tackling complex repertoire.
The good news? With the right strategies, you can transform that nervous energy into focused, confident playing.
Over my decade of teaching piano to hundreds of students, I’ve seen every shade of performance anxiety. I’ve also discovered what actually works to overcome it, and what’s just well-meaning advice that doesn’t hold up in the real world.
The Short Answer
Piano performance anxiety stems from our brain’s threat response kicking in when we feel judged or fear making mistakes. To overcome it, combine thorough preparation with physical calming techniques (like breathing exercises), mental reframing strategies, and gradual exposure to performance situations.
The key is addressing both the physical symptoms and the underlying thoughts that trigger them.
Most importantly, understand that some nervousness is normal and even helpful. The goal isn’t to eliminate anxiety completely, but to manage it so it doesn’t interfere with your playing.
Why Piano Performance Anxiety Happens
Before we tackle solutions, it helps to understand what’s happening in your body and mind when piano performance anxiety strikes. This isn’t weakness or a character flaw—it’s your brain doing exactly what evolution designed it to do.
The Biology of Performance Nerves
When you face an audience, your amygdala (the brain’s threat-detection center) can interpret the situation as dangerous. It floods your system with adrenaline and cortisol, triggering the fight-or-flight response.
Your heart races, your hands might shake or sweat, and blood flow redirects from fine motor control to major muscle groups.
This response helped our ancestors escape predators, but it’s less helpful when you need delicate finger control for a Chopin nocturne. Understanding this biology is the first step in managing piano performance anxiety, because you realize your body isn’t malfunctioning—it’s just responding to perceived threat.
Common Mental Triggers
Several thought patterns intensify piano performance anxiety:
Perfectionism: Believing you must play flawlessly or you’ve failed
Catastrophizing: Imagining worst-case scenarios (forgetting the piece, public humiliation)
Comparison: Measuring yourself against other performers
External validation: Tying your self-worth to audience approval
Inexperience: Fear of the unknown when you haven’t performed much
Many students I work with at Weaver Music discover that their piano performance anxiety actually has little to do with their playing ability. It’s rooted in these thought patterns, which means it can be addressed through specific mental strategies.
Preparation Strategies That Build Real Confidence
The foundation for managing piano performance anxiety is laid weeks before the performance. Thorough preparation doesn’t just improve your playing—it gives you genuine confidence that withstands pressure.
Master Your Piece Beyond Performance Level
I tell my students to prepare their recital piece to about 120% of what they need. If you can play it perfectly in your studio, you might manage 80% of that quality under performance stress.
But if you’ve practiced it until you can play it in your sleep, that 80% will still sound great.
This means continuing work on a piece long after you can “play it through.” Polish every phrase, nail every transition, and practice until your fingers know the music so deeply that even when your conscious mind panics, muscle memory carries you through.
Simulate Performance Conditions
Piano performance anxiety spikes when the performance environment feels unfamiliar. Combat this by recreating performance conditions during practice:
Play through your piece without stopping, even if you make mistakes
Practice on different pianos when possible
Record yourself and listen back
Perform for family members or friends
Practice in “concert dress” if your outfit might affect your playing
Stand up, bow, sit down, and begin—practice the whole ritual
At Weaver Music, I encourage students to schedule mini-performances during their practice routine. Even playing for your cat while imagining an audience helps your brain normalize the performance experience.
Develop a Pre-Performance Routine
Athletes use pre-performance routines to trigger focus and calm. Pianists can too. Create a sequence you do before every practice run-through and every actual performance.
This might include specific stretches, breathing patterns, or mental visualization.
When piano performance anxiety rises before a recital, this familiar routine signals to your brain: “We’ve done this many times before. We know what to do.” The familiarity itself is calming.
Understanding the Practice-Performance Connection
Research from the American Psychological Association shows that performance anxiety decreases significantly when musicians practice under varied conditions rather than only in comfortable settings.
This means occasionally practicing when you’re tired, in different rooms, or with minor distractions present.
The more your practice incorporates variety and challenge, the more adaptable you become under pressure. Your brain learns that it can play this piece under different circumstances, which builds genuine resilience against piano performance anxiety.
Physical Techniques to Calm Your Body
When piano performance anxiety triggers physical symptoms, you need tools to bring your body back to baseline. These techniques work because they directly influence your nervous system.
Breathing Exercises That Actually Help
Controlled breathing is one of the fastest ways to signal safety to your nervous system. When you’re anxious, breathing becomes shallow and rapid. Deliberately slowing it down tells your brain the threat has passed.
Try box breathing: Inhale for four counts, hold for four, exhale for four, hold for four. Repeat five times.
I’ve seen students go from shaking hands to steady calm in just two minutes using this technique backstage.
Another effective approach is the 4-7-8 breath: inhale for four counts, hold for seven, exhale slowly for eight. The extended exhale activates your parasympathetic nervous system, the “rest and digest” mode that counteracts anxiety.
Progressive Muscle Relaxation
Piano performance anxiety often manifests as tension—tight shoulders, clenched jaw, rigid fingers. Progressive muscle relaxation teaches you to recognize and release this tension.
Starting at your toes, deliberately tense each muscle group for five seconds, then release and notice the difference. Work up through your legs, torso, arms, hands, neck, and face.
This practice helps you identify where you hold tension and consciously let it go.
Before a performance, a quick version focusing just on your shoulders, arms, and hands can make an immediate difference in your playing comfort.
Physical Warm-Up Routines
Never go into a performance cold. A physical warm-up serves multiple purposes: it prepares your muscles, occupies your anxious mind, and establishes your routine. Your warm-up might include:
Gentle hand and wrist stretches
Shoulder rolls and neck stretches
Playing scales or arpeggios (not your performance piece)
Simple exercises to get blood flowing to your fingers
Many pianists find that establishing a consistent warm-up routine helps manage piano performance anxiety by giving them something concrete to focus on rather than spiraling worry.
The Role of Physical Health
Your overall physical condition affects how intensely you experience piano performance anxiety. Regular exercise, adequate sleep, and proper nutrition all contribute to a more resilient nervous system.
According to research published in the National Institutes of Health, regular aerobic exercise can reduce general anxiety levels by up to 20%, which translates to lower baseline anxiety when you approach performances.
You don’t need to become an athlete, but basic self-care genuinely impacts your ability to manage performance nerves.
Mental Approaches That Actually Work
Physical techniques help, but piano performance anxiety lives primarily in your mind. These mental strategies address the root of the problem.
Reframe Your Relationship with Mistakes
Much of piano performance anxiety comes from fear of mistakes. But here’s the truth: every performer makes mistakes. Every single one.
The difference is how they respond.
Professional pianists develop the skill of recovering smoothly when something goes wrong. They don’t stop, grimace, or apologize—they keep the musical line going and most audience members never notice.
Practice making intentional mistakes during run-throughs, then continuing without breaking character. This sounds strange, but it’s incredibly liberating. When you know you can recover from errors, they become much less frightening.
Students in my lesson plan often tell me this single shift—from “mistakes are disasters” to “mistakes are manageable”—transforms their relationship with piano performance anxiety.
Visualization and Mental Rehearsal
Your brain doesn’t fully distinguish between vividly imagined experiences and real ones. This means mental rehearsal creates real neural pathways.
Spend time visualizing your performance from start to finish. Imagine walking to the piano, feeling the bench beneath you, seeing the keys, and hearing yourself play beautifully.
Include sensory details—the temperature of the room, the sound of your breathing, the satisfaction of a well-executed passage.
Also visualize handling challenges. Imagine making a small mistake and recovering gracefully. Picture piano performance anxiety symptoms arising—and then using your breathing technique to calm down.
Mental rehearsal of both success and recovery builds comprehensive confidence.
Shift Your Focus from Self to Music
Piano performance anxiety intensifies when you’re focused on yourself: “How do I look? What are they thinking? Am I good enough?” This self-focused attention creates a vicious cycle of anxiety.
Instead, commit to serving the music. Your job isn’t to prove your worth or be perfect—it’s to share something beautiful.
When you shift focus from “me” to “the music,” the pressure transforms into purpose.
Before you perform, remind yourself: “I’m here to share this piece I’ve grown to love. The audience wants to receive it.” This subtle mental shift can dramatically reduce piano performance anxiety.
Cognitive Restructuring Techniques
Cognitive-behavioral approaches to piano performance anxiety involve identifying and challenging unhelpful thoughts. When you notice catastrophic thinking (“If I mess up, everyone will think I’m terrible”), deliberately counter it with evidence.
“I’ve recovered from mistakes before. Most audience members won’t notice small errors. My worth isn’t determined by one performance.”
This isn’t about positive thinking—it’s about realistic thinking. You’re training your brain to assess situations accurately rather than defaulting to worst-case scenarios.
Day-of-Performance Strategies
The day of your recital requires specific strategies to manage piano performance anxiety as it peaks.
Morning and Afternoon Preparation
How you spend performance day matters. Avoid over-practicing—this usually increases anxiety and tires your muscles. Instead:
Play through your piece once or twice in the morning, slowly and mindfully
Engage in calming activities—walk, read, listen to music you love
Eat regular, balanced meals (skip heavy foods that make you sluggish)
Stay hydrated but not over-caffeinated
Avoid other pianists’ performances on YouTube—comparison fuels anxiety
One student told me she used to spend recital day frantically practicing, which amplified her piano performance anxiety. When she switched to one calm morning run-through followed by a nature walk, her performance quality improved dramatically.
Right Before You Perform
In the final minutes before your performance, piano performance anxiety may peak. Have a plan.
Find a quiet space if possible. Do your breathing exercises. Run through your pre-performance routine. Some pianists benefit from listening to their piece one final time; others prefer silence.
Know what works for you.
Importantly, accept the nervousness rather than fighting it. Tell yourself, “My body is energized and ready. This nervousness is excitement. It will help me play with intensity and focus.”
Research shows that reframing anxiety as excitement actually improves performance.
The Walk to the Piano
Your walk to the piano sets the tone. Move deliberately, not rushed. Breathe. Remind yourself of your intention—to share the music.
Settle at the bench without hurrying. Adjust if needed. Place your hands.
Before you begin, take one full breath. This pause—just three or four seconds—allows your nervous system to settle and signals to the audience that you’re in control. Then begin with commitment.
Many pianists battling piano performance anxiety rush this moment, starting before they’re truly ready. The pause is powerful.
Managing Unexpected Challenges
Sometimes performance day brings surprises: a different piano than you expected, an uncomfortably warm room, or an unexpected delay. Piano performance anxiety can spike when things don’t go as planned.
Build flexibility into your mental approach. Remind yourself that professional musicians perform under varied conditions all the time. Your preparation is solid enough to handle variations.
Having a flexible mindset—”I can adapt to whatever comes”—reduces the impact of surprises on your nerves.
After the Performance: Learning and Growing
How you process a performance affects your future relationship with piano performance anxiety.
Realistic Self-Assessment
After performing, your brain may fixate on mistakes while ignoring everything that went well. This negativity bias is normal but unhelpful.
Deliberately practice balanced assessment. Write down three things that went well and one or two things to improve next time.
Notice what you did right—maintained tempo through a tricky section, recovered smoothly from a memory slip, connected emotionally with the music.
In my experience teaching at Weaver Music, students who practice this balanced reflection develop much healthier relationships with performance than those who focus only on what went wrong.
Gathering Useful Feedback
If you’re working with a teacher, discuss the performance. At Weaver Music, I help students process performances during their lessons, identifying both strengths and specific areas to address.
Audience feedback can be tricky—people are usually kind but vague (“Great job!”). The most useful feedback comes from musicians who can offer specific observations while remaining supportive.
Planning Your Next Performance
One of the best ways to overcome piano performance anxiety is to perform regularly. Each performance provides data and experience that inform the next one.
Don’t wait a year between performances. Look for lower-stakes opportunities: play at an open mic, perform for a community group, organize a small house concert, or even go live on social media.
Frequency builds comfort.
The students I work with who perform every few months develop resilience around piano performance anxiety that those who perform once yearly never quite achieve. Exposure is genuinely therapeutic.
Celebrating Progress, Not Just Perfection
Each performance is a learning opportunity. Maybe this time you managed your breathing better than last time. Perhaps you recovered more smoothly from a mistake. Or you simply felt more present with the music.
These incremental improvements matter. Celebrating them reinforces positive patterns and gradually reshapes your relationship with piano performance anxiety.
Long-Term Solutions for Piano Performance Anxiety
While the strategies above help with specific performances, addressing piano performance anxiety in the long term requires deeper work.
Build Performance Into Regular Practice
Make performance mode part of your regular practice routine, not something you only do right before a recital. Once or twice a week, do a complete run-through as if you’re performing.
Some pianists even dress up for these practice performances.
This regular exposure normalizes the performance state. Your brain stops treating it as a rare, threatening event and starts seeing it as just another thing you do.
Address Underlying Perfectionism
If piano performance anxiety is severe and persistent, it may be rooted in perfectionism or deeper self-worth issues. This is common among serious musicians and nothing to be ashamed of.
Working with a teacher who understands these dynamics can help. In my free 30-minute trial lessons, I often discuss not just technique but the mental game of piano playing, because the two are inseparable.
For some pianists, working with a therapist alongside a piano teacher provides the most comprehensive support for piano performance anxiety. Cognitive-behavioral therapy has strong research support for performance anxiety specifically.
Develop Multiple Identities
When your entire self-worth rests on piano performance, the stakes of any single recital become unbearably high. Piano performance anxiety often decreases when you cultivate a rich life with multiple sources of meaning and accomplishment.
You are not just a pianist. You’re also a friend, perhaps a parent, a professional in another field, someone with hobbies and interests beyond music.
This broader identity provides perspective: a less-than-perfect recital doesn’t define you.
I’ve written before about why students quit piano, and often it’s because the pressure became too intense. Keeping piano in healthy perspective—something you love and work hard at, but not the sole source of your worth—actually improves both your enjoyment and your performance.
Understand That Growth Takes Time
Managing piano performance anxiety is a skill like any other—it develops with practice over time. Your first few performances might still involve significant nerves. That’s okay.
Each one teaches you something.
Be patient with yourself. Notice the small improvements: “Last time my hands shook through the whole piece; this time they settled after the introduction.” Progress isn’t always linear, but it is real.
Students who work with me long-term, whether through online courses or regular Zoom lessons, consistently report that piano performance anxiety diminishes as they gain experience and implement these strategies.
It’s not about becoming fearless—it’s about becoming capable even in the presence of fear.
Consider the Role of Preparation Consistency
Inconsistent practice schedules often worsen piano performance anxiety because you’re never quite sure how prepared you really are. When you maintain a steady practice routine, you build reliable competence that withstands pressure.
Many adult students benefit from structured approaches to practice. I’ve found that students who follow a consistent schedule—even if it’s just 20-30 minutes daily—report less anxiety than those who cram before performances.
Know When to Seek Additional Support
For most pianists, the strategies in this article will significantly reduce piano performance anxiety. But if your anxiety is severe—causing panic attacks, making you avoid all performance opportunities, or significantly impacting your quality of life—consider seeking support from a mental health professional who specializes in performance anxiety.
There’s no shame in this. Professional athletes, actors, and musicians often work with sports psychologists or therapists to optimize their performance mindset.
You deserve the same level of support.
Additionally, working with an experienced teacher can make a tremendous difference. At Weaver Music, I’ve helped hundreds of students work through piano performance anxiety, and because I offer lessons both in-person in the Bay Area and via Zoom worldwide, location is rarely a barrier.
The investment in quality instruction—$99 for a 60-minute lesson—often pays dividends in both your playing and your confidence.
The Power of Community and Shared Experience
Connecting with other pianists who understand piano performance anxiety can be remarkably healing. You realize you’re not alone in this struggle, and you can learn from how others manage their nerves.
Consider joining piano groups, online forums, or attending masterclasses where performance anxiety is discussed openly. The more normalized these conversations become, the less shame and isolation you’ll feel around your own experience.
Celebrate the Courage It Takes
Finally, recognize that stepping onto a stage or even performing for a small group requires genuine courage. Piano performance anxiety is your brain trying to protect you from perceived threat.
The fact that you do it anyway—that you share your music despite the fear—is worthy of respect.
Every performance, regardless of outcome, is an act of vulnerability and bravery. Over time, as you implement these strategies and gain experience, piano performance anxiety typically lessens.
But even if it doesn’t disappear entirely, you’ll develop the skills to perform well anyway.
That’s the real goal: not to eliminate fear, but to make music regardless. And that’s absolutely achievable for every pianist willing to do the work.
Ready to find out for yourself?
Your first 30-minute lesson with me is completely free – we will evaluate where you are, talk through your goals, and map out your path.
If you’ve ever felt like your metronome is mocking you—clicking away smugly while you struggle to stay in time—you’re not alone. Learning how to use a metronome piano practice can feel like rubbing your head and patting your stomach simultaneously while reciting the alphabet backwards.
It’s one of those skills that separates disciplined pianists from the rest, yet it’s also one of the most universally dreaded tools in music education. I’ve been teaching piano for over a decade, and I’ve watched hundreds of students go from metronome-haters to metronome-believers.
The difference isn’t talent or discipline. It’s approach. Most people use metronomes wrong from day one, which creates frustration that compounds over time.
But when you understand how to use a metronome piano techniques correctly, the clicking transforms from enemy to ally. This comprehensive guide will show you exactly how to make that transformation happen in your own practice sessions.
In this guide, I’ll walk you through seven practical strategies that make metronome practice actually work. These aren’t theoretical music school concepts—they’re methods I use every day with real students at Weaver Music, from total beginners to advanced players preparing for performances.
The short answer
To use a metronome effectively at the piano, start at a tempo where you can play the passage perfectly with zero mistakes. Then practice the section multiple times at that tempo until it feels easy.
Only then should you increase by 5 BPM. Use subdivision clicks (eighth notes or sixteenth notes) instead of just quarter notes, and alternate between practicing with the metronome and without it to develop both external and internal timing.
The key insight: the metronome isn’t there to push you faster. It’s there to build consistency at tempos you’ve already mastered. Think of it as a mirror for your rhythm, not a drill sergeant.
Understanding how to use a metronome piano practice tool correctly will transform your playing faster than almost any other single technique adjustment. The metronome reveals timing inconsistencies you might not hear otherwise and helps build the muscle memory needed for professional-level playing.
When used properly, this simple tool becomes your most reliable partner in developing rock-solid rhythm, even tempo control, and the confidence to tackle increasingly challenging repertoire. The strategies that follow will show you exactly how to harness that power.
Why metronomes feel awful at first
Before we dive into technique, let’s acknowledge why metronomes trigger such visceral reactions. Understanding the psychology helps you work with your brain instead of against it.
The metronome exposes every imperfection. When you practice without one, your brain smooths over rhythmic inconsistencies. You slow down during hard parts and speed up during easy sections, but it feels smooth to you.
The metronome reveals this truth brutally. It creates cognitive overload for beginners. You’re already managing notes, fingering, hand position, dynamics, and pedaling.
Adding a relentless external timekeeper feels like one task too many. Your brain literally doesn’t have enough processing power yet to handle everything at once.
Here’s what most teachers don’t tell you: this feeling is temporary. As technical skills become automatic, your brain frees up capacity for timing.
The metronome gets easier not because you “get better at metronomes” but because everything else becomes less demanding. Many students also start at the wrong tempo.
They set the metronome to the target performance speed, then try to play along. This guarantees failure and frustration. We’ll fix that in the next section.
The clicking sound itself can be psychologically challenging. According to music theory research on rhythm perception, our brains naturally want to interpret and adjust rhythm based on musical context, which is why the strict, unforgiving click of a metronome feels so unnatural at first.
Another psychological barrier is the fear of judgment. The metronome doesn’t care about your excuses or explanations—it simply reveals whether you’re on the beat or not. This objective feedback can feel harsh, especially for perfectionists who struggle with making mistakes.
But here’s the reframe that helps my students: the metronome isn’t judging you. It’s just providing data. That data is incredibly valuable because it shows you exactly where to focus your practice energy.
Start slower than you think
This is the single most important principle for how to use a metronome piano practice effectively. You must start slower than feels necessary. Much slower.
Here’s my rule: set the metronome to a tempo where you can play the passage perfectly ten times in a row without a single mistake, hesitation, or stumble.
For most students learning a new piece, this ends up being 40-60% of the target tempo. Yes, really. I had a student recently working on a Chopin Nocturne.
She wanted to practice it at 120 BPM because that’s how her favorite recording sounded. At that speed, she made mistakes in nearly every measure. We dropped it to 50 BPM.
She hated how it felt at first—”It’s too slow, I can’t feel the music!” But here’s what happened: at 50 BPM, she could play it perfectly.
After three practice sessions at that glacial pace, we bumped it to 55 BPM. Then 60. Then 65. Within two weeks, she was at 90 BPM playing more musically than she ever had at 120 with mistakes.
Slow practice with a metronome builds three things simultaneously:
Muscle memory that’s accurate from the start
Mental clarity about every note and rhythm
Confidence that you can execute the passage reliably
Fast practice with mistakes builds muscle memory for the mistakes. You’re literally training your fingers to play wrong notes. Slow, perfect repetition is exponentially more effective than fast, sloppy repetition.
One more thing: don’t judge the musicality of slow practice. It won’t sound beautiful at 50 BPM. That’s not the point. You’re building a foundation.
The music comes later, and it comes more reliably because the foundation is solid. This approach to how to use a metronome piano slow practice creates neural pathways that lock in accuracy before speed.
Think of it like building a house. You wouldn’t rush through the foundation to get to the pretty parts faster. The same principle applies to piano technique.
Neuroscience research shows that slow, deliberate practice with immediate feedback (which the metronome provides) creates stronger neural connections than fast, error-prone repetition. You’re not just training your fingers—you’re rewiring your brain for precision.
When students understand this scientific basis, they’re more willing to embrace the slow tempos that feel uncomfortable at first. The patience pays dividends in the form of faster long-term progress and fewer ingrained bad habits to unlearn later.
Use subdivision, not just quarter notes
Most beginners set their metronome to click on quarter notes. This is fine for simple pieces, but it’s actually one of the biggest obstacles to understanding how to use a metronome piano technique for anything moderately complex.
Instead, set your metronome to click on the smallest rhythmic value you’re playing. If your passage has sixteenth notes, set the metronome to click sixteenth notes.
If you’re playing eighth-note triplets, use triplet clicks. Why does this work so much better? Because it removes ambiguity.
When the metronome only clicks quarters, you have to subdivide in your head to place the eighths and sixteenths accurately. For beginners, this is asking your brain to do two hard things at once: play the passage and calculate subdivision.
When the metronome clicks the subdivision, you just match the clicks. One action, not two. Your fingers and the clicks line up directly. This dramatically reduces cognitive load.
Here’s how I teach this: let’s say you’re playing a C major scale in sixteenth notes. Instead of setting the metronome to quarter note = 60, set it to sixteenth note = 60 (which many metronomes display as quarter = 60 but in sixteenth-note mode).
Now every note of your scale gets its own click. Practice it until every finger attack aligns perfectly with a click. Then, gradually turn off some of the subdivision.
Maybe switch to eighth-note clicks. Your internal sense of sixteenth notes will be much stronger because you built it with complete external support first.
This is especially powerful for dotted rhythms, syncopation, and any passage where students “feel” the rhythm wrong. The subdivision clicks force you to place notes exactly where they belong mathematically, which often differs from where they feel like they should go.
Professional pianists use this subdivision technique constantly when learning complex contemporary works. It’s not a beginner crutch—it’s a professional tool that happens to be especially helpful for developing players.
I’ve seen subdivision clicking transform students’ understanding of complex rhythmic patterns in just a single practice session. What felt impossibly complicated suddenly becomes clear when every note division has its own audible reference point.
This technique is particularly valuable for passages with mixed rhythms—say, triplets in one hand against straight eighths in the other. Setting the metronome to click the lowest common denominator (often sixteenth-note triplets in this case) makes the mathematical relationship crystal clear.
Practice with it, then without it, then with it again
One of the biggest mistakes students make is practicing exclusively with the metronome or exclusively without it. Both approaches have problems. Only practicing with the metronome makes you dependent on external timekeeping.
You develop the skill of following a click, but not the skill of generating steady time internally. The moment you perform without a metronome, your timing falls apart.
Only practicing without a metronome means you never get objective feedback. You develop an internal sense of time, but it might be inaccurate. You’ll slow down in difficult passages and rush through easy ones without realizing it.
The solution is alternation. Here’s the practice cycle I teach at Weaver Music, and it’s transformed how to use a metronome piano students approach this essential tool:
Phase 1: Practice the passage with metronome subdivision clicks at a very slow tempo until perfect (5-10 repetitions)
Phase 2: Turn off the metronome and play the passage twice, trying to maintain that exact tempo internally
Phase 3: Turn the metronome back on at the same tempo and check whether you stayed consistent
Phase 4: If you stayed consistent, increase by 5 BPM and repeat. If not, stay at the current tempo for another cycle
This builds both external and internal timing skills. You learn to follow an external pulse and to generate a steady internal pulse. Most importantly, you learn whether your internal sense matches reality.
I’ve had countless students swear they maintained tempo during Phase 2, only to discover in Phase 3 that they slowed down by 15-20 BPM without realizing it.
This awareness is valuable. It tells you where your practice needs to focus. Over time, the gap closes. Your internal tempo becomes more accurate.
Eventually, you can play entire pieces at steady tempo without external support—but you’ll have developed that skill by regularly checking it against objective measurement.
This alternating approach is one of the most effective ways to internalize rhythm while maintaining accountability. It trains independence while preventing the drift that happens when you never check your assumptions against reality.
The alternation method also prevents metronome dependency, which is a real concern for students who use the tool too consistently. You want the metronome to be a training partner, not a permanent crutch.
By regularly practicing without it and then verifying your accuracy, you build genuine internal timing that will serve you in performance situations where no external click track is available.
Let the metronome follow you first
Here’s a technique I don’t see enough teachers using: before you try to follow the metronome, let it follow you. This works especially well for expressive pieces where strict tempo feels wrong, or for students who tense up the moment the clicking starts.
It reverses the power dynamic and removes the performance anxiety. Here’s how: play through the passage at whatever tempo feels natural and comfortable.
Don’t try to be steady; just play musically. Record yourself or have someone tap along to find your natural tempo. Then set the metronome to that exact speed.
Suddenly, the metronome isn’t an adversary. It’s simply reflecting what you’re already doing. This creates a feeling of alignment instead of conflict.
Practice at this “natural tempo” with the metronome until it feels easy and collaborative. Then—and only then—start making small adjustments.
Maybe your natural tempo was 76 BPM but the target is 80. Instead of jumping straight to 80 and struggling, you’ve built comfort at 76 first. Moving to 77, then 78, then 79, then 80 happens organically.
This approach is particularly effective for adults who come to piano later in life. Many of my adult students at Weaver Music have spent decades in careers where they were competent and in control.
The metronome makes them feel incompetent, which triggers avoidance. Starting with “the metronome matching you” instead of “you matching the metronome” preserves that sense of agency.
It’s also psychologically easier. You’re not learning a new skill (following external time); you’re just adding external validation to something you already do (playing at your natural pace).
Once that foundation exists, expanding the skill becomes less threatening. This reverse-engineering approach to how to use a metronome piano practice sessions creates confidence instead of anxiety.
I’ve used this technique with students who had developed almost phobic reactions to metronomes after years of frustrating experiences. By letting them “teach” the metronome their tempo first, we removed the emotional charge and created a neutral starting point.
Within a few weeks, these same students were comfortably using metronomes in the traditional way because the initial psychological barrier had been dismantled.
How to use a metronome piano scales and technical work
Scales, arpeggios, and technical exercises are where metronome work pays the biggest dividends. This is also where understanding how to use a metronome piano students can achieve the fastest progress.
For scales, start with one octave at a time. Set the metronome to click on every note (subdivision clicks, as discussed earlier). Play the scale up and down, ensuring every finger strikes exactly with a click. This builds evenness.
Once one octave is even, extend to two octaves. You’ll notice certain transitions—often the thumb-under at the octave break—tend to rush or drag.
The metronome exposes this immediately. Isolate those transitions and drill them separately at the same tempo. Here’s a specific how to use a metronome piano scales technique I use constantly: the accent drill.
Play your scale with the metronome, but accent every fourth note. Then every third note. Then every fifth note. This forces you to maintain steady time while adding rhythmic complexity, which builds polyrhythmic awareness and strengthens your sense of pulse.
For arpeggios, the same principles apply, but the technical challenge is often greater because of the wider hand position changes. Start absurdly slow—maybe one note per second.
Make every position shift deliberate and exactly timed. Speed comes from accuracy, not from trying to go fast. Technical exercises like Hanon or Czerny are metronome goldmines.
These are specifically designed to be practiced slowly for accuracy, then gradually increased in speed. Track your progress by writing down the date and tempo in your practice journal.
Seeing “Hanon #1: 60 BPM” grow to “Hanon #1: 100 BPM” over weeks provides tangible evidence of improvement. One mistake to avoid: don’t practice scales and technical work exclusively at one tempo.
Vary it. Some days, practice scales at a very slow tempo with perfect articulation and dynamics. Other days, push the tempo to your current maximum. This builds both control and speed, and prevents boredom.
When working on how to use a metronome piano scales practice, consistency matters more than intensity. Five minutes of focused, metronome-guided scale work every day produces better results than thirty minutes once a week.
The daily repetition builds automaticity in your fingers and deepens your internalized sense of steady pulse. Over time, you’ll notice that even your sight-reading improves because your rhythmic foundation is so much stronger.
Another powerful technique for scale practice: play your scales in different rhythmic patterns while maintaining steady clicks. Try long-short patterns (dotted eighth-sixteenth), then short-long (sixteenth-dotted eighth), then triplet groupings.
This transforms boring scale practice into genuinely engaging rhythmic training while the metronome keeps you honest about maintaining the underlying pulse. The combination builds both technical facility and rhythmic sophistication simultaneously.
The 5-BPM rule for building speed
I’ve mentioned this a few times already, but it deserves its own section because it’s that important. When you’re ready to increase tempo, increase by exactly 5 BPM. Not 10. Not “a little faster.” Exactly 5.
Why 5? It’s small enough that your fingers and brain can adapt without struggle, but large enough that you’re making real progress. Jumps of 10 or more BPM often reintroduce mistakes, which means you’re back to practicing errors.
Here’s the protocol: once you can play a passage perfectly five times in a row at a given tempo, you’re ready to move up 5 BPM. Not three times. Not “pretty well most of the time.” Five perfect repetitions.
This patience is hard for students who are goal-oriented. You want to play Für Elise at 120 BPM, and you’re stuck at 75 BPM. The temptation is to jump ahead. Resist it.
Every time you jump ahead and practice with mistakes, you’re taking two steps back. I promise you: slow, incremental progress is faster in the long run.
A student who increases 5 BPM every few days will reach the target tempo weeks before a student who keeps attempting the target tempo and making mistakes.
Track your progress. Write down the date and tempo every time you increase. This creates motivation and accountability. When you see “October 15: 75 BPM, October 18: 80 BPM, October 21: 85 BPM,” you have proof that the system works, which makes it easier to trust the process during the slow middle stages.
Also, understand that progress isn’t always linear. Some weeks you’ll increase 10-15 BPM total. Other weeks you’ll stay at the same tempo, consolidating. Both are valuable.
The metronome shows you exactly where you are, without judgment or wishful thinking. This gradual building approach is central to how to use a metronome piano technique development at every level.
Professional concert pianists use the exact same 5-BPM increment method when learning new repertoire. It’s not a beginner technique—it’s simply the most efficient way the human brain and fingers learn complex motor patterns at increasing speeds.
Some students find it helpful to use even smaller increments—2 or 3 BPM—especially when working on particularly challenging passages or when approaching the upper limits of their current technical ability. There’s no prize for rushing the process.
The goal is sustainable progress that sticks, not temporary speed gains that collapse under performance pressure. I’ve watched students reach impressive tempos through patient 5-BPM increments and maintain those speeds reliably for months or years.
Meanwhile, students who try to force faster progress often find themselves stuck at the same tempo for weeks because they keep introducing errors that have to be corrected before real advancement can happen.
Choose the right metronome for you
Not all metronomes are created equal, and finding one that doesn’t irritate you makes a huge difference in whether you’ll actually use it. Traditional mechanical metronomes have a visual component (the swinging pendulum) that some students find helpful.
Watching the motion creates a secondary sensory input beyond just sound. However, they’re not portable, they can’t do subdivision clicks easily, and the ticking sound drives some people crazy.
Digital metronomes offer more features: subdivision settings, different sound options, visual flashing lights, and precise BPM control. They’re also usually cheaper and more portable. The downside is they can feel less “organic” and the beeping sounds are sometimes harsh.
Smartphone apps are what most of my students use now. Apps like Soundbrenner, Pro Metronome, or even the built-in metronome in GarageBand offer incredible flexibility.
You can choose different sounds (wood block, hi-hat, beep), set complex subdivision patterns, create tempo changes within a single session, and even use vibration mode if sound is distracting.
Here’s my advice: try several. The “best” metronome is the one you’ll actually use. If the sound of one app annoys you, try another.
If you love the aesthetic of a wooden mechanical metronome and it makes you more likely to practice with it, get that instead of the “technically superior” digital option.
One feature I strongly recommend: visual feedback in addition to audio. Many apps flash the screen in time with the beat. This visual pulse helps some students sync up more easily than audio alone, especially students who are more visually oriented or who struggle with auditory processing.
Whatever you choose, keep it easily accessible. If your metronome is buried in a drawer or requires five minutes of app navigation to start, you won’t use it.
Put it on your music stand, on your piano, or keep the app on your phone’s home screen. Making it easy to start your metronome practice removes one more barrier to consistent training.
Some advanced metronome apps even offer features like gradual tempo acceleration (automatically increasing BPM over time), programmable tempo maps for pieces with multiple tempo changes, and practice mode features that can help you track your progress over weeks and months.
These features can be valuable for advanced students, but beginners should stick with basic functionality—just a steady click at adjustable tempos with subdivision options. Don’t let feature overload prevent you from using the tool at all.
Common metronome mistakes to avoid
Even when students commit to using a metronome, certain mistakes undermine the effectiveness. Let’s address the most common ones I see in my teaching practice.
Mistake 1: Starting too fast. I’ve mentioned this already, but it bears repeating because it’s the most common error. Your ego wants to practice at performance tempo. Your fingers need to practice at learning tempo. Trust the process.
Mistake 2: Only using it on pieces you’re learning. The metronome is equally valuable—maybe more valuable—for pieces you’ve already “finished.” It reveals tempo fluctuations you’ve stopped noticing.
Record yourself playing an old piece without metronome, then check it against a metronome. You’ll be surprised how much you’re rushing or dragging in familiar passages.
Mistake 3: Treating it as a performance tool rather than a practice tool. Some students think they’ve “failed” if they can’t perform with a metronome clicking. That’s not the goal.
The metronome is training wheels. It helps you build steady internal time. Once built, you remove it for performance.
Mistake 4: Using it for every piece, every time. Some music is meant to be rhythmically flexible. Romantic-era pieces, for instance, often use rubato (expressive tempo changes) as a core musical element.
Using a metronome on Chopin’s Nocturne in E-flat major, for example, can strip away the interpretive freedom that makes the piece beautiful. We’ll discuss this more in the next section.
Mistake 5: Not adjusting for different practice goals. If you’re working on dynamics and phrasing, maybe you don’t need the metronome that day. If you’re working on evenness and rhythm, you definitely do. Match the tool to the goal.
Mistake 6: Giving up after one bad session. Your first few attempts with a metronome will probably feel awful. That’s normal. It takes several sessions before your brain adapts. Don’t judge the tool based on day one. Give it a full week of honest effort.
If you’re struggling with consistency in your practice overall, not just with metronome work, you might find my article on creating a piano practice schedule for adults helpful for building sustainable habits.
Another common mistake is fighting the click instead of listening to it. When you notice you’re off the beat, many students try to force their fingers back in sync mid-phrase, which creates tension and usually makes things worse.
Instead, if you fall out of sync, finish the phrase, stop, reset, and start again from a convenient musical entry point. Don’t try to “catch up” to the metronome—that’s not how motor learning works.
Mistake 7: Ignoring your body’s tension signals. If you notice your shoulders rising, your jaw clenching, or your breathing becoming shallow while practicing with a metronome, that’s a sign you need to slow down or take a break.
Physical tension actively interferes with motor learning and can lead to injury over time. The metronome should support relaxed, efficient technique, not create stress that compromises it.
When NOT to use a metronome
I’ve spent this entire article teaching you how to use a metronome piano practice effectively. Now I’m going to tell you when to ignore everything I just said and not use one at all.
Metronomes are tools, not rules. There are legitimate times when practicing without one is better for your musical development.
When learning a brand-new piece in the first reading: When you’re sight-reading through something for the first time, your goal is to get a general sense of the music—the melody, harmony, structure, and character.
Adding a metronome at this stage adds unhelpful pressure. Just play through it at whatever tempo works, stopping when you need to, getting familiar with the landscape.
When working on musical expression: If your focus today is on phrasing, dynamics, pedaling, or emotional interpretation, the metronome can actually get in the way.
These elements often require subtle tempo fluctuations—a slight ritardando at the end of a phrase, a slight acceleration into a climax. Strict tempo prevents you from exploring these expressive tools.
When practicing deliberately flexible music: As mentioned earlier, some pieces are meant to be played with rubato. Debussy’s “Clair de Lune,” many Chopin pieces, improvisatory-style works—these require rhythmic freedom.
You might use a metronome to learn the notes and basic rhythms accurately, then set it aside for interpretive work.
When you’re mentally exhausted: Metronome practice requires focused concentration. If you’re practicing at the end of a long day and your brain is fried, sometimes it’s better to just play for enjoyment without the cognitive load of strict timekeeping.
Playing piano for stress relief is valuable too, as I discuss in this article, and the metronome isn’t always compatible with that goal.
When it’s creating more frustration than value: If you’ve spent 20 minutes trying to sync with the metronome and you’re on the verge of throwing it across the room, stop. Take a break. Practice something else.
Come back to it tomorrow. Frustration creates tension, and tension in your hands and shoulders creates bad technique.
The goal is to develop strong internal timing that doesn’t depend on external tools. The metronome helps you build that skill, but it’s not meant to be a permanent crutch.
Think of it like training wheels on a bicycle—essential for learning balance, but eventually you need to ride without them.
In my teaching at Weaver Music, I use metronomes strategically, not universally. In a typical lesson, we might use it for 10-15 minutes on specific technical passages or scales, then set it aside for the rest of the hour while we work on musicality, interpretation, and the joy of making music.
Balance is everything. Use the metronome enough to build accurate timing. Don’t use it so much that it kills your musical spirit. You’ll know you’ve found the right balance when your playing is both rhythmically solid and emotionally alive.
One final thought: if you’re working with a teacher—whether in person in the Bay Area or via Zoom anywhere in the world—they can help you determine when metronome work is appropriate for your current pieces and goals.
At Weaver Music, personalized guidance on practice strategies is a core part of every lesson, and you can also access structured practice guidance through our four-level lesson path that breaks down exactly how to practice effectively at each stage of development.
The metronome is powerful when used wisely. It’s just one tool among many in your practice toolkit. Master it, use it strategically, and you’ll see dramatic improvements in rhythmic accuracy, technical evenness, and confidence.
But never forget that the ultimate goal isn’t perfect time—it’s beautiful music. The metronome serves that goal; it doesn’t replace it.
When you truly understand how to use a metronome piano practice sessions become more productive, less frustrating, and ultimately more musical. The click that once felt like criticism becomes a supportive partner in your journey toward mastery.
According to research from the Berklee College of Music on rhythm training, consistent metronome practice over weeks and months literally rewires your brain’s internal timing mechanisms, making you a better musician even when you’re not using the tool.
That’s the real power of this simple clicking device—it’s building skills that last far beyond the practice session itself.
The transformation that happens when you master how to use a metronome piano techniques extends beyond just the pieces you’re currently learning. You’ll find that your sight-reading becomes more accurate because you’re better at anticipating and maintaining steady rhythmic patterns.
Your ensemble playing improves because you can lock into a shared pulse more reliably. Even your improvisational skills benefit because you have a stronger internal framework for organizing musical ideas in time.
These compound benefits make the initial discomfort of learning to work with a metronome worthwhile many times over. The students who push through the awkward early stages and develop genuine facility with this tool consistently outpace their peers in overall musicianship development.
So yes, the metronome might feel like your enemy at first. But with the seven strategies outlined in this guide, you can transform it into one of your most valuable practice partners.
Start slower than feels comfortable, use subdivision clicks for clarity, alternate between guided and independent practice, let the tool match your natural tempo before pushing you faster, apply it systematically to scales and technical work, increase tempo in small increments, and choose a metronome you’ll actually enjoy using.
Follow these principles consistently, and within weeks you’ll notice the difference—not just in the pieces you’re practicing with the metronome, but in every aspect of your playing that depends on solid rhythmic foundation and steady tempo control.
Ready to find out for yourself?
Your first 30-minute lesson with me is completely free – we will evaluate where you are, talk through your goals, and map out your path.
When students ask me how often should a beginner practice piano, I can see the worry in their eyes. They’re afraid I’ll say two hours a day, or that anything less means failure. Here’s the truth I’ve learned after teaching hundreds of students: consistency beats heroic effort every single time.
The beginner who practices 15 minutes daily will outpace the one who crams an hour on Sundays, and I’ve watched this play out year after year. The question of how often should a beginner practice piano deserves an honest answer, not an idealized one.
I’m going to share what actually works in the real world, for real people with jobs and families and busy lives. Understanding how often should a beginner practice piano is the foundation of sustainable progress and long-term success at the instrument.
The Short Answer: How Often Should a Beginner Practice Piano
For most beginners, the ideal practice schedule is 5-6 days per week, 20-30 minutes per session. That’s it. Not two hours. Not until your fingers bleed. Just 20-30 minutes, almost every day.
This schedule works because your brain needs regular reinforcement to build new neural pathways. When you’re learning piano, you’re literally rewiring your brain to coordinate complex movements, read a new language (music notation), and process auditory feedback simultaneously.
If you can only manage 15 minutes a day, that’s absolutely fine for the first month or two. If you’re a younger student (under 10), 15-20 minutes is actually more appropriate than longer sessions.
The key principle: how often should a beginner practice piano is more important than how long. Daily short sessions trump weekly marathons every time. When considering how often should a beginner practice piano, think about frequency first and duration second.
Why Frequency Matters More Than Duration
I’ve had students apologize to me: “I could only practice 10 minutes each day this week.” Meanwhile, they’ve made more progress than the student who practiced one 90-minute session. Why?
Understanding the science behind practice frequency helps answer how often should a beginner practice piano in a way that actually produces results.
How Your Brain Learns Motor Skills
Piano playing is a motor skill, similar to learning to write or ride a bicycle. Motor learning research shows that distributed practice (spread over time) is vastly more effective than massed practice (crammed together).
Each time you sit at the piano, your brain strengthens the neural connections related to finger movement, reading notes, and hand coordination. These connections need time to consolidate—that happens during sleep and rest periods between practice sessions.
When you practice daily, you give your brain multiple opportunities to consolidate learning. You’re essentially pressing “save” on your progress every single day. This biological reality fundamentally shapes how often should a beginner practice piano for optimal learning.
The Muscle Memory Myth
People often talk about “muscle memory,” but that’s not quite accurate. Your muscles don’t have memory—your brain does. What we call muscle memory is actually procedural memory, stored in the cerebellum and motor cortex.
Building procedural memory requires repetition over time. Five 20-minute sessions spread across a week will build stronger procedural memory than one 100-minute session. Understanding this changes how we think about how often should a beginner practice piano.
Preventing Burnout and Injury
Shorter, frequent sessions also protect beginners from two common problems: mental burnout and physical strain. Your hands, wrists, and forearms need time to adapt to new movements.
Overdoing it in one session can lead to tension or even repetitive strain injuries. I’ve seen too many enthusiastic beginners flame out after two months because they pushed too hard, too fast. Sustainable progress is always better than spectacular burnout.
Realistic Practice Schedules: How Often Should a Beginner Practice Piano
Let me break down what how often should a beginner practice piano looks like for different situations. These are the schedules I actually recommend to my students, not some idealized fantasy.
The Absolute Minimum (Maintenance Mode)
Frequency: 4 days per week
Duration: 15 minutes
Total weekly time: 60 minutes
Expected progress: Slow but steady; you’ll improve but not quickly
This is your fallback during crazy-busy life seasons. It’s enough to maintain skills and inch forward. I often recommend this for adult beginners who are testing the waters or going through a particularly demanding work period.
This is what I recommend to almost every beginner. It’s sustainable, effective, and fits into most lives. At this pace, you’ll typically work through a beginner method book in 6-9 months and be playing recognizable simple songs within 8-12 weeks.
This schedule aligns with what I teach in my four-level lesson path, where each level is designed around this practice frequency. When people ask how often should a beginner practice piano, this is the gold standard answer.
The Accelerated Track (for Highly Motivated Students)
Frequency: 6-7 days per week
Duration: 30-45 minutes
Total weekly time: 180-315 minutes
Expected progress: Rapid improvement; you’ll advance quickly through material
Some beginners have the time, motivation, and frankly the obsession to practice more. If that’s you, wonderful—but I’d still cap sessions at 45 minutes for the first six months. Your hands need time to adapt, regardless of your enthusiasm.
For Young Children (Ages 5-9)
Frequency: 5-6 days per week
Duration: 10-20 minutes
Total weekly time: 50-120 minutes
Young children have shorter attention spans but can still make excellent progress. For parents wondering how often should a beginner practice piano when that beginner is seven years old, this is your answer. Better to keep it short and successful than long and frustrating.
Knowing how often should a beginner practice piano is only half the equation. The other half is knowing what to do during that time. A focused 20-minute session beats an aimless 45-minute session every time.
A Simple Practice Structure
Here’s the basic structure I teach all my beginners:
Warm-up (3-5 minutes): Scales, simple five-finger patterns, or easy pieces you already know well
Technique work (5-7 minutes): Specific technical exercises from your lesson—hand position, finger independence, chord changes
New material (10-15 minutes): The piece or pieces you’re currently learning, working slowly through trouble spots
Review (2-3 minutes): Play through something you learned a few weeks ago to maintain it
This structure ensures balanced development. You’re warming up your hands, building foundational technique, pushing into new territory, and maintaining past gains. This framework answers not just how often should a beginner practice piano, but how to make that practice maximally effective.
The Power of Focused Repetition
In a 20-minute practice session, it’s tempting to just play through pieces from beginning to end repeatedly. That’s not efficient. Instead, identify the 2-4 measures giving you trouble and repeat just those measures 5-10 times.
If you’re working on a piece and stumbling at measure 12, don’t restart from measure 1 every time. Practice measures 11-13 in isolation until they’re smooth, then integrate them back into the full piece.
What Your Teacher Assigns Matters
When I work with students—whether in-person in the Bay Area or via Zoom worldwide—I tailor assignments to their practice schedule. If someone can only practice 15 minutes a day, I’m not going to assign three new pieces. One piece practiced well beats three pieces practiced poorly.
During your free 30-minute trial lesson, we talk about your realistic practice availability, and I structure your learning path accordingly. We’ll discuss how often should a beginner practice piano in your specific situation.
Quality Over Quantity, Always
I need to emphasize this: how often should a beginner practice piano matters, but how you practice matters even more. I’ve taught students who practiced 45 minutes daily but developed bad habits that took months to undo.
I’ve also taught students who practiced 20 focused minutes and progressed beautifully. The quality of your practice time determines whether you’re building skills or just reinforcing mistakes.
Signs of Quality Practice
You’re working slowly enough to play correctly
You’re noticing and correcting mistakes, not just repeating them
You’re focusing on your hand position and posture
You’re practicing with intention, not just running through motions
You’re following your teacher’s specific instructions
Signs of Low-Quality Practice
You’re playing too fast and making the same mistakes repeatedly
You can’t remember what your teacher asked you to work on
One quality 20-minute session is worth three unfocused 20-minute sessions. That’s why the answer to how often should a beginner practice piano must always include the caveat: with focus and intention.
The Role of Mindfulness
Piano practice can be meditative when done right. You’re fully present, listening carefully, feeling the keys, noticing every detail. Many of my adult students discover that piano practice becomes their daily mindfulness anchor.
If you’re interested in this aspect, I’ve written about using piano for stress relief. When you understand how often should a beginner practice piano and combine it with mindful practice, the results can be transformative both musically and personally.
Common Mistakes Beginners Make
After 10+ years of teaching, I’ve seen the same practice mistakes repeatedly. Let me help you avoid them so you can truly benefit from knowing how often should a beginner practice piano.
Mistake 1: The Weekend Warrior Approach
Some beginners practice zero minutes Monday through Friday, then try to “make up for it” with a two-hour Saturday session. This doesn’t work. By Saturday, you’ve lost most of what you practiced the previous weekend. You’re essentially starting over each week.
When students ask me how often should a beginner practice piano, I’m explicit: distributed practice is non-negotiable for effective learning. If you can truly only practice on weekends, piano might not be the right hobby right now—and that’s okay.
Mistake 2: Practicing Without a Plan
Sitting down and noodling around isn’t practice. Real practice is directed work toward specific goals. Before each session, you should know: “Today I’m working on measures 9-12 of this piece and getting the left-hand rhythm steady.”
I send my students home from each lesson (whether that’s a $99 sixty-minute session in my studio or online) with written practice instructions. If you’re teaching yourself, write your own. Knowing how often should a beginner practice piano is meaningless without knowing what to practice.
Mistake 3: Never Taking a Day Off
Some overachievers practice all seven days, every single week, and wonder why they’re burned out after three months. Rest matters. Your brain consolidates learning during rest. Taking one day off per week isn’t slacking—it’s strategic.
I recommend six days maximum for beginners, with that seventh day completely piano-free. This prevents mental and physical burnout and keeps the joy alive.
Mistake 4: Comparing Yourself to Others
Your practice schedule should fit your life. If your friend practices 45 minutes daily and you practice 20, that doesn’t make you less dedicated. Comparison is the thief of joy—and it’s a major reason why students quit piano.
The question of how often should a beginner practice piano has a different answer for different people. The right answer is whatever you can sustain long-term while continuing to enjoy the process.
Adjusting Your Schedule as You Progress
The practice schedule that works for your first three months won’t be the same one you need after a year. As you advance, your needs change. Understanding how often should a beginner practice piano means also understanding how those needs evolve.
Months 1-3: Building the Habit
In the early months, how often should a beginner practice piano is primarily about habit formation. You’re training yourself to sit at the piano regularly. Even 15 minutes daily is a win if you do it consistently.
Focus on making practice a non-negotiable part of your routine, like brushing your teeth. I encourage new students to practice at the same time each day—mornings before work, lunch breaks, or evenings after dinner. Routine reduces friction.
Months 4-6: Increasing Duration
Once daily practice feels automatic, you can gradually extend session length. If you started at 15 minutes, try 20. If you started at 20, try 25-30. Your hands are adapting, your focus is improving, and you probably have more material to work on.
This is also when some students start exploring different styles or working on pieces that genuinely excite them. That intrinsic motivation makes longer practice sessions feel less like work.
Months 7-12: Deepening Practice
By now, you’re no longer a true beginner. You might naturally want to practice longer because you’re engaged with more complex pieces. Thirty to forty minutes might start feeling normal. That’s great—just keep one day off per week.
Everyone hits plateaus. You’ll practice the same amount with seemingly no progress for a few weeks. This is normal. Your brain is consolidating complex learning under the surface.
Don’t increase practice time dramatically in frustration—that rarely helps. Instead, evaluate practice quality. Are you working slowly and deliberately? Are you isolating problem areas? Sometimes a conversation with your teacher is the best remedy. This is exactly the kind of thing we troubleshoot together in lessons.
When Life Gets in the Way
Real talk: some weeks, life explodes. Work deadlines, family emergencies, illness, travel. You’re not going to practice five days that week. What do you do? How often should a beginner practice piano when normal routines fall apart?
The Two-Day Rule
I teach all my students the two-day rule: never let more than two days pass without touching the piano. If you miss Monday and Tuesday, you absolutely practice on Wednesday, even if it’s just 10 minutes.
Why? Because three days becomes four, four becomes a week, and a week becomes “I guess I don’t play piano anymore.” The two-day rule keeps you connected to the instrument even during chaos.
The 5-Minute Emergency Session
On truly insane days, practice for just five minutes. Play one scale and one piece you already know. That’s it. It keeps the habit alive and your hands somewhat warm. It counts.
When thinking about how often should a beginner practice piano, remember that consistency across months and years matters more than perfection in any given week.
Bouncing Back After a Break
If you miss a full week (it happens), don’t try to cram extra practice the following week to “catch up.” Just resume your normal schedule. You might be a bit rusty for a few days, but you’ll bounce back quickly if the break was short-term.
If the break extends beyond three weeks, you’ve lost some progress. Be patient with yourself. Review easier material for a few sessions before tackling where you left off.
Scheduling Practice Like an Appointment
The students who succeed are those who treat practice like any other important appointment. It goes on the calendar. If someone asks, “Can you meet Tuesday at 6:30?” and that’s your practice time, the answer is, “No, I have a commitment then.”
This isn’t selfishness—it’s self-respect. Your musical development matters. Protect that time. This mindset is essential for anyone serious about answering how often should a beginner practice piano with consistent action.
Making It Stick: Long-Term Success
So, how often should a beginner practice piano for long-term success? The answer is consistent, sustainable practice that fits your life—not someone else’s ideal.
Here’s what I’ve observed in hundreds of students: the ones still playing five years later aren’t necessarily the ones who practiced the most in month one. They’re the ones who found a sustainable rhythm and stuck with it.
They’re the ones who gave themselves grace during hard weeks and showed up again when life calmed down. Piano is a lifetime pursuit. There’s no finish line where you “complete” piano and move on. It’s a practice in the truest sense—something you return to, again and again, that grows with you.
The Joy Factor
Finally, I’ll share something I tell every new student: if you’re not enjoying the process at least 80% of the time, something’s wrong. Maybe you’re practicing too much and burning out. Maybe you’re practicing too little and feeling frustrated by lack of progress. Maybe your practice approach needs adjustment.
Piano should be challenging, yes. It should require focus and effort, absolutely. But it should also bring you joy, satisfaction, and moments of genuine beauty. If it doesn’t, let’s figure out why.
Working with a Teacher
One of the best ways to answer how often should a beginner practice piano for your specific situation is to work with a teacher who knows you. I adjust practice recommendations constantly based on what I see in lessons—how someone’s hands are developing, how they’re managing the workload, whether they’re frustrated or flourishing.
Whether you work with me (offering lessons worldwide via Zoom or in-person in the Bay Area) or another teacher, that personalized feedback is invaluable. We can spot issues you can’t see yourself and adjust your practice plan in real-time.
If you’ve never experienced professional piano instruction, I encourage you to learn what to expect in your first piano lesson and consider trying it. The difference between self-teaching and working with an experienced guide is profound.
Recommended Resources
For more structured guidance, consider exploring comprehensive approaches to learning. Research from music education consistently shows that beginners benefit from systematic instruction combined with regular practice habits.
The National Association for Music Education has published studies indicating that students who maintain consistent practice schedules, even brief ones, show significantly better retention and progress than those with irregular patterns. You can explore more about the science of music learning through academic resources on motor learning and skill acquisition.
These research-based insights confirm what experienced teachers observe: how often should a beginner practice piano is answered not by arbitrary rules, but by understanding how the brain actually learns complex motor skills.
Your Personal Practice Philosophy
Ultimately, you need to develop your own practice philosophy—one that honors your goals, your schedule, and your well-being. For some people, piano is a serious pursuit and they’ll happily dedicate 45 minutes daily. For others, it’s a joyful hobby worth 20 minutes most days. Both are valid.
The question of how often should a beginner practice piano isn’t about judgment or comparison. It’s about finding what works for you and committing to it fully, whatever that looks like.
Moving Forward
If you take nothing else from this article, remember these three things:
Frequency matters most: 20 minutes six times a week beats 90 minutes twice a week
Consistency beats intensity: Sustainable practice wins long-term
Quality over quantity: Focused, intentional practice is what actually builds skill
Start where you are. If you can commit to 15 minutes five days a week, start there. As it becomes habit, you can extend and expand. The important thing is to start—and to keep showing up.
Teaching piano for over a decade has shown me that success isn’t about talent or massive time investment. It’s about showing up consistently, practicing intelligently, and staying patient with yourself. Every single student I’ve seen succeed has followed this path.
Now you know the answer to how often should a beginner practice piano: 5-6 days per week, 20-30 minutes per session, with focused intention and sustainable commitment. This isn’t just theory—it’s proven practice wisdom from years of watching students transform from absolute beginners into confident players.
The question isn’t really how often should a beginner practice piano in some abstract sense. The question is: how often will you practice? Because your answer to that question, followed by consistent action, will determine your entire piano journey.
You can do this. The path is clear, the schedule is reasonable, and the rewards are immeasurable. Start today, practice tomorrow, and keep going. That’s how pianists are made—one consistent practice session at a time.
Ready to find out for yourself?
Your first 30-minute lesson with me is completely free – we will evaluate where you are, talk through your goals, and map out your path.
A realistic piano practice schedule for adults with a full-time job is four focused 20- to 25-minute sessions a week plus one floating catch-up session, roughly 90 to 120 minutes total. Practice at the same time of day when you can, give each session one clear goal, and keep a 10-minute fallback for busy days.
If you’d like help fitting that into your work week, that’s what a free 30-minute trial lesson is for: a skill check, your questions answered, and a plan with a book list. No card required.
What does a weekly piano practice schedule look like for a working adult?
A weekly piano practice schedule for a working adult should rest on four protected core sessions of 20 to 25 minutes, each with its own focus, plus one flexible 15- to 30-minute session that floats to wherever the week has room. Five-minute touchpoints on off days are optional but keep your hands familiar with the keys.
Here’s the piano practice schedule for adults I give most of my students. Swap the days to fit your calendar.
Make up a missed session, or go longer if you have energy
Friday
Core 3
20–25 min
Problem-solving: loop the hardest passages slowly
Saturday
Off or touchpoint
0–10 min
Improvise or sight-read something easy
Sunday
Core 4
20–25 min
Performance: play pieces all the way through
The flex session is your insurance policy: when a work crisis eats Wednesday, Thursday’s flex slot covers it. Across the week, aim for roughly 70 percent of your time on pieces at your level, 20 percent on easier pieces you’ve already learned, and 10 percent on something that stretches you.
Why four short sessions instead of one long one? Skills settle in between sessions, not only during them. Researchers at the National Institutes of Health reported in 2019 that people learning a new sequence of keystrokes made most of their gains during short rest breaks. Spacing practice out, known as the spacing effect, gives your brain more of those windows than one Saturday marathon.
How should you use 25, 15 or 10 minutes at the piano?
A 25-minute piano session should spend about 10 minutes slowly looping the hardest passages in your current piece, with short blocks of warm-up, technique and review around that core. On tighter days, cut the warm-up and review first at 15 minutes, and at 10 minutes pick one specific goal and work on nothing else.
For a full session after work, this is the split I recommend:
Minutes
What to do
1–3
Warm-up: a scale, arpeggio or finger exercise
4–8
Technical work tied to your current piece
9–18
Loop the hardest 2–4 measures of your repertoire slowly
19–22
Play through easier or review material
23–25
Sight-reading or exploring, if time allows
The step-by-step version of a single session lives in my guide on how to practice piano effectively. Here’s what to cut when your workday shrinks the window.
When you only have 15 minutes
Problem measures in your current piece, the ones you can’t play smoothly yet
New material you’re actively learning
Technical exercises that support those pieces
Everything else: warm-ups, sight-reading and easy review go first
When you only have 10 minutes
Use a one-goal session. Decide the goal before you sit down, and stop when the timer does:
“Get measures 9–12 smooth at half tempo.”
“Memorize the right-hand melody of the B section.”
“Drill the chord change in measure 16.”
Whatever the length, play new passages at 50 to 70 percent of full tempo, and speed up only after five clean repetitions in a row. Rushing to feel productive when time is short is exactly backward.
What is the best time of day to practice piano with a full-time job?
The best time of day to practice piano with a full-time job is whenever you are reliably alert and uninterrupted, which for many working adults means early morning before work. Practicing at the same point in your day matters more than the exact hour, because a fixed slot turns practice into a habit instead of a daily decision.
The windows that tend to work:
Early morning, before work. Nothing has derailed your day yet.
Lunch break, if you work from home.
Before dinner, as a buffer between work and home.
After the kids’ bedtime, if you still have focus left.
Weekend mornings, when your mind is fresh for new material.
Not sure which is yours? Track your energy for one week. Fifteen minutes when you’re alert beats 45 minutes when you’re drained after a long day.
Early mornings in a shared home usually mean a digital piano and headphones. My guide to practicing piano in an apartment covers how to do that without waking anyone.
What do practice schedules look like for office workers, parents and shift workers?
Practice schedules for working adults differ by job, but each successful one protects a few predictable windows: an office worker practicing before work plus weekends, a parent using 5:30 AM before the kids wake, or a shift worker planning four 20-minute sessions every Sunday. All three land between 60 and 100 minutes a week.
These are adapted from real schedules of adult students I’ve worked with.
Who
When they practice
Weekly total
What makes it work
Office worker, 9 to 6 with a 45-minute commute
Tue and Thu 6:45–7:05 AM; Sat 9:00–9:30 AM; Sun 7:30–7:55 PM; flex on a Wed or Fri lunch when working from home
75–100 min
Everything set up the night before: book open to the right page, coffee on a timer
Parent of two kids under seven
Mon, Wed, Fri 5:30–5:50 AM; 15–20 min during Saturday nap time; optional 5–10 min after bedtime
60–90 min
Headphones, so early practice doesn’t wake the house
Nurse on rotating shifts
Four 20-minute sessions planned each Sunday around the week’s shifts: afternoons after day shifts, or before leaving on night-shift weeks
80 min
A weekly target instead of fixed time slots
The office worker removed every decision from her early mornings and kept that schedule for two years. The parent accepts that some weeks land at the low end of his range. The nurse’s schedule changes every week, but her total doesn’t. You don’t need a routine schedule, just a routine commitment.
If you work full time and can’t see where piano fits in your week, we can map out a realistic schedule together in one conversation. Your first 30-minute lesson with Austin is free – no card, no pressure.
Practicing piano with a busy schedule works best when you shrink sessions instead of skipping them, keeping a 10-minute minimum on hectic days and adding five-minute touchpoints or commute-time mental practice around them. Ten focused minutes on a bad day keeps the habit alive, while skipping entirely makes the next session harder to start.
These are the patterns I see fail most often with working adults:
The daily two-hour plan. It lasts about three days before work intervenes.
The weekend warrior. One Saturday cram gives your hands one round of reinforcement a week instead of four.
All or nothing. If you can’t do a “full” session, you skip it, and guilt does the rest.
Early in my teaching, I assigned adults practice plans that looked great on paper and fell apart in real life. The students who stuck with piano were doing something much simpler that matched the energy they actually had after work.
Tools for busy days
Touchpoints (5–10 minutes): run through a piece you know, improvise, or play one hard measure.
Mental practice: visualize fingerings, hum the melody, or listen to a recording of your piece on the commute.
Double-duty technique: if your piece has Alberti bass or octave jumps, make that pattern your warm-up.
Mental practice is a real supplement, not a replacement. In a well-known 1995 study led by neurologist Alvaro Pascual-Leone, people who only imagined practicing a five-finger piano exercise showed brain changes similar to those who physically played it, though actually playing still improved performance more.
What should you do when work derails your practice for a week or more?
When work derails your piano practice for a week or more, return with shorter, easier sessions rather than long make-up sessions: 10 to 15 minutes of music you already know, rebuilding to full length over three or four practices. Muscle memory is more resilient than it feels, and most skills come back within a week or two.
The comeback plan
Start with 10–15 minutes of easy pieces you already know
Rebuild to your full session length over 3–4 practices
Lower your expectations for hard passages for a few days
Rebuild the habit before you worry about progress
Maintenance mode for busy seasons
For heavier stretches, like a job change, a move or a yearly crunch at work, switch to maintenance mode:
At least two 15-minute sessions per week
Only pieces you already know
No new material, and no guilt about it
The goal is staying connected to the piano, not making progress
One student kept twice-a-week maintenance sessions through the birth of her first child. She learned nothing new for six months, then was back to full learning capacity within a month of refocusing.
If your busy season is predictable, say November through January, plan maintenance mode for it in advance and go deeper during quieter months.
How do you make a practice schedule actually stick?
A piano practice schedule for adults sticks when sitting down at the piano is the easiest option at your chosen time, so keep the instrument where you walk past it, leave the music open, and set up the night before. A 30-second practice log and a monthly five-minute review show you which slots work and which to move.
Remove the friction
Keep your piano or keyboard in a room you pass through, not a spare room
Leave your music open to the right page, with a pencil nearby and headphones plugged in
Put each core session in your calendar like a meeting
Track lightly
After each session, log the date and length, what you worked on, and one sentence on how it went. Once a month, check which slot keeps getting skipped. If Sunday evening never happens, move it instead of blaming yourself.
Every 4 to 6 weeks, record your pieces on your phone. Listening back months later reveals progress your day-to-day ear misses, which is exactly what you need during a plateau.
Leave room for play, and get some accountability
Let some sessions be pure play, with no metronome and no agenda. They remind you why you started. A weekly lesson also helps: it gives your schedule a deadline and gives you someone to adjust the plan when your work life changes.
“My confidence at the piano has grown so much since starting lessons.” – Mia Reynolds
Lessons with me are live and one-on-one over Zoom, or in person if you’re local to the Bay Area. Start with a free 30-minute trial lesson, or start on your own today: put four 20-minute windows in this week’s calendar and show up for them.
Common questions
How many minutes a day should an adult practice piano?
Most adults should practice piano 15 to 30 minutes a day, four or five days a week. Twenty focused minutes is a strong default for a beginner with a full-time job. If you have more time on a given day, two shorter sessions usually work better than one long session when you’re already tired.
Is 20 minutes of piano practice a day enough?
Yes, 20 minutes of focused piano practice a day is enough for steady progress, especially for beginners and early intermediate players. The key word is focused: 20 minutes with one clear goal beats an hour of playing songs from the top. Practicing four or five days a week matters more than the exact minutes.
Can I do all my piano practice on the weekend?
Weekend-only piano practice works poorly compared with spreading the same minutes across the week. One long Saturday session gives your hands a single round of reinforcement and six days to forget. If weekends are truly your only option, split practice into Saturday and Sunday sessions and add short weekday touchpoints when you can.
Does mental practice away from the piano count?
Mental practice counts as a supplement to piano practice, not a substitute for it. Visualizing fingerings, humming melodies and listening to recordings of your pieces during a commute help you arrive at the keyboard with a clearer plan. Keep at least three or four real sessions at the piano each week alongside it.
Should I take planned weeks off from piano practice?
A planned lighter week every 6 to 8 weeks helps most working adults avoid burnout. Cut back to two or three short sessions, skip new material, and simply maintain what you’ve built. Planned rest removes the guilt of pulling back, and your brain keeps consolidating what you learned in the weeks before.
How long does it take a working adult to learn piano?
A working adult practicing 15 to 30 minutes, four or five days a week, typically plays recognizable songs within 3 to 6 months and reaches intermediate pieces within 1 to 2 years with a teacher or structured curriculum. Consistency affects that timeline more than talent. I go deeper in how long it takes to learn piano as an adult.
Want a practice schedule that fits your work week?
Your first 30-minute lesson with me is completely free – we will look at where you are, talk through your schedule and goals, and map out a plan you can actually keep.